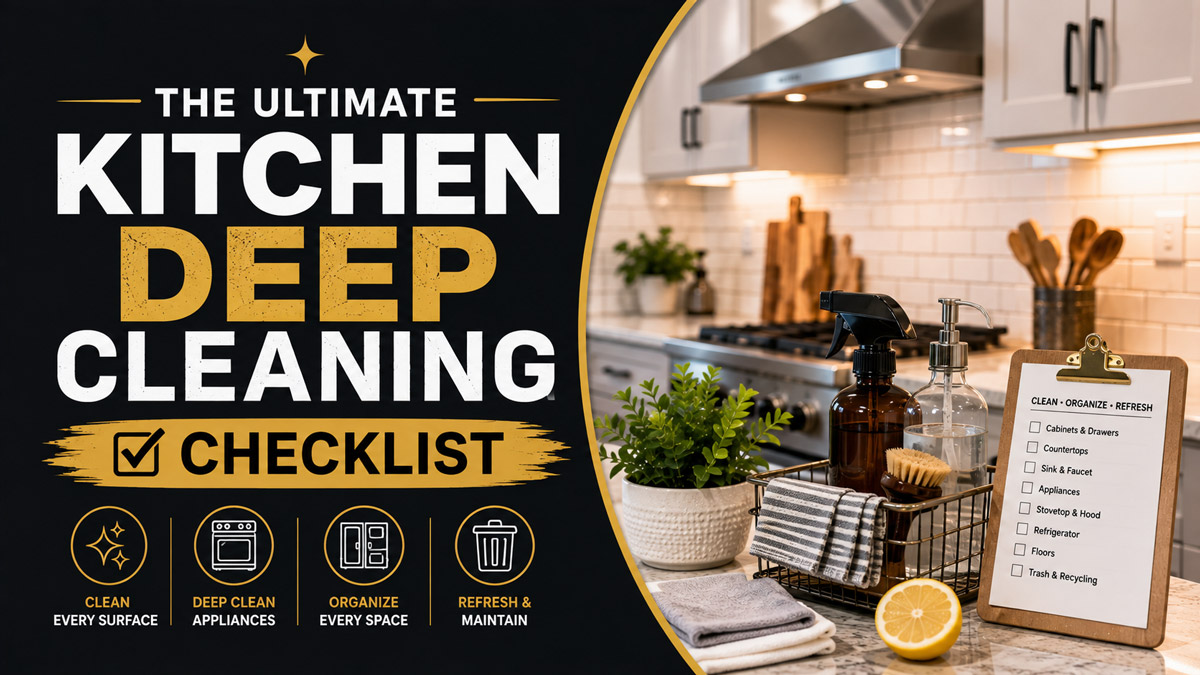
A kitchen deep cleaning checklist is a systematic framework used to sanitize, degrease, and completely restore every surface and appliance in a culinary space. Unlike standard daily wiping, deep cleaning breaks down built-up lipids, mineral deposits, and bacterial biofilms using targeted chemical and mechanical reactions. Executing this process in a strict top-to-bottom sequence prevents cross-contamination and restores original surface integrities.
Key Facts / At a Glance:
- Frequency Target: Residential kitchens require systematic deep cleaning two to four times per year, with quarterly execution representing the optimal standard.
- Time Allocation: A thorough manual DIY deep clean requires four to eight hours for a standard residential kitchen.
- Professional Speed: Commercial crews typically complete the same residential process in two to four hours using multi-person teams and industrial agents.
- DIY Cost Scope: Expect to spend $30 to $75 strictly on heavy-duty chemical agents, microfiber cloths, specialized scrapers, and nylon brush attachments.
- Professional Cost Scope: Hiring external services costs $150 to $450 or more, heavily dependent on room square footage and internal appliance cleaning add-ons.
How Do You Prepare for a Complete Kitchen Deep Clean?
Preparation determines the speed and efficacy of the entire sanitation process. Attempting to deep clean an unprepared room leads to cross-contamination and extended labor hours. You must assemble your chemical agents, mechanical tools, and safety equipment before applying any moisture to the room.
Before You Start:
- Total Time Required: 4 to 8 hours.
- Physical Difficulty: High (requires reaching, scrubbing, and moving appliances).
- Estimated Cost: $30 to $75 for initial supplies.
- Prerequisites: An empty sink, an empty dishwasher, and clear countertops.
You need specific tools to execute this process correctly. Gather ten heavy-duty microfiber cloths (minimum 300 GSM) to capture particulate matter without scratching delicate surfaces. Secure a commercial-grade d-Limonene citrus degreaser to dissolve polymerized cooking oils. You will also need a pH-neutral stone cleaner, distilled white vinegar (5 percent acidity), baking soda, a stiff nylon detail brush, plastic putty knives for scraping, and heavy-duty nitrile gloves to protect your skin from chemical burns.
Material Safety and Chemical Interaction Warning
Never mix bleach with ammonia or commercial acidic cleaners. Combining sodium hypochlorite (bleach) with acid-based solutions like white vinegar or toilet bowl cleaners instantly generates toxic chlorine gas. Mixing bleach with ammonia creates dangerous chloramine vapor. Stick to one chemical line at a time. Always flush surfaces thoroughly with clean water before switching cleaning agents.
According to the American Cleaning Institute (2023), chemical interactions cause thousands of household respiratory injuries annually. Practitioner typical figures indicate that waiting at least thirty minutes and wiping surfaces with pure water neutralizes residual chemicals effectively before introducing a new agent.
Phase 1: How Do You Deconstruct and Pre-Treat?
The first active phase of the kitchen deep cleaning checklist involves removing physical obstacles and applying chemicals that require long dwell times to function. Dwell time refers to the minutes a chemical must sit on a surface to break molecular bonds before you begin scrubbing.
Step 1: Clear the Structural Decks
Remove all small appliances, dishware, knife blocks, and decorative items from the countertops. Place these items on a dining table in an adjacent room. Countertops must be entirely bare to allow uninterrupted wiping motions later. Take down all window treatments or curtains and place them in the laundry queue.
Step 2: Apply the Oven Matrix
Spray a heavy-duty commercial oven-cleaning agent across the internal walls of the oven. If you prefer a non-toxic approach, spread a thick paste made of a two-to-one ratio of baking soda to water over the internal glass and floor. Avoid coating the heating elements. Allow this alkaline mixture to dwell while you address the rest of the room. The alkalinity requires at least two hours to saponify baked-on carbon deposits.
Step 3: Soak the Range Hood Filters
Extract the aluminum mesh filters from your overhead exhaust hood. Submerge these filters in a sink filled with boiling water mixed with one cup of heavy-duty degreaser or concentrated dish soap. The extreme heat melts the solidified lipids, while the surfactants suspend the grease particles in the water. Leave them submerged for sixty minutes.
Success Checkpoint: You will know Phase 1 is complete when all horizontal surfaces are empty, the oven is coated in treatment, and the range filters are submerged.
Common Mistake: Applying oven cleaner to the rubber door gaskets will degrade the seal and cause heat leakage during future baking.
Phase 2: How Do You Sanitize High-Level Zones?
Gravity dictates the flow of dust and chemical overspray. Cleaning a kitchen must proceed from the ceiling downward to prevent dirtying previously sanitized areas. The high-level zone encompasses everything above the upper cabinet line.
Step 1: Dust the Structural Elements
Use an extendable microfiber duster to clear ceiling corners of cobwebs. Wipe down all overhead light fixtures, ceiling fan blades, and structural trim. Airborne kitchen grease binds with household dust to create a sticky matrix on high surfaces. Dry dusting removes the loose particulate matter before you introduce wet chemicals.
Step 2: Degrease Cabinet Tops and Fronts
Apply a heavy-duty degreaser to a microfiber cloth and wipe the tops of the upper cabinets. Never spray chemicals directly onto wooden cabinetry. Wipe down the cabinet faces from top to bottom, following the grain of the wood. Pay special attention to the hardware and the area directly above the stove, which sustains the heaviest grease accumulation.
Step 3: Disinfect the Backsplashes
Scrub the walls and tile grout lines situated between the upper cabinets and the lower countertops. Use a nylon detail brush dipped in a mild detergent solution to agitate the grout lines. Grout is highly porous and absorbs food splatters quickly. Wipe the loosened debris away with a damp cloth.
Success Checkpoint: The upper half of the room should look visibly brighter, and running a dry hand over the cabinet faces should yield no sticky resistance.
Common Mistake: Using soaking wet rags on laminate or solid wood cabinets causes wood swelling and structural delamination. Always use a lightly damp cloth and dry the surface immediately with a separate towel.
Phase 3: What Is the Appliance Sanitation Sequence?
Appliances harbor the most significant bio-loads and mineral deposits in the room. This phase requires the most time and physical exertion.
Step 1: The Refrigerator Reset
Empty all food items into insulated coolers. Remove all internal glass shelves and plastic crisper drawers. Wash these components in the sink using warm soapy water. Never wash cold glass shelves with hot water, as thermal shock will shatter them. Wipe down the internal plastic walls of the refrigerator using a food-safe sanitizer or a diluted vinegar solution. Reassemble the interior. Finally, pull the unit away from the wall and vacuum the heavy dust accumulation from the condenser coils at the bottom or rear of the machine. Clogged coils force the compressor to work harder, reducing the appliance lifespan.
Step 2: The Oven and Range Recovery
Return to the pre-treated oven. Use a non-scratch nylon scrubbing pad to agitate the dissolved carbon. Scrape off any remaining polymerized spills using a plastic putty knife. Wipe the interior completely clean with damp cloths until no chemical residue remains. Clean the external stovetop, extract the burner grates, and sanitize the control dials.
Step 3: The Dishwasher Descaling
Remove the lower plastic mesh filter located at the bottom of the dishwasher tub. Scrub the trapped food debris out of the mesh under running water. Reinstall the filter. Place a glass measuring cup filled with two cups of distilled white vinegar on the top rack. Run the machine empty on its longest, hottest cycle. The acidic vinegar will dissolve calcium scale and hard water deposits throughout the internal plumbing.
Step 4: The Microwave Degreasing
Place a microwave-safe bowl containing one cup of water and two tablespoons of lemon juice inside the unit. Heat the liquid on high for three minutes until it boils vigorously. Leave the door closed for five additional minutes. The trapped acidic steam softens explosive food splatters on the internal walls, allowing you to wipe the interior clean with a single paper towel.
Success Checkpoint: All major appliances should be empty of loose debris, chemically neutralized, and visually restored to factory condition.
Common Mistake: Spraying chemical cleaners directly behind refrigerator control knobs can short-circuit the internal electronics. Always apply cleaner to the cloth first.
Phase 4: How Do You Restore Sinks and Countertops?
Countertops require material-specific approaches to prevent permanent chemical etching. The sink basin acts as the primary drainage zone for the previous phases and must be sanitized last.
Table 1: Material Vulnerability Matrix for Countertops
| Surface Material | Primary Threat | Safe Chemical Agent | Required Dwell Time |
| Natural Marble | Acidic etching (vinegar, citrus) | pH-neutral stone cleaner | 1 to 2 minutes |
| Engineered Quartz | Heat damage, abrasive scratching | Mild dish soap and water | Immediate wipe |
| Solid Wood Butcher Block | Water pooling, structural rot | Food-safe mineral oil | 20 minutes to absorb |
| Plastic Laminate | Seam delamination | Multi-surface alkaline spray | 3 to 5 minutes |
Step 1: The Countertop Reset
Sanitize and polish the countertops according to their specific material vulnerability detailed in the matrix above. Work in three-foot sections. Spray the appropriate agent, allow the necessary dwell time, and wipe the surface using tight, overlapping “S” patterns to avoid leaving streaks. Ensure the edges and undersides of the counter overhangs are wiped clean, as these areas collect hidden spills.
Step 2: The Sink and Disposal Core
Scrub the stainless steel or porcelain sink basins using a structural detail brush and a mild abrasive powder. Pay close attention to the seam where the faucet base meets the counter, which collects hard water scale. To clear the garbage disposal, flush the chamber with two cups of crushed ice, a half-cup of coarse rock salt, and several lemon wedges. Run the disposal with cold water. The abrasive ice and salt scour the internal grinding plates, while the lemon introduces natural d-Limonene to strip decaying organic matter.
Success Checkpoint: Countertops feel entirely smooth to the touch, and the sink basin drains rapidly without emitting foul odors.
Common Mistake: Using lemon juice, vinegar, or acidic bathroom cleaners on natural stone countertops causes chemical etching, which dulls the polished finish permanently.
Phase 5: How Do You Finish Floors and Trims?
The final phase addresses the debris that has fallen to the floor during the previous steps.
Step 1: The Baseboard Detail
Wipe down all painted baseboards and the wooden kick plates located directly beneath the lower cabinets. Airborne grease settles heavily at floor level, acting as an adhesive for pet hair and dust. A simple microfiber cloth dampened with warm water and a drop of dish soap effectively breaks this minor lipid barrier.
Step 2: Vacuum and Extraction
Use a high-suction vacuum equipped with a hard-floor attachment to capture all loose grit. Focus heavily on the recesses under the toe-kicks and the tight gaps between the refrigerator and the cabinetry. Sweeping with a broom merely pushes fine particulate dust back into the air.
Step 3: The Damp Mop Finish
Finish the room with a deep microfiber damp mopping. Use a residue-free floor cleanser designed for your specific flooring material (wood, tile, or linoleum). Start at the furthest corner from the room exit and mop your way backward to avoid stepping on the wet surface.
Success Checkpoint: The floor is free of all grit, sticky patches, and chemical residue.
Common Mistake: Using excess water on hardwood or luxury vinyl plank flooring forces moisture into the seams, causing cupping and edge curling over time.
Comparison of Execution Strategies
Different households require varying approaches to deep sanitation based on available time, physical capability, and budgetary constraints.
Table 2: Deep Cleaning Strategy Breakdown
| Deep Clean Strategy | Cost Range | Time Required | Best Applied When |
| DIY Manual Method | $30 to $75 | 4 to 8 hours | Budget is tight, and weekend hours are available. |
| DIY Machine-Assisted | $150 to $300 | 3 to 5 hours | Dealing with extensive tile grout or severe grease buildup. |
| Professional Services | $150 to $450+ | 2 to 4 hours | Preparing for move-out, or handling severe neglect. |
Practitioner typical figures show that integrating a high-temperature canister steam cleaner (DIY Machine-Assisted) reduces manual scrubbing time by up to sixty percent. The vaporized water reaches 220 degrees Fahrenheit, instantly melting polymerized cooking oils without requiring harsh chemical solvents.
Common Mistakes and Expert Troubleshooting
Executing a kitchen deep cleaning checklist correctly requires avoiding common chemical and mechanical errors.
Mistake: Cloudy Stainless Steel
If your stainless steel appliances look streaky, cloudy, or heavily fingerprinted after washing, hard water scale or cleaner residue is present. Standard water leaves calcium deposits behind.
Correction: Wipe the appliance along the manufactured grain using a micro-dose of food-grade mineral oil or a specialized stainless steel polish. This restores the hydrophobic barrier and provides a factory gleam.
Mistake: Sticky Grease Film Remaining
If a standard multi-surface spray fails to cut the grease above the stove, the lipids have polymerized into a hardened plastic-like state. Standard soaps lack the chemical structure to break these bonds.
Correction: Utilize an oil-based solvent or a dedicated commercial d-Limonene degreaser. Let the agent dwell for five to ten full minutes to break down the chemical bonds before attempting to wipe the surface.
Mistake: Pest Harborage Oversight
Failing to clean the interior tracks of sliding pantry doors or the deep recesses behind the stove leaves organic matter that attracts rodents and insects.
Correction: Always pull modular appliances away from the wall during a deep clean. Use a crevice tool on your vacuum to extract crumbs from structural tracks.
Which Strategy Fits Your Household?
Every home operates differently, dictating how often this comprehensive protocol must be applied.
The Busy Professional
Blocking out an entire Saturday for sanitation causes rapid burnout. Focus on the split-task method. Execute one deep appliance or structural zone per evening across a five-day week. Alternatively, delegate the major appliances to a professional residential cleaning crew bi-annually, focusing your personal efforts strictly on daily surface wiping.
The Eco-Conscious Household
Avoid synthetic solvents by relying entirely on mechanical energy and steam vapor. Investing in a high-temperature handheld steam cleaner replaces almost all chemical degreasers in the room. Use a baking soda paste for necessary structural scrubbing and high-acidity white vinegar for descaling mineral deposits in plumbing fixtures.
The Heavy Home Chef
Households engaging in high-frequency frying, wok cooking, and high-heat roasting require a significantly shortened sanitation cycle. The volume of aerosolized oil is massive. Deep clean the range hood filters and the immediate stovetop zone weekly. Perform a full-scale kitchen deep clean every sixty days to prevent systemic grease polymerization on the upper cabinetry.
Frequently Asked Questions
How much does kitchen deep cleaning cost?
Executing the process yourself costs between $30 and $75 for commercial-grade chemicals and microfiber cloths. Hiring a professional service typically ranges from $150 to $450, depending heavily on the region, the room size, and whether interior appliance cleaning is included in the base rate.
How often should you deep clean a kitchen?
Standard residential kitchens require a full deep clean two to four times per year, with a quarterly schedule being ideal. Households that cook with high heat or fry foods frequently should increase this frequency to every two months to prevent grease polymerization.
What is the difference between a standard clean and a deep clean?
A standard clean focuses on daily sanitation of high-touch horizontal surfaces, minor dishwashing, and sweeping. A deep clean systematically addresses hidden vertical surfaces, structural interiors, appliance mechanics, mineral descaling, and the removal of chemically bonded grease films.
What are the best chemicals for kitchen grease?
For fresh surface oils, mild dish soap acts as an effective surfactant. For hardened, polymerized grease, highly alkaline commercial degreasers or natural citrus-based d-Limonene solvents are required to break the stubborn molecular bonds before wiping.
How long does a kitchen deep clean take?
A comprehensive manual DIY deep clean takes an average of four to eight hours for a single person to complete. Utilizing steam machines can reduce this to roughly four hours. Professional crews using industrial agents generally finish the process in two to four hours.
The Bottom Line
Mastering your kitchen deep cleaning checklist requires treating the room as an interconnected system. By working sequentially from the ceiling to the floor, isolating chemical applications, and respecting material vulnerabilities, you guarantee a hygienic, restored environment. Adhering to this structured approach eliminates redundant labor, prevents costly damage to natural stone or wood finishes, and permanently banishes sticky grease accumulation from your culinary space.


