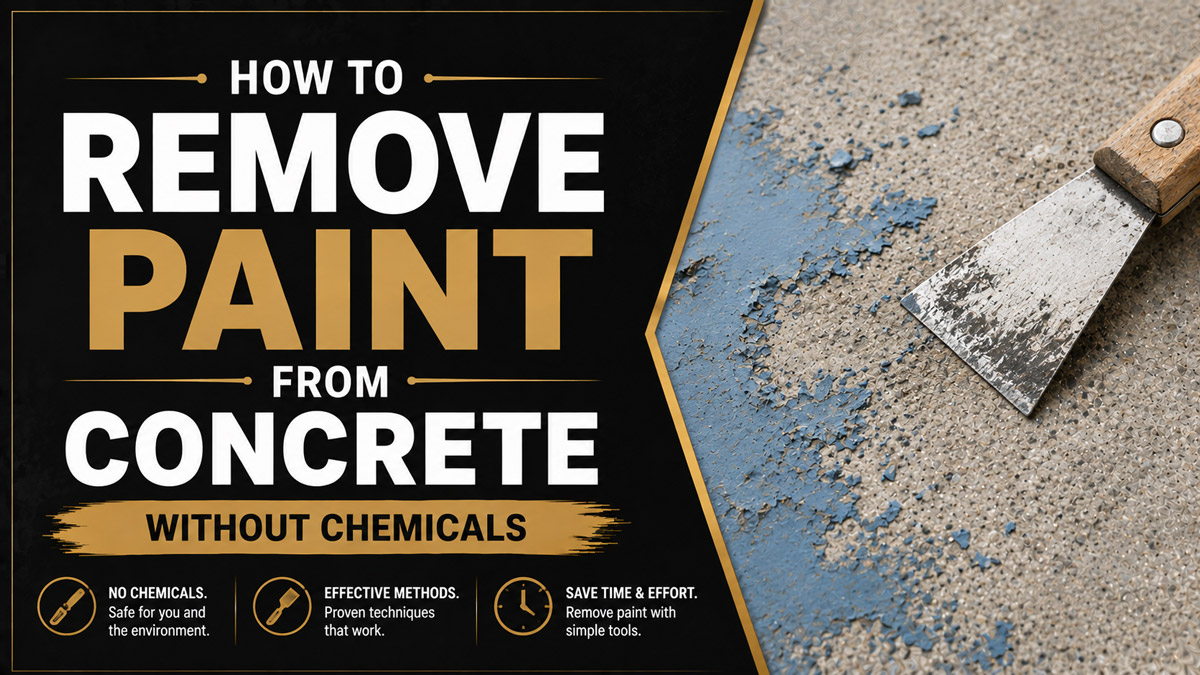
To remove paint from concrete without chemicals, scrape away loose coating, then use pressure washing for outdoor latex paint or concrete grinding for bonded paint and epoxy. Work in small test sections, control water or silica dust, and stop when the paint is gone without unnecessarily cutting into the concrete surface.
Key Facts at a Glance
- Pressure washing works best on peeling or weathered paint outdoors.
- Grinding is the most dependable option for firmly bonded floor coatings.
- Manual scraping is safest for small spots and fragile concrete.
- Heat can soften some paint, but it is slow and unsuitable for unknown lead-containing coatings.
- Dry concrete grinding can release respirable crystalline silica.
- Complete removal is not always necessary when the surface will be recoated with a compatible system.
Before You Start
| Project factor | Typical requirement |
|---|---|
| Difficulty | Moderate for scraping or pressure washing, advanced for grinding |
| Working time | 1-3 hours for small spills, 4-10 hours for a 200-square-foot coating |
| DIY cost | About $20-$75 for scraping, $60-$180 for pressure washing, $100-$350 for grinding |
| Basic protection | Safety glasses, gloves, hearing protection, work boots |
| Dust-producing work | Grinder shroud, suitable dust extractor, respiratory protection |
| Water-based removal | Outdoor drainage plan, waterproof footwear, GFCI-protected power |
| Lead uncertainty | Test before sanding, grinding, blasting, or heating old paint |
The article brief identifies pressure washing, grinding, heat, and abrasive blasting as the principal non-chemical methods. It also treats dust containment, tool control, and cleanup as essential parts of the removal process.
Essential tools and materials
Choose equipment only after selecting the removal method:
- A rigid floor scraper or carbide scraper
- A stiff nylon brush
- A wet-dry vacuum
- Plastic sheeting and painter’s tape
- A pressure washer with 15-degree or 25-degree fan nozzle
- A concrete grinder with diamond tooling and dust shroud
- A low-temperature heat gun for limited, verified applications
- Absorbent barriers or a wet vacuum for wastewater
- Safety glasses, gloves, boots, hearing protection, and suitable respiratory protection
Avoid using a standard household vacuum for concrete dust. Fine particles can pass through inadequate filters, damage the motor, and return airborne dust to the room.
Which Non-Chemical Method Should You Use?
The best non-chemical paint-removal method depends on the coating’s adhesion, the concrete’s condition, the project location, and the finish you want afterward. Pressure washing usually suits exterior latex paint, while diamond grinding is more reliable for epoxy, floor paint, and coatings that remain tightly bonded.
| Method | Best application | Typical area | Working speed | Main limitation |
|---|---|---|---|---|
| Hand scraping | Loose paint, drips, small spots | 1-30 sq. ft. | 5-20 sq. ft. per hour | Labor-intensive |
| Pressure washing | Exterior latex or peeling acrylic | 50-500 sq. ft. | 75-250 sq. ft. per hour | Runoff and possible surface etching |
| Diamond grinding | Garage coatings, epoxy, bonded paint | 50-1,000 sq. ft. | 40-250 sq. ft. per hour | Silica dust and texture change |
| Heat gun and scraper | Edges, steps, vertical details | 1-30 sq. ft. | 3-12 sq. ft. per hour | Slow and potentially hazardous on lead paint |
| Soda or media blasting | Walls, textured surfaces, complex profiles | 100-1,000 sq. ft. | 75-300 sq. ft. per hour | Containment, equipment, and cleanup |
| Shot blasting | Large commercial floors | 500+ sq. ft. | 300-1,000 sq. ft. per hour | Aggressive profile, professional equipment |
These production rates are practical planning ranges, not guaranteed specifications. Paint thickness, aggregate hardness, moisture, tool power, operator experience, edges, cracks, and required finish can change the schedule substantially.
Best method by situation
| Situation | Recommended first choice | Backup method |
|---|---|---|
| Peeling driveway paint | Pressure washing | Grinding isolated patches |
| Garage-floor epoxy | Walk-behind grinding | Shot blasting |
| Small spray-paint spot | Scraping and brushing | Light grinding |
| Painted concrete wall | Wet scraping | Professional media blasting |
| Decorative or stamped concrete | Careful hand removal | Low-pressure specialist cleaning |
| Basement floor | Shrouded grinding | Wet grinding with controlled recovery |
| Paint around steps and corners | Carbide scraping | Low-temperature heat and scraping |
| Weak or spalling concrete | Hand scraping only | Surface repair consultation |
Step 1: Identify the Paint and Concrete Condition
Inspect the coating before choosing a machine. Loose, brittle, curling, or flaking paint often responds to scraping and pressure washing, while smooth coatings that resist a scraper usually require grinding or blasting.
Use a utility knife or scraper to make a small crosshatch in an inconspicuous area. Press strong tape over the cuts and pull it away sharply. Significant paint transfer suggests weak adhesion. Little or no transfer indicates that the coating remains strongly bonded.
Check the concrete at the same time. Look for:
- Spalling or flaking cement paste
- Exposed aggregate
- Cracks with vertical movement
- Soft, powdery areas
- Previous grinder marks
- Decorative stamps or surface treatments
- Sealer beneath or above the paint
- Moisture or efflorescence
You will know the inspection is complete when you can classify the project as loose paint, bonded paint, thick coating, isolated spill, or painted decorative concrete.
Common mistake: Assuming every dark or shiny layer is paint. Concrete sealer, curing compound, adhesive residue, and oil contamination can look similar but react differently to mechanical removal.
Step 2: Test for Lead and Control the Work Area
Test old or unknown paint before grinding, sanding, blasting, or heating it. Disturbing lead-containing paint can spread hazardous dust and debris, even when no chemical stripper is used.
The EPA identifies lead as toxic when inhaled or swallowed, with particular concern for children and pregnant women. NIOSH also lists sanding and heat-gun removal of lead paint among tasks that can produce lead dust.
Lead-based residential paint was banned in the United States in 1978, but age alone cannot confirm whether a specific coating contains lead. Painted masonry may also have received industrial or specialty coatings at a later date. Use a recognized test method or hire a qualified lead professional when the result will determine whether you proceed.
For indoor work:
- Remove furniture and movable items.
- Shut nearby doors.
- Cover fixed items with plastic.
- Seal return-air vents within the work zone.
- Keep children, pets, and unprotected occupants away.
- Place the vacuum outside the containment area when the equipment permits.
- Plan how debris will be bagged without carrying dust through the building.
For outdoor pressure washing, block drains when required and plan to recover paint chips. EPA guidance states that pressure washing on lead-related renovation work requires containment so dust, debris, and wastewater do not leave the work area.
Success checkpoint: The removal area is isolated, waste has a collection path, and no unidentified old coating will be heated or pulverized.
Step 3: Scrape Off All Loose Paint
Remove loose paint before using powered equipment. A scraper clears weak material quickly, exposes the strongly bonded layer, and reduces the amount of water, grinding, or blasting needed later.
Hold a rigid floor scraper at approximately 20-40 degrees to the concrete. Push with controlled pressure instead of striking downward. For vertical concrete, use shorter strokes and collect falling chips on plastic sheeting.
A carbide scraper lasts longer than a thin putty knife on rough concrete. However, its hard edge can scratch polished, stained, or lightly textured surfaces. Test first.
Lightly misting the area can reduce airborne dust during manual scraping, provided the coating is not being collected for testing and the moisture will not create an electrical hazard. Do not flood indoor concrete because water can migrate through cracks, walls, joints, and unfinished edges.
You will know scraping is complete when the remaining paint no longer curls or releases under firm hand pressure.
Common mistake: Trying to remove every bonded stain with a scraper. Excess force can chip weak concrete without removing pigment trapped in the pores.
Step 4: Remove the Bonded Paint
Choose one of the following methods based on the test area. Do not begin across the entire surface until a 1-2-square-foot trial produces an acceptable texture.
Option A: Pressure-Wash Exterior Concrete
Pressure washing is the practical first choice for exterior concrete when the paint is already peeling, weathered, or poorly bonded. It is less dependable on thick epoxy and can permanently etch soft concrete when the nozzle is too aggressive.
A common working range is approximately 2,500-4,000 PSI with 2.5-4 gallons per minute, using a 15-degree or 25-degree fan tip. The uploaded brief also identifies those ranges as the expected starting specification for paint removal.
Follow this sequence:
- Sweep and scrape the surface.
- Set the fan nozzle approximately 12-18 inches away.
- Aim at the edge of a peeling section.
- Move the wand before pulling the trigger.
- Sweep in overlapping passes.
- Reduce the distance gradually only when necessary.
- Keep the nozzle moving continuously.
- Recover chips and contaminated water as required.
Never begin with a 0-degree pinpoint nozzle. Concentrated water can cut lines into the cement paste and expose aggregate. The article brief specifically warns against the red 0-degree tip for this reason.
High-pressure water can also cause injection injuries. OSHA records include injuries from pressure-washer streams and identifies approximately 2,100 PSI as an injection hazard in one enforcement case.
Success checkpoint: Paint releases in flakes or strips while the underlying concrete maintains an even color and texture.
Stop immediately if: The surface becomes fuzzy, aggregate starts appearing, joint sealant lifts, or straight wand marks remain after drying.
Option B: Grind Bonded Paint From Flat Concrete
Diamond grinding is the most consistent non-chemical method for firmly bonded floor paint, acrylic coatings, and many epoxy systems. It removes both the coating and a thin portion of the concrete surface, leaving a profile that may be suitable for a new coating.
Use a walk-behind grinder for open floors and a shrouded handheld grinder for edges. Select tooling recommended for coating removal rather than polishing. Soft, gummy coatings may clog fine diamond segments, while very hard coatings may require more aggressive tooling.
Follow these steps:
- Connect the grinder shroud to a suitable dust extractor.
- Inspect hoses, seals, filters, and collection bags.
- Lower the grinder flat onto the surface.
- Start the extractor before starting the grinder.
- Move in slow, overlapping passes.
- Keep the grinding head level.
- Complete one direction, then cross-grind if required.
- Stop every few minutes to inspect texture and tooling.
- Use an edge grinder only where the main machine cannot reach.
- Vacuum before deciding whether another pass is necessary.
OSHA states that handheld grinders used on concrete can generate respirable crystalline silica. OSHA’s construction standard addresses occupational exposure, and NIOSH research found very high dust exposure during uncontrolled concrete grinding.
OSHA describes the hazard plainly: “Using walk-behind milling machines and floor grinders on concrete…can generate respirable crystalline silica dust.”
Use equipment-specific engineering controls rather than relying on a disposable mask as the primary solution. Contractors must follow applicable silica regulations, exposure-control requirements, respiratory-protection rules, and manufacturer instructions.
Success checkpoint: No continuous paint film remains, the surface profile is uniform, and the grinder has not created crescents or low spots.
Common mistake: Tilting a handheld grinder to attack a stubborn patch. The wheel edge cuts much faster than the flat face and can leave a permanent crescent-shaped groove.
Option C: Use Wet Grinding When Dust Cannot Be Controlled
Wet grinding suppresses airborne dust by feeding water to the cutting area. It can be useful in controlled environments, but it creates slurry that must be recovered before it enters drains, soil, cracks, or occupied spaces.
Use only grinders designed for wet operation. Never improvise water delivery around ordinary electric tools. Connect electrical equipment through appropriate ground-fault protection and inspect every cable before beginning.
Keep the slurry wet until it is collected. A thin layer can dry quickly and become airborne dust again. Use a wet vacuum or squeegee recovery system, then manage the waste according to its contents and local requirements.
Wet grinding is not automatically safer in every situation. It trades airborne dust for electrical, slip, wastewater, and disposal hazards.
Option D: Soften Small Areas With a Heat Gun
A heat gun can soften some paint on steps, corners, vertical surfaces, and detailed areas where grinding would damage adjacent concrete. It is too slow for most floors and should not be used on paint that may contain lead without an appropriate lead-safe plan.
Work on sections approximately 2-4 inches wide. Keep the gun moving, heat only until the film softens, then lift the paint with a scraper. Avoid scorching the coating or holding heat against cracks and sealant joints.
EPA lead-safe guidance permits only a low-temperature heat gun below 1,100°F for lead-related renovation work. Open-flame burning and heat above that level are prohibited practices because overheating lead paint can create dangerous fumes.
The uploaded AI Overview suggests operational temperatures from 500°F to 1,000°F, but the practical setting should be the lowest temperature that softens the verified coating.
Success checkpoint: The paint becomes flexible and lifts without smoke, charring, or discoloring the concrete.
Stop immediately if: The coating smokes, gives off a strong odor, blackens, bubbles violently, or cannot be identified.
Option E: Hire a Media-Blasting Contractor
Media blasting is suitable for masonry walls, textured concrete, large exterior surfaces, and shapes that grinders cannot follow. It propels soda, glass, mineral, or other media against the coating through compressed air.
“Soda blasting” is often described as gentle, but no blasting medium is universally harmless to concrete. Pressure, media hardness, particle size, nozzle distance, dwell time, concrete strength, and operator technique determine the result. Soft cement paste and decorative details can erode before stubborn paint releases.
A professional should create a sample area that demonstrates:
- Paint-removal percentage
- Final concrete texture
- Aggregate exposure
- Dust and debris containment
- Cleanup method
- Protection of windows, joints, landscaping, and nearby finishes
Abrasive blasting can create significant airborne-contaminant hazards. OSHA guidance emphasizes engineering controls, respiratory protection, hearing protection, and containment for blasting operations.
Step 5: Work in Small, Overlapping Sections
Divide the surface into manageable sections so you can judge progress before causing widespread damage. A 4-by-4-foot grid works well for floors, while walls may require smaller sections that match the containment and access setup.
For pressure washing, overlap passes by approximately one-third of the fan width. For grinding, overlap sufficiently to prevent ridges between passes. For scraping, complete one defined section before scattering effort across the room.
Inspect the concrete after each section under side lighting. Low-angle light reveals paint film, grinder swirls, ridges, gouges, and moisture more clearly than overhead light.
Do not judge wet concrete by color alone. Water temporarily darkens the slab and can hide thin paint residue. Allow a representative area to dry before confirming the finish.
Success checkpoint: Adjacent sections have the same texture and no hard paint edge remains between completed and unfinished areas.
Step 6: Clean Up Without Redistributing Dust
Vacuum debris with equipment suitable for the material and removal method. Do not use compressed air or dry household sweeping to clean concrete-grinding dust, because both can return fine particles to the breathing zone.
The uploaded brief recommends a HEPA-filtered vacuum and warns against dry sweeping silica-containing dust.
For dry removal:
- Keep the extractor running while the grinder stops.
- Vacuum the machine and floor.
- Work from the clean zone toward the exit.
- Wipe horizontal ledges.
- Seal collection bags before moving them.
- Remove containment inward to trap settled debris.
For pressure washing:
- Collect loose chips before they reach drains.
- Recover wastewater when contamination or local rules require it.
- Clean splash from walls and adjacent surfaces.
- Remove temporary drain protection carefully.
- Allow the concrete to dry before final inspection.
Paint chips are not automatically ordinary waste. Disposal requirements can change when the coating contains lead or another regulated material. Confirm local requirements rather than mixing unknown debris into soil, stormwater, or general wash water.
Step 7: Inspect the Bare Concrete
Inspect the concrete only after it is clean and sufficiently dry. The goal is not merely to remove visible color. The surface must also be sound enough for its next use.
Check for:
- Remaining glossy paint
- Dark pores filled with pigment
- Grinder ridges or swirl marks
- Pressure-washer lines
- Exposed aggregate
- Soft cement paste
- Cracks and spalls
- Oil or adhesive contamination
- Moisture movement
- Sealer that remains beneath the paint
A small amount of pigment in deep pores may remain after the continuous film has been removed. That staining is often cosmetic and may not justify aggressive grinding, especially when the concrete will remain unfinished.
If the surface will be recoated, follow the coating manufacturer’s preparation specification. “Bare concrete” and “properly profiled concrete” are not always the same condition. Some coatings require a defined mechanical profile, while stains and thin decorative finishes may reveal every grinder mark.
Step 8: Repair Damage and Prepare for the Next Finish
Repair cracks, spalls, holes, and damaged joints only after removal exposes their full extent. Paint can bridge defects and hide weak edges that will fail beneath a new coating.
Remove loose concrete from repair areas and use a repair product compatible with the intended finish. Respect minimum depth, moisture condition, application temperature, and cure time. A patch that feels hard at the surface may still be too young or too damp for coating.
Before repainting:
- Confirm that no glossy film remains.
- Vacuum the surface thoroughly.
- Verify the required concrete profile.
- Check for moisture when the coating system requires it.
- Allow water-washed concrete to dry.
- Confirm patch compatibility.
- Apply primer when specified.
- Coat within the manufacturer’s environmental limits.
Do not apply new paint simply because the concrete looks clean. Moisture vapor, weak surface paste, incompatible old coating, oil in the pores, and insufficient profile can cause another adhesion failure.
How Long Does Paint Removal Take?
Removing paint from concrete typically takes 1-3 hours for isolated spills, 4-10 hours for a 200-square-foot DIY floor, and one or more working days when heavy epoxy, edges, repairs, containment, and drying are included.
| Project | Likely method | Active removal time | Additional time |
|---|---|---|---|
| 10 sq. ft. paint spill | Scraping or handheld grinding | 30-120 minutes | 30-60 minutes cleanup |
| 100 sq. ft. patio | Pressure washing | 1-3 hours | 4-24 hours drying |
| 200 sq. ft. garage floor | Walk-behind grinding | 3-7 hours | 1-3 hours edges and vacuuming |
| 500 sq. ft. driveway | Pressure washing and spot grinding | 3-8 hours | 4-24 hours drying |
| 500 sq. ft. epoxy floor | Grinding or shot blasting | 4-12 hours | Repairs and profiling |
| Painted masonry wall | Scraping or media blasting | 1-3 days | Containment and cleanup |
Edges often take longer per square foot than the open floor. A project quoted as “200 square feet” can still require extensive labor when paint covers steps, corners, control joints, columns, or equipment pads.
How Much Does Non-Chemical Removal Cost?
DIY paint removal commonly costs $20-$75 for hand scraping, $60-$180 for a pressure-washer rental and accessories, or $100-$350 for grinder rental, diamond wear, dust collection, and protective equipment. Professional work costs more because containment, surface repair, disposal, mobilization, and finish requirements are included.
| Cost item | Typical DIY range |
|---|---|
| Floor or carbide scraper | $15-$60 |
| Pressure-washer rental | $40-$120 per day |
| Handheld grinder rental | $40-$100 per day |
| Walk-behind grinder rental | $100-$300 per day |
| Diamond tooling or wear charge | $30-$150 |
| Dust extractor rental | $60-$200 per day |
| Plastic, tape, bags, filters | $25-$100 |
| Lead testing or professional assessment | Varies by test and location |
These are planning estimates rather than live rental quotes. Local inventory, machine size, deposits, accessory charges, taxes, and diamond wear policies can materially change the total.
The cheapest tool is not always the lowest-cost solution. A small grinder may cost less to rent but require an entire day, produce uneven profiling, and consume expensive tooling on a large floor.
Common Mistakes and How to Fix Them
| Problem | Likely cause | Recovery action |
|---|---|---|
| Crescent-shaped gouges | Grinder tilted onto wheel edge | Flatten surrounding high points carefully or repair the depression |
| Straight etched lines | Pressure nozzle too close or too narrow | Increase distance, use a wider fan, blend only if sufficient surface remains |
| Paint smears instead of cutting | Coating is soft or tooling is glazed | Change tooling, reduce heat, clean the wheel, or use scraping first |
| Excessive airborne dust | Poor shroud seal, clogged filter, weak extractor | Stop work, restore airflow, inspect seals, use compliant controls |
| Thin paint patches remain | Passes were too fast or poorly overlapped | Cross-grind or repeat only on remaining areas |
| Aggregate becomes exposed | Removal continued beyond the paint film | Stop and reassess the desired finish |
| New coating peels | Moisture, residue, weak concrete, or insufficient profile | Diagnose the adhesion failure before recoating |
| Paint returns from pores | Pigment penetrated porous concrete | Accept staining, grind lightly, or use an opaque compatible coating |
| Water enters the building | Poor drainage or unsealed joints | Stop pressure washing and recover water before continuing |
| Heat produces smoke | Excess temperature or prolonged dwell | Stop, ventilate safely, and reassess coating hazards |
Variations for Different Concrete Surfaces
How Should You Remove Paint From a Driveway?
Use scraping followed by pressure washing for a driveway when the coating is loose or weathered. Keep the fan nozzle moving, protect expansion joints, collect chips, and avoid concentrating water on cracks or deteriorated edges.
Bonded traffic paint may require grinding or professional blasting. A driveway’s visible texture matters, so test where a change in aggregate exposure will be least noticeable.
How Should You Remove Paint From a Garage Floor?
Use shrouded grinding for firmly bonded garage-floor paint or epoxy. Start with a walk-behind machine on open areas, then complete edges with compatible handheld equipment.
Check for oil contamination and moisture before applying another coating. Removing the old paint does not remove oil that has penetrated deeper into the slab.
Can You Remove Paint From Stamped Concrete?
Paint can be removed from stamped concrete, but aggressive pressure washing and grinding can flatten texture, expose aggregate, or permanently alter color. Begin with hand scraping in a hidden area and stop when the base finish starts changing.
Media blasting should be performed only after an approved sample. Decorative concrete often has more value in its original texture than in achieving complete paint removal.
How Do You Remove Spray Paint From Concrete?
Fresh, isolated spray paint can often be reduced by immediate blotting, gentle scraping, and controlled abrasion after it dries. Older spray paint penetrates porous concrete and may leave a shadow even after the surface film is gone.
Use a small diamond hand pad or shrouded grinder for stubborn spots. Feather the surrounding area carefully because a perfectly clean circle can look more noticeable than the original mark.
How Do You Remove Thick Epoxy Without Chemicals?
Remove thick epoxy with aggressive diamond grinding, carbide milling, shot blasting, or a combination of methods. Epoxy usually resists ordinary pressure washing because it forms a strong, continuous film.
Start with a tooling test. Some epoxy becomes gummy and loads the wheel, while brittle systems fracture readily. Large floors usually justify professional equipment because handheld grinding creates inconsistent profiles and excessive edge labor.
Expert Rules of Thumb
Remove the Film, Not Unnecessary Concrete
The goal is to eliminate the coating to the degree required by the next finish. Continuing until every stained pore appears new can remove sound cement paste, expose aggregate, deepen tool marks, and reduce the floor’s appearance.
Edges Determine the Real Project Duration
Open-floor production rates are misleading when a room contains columns, steps, joints, shelving, drains, or wall-to-floor transitions. Contractors often finish the central floor quickly and spend equal time completing the final perimeter.
Surface Uniformity Matters More Than Maximum Aggression
A uniformly prepared surface usually performs and looks better than one with a perfectly clean center and heavily gouged edges. Choose the least aggressive method that reliably reaches the required endpoint.
Honest Limitations of Chemical-Free Removal
Removing paint without chemical stripper does not mean the project is hazard-free or environmentally impact-free. Grinding creates silica-containing dust, pressure washing creates potentially contaminated wastewater, blasting produces airborne media and debris, and heat may release hazardous dust or fumes from old coatings.
Mechanical removal can also alter the concrete permanently. Polished floors may lose sheen, decorative surfaces may lose detail, and soft slabs may expose aggregate before all pigment disappears.
Some situations deserve professional evaluation:
- Suspected lead-containing paint
- Large occupied interiors
- Industrial coatings of unknown composition
- Weak or historically significant masonry
- Extensive epoxy
- Moisture-damaged floors
- Projects requiring a guaranteed decorative finish
- Work near storm drains, soil, waterways, or sensitive equipment
Frequently Asked Questions
Can vinegar remove paint from concrete?
Vinegar may soften or loosen limited water-based residue, but it is an acid and therefore does not meet a strict “without chemicals” requirement. Acidic liquids can also react with cement paste and change the concrete surface. For genuinely non-chemical removal, use scraping, controlled pressure washing, grinding, heat, or professional blasting.
Will boiling water remove paint from concrete?
Hot water may soften some fresh latex paint, but boiling water rarely removes a cured, bonded coating from porous concrete. It can also create burn hazards and drive colored residue farther across the surface. Use warm water only as an aid to scraping after testing a small area.
Can I sand paint off concrete?
Paint can be sanded from concrete, but ordinary sandpaper is inefficient on rough surfaces and power sanding can create hazardous dust. A shrouded concrete grinder with appropriate tooling is generally more effective. Unknown old paint should be tested for lead before any sanding or grinding begins.
Do I need to remove all paint before repainting concrete?
Complete removal is not always required. Sound, compatible paint may remain when the new coating manufacturer permits recoating and adhesion testing confirms that the old layer is stable. Remove loose, glossy, contaminated, incompatible, or failing paint, then create the surface profile specified for the replacement system.
Why is paint still visible after grinding?
Paint color can remain because pigment has entered concrete pores below the removed film. A visible stain does not always mean a continuous coating remains. Inspect under side lighting and test for gloss or film edges before removing more concrete solely to eliminate discoloration.
Can a pressure washer damage concrete?
A pressure washer can etch cement paste, expose aggregate, widen weak areas, damage joints, and leave permanent lines. Risk increases with narrow nozzles, short working distance, high pressure, and deteriorated concrete. Begin with a fan tip at a greater distance and approach gradually after testing.
The Bottom Line
The most reliable way to remove paint from concrete without chemicals is to match the tool to the coating. Scrape loose material first, pressure-wash peeling exterior paint, grind firmly bonded floor coatings, and reserve heat or blasting for limited situations where their risks can be controlled.
Test a small section before committing to the full surface. Lead-containing paint, respirable silica, high-pressure water, wastewater, and permanent texture changes can make a seemingly simple removal project hazardous. Stop when the paint film is removed and the concrete has the uniform, sound profile required for its next use.


