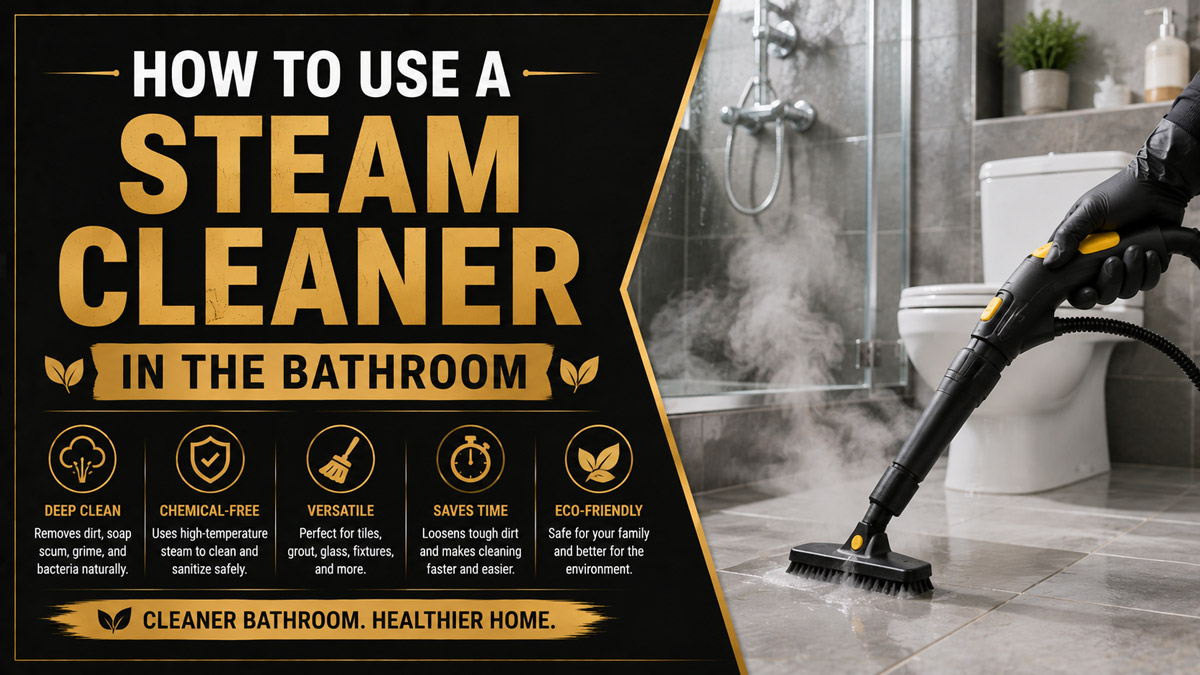
To use a steam cleaner in the bathroom, remove loose dirt, fill and heat the machine according to its manual, select the correct attachment, and clean from high surfaces to the floor. Move the steam steadily, wipe loosened residue immediately, and avoid unsealed, heat-sensitive, cracked, or adhesive-backed materials.
Key Facts at a Glance
- A steam cleaner loosens bathroom soil, but a microfiber cloth or extraction tool must remove the released residue.
- A routine bathroom usually takes 20-40 minutes to steam-clean after preparation.
- Ceramic and porcelain tile generally tolerate steam better than unsealed stone, damaged grout, laminate, or painted surfaces.
- Steam must remain on a surface for the manufacturer-specified contact time before a sanitizing claim is valid.
- Small nylon brushes suit grout and tracks, while microfiber-covered tools protect broad tile surfaces.
- The appliance manual overrides general advice about water type, descaling products, attachments, and compatible materials.
Before You Start
Steam cleaning a bathroom is a moderate-effort task rather than a spray-and-wipe shortcut. The machine supplies heat and moisture, but the operator still needs to control dwell time, brush agitation, residue removal, and surface exposure.
| Requirement | Typical amount or range | Practical note |
| Total time | 20-40 minutes | Allow 45-75 minutes for heavily soiled grout |
| Difficulty | Moderate | Heat, moisture, and surface compatibility require attention |
| Machine heat-up | 30 seconds to 10 minutes | Varies by handheld, mop, or canister design |
| Water | 250 mL to 1.5 L | Follow the reservoir limit marked by the manufacturer |
| Microfiber cloths | 4-8 clean cloths | Separate toilet cloths from shower and sink cloths |
| Detail brushes | 1-3 nylon brushes | Replace brushes that become flattened or contaminated |
| Floor pads | 1-2 washable pads | Change the pad when it becomes visibly gray |
| Direct consumable cost | About $1-$5 | Mainly water, cloth laundering, and occasional brush wear |
| Steam-cleaner purchase | About $40-$400 | Handheld units cost less; canisters provide longer runtime |
Tools and Materials
Prepare the steam cleaner, its compatible attachments, clean microfiber cloths, a dry vacuum or broom, protective gloves, and a container for used cloths. A squeegee can help on shower glass, while an old towel placed near the doorway catches runoff.
Use only accessories approved for the machine. An attachment that fits physically may still restrict steam incorrectly, damage a locking connector, or expose the operator to escaping vapor.
Safety Prerequisites
Inspect the electrical cord, plug, hose, trigger, pressure cap, seals, and attachment locks before filling the machine. Do not operate equipment with a damaged cord, leaking hose, loose cap, or cracked reservoir.
Keep the cord away from standing water. Plug the appliance into a properly protected bathroom circuit, and never handle the plug with wet hands. Children and pets should remain outside the working area until surfaces are cool and dry.
Never open a pressurized reservoir while the machine is hot. Switch it off, unplug it, release pressure as directed, and wait for the manufacturer’s cooling period before refilling.
Which Steam Cleaner Works Best in a Bathroom?
A canister steam cleaner is usually the most capable choice for a full bathroom because its hose, larger reservoir, and attachment range can handle walls, grout, fixtures, and floors. A handheld unit suits spot cleaning, while a steam mop is primarily a sealed-floor appliance.
| Steam-cleaner type | Typical capacity | Typical working time | Best bathroom use | Main limitation |
| Handheld | 200-400 mL | 8-20 minutes | Faucets, tracks, grout spots, toilet hinges | Frequent refilling and arm fatigue |
| Canister | 1-2 L | 35-90 minutes | Full showers, walls, fixtures, grout, floors | Higher cost and more storage space |
| Steam mop | 300-700 mL | 15-35 minutes | Large sealed floor areas | Poor reach on walls and fixtures |
| Convertible mop | 300-600 mL | 15-30 minutes | Floors plus light handheld detailing | Detachable unit may have modest pressure |
Pressure specifications should not determine the purchase alone. Consistent steam flow, hose reach, brush quality, refill design, pad availability, and temperature control often affect bathroom performance more than the largest pressure number printed on the box.
What Bathroom Surfaces Can You Steam-Clean?
Steam is generally suitable for intact ceramic tile, porcelain tile, sealed grout, and some manufacturer-approved glass and fixtures. Steam can damage surfaces that contain open pores, weak adhesives, deteriorated sealants, hidden cracks, or heat-sensitive coatings.
Always test an inconspicuous area. Apply a brief, distant pass, let the surface cool, and inspect it under good light for whitening, softening, lifting, discoloration, loss of gloss, or adhesive movement.
| Bathroom surface | General suitability | Safer method | Main risk |
| Glazed ceramic tile | Usually suitable | Microfiber tool or low-pressure nozzle | Heat entering existing cracks |
| Porcelain tile | Usually suitable | Steady passes with immediate wiping | Residue left in textured finishes |
| Sound sealed grout | Usually suitable | Nylon brush with light pressure | Erosion from prolonged close-range blasting |
| Unsealed grout | Use caution | Test first and minimize moisture | Water penetration and staining |
| Tempered shower glass | Often suitable | Warm gradually, then use a squeegee | Thermal stress and edge damage |
| Mirror | Use caution | Light steam on a cloth or squeegee | Moisture entering the backing or edges |
| Sealed natural stone | Manufacturer approval needed | Low heat, short exposure | Sealer damage or stone discoloration |
| Unsealed marble or limestone | Avoid | Stone-specific cleaner | Etching, moisture absorption, finish damage |
| Sheet vinyl | Check flooring instructions | Low steam with constant movement | Adhesive softening or seam lifting |
| Luxury vinyl tile | Often restricted | Manufacturer-approved damp cleaning | Joint penetration and adhesive damage |
| Laminate flooring | Usually avoid | Barely damp microfiber cleaning | Swelling at joints and edges |
| Acrylic shower enclosure | Use caution | Low heat from a distance | Warping, dulling, or stress cracking |
| Silicone caulk | Limited exposure only | Brief pass and wipe | Adhesive weakening in aged caulk |
| Painted drywall | Avoid direct steam | Dry dusting or approved cleaner | Paint lifting and gypsum saturation |
| Wallpaper | Avoid | Manufacturer-approved cleaning | Adhesive release |
| Electrical outlets and controls | Never steam directly | Switch off and wipe externally | Shock, short circuit, and internal corrosion |
How to Use a Steam Cleaner in the Bathroom Step by Step
The most reliable sequence is preparation, attachment selection, upper walls, shower surfaces, grout, glass, fixtures, toilet exteriors, and floors. This top-to-bottom order prevents loosened soil and condensation from falling onto areas that have already been cleaned.
Step 1: Clear, Ventilate, and Dry-Clean the Bathroom
Remove bath mats, towels, toiletries, bins, scales, plants, and movable storage. Open the exhaust route or window when weather and privacy allow, but avoid creating a cold draft directly across glass that will receive hot steam.
Vacuum or sweep hair, dust, tissue fragments, and grit from floors, ledges, tracks, and corners. Steam turns dry debris into damp paste, which increases wiping time and can drag abrasive particles across glossy surfaces.
Inspect grout, caulk, tiles, fixtures, and glass edges. Mark cracked grout, loose tiles, peeling coatings, failed sealant, and damaged flooring seams as no-steam zones.
Success checkpoint: The room should be uncluttered, loose debris should be gone, and every questionable surface should be identified.
Common mistake: Beginning with visible soap scum while dry hair remains in corners. The hair sticks to brushes, pads, and wet grout.
Step 2: Fill, Heat, and Select the Attachment
Fill the reservoir only to its marked maximum. Use the water type specified in the manual. Distilled or demineralized water can reduce mineral deposits in many machines, but some manufacturers permit tap water or prescribe a particular mixture.
Lock the cap and attachment before plugging in the appliance. Allow the heating indicator to show that operating temperature has been reached. Purge the first burst into a sink or folded towel because initial output may contain condensed water.
Choose the attachment by surface:
- Use a concentrated jet nozzle for narrow tracks and inaccessible joints.
- Use a small nylon brush for sound grout and textured tile.
- Use a microfiber-covered head for broad walls and tile faces.
- Use a squeegee tool for compatible shower glass.
- Use a wide padded floor head for approved sealed flooring.
- Reserve separate brushes and cloths for the toilet area.
Success checkpoint: The machine should produce steady vapor rather than repeated spits of hot water.
Common mistake: Overfilling the reservoir. Excess water can delay vapor production and cause sputtering.
Step 3: Start With Upper Walls and Ledges
Begin at the highest steam-safe surface, such as the upper shower wall or tiled backsplash. Work in sections about 2 feet by 2 feet so released residue can be wiped before it cools or dries again.
Hold the tool at the distance recommended by the manufacturer. Keep it moving in overlapping passes instead of concentrating heat on one point. Follow each section with a folded microfiber cloth, turning to a clean face as it becomes damp.
Steam softens body-oil film, light soap residue, and accumulated dust. It does not make the contamination disappear. Immediate wiping transfers the suspended material from the wall to the cloth.
Success checkpoint: A clean cloth should glide over the tile without collecting dark residue.
Common mistake: Steaming the entire wall before wiping. The loosened film can settle back onto the surface.
Step 4: Steam-Clean Shower Tiles
Fit a microfiber-covered tool for smooth tile faces. Move horizontally or vertically at a controlled pace, with each pass slightly overlapping the previous one.
For textured tile, use a nylon brush with light pressure. Let heat soften the soil before adding force. Excessive scrubbing can flatten brushes, spread dirty water, or alter delicate finishes.
Divide the enclosure into upper, middle, and lower zones. Lower shower walls usually contain more soap scum because rinse water, body products, and skin oils collect there. These areas may need a second pass.
Success checkpoint: The tile should feel smooth after wiping and should not retain a greasy drag.
Common mistake: Treating heavy mineral scale as ordinary soap residue. Steam can soften surface contamination, but thick calcium deposits often require a compatible descaling treatment.
Step 5: Clean Grout Without Damaging It
Steam-clean grout with a small nylon brush positioned directly over an intact joint. Advance slowly enough to heat the soil, but do not hold a concentrated jet on one point for an extended period.
Use light brush pressure. The steam should perform most of the loosening. Wipe every few lines with a clean microfiber cloth so dirty moisture does not migrate into neighboring joints.
Dark grout does not always indicate removable dirt. Permanent pigment variation, deep staining, missing sealer, and biological growth beneath the surface may remain after cleaning.
Stop immediately if the joint sheds sand, forms a groove, changes texture, or exposes a crack. Those symptoms indicate deteriorated grout that needs repair rather than stronger steam.
Success checkpoint: Surface soil should transfer to the cloth while the grout remains firm and evenly textured.
Common mistake: Using a metal brush. Metal can scratch tile, abrade grout, leave fragments, and create rust marks.
Step 6: Steam Shower Glass and Mirrors Carefully
Tempered shower glass can often be steam-cleaned, but the panel should be warmed gradually. Begin with the tool farther away, make a light pass across the glass, and then move closer within the machine manufacturer’s recommended range.
Work from top to bottom. Follow the steam with a squeegee, wiping the rubber blade after each pull. Dry the edges and lower channel with a microfiber cloth.
Avoid aggressive steam on chipped edges, cracked panels, decorative films, cold exterior-facing glass, and glass of unknown condition. Temperature differences across damaged glass can increase stress.
Use minimal moisture around mirror edges. Steam or water that enters behind the reflective backing may cause black spotting, separation, or corrosion.
Success checkpoint: The glass should dry clear without milky streaks or water collecting at its edges.
Common mistake: Holding a hot nozzle close to one cold spot. Gradual warming is safer than sudden concentrated heating.
Step 7: Detail Faucets, Drains, and Shower Tracks
Use a jet nozzle or small nylon brush around faucet bases, handles, drain rims, shower-door tracks, and metal joints. Short bursts are safer than prolonged heating around seals, plated surfaces, and plastic components.
Place a cloth below the work area to capture runoff. After steaming, wipe and buff chrome or stainless steel with a dry microfiber cloth. This removes suspended residue before minerals in the moisture dry as spots.
Steam may loosen light limescale, but thick mineral crust usually needs chemical dissolution. Apply only a surface-safe product, observe its dwell time, rinse it completely, and never mix acids with bleach or unknown cleaners.
Do not direct steam into faucet cartridges, powered mirrors, digital controls, outlets, light fittings, ventilation motors, or gaps leading into walls.
Success checkpoint: Moving parts should remain smooth, and the dried finish should show no chalky residue.
Common mistake: Assuming more heat will remove every mineral deposit. Calcium scale often responds to chemistry more effectively than additional temperature.
Step 8: Clean the Toilet Exterior and Hinges
Steam can help clean the toilet’s exterior, seat hinges, mounting points, flush handle, and base perimeter when the material manufacturer permits it. Use dedicated accessories that will not later touch the sink or shower.
Begin with the cleaner areas, such as the tank and handle, before moving to the seat mounts and base. Apply short controlled passes and wipe immediately with toilet-only cloths.
Avoid forcing steam into electronic bidet controls, heated-seat components, electrical connections, concealed mechanisms, or gaps beneath loose fittings. Do not blast one spot on very cold porcelain.
Steam cleaning does not replace removal of visible organic contamination before disinfection. A surface must first be clean, and any disinfectant or steam-sanitizing protocol must meet its labeled contact requirements.
Success checkpoint: Hinges and joints should be free from visible residue, with no water entering electrical or mechanical components.
Common mistake: Reusing the toilet brush or cloth on another bathroom surface. Color-coded tools reduce cross-contamination.
Step 9: Finish With the Bathroom Floor
Steam the floor only when its manufacturer approves steam cleaning. Intact glazed ceramic and porcelain tile usually tolerate controlled steam better than laminate, damaged vinyl, unsealed stone, or flooring with open seams.
Attach a clean microfiber pad and begin at the farthest corner. Move toward the exit in overlapping passes without parking the hot head in one location.
Change the pad when it becomes visibly dirty. Continuing with a saturated gray pad redistributes soil instead of removing it. Pay attention to edges, but do not force vapor under baseboards, cabinets, toilets, or lifted flooring seams.
Allow the floor to dry before replacing mats and objects. Ventilation reduces condensation and prevents moisture from remaining in grout lines or enclosed corners.
Success checkpoint: The floor should dry evenly without tackiness, raised seams, discoloration, or water collecting at edges.
Common mistake: Treating all bathroom flooring as waterproof. A water-resistant top layer does not guarantee that its joints, backing, or adhesive tolerate steam.
Step 10: Shut Down and Maintain the Machine
Switch off and unplug the cleaner after finishing. Release pressure and open the reservoir only according to the manual. Allow attachments and the machine body to cool before handling internal parts.
Empty remaining water when the manufacturer recommends it. Rinse removable cloths and pads promptly, then launder them without fabric softener if their care instructions prohibit it. Fabric softener can reduce microfiber absorbency.
Inspect brushes, seals, and nozzles for trapped debris. Store the machine dry with the cord loosely arranged and attachments ventilated.
Descale only by the manufacturer’s approved procedure. Do not automatically pour vinegar, lemon juice, detergent, fragrance, bleach, or commercial cleaner into the reservoir. Acids and additives can damage boilers, seals, sensors, coatings, or warranty coverage.
Success checkpoint: The tank, pads, and attachments should be clean, cool, dry, and ready for the next session.
Common mistake: Storing a damp pad on the machine. Moisture and captured soil can produce odor and microbial growth.
Does Steam Really Sanitize a Bathroom?
A steam cleaner can reduce microorganisms when the appliance delivers the required temperature and the operator maintains the specified contact time. A rapid pass should be described as cleaning unless the manufacturer has validated that exact attachment, distance, surface, and exposure time for sanitization.
Microorganism reduction depends on more than boiler temperature. Steam cools as it travels through the hose, leaves the nozzle, contacts a cold surface, and spreads across a tool or cloth.
Visible soil also interferes with treatment. Body oils, soap film, dust, and organic material can shield contamination, so the surface should be cleaned before relying on a sanitizing cycle.
Product statements such as “kills 99.9 percent” are not universal operating rules. The supporting instructions may require a specific accessory and several seconds of stationary or slow contact. Read the complete claim rather than relying on front-label wording.
Steam is also not a sterilization method for an ordinary residential bathroom. Sterilization has a stricter meaning and requires validated processes that household surface cleaning does not provide.
Common Mistakes and How to Fix Them
| Problem | Likely cause | Immediate recovery | Prevention |
| Machine spits hot water | Reservoir overfilled or not fully heated | Stop, let it reach operating temperature, and purge safely | Fill only to the marked line |
| Soil smears across tile | Too much area steamed before wiping | Re-steam a small section and wipe with a clean cloth | Work in 2-foot sections |
| Grout remains dark | Deep staining, missing sealer, mold, or deterioration | Let it dry, reassess, and use a grout-specific method | Identify whether the issue is soil or damage |
| Glass dries with streaks | Dirty squeegee, hard-water residue, or excess moisture | Re-clean lightly and dry with a fresh cloth | Wipe the blade after every pull |
| Floor feels sticky | Dirty pad or previous detergent residue | Replace the pad and make controlled passes | Vacuum first and change pads early |
| Steam pressure falls | Low water, scale, blocked tool, or cycling heater | Switch off and inspect per the manual | Maintain the unit and use approved water |
| Caulk begins lifting | Heat exposure on aged or failed sealant | Stop steaming, dry the joint, and replace failed caulk | Keep direct steam away from weak sealant |
| Vinyl edge curls | Heat or moisture affected a seam or adhesive | Stop, dry immediately, and consult the floor maker | Avoid steam unless explicitly approved |
| Mirror edge darkens | Moisture reached the backing | Stop steaming and keep the edge dry | Apply minimal moisture near mirror borders |
| Bathroom becomes excessively wet | Tool held too close or steam output too high | Ventilate and wipe condensation | Use lower output and steady movement |
Troubleshooting a Steam Cleaner
Why Is the Steam Pressure Low?
Low steam pressure commonly results from insufficient heating, low water, mineral scale, a blocked attachment, a kinked hose, or a component that has not locked into place. Turn the machine off before inspecting it.
Confirm the reservoir level and heat indicator. Remove and examine cooled attachments for obstruction, then follow the manual’s cleaning procedure. If pressure repeatedly drops despite correct operation, a seal, valve, heater, or thermostat may require professional service.
Why Does the Cleaner Keep Sputtering?
Sputtering often occurs during initial warm-up, after attaching a cool hose, or when condensed water collects in the tool. Purge the first output into a sink or towel until the flow becomes consistent.
Persistent sputtering can indicate overfilling, incomplete heating, scale, or an internal fault. Do not point the tool toward skin or fragile surfaces while testing it.
Can You Descale a Steam Cleaner With Vinegar?
Use vinegar inside a steam cleaner only when the manufacturer specifically authorizes it. Generic vinegar advice is unsafe because boiler metals, seals, tubing, sensors, and coatings differ between appliances.
Some manufacturers prescribe a branded descaler, a measured citric-acid solution, a rinse-only process, or service-center maintenance. Follow the stated dilution, temperature, and flushing instructions exactly.
Why Is Dirt Returning After Steam Cleaning?
Dirt appears to return when liquefied residue was not removed, dirty cloths were reused, porous grout retained contaminated moisture, or cleaner residue remained from previous products. Steam loosens contamination but does not automatically extract it.
Repeat the area in smaller sections. Use clean absorbent cloths, turn them frequently, and allow porous surfaces to dry fully before judging the final result.
Variations for Different Bathroom Conditions
Heavy Soap Scum
Heavy soap scum may need pretreatment because the deposit contains fatty residues, minerals, and product binders. Use a cleaner approved for the surface, allow its labeled dwell time, agitate if permitted, and rinse completely before steaming.
Never steam over bleach, ammonia, acids, solvents, or an unknown chemical film. Heat can increase vapor release, spread the product, or accelerate an unsafe reaction.
Heavy Limescale
Steam alone is rarely the fastest solution for thick calcium deposits. A compatible acidic descaler dissolves mineral bonds more effectively, while steam can assist with final rinsing and residue removal after the chemical has been removed.
Acid-sensitive stone, grout, plated fixtures, and damaged finishes require special caution. Test the descaler and observe its maximum contact time.
Mold-Stained Grout or Caulk
Steam may remove surface residue and reduce some viable growth, but recurring mold usually signals retained moisture, failed caulk, poor ventilation, or contamination below the visible surface. Cleaning alone does not correct the moisture source.
Replace failed sealant and repair leaks. Porous materials with deep or recurring growth may require removal rather than repeated steaming.
Small Apartment Bathroom
A handheld cleaner can handle a compact bathroom if the work is divided into short zones. Clean the shower and fixtures first, allow the appliance to cool if refilling is required, then complete the toilet and floor.
Plan the sequence before heating. A small reservoir becomes frustrating when accessories, cloths, and surfaces are not ready.
Natural-Stone Bathroom
Natural stone requires instructions from the stone supplier, installer, or sealer manufacturer. Marble, limestone, travertine, slate, and granite vary in porosity, finish, mineral composition, and sealer condition.
Use a pH-appropriate stone cleaner when steam approval is unavailable. A method that appears safe on glazed ceramic tile cannot be transferred automatically to natural stone.
How Long Does Bathroom Steam Cleaning Take?
A lightly soiled bathroom typically takes 20-40 minutes after clutter has been removed. A large shower, heavily stained grout, multiple glass panels, or repeated refilling can increase the session to 45-75 minutes.
| Bathroom condition | Preparation | Active steaming | Wiping and drying | Typical total |
| Small powder room | 5 minutes | 8-12 minutes | 5-8 minutes | 18-25 minutes |
| Standard full bathroom | 8-12 minutes | 15-25 minutes | 8-12 minutes | 31-49 minutes |
| Large tiled shower | 10-15 minutes | 25-40 minutes | 10-15 minutes | 45-70 minutes |
| Restorative grout cleaning | 10-15 minutes | 35-60 minutes | 15-20 minutes | 60-95 minutes |
The wiping stage should not be removed from the estimate. Steam without residue collection often creates the appearance of speed while leaving suspended soil behind.
How Much Does Bathroom Steam Cleaning Cost?
The direct cost of using an owned steam cleaner is usually low because the process consumes water, washable cloths, and modest electricity. Equipment cost varies more significantly, from basic handheld machines to durable canister systems.
| Expense | Typical cost | Replacement frequency |
| Entry handheld cleaner | $40-$80 | Several years with proper care |
| Convertible steam mop | $80-$180 | Several years |
| Canister steam cleaner | $150-$400+ | Several years |
| Nylon detail brushes | $8-$25 per set | When bristles flatten or wear |
| Microfiber cloths | $10-$25 per pack | Months to years |
| Replacement floor pads | $10-$30 per set | Based on wear and laundering |
| Approved descaler | $8-$20 | Several maintenance cycles |
A larger machine is not automatically more economical. An apartment renter who cleans one compact bathroom may receive better value from a handheld unit, while a household with multiple tiled bathrooms benefits from a canister’s capacity and hose reach.
Steam Cleaning Versus Other Bathroom Methods
Steam cleaning is strongest when heat, targeted moisture, and mechanical wiping can release soil from hard, intact surfaces. It is weaker against thick mineral scale, damaged materials, deeply penetrated mold, and surfaces that cannot tolerate heat.
| Method | Best use | Main advantage | Main limitation |
| Steam cleaning | Grout, tracks, tile, fixture joints | Reaches crevices with minimal detergent | Requires heat-safe surfaces and wiping |
| Detergent cleaning | Body oils and soap film | Surfactants lift greasy residue | Requires rinsing and product compatibility |
| Acidic descaling | Calcium and hard-water deposits | Dissolves mineral buildup | Can damage stone, grout, and metal finishes |
| Disinfectant | Validated microbial reduction | Labeled organisms and contact time | Surface usually needs pre-cleaning |
| Manual scrubbing | Localized stubborn soil | Direct mechanical action | Labor-intensive and can abrade finishes |
| Professional restoration | Failed grout, deep staining, severe buildup | Repair and specialized extraction | Highest cost |
The best bathroom-cleaning process may combine methods. Steam can clean joints and textured surfaces, a compatible descaler can address mineral deposits, and a registered disinfectant can be used when a specific disinfection outcome is required.
Practitioner Rules That Improve Results
First, treat wiping as part of steam cleaning rather than a separate finishing task. The machine releases soil, while the cloth removes it. Skipping either function produces an incomplete result.
Second, judge grout before increasing pressure. A dark line may need cleaning, but a soft, sandy, cracked, or recessed line needs repair. Stronger steam can turn a maintenance problem into a replacement project.
Third, begin with the least aggressive combination of distance, output, attachment, and dwell time. Increase only one factor at a time. This makes surface reactions easier to identify and limits damage.
A steam cleaner is not the right tool for every bathroom problem. It cannot restore failed sealant, repair loose tile, remove every mineral deposit, correct hidden moisture, or make a damaged surface heat-safe.
Conclusion
Learning how to use a steam cleaner in the bathroom requires more than directing hot vapor at visible dirt. Prepare the room, confirm that each surface tolerates heat and moisture, use the correct attachment, clean from top to bottom, and wipe every section before released residue settles again.
Use steam for intact tile, sound grout, approved glass, fixture joints, and compatible floors. Choose another method for heavy scale, failed caulk, damaged materials, unsealed stone, electrical components, and flooring that prohibits steam.
Frequently Asked Questions
Can I Put Bathroom Cleaner in a Steam Cleaner?
Do not add bathroom cleaner, disinfectant, vinegar, fragrance, bleach, or detergent to a steam-cleaner reservoir unless the appliance manufacturer explicitly permits that exact product. Additives can foam, corrode components, damage seals, produce irritating vapor, block the boiler, or void the warranty. Apply compatible chemicals directly to the surface when their instructions allow it.
Should I Use Distilled Water in a Steam Cleaner?
Use the water type specified in the appliance manual. Distilled or demineralized water reduces mineral deposits in many steam cleaners, especially in hard-water areas, but some machines are designed for tap water or a prescribed blend. Water recommendations can affect sensors, boiler performance, descaling schedules, and warranty coverage.
Can Steam Remove Mold From Bathroom Grout?
Steam can loosen surface residue and reduce microorganisms under the correct temperature and contact conditions, but it may not remove staining or growth beneath porous grout. Recurring mold indicates a moisture, ventilation, leak, or sealant problem. Repair the moisture source and replace deteriorated grout or caulk when cleaning does not solve the condition.
How Often Should You Steam-Clean a Bathroom?
A typical household can steam-clean high-contact details and shower tracks every one to two weeks, with a broader tile and grout session every four to eight weeks. Actual frequency depends on bathroom use, ventilation, water hardness, surface condition, and whether routine wiping prevents soap and mineral deposits from accumulating.
Can You Steam-Clean a Glass Shower Door?
Many intact tempered-glass shower doors can be steam-cleaned when the manufacturer permits it. Warm the panel gradually, keep the tool moving, and use a squeegee from top to bottom. Avoid steaming chipped edges, cracked glass, decorative films, cold exterior-facing panels, or seals that are already loose or deteriorated.
Does Steam Cleaning Replace Disinfectant?
Steam cleaning does not automatically replace a labeled disinfectant. A steam cleaner may provide validated sanitizing performance when the operator follows the manufacturer’s attachment, temperature, distance, and contact-time instructions. Use a registered disinfectant when you need control of specific organisms and the steam appliance does not provide an applicable validated claim.


