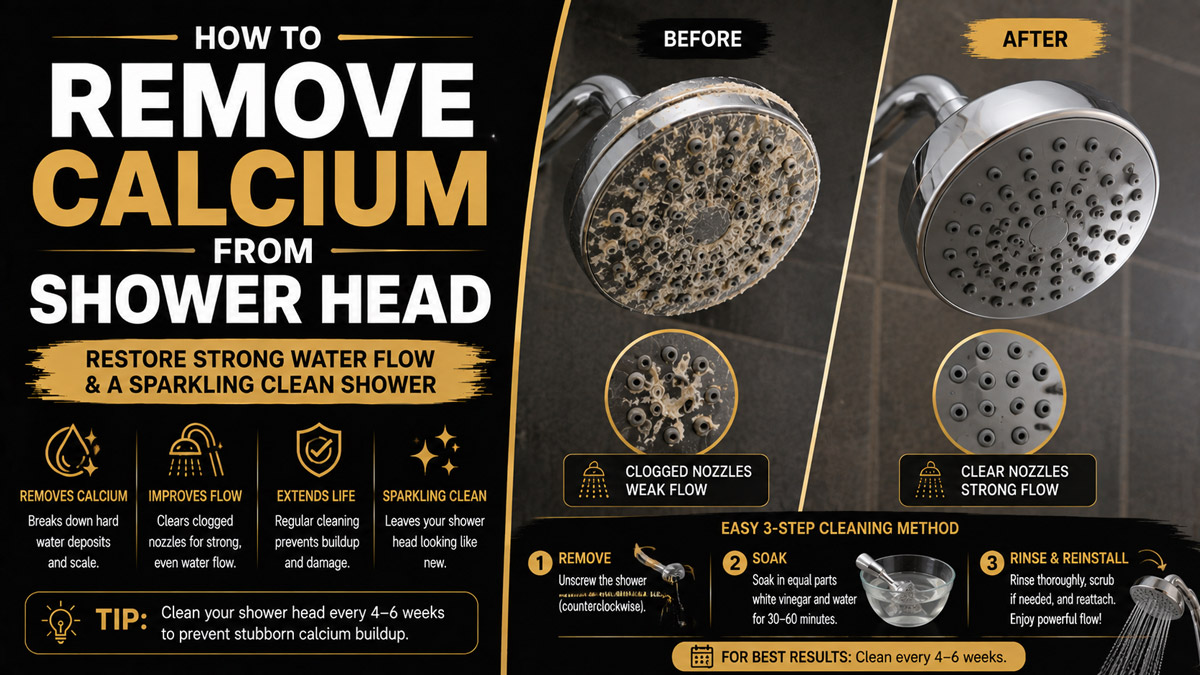
Figuring out how to remove calcium from shower head restores water pressure and protects plumbing. You can dissolve these hard water deposits completely in five steps. The entire process takes under an hour and requires beginner skills. Selecting the correct soaking time for your specific metal finish guarantees success.
Before You Start
According to the US Geological Survey (USGS 2020 water hardness data), nearly 85 percent of homes in the United States operate with hard water. This water leaves behind calcium carbonate deposits. Removing this buildup requires a specific chemical reaction using acetic acid.
You must gather the correct materials before beginning the process. Using the wrong tools will damage the finish on your plumbing fixtures permanently.
| Item Required | Quantity / Specification | Typical Cost | Purpose in Process |
| Distilled White Vinegar | 1 to 2 cups (5% acidity) | $2 to $4 | Dissolves the calcium carbonate chemically. |
| Heavy-Duty Plastic Bag | 1-gallon size (Ziploc style) | $1 | Holds the acidic solution around the fixture. |
| Fasteners | 2 strong rubber bands or zip ties | $1 | Secures the bag tightly to the shower arm. |
| Cleaning Brush | 1 stiff-bristled nylon toothbrush | $2 | Dislodges softened flakes from the nozzles. |
| Microfiber Cloth | 1 clean, dry cloth | $3 | Polishes the finish and removes residue. |
| Plumber’s Tape (PTFE) | 1 roll (1/2-inch width) | $2 | Seals the pipe threads if you remove the head. |
| Adjustable Wrench | 1 tool (preferably smooth jaw) | $15 | Loosens the connection nut (optional). |
Prerequisites: You need a working hot water supply. You also need good lighting to inspect the small rubber nozzles.
Step Summary
| Step Number | Action | Time Required | Most Common Mistake |
| Step 1 | Inspect the finish and buildup level. | 2 minutes | Assuming a plastic fixture is solid metal. |
| Step 2 | Secure the acid bath or remove the head. | 5 minutes | Using a thin bag that leaks acid everywhere. |
| Step 3 | Execute the chemical soak. | 30 to 60 minutes | Over-soaking and stripping plated finishes. |
| Step 4 | Scrub the nozzles and flush the system. | 5 minutes | Using metal tools to clear rubber nozzles. |
| Step 5 | Reassemble and perform a flow test. | 5 minutes | Applying thread tape in the wrong direction. |
Step 1: Inspect the Finish and Buildup
Determine exactly what material covers your shower head before applying any chemicals. Tap the back of the fixture lightly with your fingernail. A sharp ringing sound indicates solid brass or steel. A dull clicking sound indicates coated plastic. You must identify coated plastics, oil-rubbed bronze, and gold finishes immediately. These delicate surfaces require strict time limits in acidic solutions.
Examine the faceplate under a bright light. Look at the small rubber nozzles. White, chalky crust indicates heavy calcium carbonate scale. A 2018 study published in the Journal of Environmental Health found that typical shower head biofilms thrive inside this untreated porous scale. If the crust bridges the gap between multiple nozzles, you face a severe blockage.
You will know this step worked when you have written down a specific maximum soaking time based on your fixture material. The most common mistake at this stage is assuming a heavy chrome-plated plastic fixture is solid steel. Treat all uncertain finishes as delicate.
Step 2: Secure the Acid Bath or Remove the Fixture
Pour exactly 1.5 cups of standard 5 percent distilled white vinegar into a thick 1-gallon plastic bag. Open the bag wide and lift it straight up over the shower head. Push the bag upward until the entire faceplate and all nozzles sit completely submerged in the liquid. Gather the excess plastic tightly around the metal pipe extending from the wall. Wrap a thick rubber band tightly around this gathered plastic at least three times.
If the fixture angle prevents total submersion, you must remove the shower head completely. Wrap a small rag around the connection nut to prevent scratches. Grip the nut with an adjustable wrench and turn it counter-clockwise. Place the detached fixture in a deep glass bowl and pour enough vinegar to cover it completely.
You will know this step worked when you can let go of the bag and it hangs freely without leaking a single drop. The most common mistake here is using thin grocery bags. Grocery bags often contain microscopic holes that slowly leak acidic vinegar into your bathtub.
Step 3: Execute the Chemical Soak
Leave the fixture submerged in the liquid entirely undisturbed for the appropriate duration. The acetic acid requires time to break down the hardened minerals. For standard chrome, solid stainless steel, or uncoated plastic, set a timer for 45 to 60 minutes. For brass, gold, oil-rubbed bronze, or any matte black finish, set a strict timer for exactly 20 minutes.
Watch the liquid carefully during the first five minutes. You will see tiny bubbles rising from the rubber nozzles. This effervescence is carbon dioxide gas escaping as the acid dissolves the calcium carbonate.
You will know this step worked when the crusty white buildup turns into a soft, translucent gel. The most common mistake during this step is forgetting to set a timer. Leaving delicate plated fixtures in an acid bath for several hours will permanently strip the finish down to the base metal.
Step 4: Mechanical Scrubbing and Flushing
Remove the bag carefully and dump the used liquid directly down the drain. Turn your shower valve to the hottest possible setting and let the water run at full pressure. Stand back to avoid the initial spray. The hot water expands the internal metal components slightly. This expansion forces loose scale out of the internal water channels.
While the hot water runs, scrub the faceplate aggressively with a stiff nylon toothbrush. Press the bristles directly into the rubber nozzles. Use a circular motion to break away the softened mineral gel. For stubborn nozzles that still spray sideways, turn the water off. Straighten a standard metal paperclip. Push the tip of the paperclip gently straight into the center of the blocked hole to clear the internal plug.
You will know this step worked when every single nozzle shoots water in a straight, uniform line. The most common mistake is using harsh abrasives like steel wool or wire brushes. Wire brushes will permanently scratch the faceplate and tear the delicate rubber nozzles.
Step 5: Reassemble and Perform a Flow Test
Wipe the entire fixture down completely using a damp microfiber cloth. This removes all remaining acidic residue. Buff the surface with a dry section of the cloth to restore the shine.
If you removed the fixture from the wall pipe in Step 2, you must prepare the threads before reattaching it. Peel away any stringy remnants of old white tape from the wall pipe. Wrap fresh plumber’s tape around the pipe threads. You must wrap the tape in a clockwise direction exactly three times. Check inside the connection nut to ensure the black rubber O-ring sits perfectly flat. Screw the fixture back onto the pipe clockwise by hand until it stops completely. Do not use the wrench to tighten it further. Turn on the water to maximum pressure.
You will know this step worked when the connection joint remains completely dry under full municipal water pressure. The most common mistake here is wrapping the thread tape counter-clockwise. Wrapping backward causes the tape to unravel and bunch up when you screw the fixture on, resulting in immediate leaks.
Common Mistakes and How to Fix Them
The Build Up Will Not Dissolve
Sometimes a standard room-temperature soak fails to break down massive mineral deposits. This happens when the scale is incredibly thick or the vinegar is old and has lost its acidity.
To fix this, you must introduce heat to accelerate the chemical reaction. Remove the shower head from the wall pipe completely. Pour three cups of fresh vinegar into a stainless steel pot. Warm the liquid on your stove until it steams gently. Do not bring it to a rolling boil. Submerge the fixture in the warm liquid for exactly 30 minutes. The heated acid will dissolve scale twice as fast as room-temperature liquid.
The Pipe Joint Leaks After Reassembly
Water dripping heavily from the connection point behind the faceplate indicates a failed seal. This usually results from a damaged internal washer or incorrect tape application.
To fix this, turn off the water and unscrew the fixture. Look inside the threaded nut. If the black rubber washer looks cracked, flat, or brittle, you must replace it. Hardware stores sell standard half-inch plumbing washers for pennies. Insert the new washer so it sits flat. Remove the old tape from the wall pipe completely. Apply exactly three tight layers of new PTFE tape in a clockwise direction. Reattach the head firmly by hand.
Water Pressure Remains Terribly Low
You have cleaned the external nozzles, but the water flow remains weak. According to the EPA WaterSense specification (2022), modern fixtures contain internal flow restrictors that can clog completely with just 1mm of calcium debris.
To fix this, you must clean the internal filter screen. Remove the fixture from the wall. Look inside the threaded connection. You will see a small mesh screen sitting on top of a plastic flow restrictor. Pull this screen out gently using needle-nose pliers. Rinse the screen under a strong stream of tap water to dislodge the trapped grit. Push the clean screen back into place securely and reinstall the fixture.
The Rubber Nozzles Are Hard and Cracked
Long-term exposure to hard water and harsh chemical cleaners can degrade silicone and rubber. If the nozzles feel brittle or chunks of rubber break off during scrubbing, the material has failed completely.
You cannot fix degraded rubber with cleaning solutions. The physical structure of the polymer has broken down. You must replace the entire shower head unit. Trying to force water through broken nozzles will cause the water to spray erratically across your bathroom walls.
Process Variations for Different Situations
Dealing with Large Rainfall Fixtures
Standard 1-gallon bags will not fit over massive square rainfall shower heads. Removing these large ceiling-mounted fixtures often requires specialized tools and can damage the ceiling drywall.
Instead of a bag, use a shallow plastic storage bin. Fill the bin with enough vinegar to reach a depth of one inch. Lift the bin up to the ceiling until the rainfall faceplate submerges completely in the liquid. You will need a second person to hold a sturdy stepladder. Have your assistant stand on the ladder and physically hold the bin in place for 20 to 30 minutes. It requires shoulder strength, but this method prevents the risks of removing heavy ceiling hardware.
Cleaning a Handheld Wand
Handheld wands on flexible metal hoses are much easier to descale. You do not need bags or rubber bands.
Simply unclip the wand from its wall bracket. Let it hang straight down into a tall plastic pitcher placed on the shower floor. Pour vinegar into the pitcher until the liquid covers the entire head of the wand. Ensure the liquid does not submerge the connection point where the hose meets the wand. Leaving the hose submerged can trap acid inside the metal coil, leading to premature rusting.
Using Commercial Descalers (CLR)
If vinegar fails repeatedly, you may need a commercial descaler like CLR (Calcium, Lime, and Rust Remover). These products use stronger acids like lactic acid or gluconic acid.
You must read the manufacturer instructions carefully. Commercial descalers act much faster than household vinegar. You typically mix CLR with equal parts warm water. You must never soak a fixture in CLR for more than 2 to 3 minutes. Extended exposure to these strong industrial acids will destroy plastic components and dissolve the brass components inside the water channels. Always wear nitrile gloves and ensure heavy bathroom ventilation when using commercial chemicals.
Cost and Time Breakdown
Understanding the exact investment helps you prepare properly for the task. The table below outlines realistic expectations for a standard descaling project.
| Project Factor | Typical Expectation | Notes on Variations |
| Total Time (Active) | 15 minutes | Setup, scrubbing, and flushing require minimal active labor. |
| Total Time (Waiting) | 20 to 60 minutes | Varies strictly based on the metal finish of the fixture. |
| Total Material Cost | $1 to $4 | Assumes you already own a toothbrush and a cloth. |
| Skill Level Required | Beginner | No specialized plumbing knowledge needed unless removing the pipe. |
If you need to purchase an adjustable wrench and fresh plumber’s tape, the total cost will rise to approximately $20. This remains significantly cheaper than hiring a professional plumber or buying a replacement fixture.
Frequently Asked Questions
Can I mix baking soda with the vinegar to make it clean faster?
No. Mixing baking soda (a base) with vinegar (an acid) creates an immediate bubbling reaction that neutralizes the acidic properties entirely. You are left with basically water and a small amount of salt. The solution will completely lose its ability to dissolve hard calcium minerals.
Why should I never mix bleach with this process?
Mixing household bleach with any acidic substance creates highly toxic chlorine gas. If you recently sprayed a bleach-based mildew cleaner inside your shower stall, you must rinse the area completely with plain water before introducing vinegar to the environment.
Will apple cider vinegar work instead of white vinegar?
Apple cider vinegar contains a lower percentage of acetic acid and includes sugars and organic compounds. It will eventually dissolve the minerals, but it works much slower. It also leaves behind a sticky residue and a strong fermented odor that requires heavy scrubbing to remove.
How often should I perform this maintenance?
If you live in an area with hard municipal water, you should execute this process every three to four months. Regular light maintenance prevents the scale from solidifying into the internal water channels. Homes with installed water softening systems may only need to do this once a year.
Is it safe to use a needle to clear the holes?
You should avoid sewing needles or push pins. The sharp points will easily puncture the sidewalls of the delicate silicone nozzles. This permanently ruins the spray pattern. Always use a dull tool, like the flattened end of a paperclip, and insert it with gentle pressure.
Conclusion
Understanding how to remove calcium from shower head ensures your bathroom fixtures operate at peak efficiency for years. By identifying your finish, applying the correct acid soak time, and clearing the internal screens, you eliminate the restrictions that ruin water pressure. Maintain a routine schedule with these specific steps to keep your plumbing completely clear of damaging scale.


