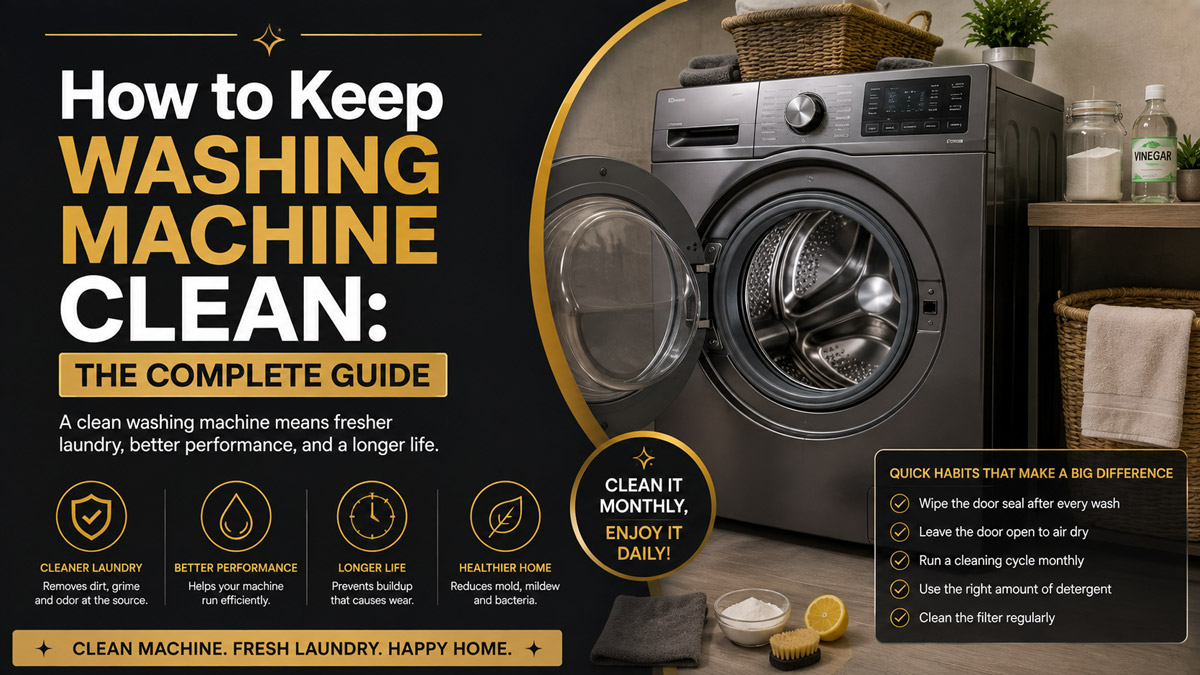
Learning exactly how to keep washing machine clean requires a targeted approach to dissolve hard water minerals, strip soap scum, and kill embedded mold. By following these 7 sequential steps, you will completely restore your appliance in just 20 minutes of active work. The single most important factor determining your success is running the acidic and alkaline cleaning cycles completely separately.
Before You Start
- Total Time Required: 2.5 to 3.5 hours (20 minutes active, 2+ hours passive).
- Difficulty Level: Beginner.
- Cost: $3 to $8.
- Tools and Materials:
- Distilled white vinegar (2 cups / 475 mL)
- Baking soda (1/2 cup / 90 g)
- Warm water (1 gallon / 3.8 L)
- Liquid dish soap (1 teaspoon / 5 mL)
- Clean microfiber cloths (2)
- Nylon scrub brush or old toothbrush (1)
- Prerequisites: Ensure the washing machine drum is completely empty of clothing.
Phase 1: Manual Debris and Mold Removal
Step 1: Remove and Scrub the Detergent Dispenser
Pull out the detergent drawer completely to wash away compacted powder and black mold. Press the plastic release tab located at the back of the drawer and slide it free. Soak the entire unit in 1 gallon of warm water mixed with 1 teaspoon of dish soap. Use your toothbrush to scrub the siphon tube and fabric softener compartments. Before replacing it, shine a flashlight into the empty drawer housing inside the machine and scrub the ceiling jets where hidden mold grows.
- You’ll know it worked when: The plastic feels completely smooth, the siphon cap is clear of blockages, and no black spots remain in the housing cavity.
- Common mistake: Wiping the drawer but ignoring the internal housing cavity. The mold will immediately recolonize the clean drawer.
Step 2: Wipe the Rubber Gasket and Inner Door Glass
Pull back the folds of the rubber door seal to expose hidden hair, coins, and mildew. Dip a microfiber cloth into a 1:1 solution of warm water and white vinegar, and aggressively wipe the entire circumference of the gasket (front-loaders). Next, spray the inside of the machine’s glass door with the same solution and wipe it down.
- You’ll know it worked when: The cloth comes back clean after a swipe inside the deepest fold of the gasket, and the door glass squeaks when rubbed.
- Common mistake: Using bleach to clean the gasket at this stage. Bleach breaks down rubber over time and creates toxic gas when it mixes with the vinegar used in Step 3.
Phase 2: The Deep Cleaning Cycles
Step 3: Run the Vinegar Descaling Cycle
Run a high-temperature acid cycle to break down calcium deposits and kill bacteria. Pour exactly 2 cups of distilled white vinegar directly into the empty drum (not the dispenser drawer). Set the machine to its “Clean Washer” cycle, or manually select the hottest water setting available (ideally 90°C / 194°F) with an extra rinse. Let the cycle run to completion.
- You’ll know it worked when: The interior drum looks highly polished and the heavy, damp smell is replaced by a faint, sterile vinegar scent.
- Common mistake: Adding vinegar to the dispenser drawer. Most modern machines flush the drawer early, diluting the vinegar too quickly. Pouring it into the drum ensures it impacts the internal water lines at full strength.
Step 4: Run the Baking Soda Deodorizing Cycle
Run a secondary alkaline cycle to neutralize residual acids and scrub away lingering odors. Sprinkle 1/2 cup of baking soda directly onto the floor of the empty drum. Run the exact same hot wash cycle (90°C / 194°F) you used in Step 3.
- You’ll know it worked when: The inside of the machine smells like absolutely nothing—a completely neutral, fresh baseline.
- Common mistake: Mixing baking soda and vinegar in the same cycle. This chemical reaction simply creates saltwater and carbon dioxide foam, completely neutralizing the cleaning power of both agents.
Phase 3: Drainage and Final Polish
Step 5: Empty and Clean the Drain Filter
Open the bottom access panel to clear the pump filter of debris that the deep clean just dislodged. Place a shallow towel under the panel (front-loaders only). Uncap the small emergency drain tube to release trapped water, then slowly unscrew the main filter cap. Pull out the filter, remove trapped lint, hair, or coins, and rinse it under running water.
- You’ll know it worked when: You can see clearly through the plastic lattice of the filter and the internal impeller blade spins freely when nudged with a finger.
- Common mistake: Cross-threading the filter cap when replacing it. Always thread it carefully; if it feels tight immediately, back it out and try again to prevent massive floor leaks.
Step 6: Clean the Water Inlet Screens
Detach the hot and cold water hoses at the back of the machine to clear the inlet screens of hard water sediment. Turn off your wall water valves first. Unscrew the hoses (have a towel ready for drips). Use needle-nose pliers to gently pull out the small mesh screens seated inside the machine’s inlet ports. Rinse them under the tap, scrub with a toothbrush, and press them back into place.
- You’ll know it worked when: The mesh is completely free of white, chalky calcium flakes, ensuring your machine fills at maximum water pressure.
- Common mistake: Forgetting to turn the wall valves back on before starting your next load, which will trigger a water supply error code.
Step 7: Wipe the Exterior and Air Dry
Wipe down the control panel and outer shell to remove dust and detergent drips, then prop the door open. Use a damp microfiber cloth on the exterior. Leave the main door open at a 45-degree angle, and pull the detergent drawer out about 2 inches.
- You’ll know it worked when: The exterior shines and the interior drum stays bone dry between wash days.
- Common mistake: Closing the door completely after the cleaning process. A sealed, dark, damp drum is the primary cause of a smelly washing machine.
Common Mistakes and How to Fix Them
| Failure Mode | Root Cause | Exact Correction |
| Machine smells like mildew after cleaning. | Severe mold is embedded deep inside the internal drainage hoses, surviving the vinegar. | Run a hot cycle using 1 cup of liquid chlorine bleach directly in the drum. Never mix this with vinegar. |
| Water leaks from the bottom front door. | The drain filter was cross-threaded or debris is blocking the O-ring seal. | Open the access panel. Unscrew the filter entirely. Wipe the threads and rubber O-ring clean. Re-thread it completely flush. |
| Cycle stops and displays an error code. | The heavy cleaning cycle dislodged a massive clog that is now blocking the drain pump. | Manually drain the machine using the emergency drain tube next to the filter. Remove the filter, clear the blockage, and restart. |
| Brown spotting on clothes after cleaning. | Mineral scale broke loose during cleaning but didn’t flush completely out of the drum. | Wipe the drum out manually with a damp cloth, then run a quick, empty cold-water cycle to flush the loose debris. |
Process Variations
Top-Load Washing Machines
Top-loaders require a mechanical soak. During Step 3 (Vinegar Cycle), let the machine fill with hot water and agitate for 5 minutes to mix the vinegar. Then, press Pause or pull the dial to stop the cycle. Let the acidic water sit in the drum for 1 hour to soak the agitator column and upper drum walls before resuming the cycle.
Machines with a “Tub Clean” Setting
If your machine has a dedicated “Tub Clean” or “Sanitize” button, use this instead of manually selecting the hottest cycle. This setting is factory-calibrated to heat water to the absolute maximum temperature and extends the rinse duration to ensure all cleaning agents are flushed.
Time and Cost Breakdown
- Active Labor: 20 minutes (Wiping gasket, scrubbing dispenser, cleaning filters).
- Passive Wait Time: 2 to 3 hours (Waiting for the two separate wash cycles to complete).
- Material Cost: A 1-gallon jug of white vinegar costs roughly $3.50. A standard box of baking soda costs $1.50. You will use less than $1.00 worth of materials per monthly clean.
Frequently Asked Questions
How often should I clean my washing machine?
You must perform this deep cleaning process once a month. If you wash heavily soiled work clothes or live in a highly humid climate, inspect the rubber gasket and drain filter every two weeks to prevent severe mold buildup.
Can I use commercial washing machine tablets instead?
Yes. Brands like Affresh use sodium percarbonate (oxygen bleach) to descale and deodorize simultaneously. If using a commercial tablet, you only need to run a single hot cycle instead of two, but you must still manually clean the filter and gasket.
Why are my clean clothes coming out smelling sour?
Sour odors occur when you use too much liquid laundry detergent. The excess soap coats the drum and outer tub in a sticky scum that traps moisture and bacteria. Reduce your detergent dose to exactly 2 tablespoons per normal load.
Should I use liquid fabric softener?
No. Liquid fabric softener is a primary cause of washing machine grime. It is fat-based and leaves a thick, waxy residue inside the drum and pipes that feeds mold. Use half a cup of white vinegar in the rinse dispenser instead.
Knowing how to keep washing machine clean is the easiest way to protect your clothing and extend the lifespan of your appliance. Commit to this simple monthly routine, and you will never deal with ruined laundry or a foul-smelling utility room again.


