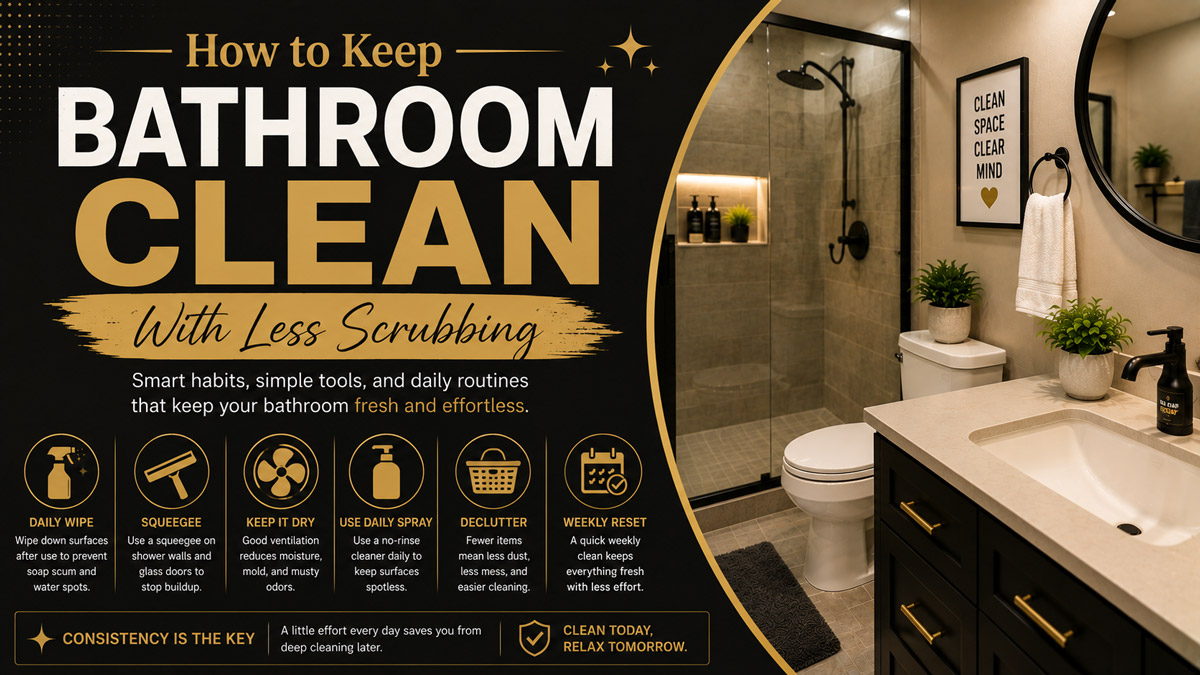
To keep a bathroom clean, remove moisture after every shower, return products to storage, wipe visible splashes daily, and complete a focused 25-45 minute cleaning each week. Consistency matters more than aggressive scrubbing because soap residue, mineral deposits, hair, dust, and bacteria are easier to remove before they build into hardened layers.
Key Facts at a Glance
- A daily bathroom reset usually takes 2-5 minutes.
- A thorough weekly clean generally takes 25-45 minutes for one regularly maintained bathroom.
- Shower walls stay cleaner when water and product residue are removed immediately after bathing.
- Bathroom humidity should remain no higher than about 50 percent when practical to reduce conditions that support mold growth.
- Cleaning removes soil, while disinfecting uses a labeled product to kill specified germs on a pre-cleaned surface.
- Disinfectants work only when the surface remains wet for the contact time printed on the product label.
Before You Start
A maintenance routine works best when the bathroom already has a reasonable baseline level of cleanliness. A severely neglected bathroom may need one initial deep clean before short daily resets can keep it under control.
| Planning factor | Typical requirement | Practical recommendation |
| Daily time | 2-5 minutes | Reset surfaces after the final morning or evening use |
| Weekly time | 25-45 minutes | Clean one bathroom in a fixed top-to-bottom sequence |
| Monthly time | 45-90 minutes | Detail vents, drains, grout, seals, storage, and hidden areas |
| Difficulty | Beginner | Use separate cloths and follow product labels |
| Basic startup cost | $15-$30 | Buy reusable microfiber cloths, a brush, gloves, and one compatible cleaner |
| Expanded supply cost | $40-$75 | Add a squeegee, grout brush, drain tool, and surface-specific products |
| Ongoing refill cost | $5-$20 monthly | Depends on household size and product concentration |
Supplies That Make the Routine Easier
You do not need a cabinet full of specialized products. A compact cleaning caddy reduces setup time and makes short maintenance sessions more likely to happen.
Keep these items together:
- Two to four microfiber cloths
- A toilet brush
- A small detail or grout brush
- A non-scratch sponge
- A shower squeegee
- Disposable or washable gloves
- A vacuum, broom, or dry floor tool
- A bathroom-safe general cleaner
- A toilet bowl cleaner
- A glass cleaner or compatible mild solution
- An EPA-registered disinfectant when disinfection is needed
- A plastic drain-hair removal tool
Use separate cloths for the toilet and other bathroom surfaces. A simple labeling system, such as “toilet,” “glass,” and “general,” reduces accidental cross-contamination.
Step 1: Control Moisture After Every Shower
Moisture control is the most effective way to keep a bathroom clean because standing water supports mildew, musty odors, mineral spots, deteriorating caulk, and recurring surface mold. Run the exhaust fan during bathing and continue using it until mirrors and wet surfaces begin to clear.
The CDC recommends keeping indoor humidity no higher than 50 percent when possible and using bathroom exhaust fans that vent outdoors. It also advises fixing plumbing leaks because mold continues returning when the moisture source remains.
After each shower:
- Squeegee the shower door or walls.
- Shake water from the shower curtain.
- Spread the curtain or liner fully open.
- Hang towels with enough space to dry.
- Remove puddles from ledges, floors, and around the tub.
- Leave the shower door partly open when the design and household safety conditions allow it.
A squeegee pass usually takes 30-60 seconds. Start at the top and pull water downward in overlapping strokes. Wipe the bottom track, faucet base, and horizontal ledges with a microfiber cloth because those locations hold water longer than vertical surfaces.
Success checkpoint: The shower enclosure should have no visible puddles, folded wet curtain sections, or soaked bathmats.
Common mistake: Turning off the exhaust fan immediately. A fan cannot remove lingering water vapor if it runs only during the shower.
Step 2: Complete a Two-Minute Daily Reset
A daily reset prevents clutter and light soil from turning into a cleaning project. The goal is not to scrub the entire room. The goal is to restore dry, open, wipeable surfaces.
Use this sequence:
- Put toiletries, cosmetics, medicines, and grooming tools away.
- Hang towels and bathmats so they dry fully.
- Wipe toothpaste, makeup, shaving residue, and standing water from the sink.
- Remove visible hair from the counter, basin, shower, and floor.
- Check the toilet seat and flush handle for visible soil.
- Empty the bin when waste reaches about two-thirds full.
Counters stay cleaner when only daily-use items remain visible. Store backup products, styling tools, cleaning supplies, and unopened packages inside cabinets or labeled baskets.
Do not leave wet toothbrush cups, soap dishes, razors, or bottles sitting in pooled water. Lift them, wipe underneath, and allow the area to dry. Soap bottles often create sticky rings because water mixes with leaked product at the base.
Success checkpoint: The counter should be mostly clear, the sink should be dry, and no damp fabric should be crumpled on the floor.
Common mistake: Organizing around dirt instead of removing items first. Cleaning exposed strips of counter while leaving bottles in place allows residue to build underneath them.
Step 3: Keep the Sink and Counter Dry
Bathroom sinks remain cleaner when water, toothpaste, soap, cosmetics, and hair are removed before they dry. A ten-second wipe after brushing teeth can prevent the chalky film that otherwise requires cleaner and scrubbing later.
Keep a folded microfiber cloth within reach, but place it where it can dry between uses. Wipe in this order:
- Faucet handle
- Faucet base
- Counter
- Sink rim
- Basin
- Drain area
Rinse the cloth after removing toothpaste or heavy product residue. A dry cloth spread over a larger area can smear residue instead of collecting it.
Clean the faucet aerator and the narrow seam around the fixture during the weekly session. A small brush reaches areas that a cloth cannot. For chrome and many finished fixtures, avoid steel wool and harsh abrasive powders because they may scratch or dull the finish.
Natural stone counters need a stone-compatible, pH-neutral cleaner. Vinegar, lemon juice, and other acids can etch marble, travertine, limestone, and some stone surfaces.
Success checkpoint: The fixture should feel smooth rather than sticky, and no water should remain around the faucet base.
Common mistake: Spraying cleaner directly into seams, outlets, or fixture openings. Spray the cloth when overspray could enter electrical components or vulnerable joints.
Step 4: Prevent Shower Film and Hard-Water Spots
Shower film consists of body oils, soap residue, minerals, shampoo, conditioner, dust, and other material left behind when water evaporates. Removing water after each use reduces both soap film and visible mineral spotting.
Once or twice each week, spray or apply a cleaner compatible with the shower material. Allow the product to remain for the label-listed dwell time, then agitate with a non-scratch sponge and rinse thoroughly.
| Shower material | Suitable routine | Avoid |
| Tempered glass | Squeegee daily; use compatible glass or mineral cleaner weekly | Steel wool, razor blades without manufacturer approval |
| Acrylic | Mild detergent and soft cloth or non-scratch sponge | Abrasive powder, rough pads, harsh solvents |
| Fiberglass | Mild non-abrasive cleaner; rinse and dry | Stiff metal brushes, aggressive scouring |
| Ceramic tile | Neutral cleaner for routine soil; suitable descaler for mineral deposits | Leaving acidic cleaner on grout too long |
| Natural stone | Stone-safe pH-neutral cleaner; dry after use | Vinegar, lemon juice, acidic limescale remover |
| Grout | Soft or medium nylon brush with compatible cleaner | Repeated harsh acid use, wire brushes |
For hard-water deposits on compatible glass, use a manufacturer-approved mineral remover. Acidic products may dissolve mineral scale, but they can also damage stone, metal finishes, grout, and nearby materials. Protect surrounding surfaces and follow the product directions.
Success checkpoint: Water should rinse away without leaving a greasy feel or visible product streaks.
Common mistake: Applying more cleaner instead of increasing agitation or dwell time. Excess product can leave a new film that attracts dirt.
Step 5: Maintain the Toilet Between Weekly Cleans
A toilet stays presentable when visible soil, splashes, and bowl deposits are handled promptly. Inspect the seat, rim, flush handle, exterior, floor connection, and bowl each day.
For the weekly clean:
- Apply bowl cleaner beneath the rim.
- Allow the listed dwell time.
- Brush beneath the rim, along the waterline, and into the trap opening.
- Flush while rinsing the brush in clean bowl water.
- Apply surface cleaner to a dedicated toilet cloth.
- Wipe the handle, tank, lid, seat, hinges, rim, exterior bowl, and base.
- Clean the nearby floor last.
Work from the least soiled exterior area toward the most contaminated area. Do not wipe the flush handle with the same cloth section used on the toilet base.
Automatic bowl products can reduce visible staining, but they do not replace brushing and exterior cleaning. Some in-tank products may also be incompatible with internal toilet components, so review the toilet manufacturer’s instructions before using them.
Success checkpoint: No residue should remain beneath the seat hinges, around the base, or at the bowl waterline.
Common mistake: Cleaning the bowl but ignoring the flush handle, seat hinges, and surrounding floor.
Step 6: Clean High-Touch Surfaces Correctly
Bathroom cleaning and bathroom disinfection are different tasks. Cleaning removes dirt and organic material with water, detergent, and physical action. Disinfection uses a registered product to kill the organisms listed on its label after visible soil has been removed.
High-touch areas include:
- Faucet handles
- Door handles
- Toilet flush handles
- Toilet seats
- Light switches
- Cabinet pulls
- Shower controls
- Shared product dispensers
Routine cleaning is often sufficient for a healthy household. Disinfection becomes more useful after illness, contact with bodily fluids, heavy shared use, or contamination of a high-touch surface.
EPA guidance explains that a disinfected surface must remain visibly wet for the full contact time printed on the label. A product requiring ten minutes of contact cannot work as directed when it is sprayed and immediately wiped dry.
The CDC states, “Never mix household bleach (or any disinfectants) with any other cleaners or disinfectants.” Chemical mixing can create hazardous gases or change how the products behave.
Success checkpoint: The surface has been cleaned first and, when disinfected, stayed wet for the entire labeled contact time.
Common mistake: Assuming every cleaner disinfects. Look for an EPA registration number and specific disinfection directions when that function is required.
Step 7: Control Hair, Dust, and Floor Grime
Bathroom floors collect hair, textile fibers, dust, skin particles, product residue, moisture, and tracked-in soil. Dry debris should be removed before mopping because wet hair and dust form clumps that spread across the floor.
Two or three times per week, depending on use:
- Pick up bathmats, scales, bins, and movable items.
- Vacuum or sweep corners, behind the door, and around the toilet.
- Spot-clean visible spills.
- Return dry items to the floor.
During the weekly cleaning, mop from the farthest corner toward the exit. Use only the amount of solution recommended for the flooring. Too much water can enter seams, swell vulnerable materials, soften adhesive, or leave sticky residue.
Wash bathmats according to their care labels. Mats with rubberized backing may require gentle cycles and air drying because high heat can damage the backing.
Success checkpoint: Corners and the toilet base should be free of hair, and the floor should dry without a sticky feel.
Common mistake: Mopping before removing dry debris. The mop then pushes damp hair into edges and grout lines.
Step 8: Use a Weekly Top-to-Bottom Cleaning Order
A fixed cleaning order saves time and prevents cleaned surfaces from being contaminated again. Dust and debris move downward, so high areas should be cleaned before floors.
Weekly Bathroom Cleaning Schedule
| Task | Typical frequency | Typical time |
| Remove clutter and laundry | Weekly | 2-3 minutes |
| Dust vent covers and high ledges | Weekly | 2-4 minutes |
| Clean mirror | Weekly | 2-3 minutes |
| Clean shower or tub | Weekly | 8-15 minutes |
| Clean sink and counter | Weekly | 4-6 minutes |
| Clean toilet | Weekly | 5-8 minutes |
| Clean touchpoints | Weekly or after illness | 2-4 minutes |
| Vacuum or sweep floor | 2-3 times weekly | 2-4 minutes |
| Mop floor | Weekly | 4-7 minutes |
| Replace towels and empty bin | Weekly or as needed | 2-3 minutes |
Follow this order:
- Ventilate the room.
- Remove rugs, towels, bins, and counter items.
- Apply products that require dwell time.
- Dust vents, lights, frames, ledges, and mirror tops.
- Clean the mirror.
- Scrub and rinse the shower or tub.
- Clean the sink and counter.
- Clean the toilet with dedicated tools.
- Wipe high-touch surfaces.
- Vacuum or sweep.
- Mop toward the doorway.
- Return only clean, dry items.
Professional cleaners often gain speed by allowing chemistry to work while they complete another task. Applying compatible products first reduces the amount of force required later.
Step 9: Perform Monthly Detail Maintenance
Monthly cleaning addresses areas that do not need weekly attention but create odor, grime, reduced ventilation, or hidden moisture when ignored.
Complete these tasks every four to six weeks:
- Vacuum the exhaust fan cover.
- Wash removable fan covers according to manufacturer directions.
- Clean behind the toilet and beneath movable storage.
- Remove hair from the sink and shower drain openings.
- Wash bins and storage baskets.
- Check caulk, grout, and seals for cracks or discoloration.
- Wipe cabinet interiors and discard empty containers.
- Clean shower-door tracks.
- Descale compatible faucet aerators and showerheads.
- Wash the shower curtain and liner according to their care labels.
- Inspect under the sink for leaks.
- Check the toilet base for moisture.
- Replace worn brushes, cracked gloves, or sour-smelling cloths.
Do not treat recurring mold, soft drywall, loose flooring, or persistent moisture as ordinary cleaning problems. Those conditions may indicate a leak, failed seal, ventilation problem, or damaged building material.
Success checkpoint: Hidden areas should be dry, airflow should be unobstructed, and no active leak should be visible.
How Often Should a Bathroom Be Cleaned?
A bathroom should receive a 2-5 minute reset daily, floor debris removal several times per week, a complete clean every week, and detail maintenance every month. Households with children, illness, multiple users, pets, poor ventilation, or hard water may need shorter intervals.
| Household situation | Daily reset | Full clean | Extra priority |
| One adult, light use | 2-3 minutes | Every 7-10 days | Dust and water spots |
| Couple, regular use | 3-5 minutes | Weekly | Sink, shower, floor |
| Family with children | 5-8 minutes | Weekly or twice weekly | Toilet, touchpoints, toys |
| Shared roommate bathroom | 5 minutes | Weekly | Assigned responsibilities |
| Guest bathroom | After use | Every 2-4 weeks | Dust, toilet waterline, towels |
| Poorly ventilated bathroom | 5 minutes | Weekly | Moisture and mold checks |
| Hard-water household | 5 minutes | Weekly | Squeegee and mineral control |
Cleaning frequency should respond to visible conditions. A rigid calendar is less useful than clear triggers such as a sticky floor, visible toilet soil, cloudy glass, a slow drain, damp towels, or musty odor.
Which Bathroom Cleaners Should You Use?
The best bathroom cleaner is the mildest product that safely removes the specific soil from the specific surface. No single product is ideal for soap film, mineral scale, body oils, mold staining, toilet deposits, glass, stone, metal, and disinfection.
| Product type | Best use | Main limitation |
| Mild detergent | Routine soil, body oils, washable surfaces | May not dissolve heavy mineral scale |
| Acidic descaler | Hard-water deposits on compatible surfaces | Can damage stone, grout, and finishes |
| Alkaline cleaner | Greasy body-product residue | May require gloves and careful rinsing |
| Abrasive cleanser | Durable surfaces approved for abrasion | Can scratch acrylic, fiberglass, glass, and metal |
| EPA-registered disinfectant | Germ reduction on listed surfaces | Requires pre-cleaning and wet contact time |
| Hydrogen peroxide product | Compatible surface cleaning or disinfection as labeled | Strength and use vary by product |
| Vinegar solution | Light mineral residue on compatible surfaces | Not suitable for natural stone and not a universal disinfectant |
| Steam cleaner | Heat-tolerant sealed surfaces | Can damage heat-sensitive materials and carries burn risk |
“Natural” does not automatically mean safe for every surface. Acids can etch stone, concentrated essential oils may irritate skin or damage materials, and homemade mixtures lack standardized performance instructions.
How Do You Prevent Mold From Returning?
Prevent bathroom mold by controlling humidity, drying wet surfaces, repairing leaks, improving ventilation, and replacing materials that remain contaminated or water-damaged. Cleaning visible spots without correcting moisture usually produces only temporary improvement.
The CDC states that mold grows where moisture is present and advises cleaning the mold while fixing the underlying water problem.
Check these common moisture sources:
- Dripping supply lines
- Leaking shower doors
- Failed tub or shower caulk
- Loose toilet seals
- Condensation on pipes
- Towels drying too slowly
- Exhaust fans that do not vent outdoors
- Blocked fan covers
- Water collecting in shower tracks
- Wet products stored in closed containers
Small surface spots on washable, nonporous materials may be cleaned using a compatible product and appropriate protective equipment. Large areas, recurring growth, contaminated porous materials, sewage exposure, or mold linked to structural water damage may require professional assessment.
People with asthma, chronic lung disease, weakened immune systems, or severe mold sensitivity should avoid unnecessary exposure during cleanup and follow appropriate medical guidance.
Common Mistakes and How to Fix Them
| Problem | Likely cause | Correction |
| Shower becomes cloudy within days | Water dries on glass; too much product residue | Squeegee after use and rinse cleaners thoroughly |
| Bathroom smells musty | Wet towels, trapped humidity, hidden leak | Dry fabrics, run fan longer, inspect plumbing |
| Floor feels sticky | Too much cleaner or inadequate rinsing | Mop again with the flooring manufacturer’s recommended method |
| Grout darkens quickly | Moisture, embedded soil, worn sealer, or mold | Clean gently, dry fully, inspect grout and ventilation |
| Toilet stains return | Mineral-rich water, neglected waterline, internal leak | Brush more often and inspect tank components |
| Drain slows repeatedly | Hair and soap trapped near stopper | Remove stopper and extract debris mechanically |
| Mirror streaks | Excess spray or dirty cloth | Use less product and a clean, dry microfiber cloth |
| Caulk stays black | Mold embedded in failed sealant | Correct moisture and replace deteriorated caulk |
| Disinfectant dries too soon | Insufficient product or excessive airflow | Reapply according to label and maintain wet contact time |
| Fixtures look dull | Abrasives or incompatible acids | Stop using the product and follow manufacturer care instructions |
Do Not Mix Cleaning Chemicals
Never combine bleach with ammonia, vinegar, acids, toilet bowl cleaner, or another cleaner. The CDC warns that bleach and other disinfectants should not be mixed with cleaning products because dangerous reactions can occur.
Use one product at a time. Rinse the surface thoroughly when changing product types, ventilate the room, wear any protective equipment specified on the label, and store chemicals in their original containers.
Do Not Ignore Contact Time
Many people spray disinfectant and wipe immediately. That method may clean the surface, but it does not satisfy disinfection directions when the label requires the surface to remain wet.
Read four label details before use:
- Approved surfaces
- Dilution instructions
- Contact time
- Required rinsing or ventilation
Do Not Use Abrasives by Habit
A rough pad may remove a stain quickly while leaving microscopic scratches that trap future soil. Use soft cloths and non-scratch sponges first, especially on acrylic, fiberglass, polished metal, coated fixtures, and glass.
Routines for Different Households
Busy Professionals
Use a minimum effective routine: squeegee the shower, wipe the sink, hang towels, remove hair, and put products away. Complete the reset immediately after the final morning shower or before bed.
Keep one cloth near the sink and the full caddy outside the room or in a ventilated cabinet. A visible tool reduces friction, but a permanently damp cloth creates odor.
Families With Children
Focus on toilet surfaces, faucet handles, wet floors, bath toys, and chemical storage. Rinse bath toys, drain trapped water, and spread them out to dry.
Store cleaners in locked or inaccessible cabinets. Assign children safe tasks such as hanging towels, placing clothes in a hamper, and returning toys to a drying basket.
Shared Bathrooms
Create responsibility zones rather than expecting everyone to “help.” One person can handle the sink and mirror, another the shower, and another the toilet and floor.
Add a reset rule: each user removes personal items, dries splashes, and hangs towels immediately. Shared storage should provide one labeled container per person.
Eco-Conscious Homes
Use reusable microfiber cloths, washable mop pads, concentrated products, refillable containers approved by the product manufacturer, and the least aggressive compatible cleaner.
Low-chemical cleaning works well for light daily soil. It is less reliable for every disinfection need, heavy mineral scale, sewage contamination, or advanced mold problems.
How Much Time Does Bathroom Cleaning Take?
A maintained bathroom typically needs 15-35 minutes of total attention across the week, plus a 25-45 minute focused weekly clean. Neglected rooms take longer because dried soap film, mineral scale, embedded grout soil, and clutter require repeated treatment.
A practical weekly workload looks like this:
- Daily resets: 3 minutes × 7 days = 21 minutes
- Two quick floor pickups: 3 minutes × 2 = 6 minutes
- Weekly clean: 25-45 minutes
- Monthly detail work averaged weekly: 10-20 minutes
That equals roughly 62-92 minutes per week for one frequently used bathroom. The time is distributed across short sessions, so the room rarely reaches the point where a two-hour rescue clean is necessary.
Frequently Asked Questions
What should I clean in the bathroom every day?
Wipe sink splashes and toothpaste, remove visible hair, hang towels, spread the shower curtain, squeegee wet shower surfaces, return toiletries to storage, and inspect the toilet for visible soil. These tasks usually take 2-5 minutes and prevent moisture, clutter, and fresh residue from becoming hardened buildup.
Can I use vinegar on every bathroom surface?
No. Vinegar is acidic and can damage marble, travertine, limestone, some grout, certain metal finishes, and other acid-sensitive materials. Use it only when the surface manufacturer permits acidic cleaning. A pH-neutral cleaner is safer for natural stone and many mixed-material bathrooms.
Why does my bathroom still smell after cleaning?
Persistent odor may come from damp towels, a dirty bin, a dry drain trap, trapped hair, toilet seal leakage, poor ventilation, hidden moisture, or contaminated caulk. Remove fabrics and waste, clean drain openings, run water in rarely used drains, ventilate the room, and inspect for leaks.
Should I disinfect the bathroom every day?
Most healthy households do not need to disinfect every bathroom surface daily. Routine cleaning is usually sufficient unless someone is ill, bodily fluids contaminate a surface, or high-touch areas receive unusually heavy use. When disinfecting, clean first and follow the product’s surface, contact-time, ventilation, and rinsing instructions.
How do I keep bathroom drains from clogging?
Use a hair catcher, remove visible hair after bathing, clean the stopper regularly, and extract trapped debris with a plastic drain tool before the drain becomes blocked. Avoid relying on repeated chemical drain cleaners because they may damage some plumbing components and do not remove every type of obstruction.
Why does bathroom grout get dirty so quickly?
Grout is textured and may absorb moisture, soap residue, body oils, and dirty rinse water. Poor ventilation, ineffective rinsing, damaged sealer, and standing water make discoloration return faster. Clean grout with a compatible product and nylon brush, rinse it, dry the area, and correct moisture problems.
Conclusion
The most reliable way to keep bathroom clean is to control moisture, remove fresh residue immediately, maintain clear surfaces, and follow a predictable weekly order. A few minutes of drying and resetting each day prevents the hardened soap film, mineral buildup, odors, mold conditions, clutter, and floor grime that make bathroom cleaning slow and frustrating.
Start with three habits: run the exhaust fan, squeegee the shower, and wipe the sink after use. Add one weekly 25-45 minute cleaning session and one monthly detail check. That routine keeps the room consistently usable without depending on harsh chemicals or exhausting deep cleans.


