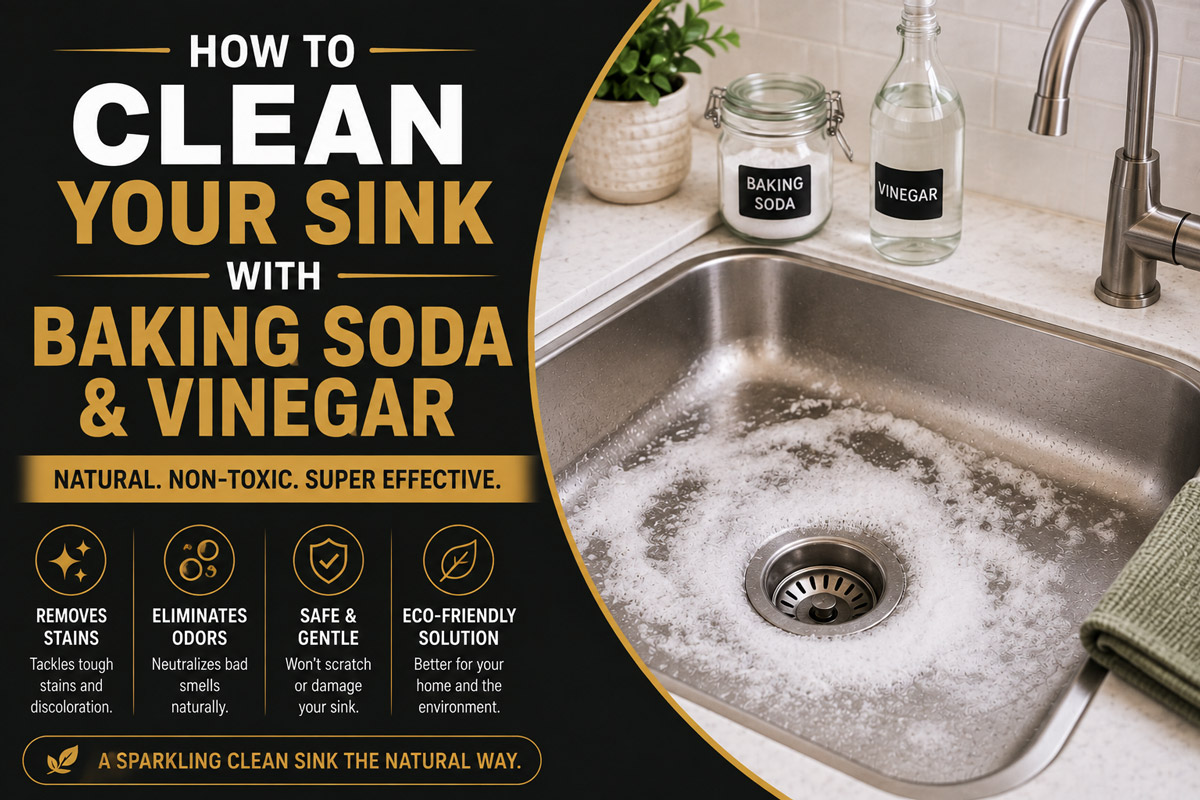
To clean your sink with baking soda and vinegar, rinse the basin, sprinkle 1/4 to 1/2 cup of baking soda over the damp surface, scrub with a soft sponge, and apply diluted white vinegar only where the sink material permits it. Rinse thoroughly, dry the basin, and treat the drain separately if odors remain.
Key Facts at a Glance
- Baking soda cleans mainly through mild abrasion and alkalinity, not through fizzing.
- White vinegar works best against hard-water deposits and other alkaline mineral residue.
- Combining baking soda and vinegar produces carbon dioxide, water, and sodium acetate.
- The reaction helps disturb loose residue, but it does not dissolve hair or severe grease clogs.
- Vinegar should not be used automatically on natural stone, copper, or an unknown specialty finish.
- Baking soda and household vinegar clean and deodorize, but they should not be treated as registered disinfectants.
Before You Start
Cleaning a typical sink basin with baking soda and vinegar takes about 15-25 minutes, including preparation, scrubbing, rinsing, and drying. The procedure is easy, but sink material is the factor that most strongly determines whether vinegar is appropriate.
| Requirement | Typical amount or value | Practical note |
| Active working time | 8-12 minutes | Includes scrubbing and rinsing |
| Total elapsed time | 15-25 minutes | Longer when treating mineral deposits |
| Baking soda | 1/4-1/2 cup | Use less for a small bathroom sink |
| White vinegar | 1/2-1 cup | Dilute or omit according to material |
| Warm water | 1-2 gallons | Hot tap water is normally sufficient |
| Dish soap | 1 teaspoon | Useful for grease before mineral treatment |
| Sponge or cloth | 1 non-scratch tool | Avoid steel wool and harsh scouring pads |
| Detail brush | 1 soft toothbrush | Cleans the drain rim and faucet base |
| Typical material cost | $0.15-$0.60 | Depends on quantities and local prices |
| Difficulty | Beginner | Material identification is the main precaution |
What You Need
Gather the following supplies:
- Baking soda
- Distilled white vinegar with approximately 5 percent acidity
- Warm water
- Mild dish soap
- A soft sponge or microfiber cloth
- A soft toothbrush or narrow detail brush
- A small spray bottle or measuring cup
- A dry microfiber towel
- Rubber gloves if your skin is sensitive
- The sink manufacturer’s care instructions, when available
Do not mix the ingredients in a sealed bottle. The reaction releases carbon dioxide gas, which can build pressure inside a closed container.
How Do Baking Soda and Vinegar Clean a Sink?
Baking soda and vinegar perform different jobs. Baking soda is a mildly alkaline powder that absorbs odors and provides gentle mechanical abrasion, while vinegar is an acidic liquid that can dissolve alkaline mineral deposits such as calcium-based hard-water residue.
When sodium bicarbonate contacts acetic acid, the substances react to form carbon dioxide, water, and dissolved sodium acetate. University chemistry explanations describe the same acid-base reaction and identify carbon dioxide as the source of the visible bubbles.
The equation is:
NaHCO₃ + CH₃COOH → CH₃COONa + H₂O + CO₂
The fizz looks powerful, but appearance should not be confused with cleaning strength. Once enough acid and base have reacted, much of their original acidity and alkalinity has been neutralized. The remaining liquid is not a stronger universal cleaner.
The most effective sequence is therefore purposeful:
- Use baking soda first for light scrubbing, residue lifting, and odor control.
- Use vinegar separately or afterward for compatible mineral deposits.
- Use dish soap first when the contamination is oily or greasy.
- Use mechanical removal when hair, food, or a solid obstruction blocks the drain.
This distinction is one of the most important practical rules. Chemistry supports the cleaning process, but contact, agitation, rinsing, and correct material selection produce the visible result.
Which Sinks Can Be Cleaned This Way?
Baking soda is tolerated by many sink materials when it is dampened and applied with a soft tool. Vinegar is more material-dependent because acids can alter certain metals, stone sealers, grout, coatings, and decorative finishes.
| Sink material | Baking soda | Vinegar | Recommended adjustment |
| Stainless steel | Usually suitable | Usually suitable when diluted | Scrub with the grain and rinse completely |
| Glazed porcelain | Suitable with light pressure | Usually suitable for brief contact | Avoid abrasive pads on worn glaze |
| Glazed ceramic | Suitable with light pressure | Usually suitable for brief contact | Test decorative or hand-painted areas |
| Fireclay | Usually suitable | Follow manufacturer guidance | Prevent impact damage and rinse well |
| Granite composite | Product-specific | Product-specific | Check the manufacturer before use |
| Quartz composite | Product-specific | Product-specific | Test a hidden area and limit contact |
| Natural granite | Use cautiously | Often discouraged | Protect the sealer and use pH-neutral cleaner |
| Marble | Avoid abrasive scrubbing | Avoid vinegar | Acid can etch calcium-based stone |
| Copper | Use manufacturer-approved care | Usually avoid | Vinegar can alter or strip patina |
| Brass | Use cautiously | Usually avoid prolonged contact | Acid can alter the finish |
| Acrylic | Use a very soft cloth | Product-specific | Avoid abrasive pressure |
| Solid surface | Usually suitable gently | Product-specific | Follow the brand’s care instructions |
| Enameled cast iron | Gentle use only | Brief contact if approved | Protect chipped or worn enamel |
Manufacturer instructions override generic cleaning advice. Sink compositions vary even when products share a category name. For example, BLANCO permits acid-based cleaners such as vinegar cleaner for certain SILGRANIT composite sinks, while its stainless-steel guidance warns against scratching and recommends controlled dilution for concentrated vinegar products.
That contrast shows why blanket statements such as “never use vinegar on composite” or “vinegar is safe on every granite sink” are unreliable.
How to Clean Your Sink With Baking Soda and Vinegar
The safest general procedure uses baking soda as the primary basin cleaner and vinegar as a targeted mineral remover. Keep the ingredients separate long enough for each one to perform its strongest function.
Step 1: Identify the Sink Material
Confirm whether the sink is stainless steel, porcelain, ceramic, composite, natural stone, copper, acrylic, or another material. Look beneath the basin for a label, check purchase records, or search the manufacturer’s model number.
Do not assume that a black sink is natural granite or that a white sink is porcelain. Black basins are often quartz or granite composites, while white sinks may be fireclay, enameled cast iron, acrylic, porcelain, or solid-surface material.
Success checkpoint: You know whether vinegar is approved, conditionally allowed, or best avoided.
Common mistake: Testing a strong solution in the center of the basin. Test any uncertain cleaner near the back edge or another inconspicuous area.
Step 2: Empty and Rinse the Basin
Remove dishes, racks, strainers, soap containers, sponges, and drain covers. Rinse loose food, hair, coffee grounds, toothpaste, and surface debris into a removable strainer or collect it for disposal.
Use warm water rather than relying on cleaner to move solid debris. Food particles and hair can interfere with scrubbing and may enter the drain unnecessarily.
Wipe away standing grease with a paper towel and place it in the trash. Do not wash cooking fat into the plumbing because it can cool, harden, and contribute to downstream buildup.
Success checkpoint: The basin is empty, damp, and free from loose debris.
Common mistake: Beginning with a dirty sponge. A greasy or odor-filled sponge can spread contamination across the sink.
Step 3: Wash Away Grease With Dish Soap
Apply approximately 1 teaspoon of mild dish soap to a damp sponge. Wash the basin, drain rim, faucet base, sink divider, and upper edges for 1-2 minutes.
Dish soap should come before vinegar when the sink contains cooking oil, butter, meat fat, skin oils, cosmetics, or greasy food residue. Surfactants in dish soap surround and suspend oil more effectively than the brief baking soda and vinegar reaction.
Rinse lightly, leaving the basin damp enough for baking soda to adhere.
Success checkpoint: The surface no longer feels oily or slippery.
Common mistake: Expecting vinegar to dissolve a thick grease film. Vinegar targets mineral residue better than concentrated cooking fat.
Step 4: Apply Baking Soda
Sprinkle 1/4 cup of baking soda across a small or medium sink. Use up to 1/2 cup for a large double-bowl kitchen sink.
Distribute the powder over the damp base, sidewalls, drain rim, and stained areas. Add a few drops of water if the powder remains completely dry. The desired consistency is a damp coating or loose paste, not a basin full of cloudy water.
Leave the baking soda in place for 3-5 minutes on routine grime. For stubborn food residue on a compatible surface, extend the contact period to approximately 10 minutes.
Success checkpoint: A thin, damp baking soda layer remains on the dirty areas.
Common mistake: Pouring in too much water. Excess water carries the powder down the drain before it can provide useful abrasion.
Step 5: Scrub With a Non-Scratch Tool
Scrub the basin using a soft sponge, microfiber cloth, or manufacturer-approved non-scratch pad. Use overlapping circular motions on smooth glazed surfaces and follow the visible grain on brushed stainless steel.
Apply light to moderate pressure for 2-4 minutes. Baking soda is mild, but any abrasive material can contribute to visible dullness when used aggressively, repeatedly, or on a delicate finish.
Use a soft toothbrush around the drain flange, faucet base, seams, sink rim, overflow opening, and mounting hardware. These areas often retain a dark line of soap, food residue, or mineral scale.
Success checkpoint: The surface feels smooth, and visible film transfers to the sponge or cloth.
Common mistake: Using steel wool, a wire brush, or a heavily worn scouring pad. These tools can leave scratches or embedded metal particles that later appear rusty.
Step 6: Use Vinegar on Compatible Deposits
For a vinegar-compatible sink, spray a small amount of diluted white vinegar onto areas with hard-water spots, chalky residue, or soap-mineral film. A conservative starting dilution is equal parts vinegar and water.
Allow 1-3 minutes of contact for routine mineral residue. Scrub lightly with a soft cloth, then rinse. More time is not automatically better, especially around sealants, plated drains, decorative finishes, natural stone, or unknown composite formulations.
Applying vinegar directly over remaining baking soda will produce fizz. The bubbling may help disturb loose particles, but immediate neutralization reduces the period during which the vinegar remains strongly acidic.
For stubborn mineral scale, rinse most baking soda away first, then use vinegar separately. This sequence gives the acid direct access to the deposit.
Success checkpoint: White mineral spots soften or wipe away without a change in surface color or gloss.
Common mistake: Soaking the entire sink in undiluted vinegar. Targeted application provides more control and less risk.
Step 7: Clean the Drain Rim and Stopper
Lift or remove the drain stopper when its design permits. Scrub the underside, pivot points, strainer basket, rubber seal, and drain rim with dish soap and a soft brush.
Many recurring sink odors originate in these hidden parts rather than deep inside the pipe. Bathroom stoppers collect hair, toothpaste, shaving residue, soap, and skin oils. Kitchen strainers accumulate food particles and grease beneath their visible upper edge.
For a garbage disposal, switch off power at the wall switch and, for greater safety during hand cleaning, at the circuit breaker. Never place a hand inside the grinding chamber. Clean removable components and the accessible top and underside of the rubber splash guard with a handled brush.
Success checkpoint: No slime, hair, food residue, or dark film remains around the removable drain components.
Common mistake: Pouring more deodorizer into the drain while leaving a dirty stopper or splash guard untouched.
Step 8: Rinse and Dry Thoroughly
Rinse the entire basin with warm water until no baking soda grit or vinegar odor remains. Run water around the drain rim, faucet base, corners, and seams.
Dry the basin with a clean microfiber towel. Drying is not purely cosmetic. Removing water droplets reduces the mineral deposits that cause fresh spotting, especially in hard-water areas.
Polish brushed stainless steel in the direction of the grain. Do not apply cooking oil as a routine finishing treatment because excess oil can attract dust and create a patchy film.
Success checkpoint: The sink feels smooth, looks evenly clean, and shows no powdery residue after drying.
Common mistake: Allowing baking soda slurry to dry on the surface. Dried residue can make a clean sink look cloudy.
How Much Baking Soda and Vinegar Should You Use?
A standard sink does not require cups of each ingredient. Controlled quantities are easier to scrub, rinse, and keep away from vulnerable finishes.
| Cleaning task | Baking soda | Vinegar | Contact time |
| Small bathroom basin | 2-4 tablespoons | 1/4 cup diluted | 1-3 minutes |
| Standard kitchen basin | 1/4 cup | 1/2 cup diluted | 1-3 minutes |
| Large double-bowl sink | 1/2 cup total | 1/2-1 cup diluted | 1-3 minutes |
| Localized stain | 1 tablespoon paste | 1-2 tablespoons if approved | 1-3 minutes |
| Drain deodorizing | 1/2 cup | 1/2-1 cup | 10-15 minutes |
| Faucet aerator soak | None | 50/50 vinegar and water | 15-30 minutes |
| Weekly maintenance | 2-4 tablespoons | Optional targeted spray | Under 5 minutes |
| Heavy mineral deposit | Baking soda separately | Targeted vinegar treatment | Repeat short cycles |
Kohler recommends a 50/50 mixture of white vinegar and warm water for certain faucet mineral deposits and removable aerators. That manufacturer guidance applies to specified faucet-cleaning situations, not automatically to every sink surface or specialty finish.
Can You Clean the Drain With Baking Soda and Vinegar?
Baking soda and vinegar can refresh a mildly odorous drain and disturb loose residue near the drain opening, but the combination is not a reliable solution for a solid hair clog, compacted food, hardened grease, a blocked trap, or an obstruction deeper in the pipe.
Use this method for maintenance:
- Remove visible debris from the stopper or strainer.
- Pour 1/2 cup of baking soda into the drain.
- Add 1/2 to 1 cup of white vinegar.
- Cover the drain loosely with a stopper.
- Wait 10-15 minutes.
- Flush with hot tap water for 30-60 seconds.
Use hot tap water as the conservative default. Extreme heat can affect some plumbing components, soften certain materials, or create thermal stress where temperature changes abruptly.
Why the Method Has Limits
The gas produced by the reaction can move through small gaps and disturb loose material, but household sink plumbing is not a sealed pressure-cleaning system. Most carbon dioxide escapes toward the drain opening or through available air space.
Baking soda also does not digest hair. Vinegar does not mechanically pull out a solid obstruction. Once the acid and base neutralize each other, the remaining solution has less ability to act as either a strong acid or a useful alkaline cleaner.
Use a drain snake, remove and clean the stopper, check the P-trap when qualified to do so, or call a plumber when:
- Water does not drain at all.
- Multiple fixtures drain slowly.
- The drain repeatedly backs up.
- Sewage odor enters the room.
- Gurgling occurs in nearby fixtures.
- A disposal hums but does not turn.
- Chemical drain cleaner has already been added.
- Leakage appears below the sink.
Do not add baking soda, vinegar, bleach, ammonia, or another cleaner after using a commercial drain product. Unknown chemical combinations can create dangerous reactions, heat, splashing, or toxic gases.
Does Baking Soda and Vinegar Disinfect a Sink?
Baking soda and household vinegar should be treated as cleaners and deodorizers, not as dependable disinfectants. They can remove soil that shelters microorganisms, but visible cleanliness is different from verified pathogen reduction.
The U.S. Environmental Protection Agency explains that disinfectants must be evaluated and registered for specific organisms, surfaces, concentrations, and contact times. The EPA states that when a product label lacks directions for a pathogen, the agency has not reviewed data proving effectiveness for that use.
The Centers for Disease Control and Prevention also notes in healthcare guidance that common alternatives such as baking soda and vinegar are not EPA-registered disinfectants and should not substitute for approved disinfection procedures.
For ordinary household maintenance, cleaning may be sufficient. Disinfect after cleaning when the sink has contacted raw poultry juices, vomit, fecal contamination, floodwater, or material associated with an infectious illness.
Use an EPA-registered product approved for the sink surface and intended organism. Follow the label’s dilution, ventilation, protective equipment, and wet contact-time instructions.
Never mix vinegar with chlorine bleach. Acidifying bleach can release hazardous chlorine gas.
Common Mistakes and How to Fix Them
| Problem | Likely cause | Corrective action |
| Sink looks cloudy | Baking soda residue remains | Rinse again and dry with clean microfiber |
| Stainless steel has streaks | Scrubbing crossed the grain | Clean and dry in the grain direction |
| Surface feels greasy | Oil was not prewashed | Repeat with dish soap before baking soda |
| Mineral spots remain | Vinegar neutralized too quickly | Rinse baking soda, then apply vinegar separately |
| Finish looks dull | Excess abrasion or acid exposure | Stop cleaning and check manufacturer guidance |
| Drain still smells | Stopper, overflow, disposal flap, or trap is dirty | Clean removable parts and investigate the odor source |
| Drain remains slow | Hair or solid debris blocks flow | Use mechanical removal rather than more fizz |
| Brown marks appear | Embedded metal transfer or rusting debris | Remove the source and use an approved rust treatment |
| White film returns quickly | Hard water dries on the sink | Wipe the basin dry after use |
| Vinegar smell remains | Incomplete rinsing or trapped liquid | Flush with water and ventilate the room |
Mixing the Ingredients Too Early
Premixing baking soda and vinegar in a bowl creates immediate fizz but sacrifices much of the separate cleaning value. Use the alkaline powder for scrubbing first and the acid for mineral deposits second.
Using Too Much Baking Soda
A thick layer increases rinsing work without increasing cleaning power proportionally. Begin with 1/4 cup for a standard basin and add more only where needed.
Treating Fizz as Proof of Unclogging
Bubbles prove that an acid-base reaction is occurring. They do not prove that hair, grease, or a solid object has left the pipe.
Ignoring the Manufacturer’s Instructions
Composite formulations, metal finishes, sealers, coatings, and enamel conditions vary. A cleaner accepted for one brand may be discouraged for another.
Skipping the Final Drying Step
Water left on the basin evaporates and leaves dissolved minerals behind. Drying prevents many spots more effectively than repeatedly treating them later.
How Should the Method Change for Different Situations?
Stainless Steel Kitchen Sinks
Use baking soda with a damp cloth and scrub along the visible grain. Apply diluted vinegar briefly to hard-water deposits, rinse completely, and dry.
Avoid chlorine bleach residue, steel wool, and prolonged contact with salty or acidic materials. These conditions can damage the passive surface layer or leave discoloration.
Porcelain and Ceramic Bathroom Sinks
Use a soft sponge and moderate pressure. Baking soda can remove toothpaste film and light marks, but heavily worn glaze should be treated more gently because rough areas trap residue.
Keep vinegar away from surrounding natural-stone countertops, unsealed grout, and acid-sensitive decorative details.
Composite Sinks
Check the exact brand and model. Some engineered composites tolerate vinegar-based descaling products, while others specify proprietary cleaners or limited exposure.
Use a soft pad, rinse fully, and avoid assuming that every composite sink behaves like natural stone.
Natural-Stone Sinks
Skip vinegar unless the stone manufacturer explicitly approves it. Marble, limestone, travertine, and other calcium-rich stones can etch when exposed to acid.
Use a pH-neutral stone cleaner and a nonabrasive cloth. Test cleaning methods in an inconspicuous area.
Copper Sinks
Avoid the standard vinegar procedure unless deliberate patina removal is intended and permitted by the manufacturer. Acid can change copper’s color and remove an aged finish unevenly.
Use warm water, mild soap, and a soft cloth for routine care.
Garbage Disposal Sinks
Clean the visible strainer, splash guard, and accessible rim before treating the drain. Decaying residue beneath the rubber splash guard commonly causes odor.
Do not place hands inside the chamber. Use a handled brush and disconnect power before cleaning accessible disposal parts.
Baking Soda and Vinegar Versus Other Sink Cleaners
No single cleaner handles grease, minerals, stains, odors, and pathogens equally well. Choose according to the soil rather than using the same mixture for every problem.
| Cleaner | Best use | Typical working time | Main limitation |
| Mild dish soap | Grease and daily soil | 1-3 minutes | Weak on mineral scale |
| Baking soda paste | Odor and light surface grime | 3-10 minutes | Can leave residue or dull delicate finishes |
| Diluted vinegar | Hard-water and mineral deposits | 1-5 minutes | Unsafe for some stone, metals, and coatings |
| Baking soda plus vinegar | Light drain refreshing | 10-15 minutes | Weak on solid clogs |
| Hydrogen peroxide product | Product-specific stain or sanitation task | Label-directed | Compatibility varies |
| EPA-registered disinfectant | Verified pathogen control | Label-directed | Requires correct contact time and surface approval |
| Enzyme drain maintainer | Organic residue maintenance | Several hours | Slow and unsuitable for solid objects |
| Drain snake | Hair and physical obstruction | 5-30 minutes | Requires access and careful handling |
| Manufacturer cleaner | Specialty sink finish | Label-directed | Higher cost and limited availability |
Practitioner Rule of Thumb
Match the cleaner to the residue:
- Greasy and slippery: Start with dish soap.
- White and chalky: Use a compatible acid treatment.
- Dark and slimy: Remove organic soil mechanically, then wash.
- Powdery after cleaning: Rinse more thoroughly.
- Slow drain with visible hair: Pull the obstruction out.
- Pathogen concern: Clean first, then use an approved disinfectant.
How Long and How Much Does Sink Cleaning Cost?
A routine sink cleaning usually requires 15-25 minutes and less than $1 in consumable materials. Weekly maintenance can take 5-10 minutes when residue is removed before it hardens.
| Cleaning level | Total time | Typical consumable cost | Suggested frequency |
| Quick daily rinse and dry | 1-2 minutes | Under $0.05 | After heavy use |
| Weekly baking soda cleaning | 5-10 minutes | $0.10-$0.30 | Once weekly |
| Mineral-spot treatment | 10-15 minutes | $0.10-$0.40 | As deposits appear |
| Drain deodorizing | 15-20 minutes | $0.20-$0.60 | Monthly or as needed |
| Full sink and fixture detail | 20-30 minutes | $0.30-$1.00 | Every 2-4 weeks |
| Mechanical clog removal | 15-45 minutes | $0-$20 | Only when needed |
| Professional drain service | 30-120 minutes | Local service rate | For recurring or severe blockage |
These figures are practical household estimates rather than fixed market prices. Sink size, water hardness, neglected buildup, cleaner prices, and plumbing access change the total.
Expert Insights That Improve the Result
The Fizz Is Usually the Least Important Part
The visible reaction attracts attention, but sink cleaning improves most through correct cleaner selection, surface contact, light agitation, rinsing, and drying. Let baking soda and vinegar perform separate jobs before allowing them to react.
Recurring White Residue Is Usually a Water Problem
When chalky spots return within days, the problem is often dissolved calcium and magnesium left after water evaporates. Drying the sink after use can outperform increasingly aggressive cleaning.
The Odor Source May Be Above the Trap
A smelly drain does not always indicate a deep plumbing obstruction. The underside of a stopper, overflow channel, strainer basket, disposal splash guard, or drain flange may hold enough organic film to produce odor.
Honest Limitations
Baking soda and vinegar are inexpensive and useful for routine sink maintenance, but the combination is not a universal stain remover, disinfectant, or drain opener.
It will not reliably remove deep rust, restore etched stone, repair worn enamel, reverse scratches, dissolve a dense hair plug, clear a foreign object, or sanitize a contaminated surface to a verified standard. Repeating the treatment cannot correct a problem caused by material damage or plumbing failure.
Stop and seek material-specific or professional help when the sink changes color, develops rough patches, leaks, cracks, drains repeatedly back up, or produces sewage odors.
Frequently Asked Questions
Can I leave baking soda and vinegar in the sink overnight?
Do not leave the mixture on a sink surface overnight. Prolonged moisture and acid exposure can affect sealants, plated components, natural stone, copper, composite formulations, or damaged enamel. Routine basin treatment normally needs only a few minutes. Drain deodorizing generally requires 10-15 minutes before flushing.
Should the sink be wet before applying baking soda?
Yes. A lightly damp sink helps baking soda adhere to the base and sidewalls. The basin should not contain standing water because excess water dilutes the powder and carries it toward the drain before you scrub. Mist the surface or rinse it briefly, then begin applying the powder.
Can baking soda scratch stainless steel?
Baking soda is mild, but scratching remains possible when dry powder is rubbed forcefully, trapped beneath an aggressive pad, or moved repeatedly against a brushed finish. Dampen the powder, use a soft tool, follow the stainless-steel grain, apply moderate pressure, and rinse away every particle.
Why does my sink still smell after cleaning the drain?
Persistent odor often comes from residue beneath the stopper, inside the overflow passage, under a garbage disposal splash guard, or within the P-trap. Clean accessible components mechanically. Sewage odor, recurring backup, gurgling, or odor from multiple fixtures warrants plumbing inspection rather than repeated deodorizing.
Can I mix vinegar and baking soda in a spray bottle?
Do not mix them in a sealed spray bottle. The reaction releases carbon dioxide gas, which can create pressure, and the ingredients neutralize each other before reaching the sink. Store them separately. Apply baking soda first and vinegar later where the surface permits acidic cleaning.
How often should I clean my sink this way?
For a frequently used kitchen or bathroom sink, use a gentle baking soda cleaning about once a week and treat mineral deposits only as needed. Rinse and dry the sink after heavy use. Frequent aggressive scrubbing or repeated acid exposure is unnecessary and may shorten the life of delicate finishes.
The Bottom Line
The best way to clean your sink with baking soda and vinegar is to use the ingredients sequentially rather than treating the fizz as the main cleaner. Wash away grease with dish soap, scrub compatible surfaces with damp baking soda, use diluted vinegar briefly for mineral deposits, rinse thoroughly, and dry the basin.
Confirm the sink material before applying vinegar. Use the method for ordinary grime, odors, and light mineral buildup, but choose mechanical clog removal, a manufacturer-approved specialty cleaner, or an EPA-registered disinfectant when the problem requires a different tool.


