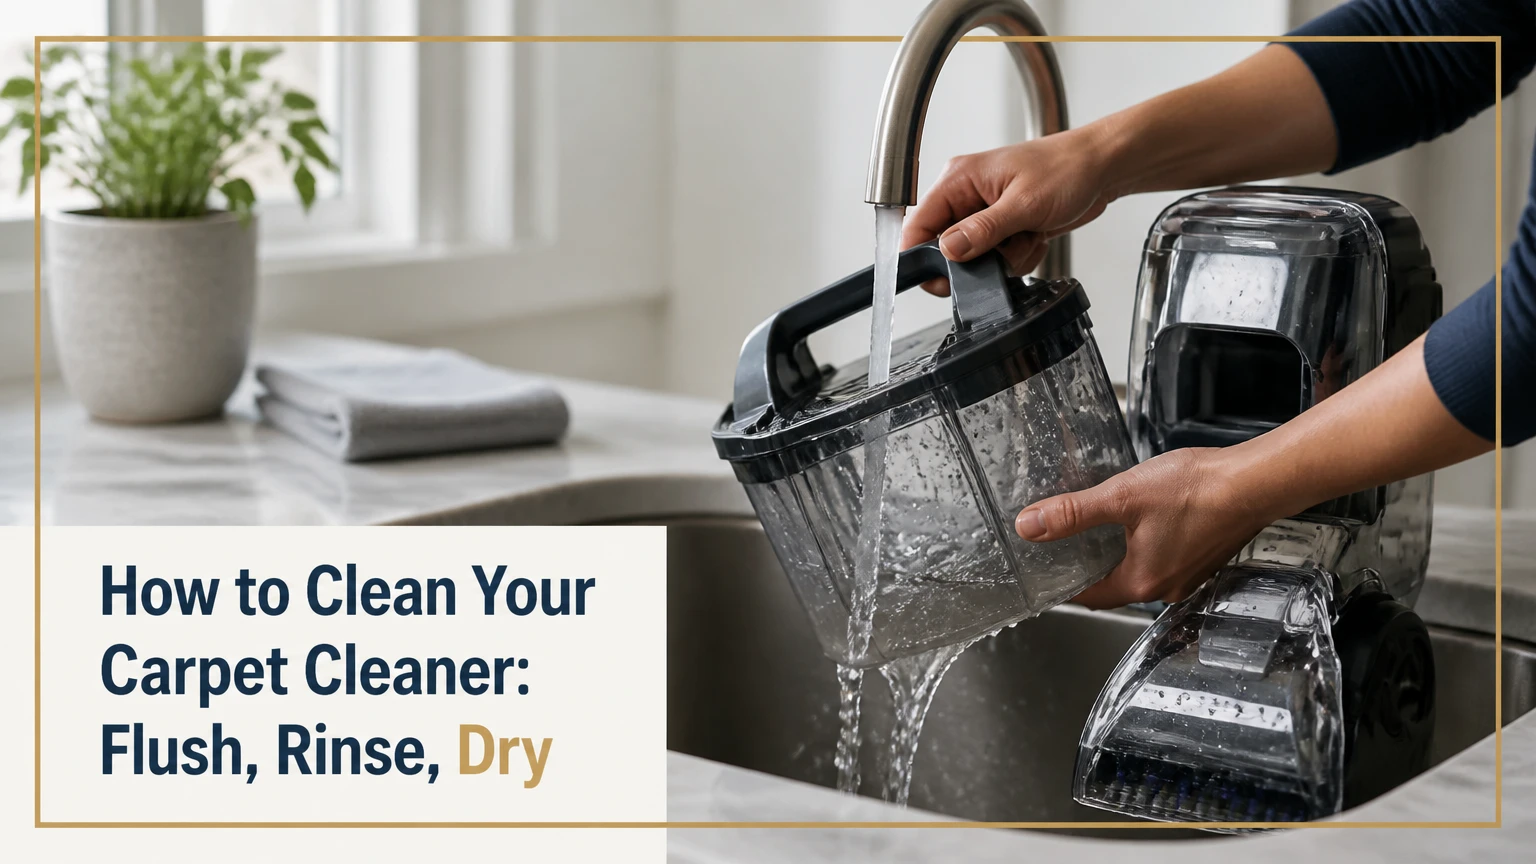
To clean your carpet cleaner, unplug the machine, empty both tanks, flush the solution and suction paths with clean warm water, then wash the nozzle, filter, hose, and brush roll. Remove hair before it reaches the motor, inspect the tank seal and float, and air-dry every removable part completely before storage.
Key facts at a glance
Clean the recovery tank immediately after every carpet-cleaning session.
Flush the spray system with clean water, not additional detergent.
A blocked nozzle, dirty filter, stuck float, or poor tank seal can reduce suction.
Remove wrapped hair from brush-roll axles before wiping the brush chamber.
Vinegar is not universally safe for carpet-cleaner pumps, seals, or warranties.
Typical post-use maintenance takes 10-20 minutes, excluding overnight drying.
Before You Start Cleaning a Carpet Cleaner
Most household carpet cleaners can be cleaned in 10-20 active minutes, with 12-24 hours of air-drying for detached parts. The work requires no specialist tools, but the machine must be unplugged before you reach beneath the nozzle, remove a brush roll, or handle a filter.
| Requirement | Typical amount or time | Practical specification |
|---|---|---|
| Clean warm water | 1-2 liters | Warm tap water, never boiling water |
| Active cleaning time | 10-20 minutes | Portable units usually take less time |
| Drying time | 12-24 hours | Keep tanks, filters, hose ends, and nozzle open |
| Tools | 4 items | Microfiber cloth, soft brush, scissors, shallow tray |
| Detergent | 0 milliliters | Do not add soap during the rinse flush |
| Electrical safety | 1 condition | Power off and unplug before disassembly |
Read the model manual first, especially if the machine has a removable hose, heated-water system, antimicrobial filter, or integrated brush head. BISSELL, Rug Doctor, Hoover, Shark, and rental-equipment instructions do not use identical parts or cleaning chemicals.
Do not immerse the motor housing, power cord, plug, control panel, or electrical connections. Wipe those components with a slightly damp cloth and dry them immediately.
How to Clean Your Carpet Cleaner After Every Use
A complete carpet-cleaner cleanup has five actions: flush the fluid path, drain and wash the tanks, clear the nozzle and filter, remove brush-roll debris, and dry the machine before storage. The most important factor is promptness because dirty recovery water develops odor quickly inside warm, enclosed plastic chambers.
Step 1: Flush the Spray and Suction Paths
Fill the clean-water tank with plain warm water, install it securely, and run the machine over a suitable drain or hard floor while holding the spray trigger. Release the trigger, then run suction without spraying so residual water leaves the hose and recovery channel.
- Empty the detergent solution from the clean-water tank.
- Add enough clean warm water to operate the pump for about 30 seconds.
- Recline the cleaner only as the manual permits.
- Hold the spray trigger while directing the nozzle toward a drainable surface.
- Release the trigger and run the vacuum for 15-30 seconds.
- Turn the machine off and inspect the dirty tank for expelled residue.
You will know the flush worked when the discharge becomes clear and the pump stops releasing visible detergent foam. A short flush is usually sufficient after one room; a longer rinse is reasonable after heavily soiled pet accidents or concentrated cleaning solution.
Common mistake: Adding dish soap, laundry detergent, or extra carpet shampoo to the rinse tank creates foam rather than improving hygiene. Foam can wet filters, trigger the float shutoff, and travel toward the vacuum motor.
Step 2: Empty and Wash Both Tanks
Remove the clean-water tank and recovery tank, then empty them completely. Rinse the dirty-water tank with warm water until no sludge, hair, detergent film, or carpet fibers remain around the inlet, lid, and float assembly.
Clean the tanks in this order:
- Pour dirty water into a toilet, utility sink, or suitable drain.
- Rinse the recovery tank walls and lid.
- Check that the float moves freely and is not coated with residue.
- Wash the clean tank, cap, valve, and solution filter if the manual allows it.
- Wipe the tank gasket and inspect it for cracks, flattening, or displacement.
- Leave both tanks uncapped while they dry.
The recovery tank is usually the odor source because it receives warm water, soil, pet residue, detergent, and biological material. A sour smell that remains after washing often indicates residue inside the lid, float chamber, hose connection, or nozzle rather than inside the tank itself.
Vinegar warning: Do not assume a vinegar mixture is a universal sanitizer. Some manufacturers permit diluted vinegar for mineral scale, while others warn against acids because they can affect seals, pumps, coatings, or warranty coverage. Use the manual’s approved cleaner first; if no guidance exists, use warm water and a manufacturer-approved descaler rather than improvising a chemical concentration.
Step 3: Clear the Floor Nozzle and Suction Opening
Detach the floor nozzle, suction plate, or transparent front cover according to the model instructions. Remove wet lint, pet hair, mud, threads, and carpet fibers from the narrow suction channel because a small blockage can reduce airflow more than a visibly dirty tank.
Use fingers with gloves, a soft brush, or a plastic pick for packed debris. Avoid forcing a metal tool through a spray jet because the opening can deform or the needle can push debris deeper into the spray bar.
Rinse detachable plastic parts under warm running water. Hold the nozzle toward a light source and confirm that the suction throat is open from end to end. Wipe the nozzle seal before reinstalling it, since a displaced seal can admit air and reduce extraction.
Success checkpoint: Water should pass through the nozzle without backing up, and the clear suction channel should show no compressed mat of fibers. Refit every latch until it clicks or sits flush.
Step 4: Wash Filters, Float Screens, Hose Ends, and Brush Rolls
Filters protect the vacuum motor from lint and moisture, while the float mechanism prevents liquid from entering the motor when the recovery tank reaches its limit. Remove only the filters identified as washable in the manual, brush away loose debris, rinse them, and dry them fully before installation.
Lay an upright cleaner on its permitted side or back, then remove the brush cover if the design provides a latch. Cut wrapped hair and thread with scissors rather than pulling forcefully against the belt, axle, or bearing.
Clean the brush assembly in this order:
- Cut hair at several points along the axle.
- Pull the loosened strands away from the end caps.
- Rotate the brush by hand to locate resistance.
- Wipe the brush chamber and axle recesses with a microfiber cloth.
- Check the belt for fraying, slack, or visible separation.
- Reinstall the roll and cover without pinching the belt.
Portable spot cleaners may have a small motorized hand tool instead of a floor brush. Open the tool’s hair-access cover if present, clear the spray tip, rinse the transparent suction path, and drain the hose by holding its nozzle lower than the machine.
Expert maintenance rule: A brush roll can look clean while its end bearings remain jammed with hair. Always rotate the roll after cleaning; a stiff axle creates more mechanical load than surface lint does.
Step 5: Dry, Reassemble, and Store Correctly
Allow tanks, filters, nozzle pieces, brush covers, and hose ends to air-dry completely before reassembly. A typical drying period is 12-24 hours, although thick filters and enclosed hoses may require longer in a humid room.
Wipe the exterior housing and power cord with a dry or barely damp cloth. Keep the machine upright in a cool, dry location, and store the recovery tank lid open or removed when the design allows it.
Do not store a carpet cleaner with water in either tank, a wet filter installed, or a collapsed hose holding liquid. Reassemble only after parts are dry, then test the tank latches and seals without running detergent through the machine.
Success checkpoint: No component feels cool and damp, no water drips when the hose is raised, and the recovery tank has no sour odor. If moisture remains, continue drying rather than closing the machine in a cupboard.
What Changes by Carpet-Cleaner Type?
Portable spot cleaners have short fluid paths and small tanks, upright extractors have larger brush chambers, and commercial machines have longer hoses, high-capacity tanks, and more serviceable components. The cleaning principle is the same, but the most failure-prone part changes with the machine design.
| Machine type | Typical tank capacity | Main debris risk | Typical cleanup time |
|---|---|---|---|
| Portable spot cleaner | 0.6-2 liters | Pet hair in hose and hand tool | 8-15 minutes |
| Upright residential extractor | 3.5-5 liters | Hair around brush axles | 12-20 minutes |
| Rental upright machine | 7-15 liters | Soil in nozzle and recovery tank | 15-25 minutes |
| Commercial extractor | 10-60 liters | Scale, lint, and hose residue | 20-40 minutes |
Portable units need frequent hose rinsing because their narrow tubing holds more residue relative to its diameter. Upright machines need regular brush-roll inspection, especially in homes with long-haired pets. Commercial extractors require scheduled inspection of pump screens, vacuum filters, couplings, and recovery hoses.
Commercial equipment is not automatically cleaner. Rental machines can contain residue from previous users, so inspect the nozzle, tank, hose, and hand tool before use and rinse the recovery path after returning to the rental location.
Which Maintenance Schedule Fits Your Machine?
Clean tanks, nozzles, and visible brush debris after every use. Inspect filters weekly during frequent use, and descale only at the interval allowed by the manufacturer because water hardness, usage, and pump design determine the correct schedule.
| Component or task | Light household use | Frequent or pet use | Commercial or rental use |
|---|---|---|---|
| Empty recovery tank | After every session | After every session | After every job |
| Rinse fluid path | After every session | After every session | After every job |
| Inspect brush roll | Monthly | Every 1-2 sessions | Daily |
| Wash washable filter | Every 4-6 uses | Weekly | Daily or per shift |
| Inspect hose and seals | Every 3 months | Monthly | Weekly |
| Descale pump path | Every 6-12 months, if approved | Every 3-6 months, if approved | Monthly to quarterly, if approved |
These intervals are typical operating ranges, not universal manufacturer specifications. Hard water leaves calcium deposits faster, while detergent overuse leaves sticky film that can obstruct spray jets even when mineral scale is minimal.
What Should You Never Put in a Carpet Cleaner?
Use only the solution and water temperature specified for the machine. Standard laundry detergent, dish soap, bleach, essential oils, fabric softener, and undiluted vinegar can create foam, damage seals, leave residues, or cause an incompatible chemical reaction.
Avoid these common errors:
- Scalding water: Water above the manual’s limit can deform plastic valves, damage tubing, and create a burn hazard. Many machines specify warm or hot tap water, not boiling water.
- Excess shampoo: More detergent increases residue and foam rather than extraction performance.
- Bleach: Chlorine can discolor carpet, weaken seals, and damage clothing or skin.
- Dish soap: High-foam surfactants can fill the recovery tank with bubbles and activate the float prematurely.
- Closed wet storage: Damp filters and tanks encourage mildew odor.
- Improvised needle cleaning: A pin can damage a spray opening if pushed into the wrong component.
- Aggressive brush scraping: Sharp tools can score plastic seals and create an air leak.
A pure-water rinse pass over the carpet can help remove detergent residue, but the rinse must not replace machine cleanup. The recovery tank still contains extracted soil and must be emptied immediately.
How Do You Fix Low Suction?
Low suction usually comes from a full recovery tank, blocked nozzle, wet or clogged filter, stuck float, hose obstruction, or leaking tank seal. Check those causes in that order before assuming the vacuum motor has failed.
- Empty the dirty-water tank and confirm its lid is seated.
- Inspect the black or molded tank gasket for hair, cracks, and displacement.
- Check that the float moves freely and is not stuck in the full position.
- Remove lint from the nozzle throat and hose connection.
- Confirm that washable filters are dry and correctly installed.
- Look for a split hose, loose coupling, or missing nozzle cover.
- Test suction briefly with the correct attachment installed.
A recovery tank that is not fully latched can admit enough air to reduce extraction while the motor still sounds normal. A float that remains raised can also stop liquid recovery even when the tank is not visibly full.
Stop using the machine if the motor smells burnt, trips a breaker, produces smoke, or makes a sharp bearing noise. Motor replacement and electrical diagnosis belong to an authorized service center.
Why Is the Carpet Cleaner Not Spraying?
A carpet cleaner that fails to spray usually has an empty or incorrectly seated clean tank, an unprimed pump, blocked spray jets, a clogged solution filter, or a damaged trigger valve. Confirm the tank valve opens and run the approved priming procedure before attempting descaling.
Check the system as follows:
- Fill the clean tank to its marked level with approved water and solution.
- Remove and reseat the tank until its valve engages.
- Hold the trigger for the manual’s specified priming period.
- Inspect the spray bar and wipe visible mineral deposits.
- Clean the solution filter if the manual identifies it as removable.
- Check the trigger, hose coupling, and tubing for leaks.
Do not automatically insert a sewing needle into every jet. Some spray bars have delicate molded openings, and a needle can enlarge them or break off inside the passage. Use the manufacturer’s cleaning tool or approved descaling process.
If the pump hums but no solution moves after priming and cleaning, the pump may be airlocked, scaled internally, or mechanically worn. Continued dry operation can overheat the pump.
How Do You Remove a Sour Odor?
Remove sour odor by emptying the recovery tank, washing its lid and float chamber, flushing the hose and nozzle, and drying every component separately. Spraying a fragrance into the tank hides odor but does not remove the organic residue causing it.
For a mild odor, repeat the warm-water rinse and use a soft bottle brush on accessible channels. For persistent odor, use a manufacturer-approved extractor sanitizer or enzymatic cleaner that is specifically labeled for the machine, then flush with clean water.
Check hidden locations:
- The underside of the recovery-tank lid
- The float cage and inlet screen
- The transparent nozzle throat
- The hand-tool suction channel
- The lower hose coupling
- The brush chamber and end caps
Expert insight: Odor often returns because users wash only the tank. The recovery path includes several small chambers with a greater surface-area-to-volume ratio than the tank, so a teaspoon of residue can contaminate the next recovery load.
How Should Pet Owners and High-Traffic Homes Adjust Cleaning?
Pet owners should dry-vacuum carpet thoroughly before using an extractor, while high-traffic households should use the least detergent that removes soil and follow with a clean-water rinse pass. Both practices reduce the debris and residue entering the machine.
For pet owners:
- Remove solid material with disposable tools.
- Dry-vacuum the area slowly in two directions.
- Pre-treat according to the carpet and chemical label.
- Extract with approved solution.
- Rinse if the product instructions permit.
- Clean the nozzle and filter halfway through a large job.
Wet pet hair clumps together and can block a narrow portable hose quickly. Long hair also winds around brush axles, where it increases belt and bearing load.
For high-traffic homes, avoid saturating carpet. Excess water lengthens carpet-drying time and increases the volume of contaminated recovery liquid without necessarily improving soil removal.
How Much Does Carpet-Cleaner Maintenance Cost?
Routine cleaning costs approximately $0-10 when using tap water and existing household tools, while replacement filters, belts, hoses, or manufacturer-approved solutions commonly add $10-80 per part. Repair-shop labor often costs more than a basic portable machine.
| Maintenance item | Typical price range | Replacement or service trigger |
|---|---|---|
| Microfiber cloth and soft brush | $3-12 total | Replace when contaminated or worn |
| Approved cleaning solution | $10-30 per bottle | Use at label dilution |
| Washable or replacement filter | $8-35 | Replace when cracked or permanently clogged |
| Brush roll or belt | $15-60 | Replace for cracks, missing bristles, or slipping |
| Hose or nozzle assembly | $20-80 | Replace for splits or irreparable blockage |
| Small-machine professional repair | $60-150 | Consider machine age and retail value |
These are typical consumer-market ranges, not quotes for a particular brand or location. Before ordering parts, record the exact model number because visually similar filters, tanks, and brush rolls often have incompatible latches.
When Should You Stop Cleaning and Repair the Machine?
Replace or professionally repair a carpet cleaner when electrical damage, a cracked pressure line, a failed pump, or a burnt motor remains after basic blockage and seal checks. A simple hair clog is a maintenance problem; a leaking pressurized line near electrical components is a safety problem.
A service decision becomes more reasonable when:
- The machine trips a circuit breaker repeatedly.
- The pump leaks after tank and hose seals are correctly installed.
- The motor emits a burning smell or grinding noise.
- The brush belt repeatedly fails after debris removal.
- The housing has cracked around a tank latch or electrical joint.
- Repair cost approaches half the price of an equivalent replacement.
Do not open the motor housing while the machine is connected to power. Manufacturer service departments can identify model-specific pump, float, and gasket parts more safely than generic repair advice.
Common Questions About Carpet-Cleaner Care
Can I leave water in my carpet cleaner overnight?
No. Empty the clean and recovery tanks after each session, because stagnant water and extracted soil support odor-producing residue. Leave the tanks open to dry, and drain the hose by lowering its nozzle so trapped liquid does not remain in a bend.
Can I use white vinegar to clean a carpet cleaner?
Only if the manufacturer permits vinegar for that model. Diluted vinegar may help with mineral scale in some machines, but acidic solutions can affect pump seals, tubing, coatings, or warranty coverage. Warm-water flushing and an approved descaler are safer default choices.
How often should I clean the carpet-cleaner filter?
Clean a washable filter every four to six uses under light household use, weekly in a pet home, and daily in commercial work. Replace a filter when it is torn, permanently misshapen, or impossible to rinse clean. Install it only after complete drying.
Why does my carpet cleaner smell after I cleaned it?
A persistent smell usually comes from residue in the recovery-tank lid, float chamber, hose, nozzle, or brush housing rather than from the tank walls alone. Wash those hidden areas, flush the suction path, and air-dry each detachable part separately.
Can I rinse the carpet-cleaner hose under a faucet?
Rinse only a detachable hose or hose end that the manual identifies as washable. Keep electrical connectors and the motor housing dry, and drain the hose fully before storage. A hose that cannot be removed should be flushed through the machine’s normal clean-water cycle.
How long should a carpet cleaner dry before storage?
Allow removable tanks, filters, nozzle parts, brush covers, and hose ends to dry for 12-24 hours in a ventilated area. Humid rooms may require more time. Closed storage is appropriate only after no component feels damp and no trapped water drains from the hose.
The Bottom Line
Cleaning a carpet cleaner means flushing its fluid paths, emptying and washing both tanks, clearing the nozzle and filter, removing hair from the brush roll, and drying every removable component. The exact chemical and temperature limits depend on the model manual, but the core routine remains consistent. Perform it after every use, and how to clean your carpet cleaner becomes a 10-20 minute maintenance habit rather than a suction failure or odor problem.


