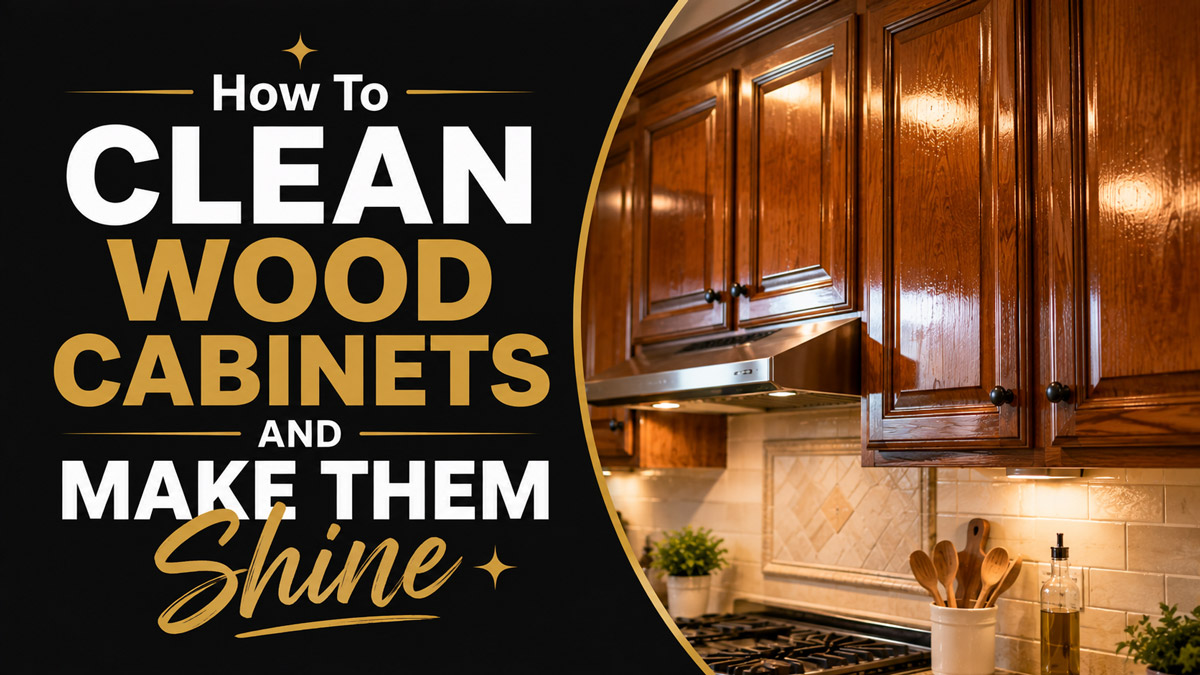
Learning how to clean wood cabinets and make them shine requires removing polymerized cooking grease before applying a protective finish. You must dissolve the sticky surface film with a gentle degreaser, dry the wood completely, and buff a conditioning oil or wax into the grain to restore the factory luster.
Key Facts / At a Glance:
- Routine cabinet maintenance takes 15 to 30 minutes and costs nothing using household dish soap.
- Deep degreasing and shine restoration requires 1.5 to 3 hours for a standard kitchen.
- Never use silicone-based aerosol sprays because they permanently contaminate the wood finish.
- You must dry cabinets immediately after washing to prevent water from expanding the wood joints.
- Abrasive scrubbing pads will permanently scratch the polyurethane topcoat and dull the shine.
What Tools Do You Need Before Starting?
You need mild dish soap, warm water, and high-quality microfiber cloths to clean wood cabinets safely. Gathering a soft-bristled toothbrush for hardware crevices and a commercial wood conditioner for the final polish ensures you have everything required to restore the protective clear coat without causing accidental scratches.
Kitchen grease is composed of triglycerides that atomize during cooking. These microscopic oil particles float through the air, land on vertical cabinet surfaces, and polymerize due to oxygen exposure. Once polymerized, the oils harden into a sticky resin that traps household dust. Attempting to wipe away this resin with a dry paper towel will simply push the abrasive dust deeper into the wood grain. You must break the lipid bonds chemically before applying any friction.
A typical rule of thumb among professional cabinet refinishers is to avoid any cleaner with a pH higher than 8.0 or lower than 5.0. Highly alkaline solutions (like heavy-duty oven cleaners) will slowly soften cured polyurethane. Highly acidic solutions (like pure white vinegar) will etch the clear coat over time. Neutral or near-neutral cleaners provide the safest chemical environment for maintaining wood finishes.
Required Materials And Cost Breakdown
Before beginning the process, gather your supplies. Using the correct tools prevents irreversible damage to your cabinetry. Microfiber cloths are mandatory because their synthetic fibers trap dirt internally rather than dragging it across the surface.
| Cleaning Level | Required Materials | Typical Timeframe | Estimated Cost |
| Routine Maintenance | Dish soap, warm water, two microfiber cloths (300 GSM) | 15 to 30 minutes | Under $5 |
| Heavy Degreasing | Concentrated wood cleaner, soft toothbrush, three cloths | 1 to 2 hours | $10 to $25 |
| Full Restoration | Degreaser, detailing tools, carnauba wax or oil polish | 2 to 3 hours | $20 to $40 |
| Spot Treatment | Non-gel toothpaste, baking soda, soft flannel cloth | 10 to 15 minutes | Under $5 |
Why Wood Cabinet Finishes Matter
Your cleaning approach depends entirely on the protective layer sitting above the raw wood. Raw wood is highly porous and will absorb water immediately. Factory cabinets are sealed with catalyzed varnish, polyurethane, or lacquer. When you clean your cabinets, you are actually cleaning this microscopic topcoat.
If this clear coat is compromised by heavy scrubbing, moisture penetrates the raw wood below. Once moisture reaches the raw wood, the grain swells, the seams split, and the finish delaminates. Your goal is to remove surface contaminants while preserving the integrity of this invisible barrier.
Step 1: Prep The Surface And Remove Dust
Removing loose surface dust before introducing moisture is the most critical preparatory step in cabinet cleaning. You must use a dry microfiber cloth or a vacuum cleaner with a soft brush attachment to lift away loose particles before they combine with cleaning liquids to form an abrasive paste.
Dust in a kitchen environment is rarely just dry dirt. It consists of dead skin cells, pet dander, and microscopic food particles. When you spray a liquid cleaner directly onto a dusty cabinet, you create a slurry. Wiping this slurry across the wood acts like fine-grit sandpaper, inflicting thousands of micro-scratches into the clear coat. Over time, these scratches scatter light, resulting in a dull, lifeless appearance that no amount of polish can fix.
Action: Start at the highest cabinet in the kitchen and work your way down to the baseboards. Gently wipe the surface with a dry, static-charged microfiber cloth.
Specifics: Use a cloth with a rating of at least 300 GSM (grams per square meter) to ensure the fibers are long enough to pull dust away from the wood.
Success Checkpoint: You will know this step worked when the cabinet surface feels smooth and dry to the touch, with no visible loose particles resting in the trim grooves.
Common Mistake: Using a feather duster is a common error. Feather dusters simply launch the particles into the air, allowing them to settle right back onto the sticky grease layer a few minutes later.
Step 2: Wash With A Gentle Degreaser
Washing wood cabinets requires a mild degreasing solution that dissolves polymerized cooking oils without stripping the underlying varnish. You must apply a diluted mixture of dish soap and warm water using a damp cloth, working methodically from top to bottom while giving the soap enough time to break down the grease.
The chemical process required here is saponification. Dish soaps (like Dawn) contain surfactants with hydrophobic tails that attach to the grease and hydrophilic heads that attach to the water. When you wipe the cabinet, the water pulls the soap, and the soap pulls the grease away from the wood. The temperature of the water plays a massive role in this process. Warm water (between 105 and 115 degrees Fahrenheit) accelerates the chemical reaction and softens hardened grease much faster than cold water.
Action: Mix two tablespoons of mild liquid dish soap into one gallon of warm water. Dip a clean microfiber cloth into the bucket and wring it out completely until it is barely damp.
Specifics: Wipe the cabinet doors using gentle, circular motions. Focus heavily on the wood immediately above the stove and the areas directly surrounding the cabinet hardware. Allow the moisture to sit on heavy grease spots for exactly 60 seconds to soften the resin.
Success Checkpoint: You will know the degreaser is working when the cloth glides smoothly across the surface rather than catching or dragging on sticky patches.
Common Mistake: Spraying commercial cleaner directly onto the cabinet face is a severe mistake. The liquid will run down the wood, pool inside the lower trim joints, and seep into the unsealed edges of the central panel. Always spray the cleaner onto the cloth first.
Detailing Hardware And Grooves
Cabinet doors often feature recessed panels (like Shaker style) or intricate molding. Grease and dust accumulate heavily in these sharp corners. A flat cloth cannot reach the deepest parts of the joint.
Dip a soft-bristled toothbrush into your warm soapy water and tap it on the edge of the bucket to remove excess liquid. Gently agitate the corners, grooves, and the tight spaces behind the metal handles. Wipe the loosened grime away immediately with your damp microfiber cloth. Never use a stiff plastic scrub brush, as the rigid bristles will slice through the polyurethane clear coat.
Step 3: Rinse The Wood And Dry Completely
Rinsing the cabinets removes residual soap film that will otherwise attract new dirt and leave a cloudy finish. You must wipe the entire surface a second time with a separate cloth dampened only in pure water, followed immediately by a rigorous buffing with a completely dry towel.
Leaving soap residue on wood cabinets defeats the purpose of cleaning them. Surfactants are designed to attract oils. If left on the wood, the dried soap will act as a magnet for airborne cooking grease, causing the cabinets to become sticky twice as fast. Furthermore, moisture is the natural enemy of wood joinery. Modern cabinet doors feature a floating center panel designed to expand and contract with seasonal humidity. If liquid water seeps into the gap between the panel and the frame, the wood will swell irreversibly.
Action: Empty your soap bucket and refill it with clean, warm water. Dampen a fresh microfiber cloth, wring it out tightly, and wipe away all soapy residue.
Specifics: Work in small sections, completing one entire door at a time. Do not rinse the entire kitchen before drying.
Success Checkpoint: You will know the surface is thoroughly rinsed when the wood looks clear and the cloth moves with zero soapy resistance.
Common Mistake: Allowing the cabinets to air dry is a fatal error. Air drying leaves water sitting on the surface long enough to penetrate micro-fissures in the clear coat. You must manually dry the wood with a soft towel immediately after rinsing.
Step 4: Apply Polish Or Conditioner To Shine
Applying a wood polish or conditioner restores the natural luster of the cabinets by filling microscopic scratches and rehydrating dry finishes. You must rub a small amount of wax or oil-based conditioner into the wood following the direction of the grain, then buff away the excess to leave a hard, reflective surface.
A cabinet loses its shine when the clear coat accumulates thousands of tiny abrasions from daily use. These abrasions scatter incoming light in random directions, creating a dull, matte appearance. Wood polishes contain oils or waxes with a high refractive index. When forced into these micro-scratches, the polish levels the surface, allowing light to reflect evenly and creating a deep, rich gloss.
Action: Apply a dime-sized drop of commercial wood polish or liquid beeswax onto a dry, clean microfiber cloth.
Specifics: Rub the product into the cabinet door using straight lines that run parallel to the wood grain. Allow the product to sit for 10 to 15 minutes so the oils can penetrate any dry areas of the finish.
Success Checkpoint: You will know the application is successful when the wood grain appears visibly darker and richer, reflecting overhead lighting consistently.
Common Mistake: Applying too much polish creates a thick, greasy layer that never fully cures. A typical professional standard dictates that a single ounce of high-quality wax should cover an entire 10-foot run of lower cabinets. If the wood feels slick or greasy after 30 minutes, you applied too much product.
The Final Buffing Process
The actual shine does not come from applying the product; it comes from removing the excess. After the polish has rested for 15 minutes, take a fresh, completely dry flannel or microfiber cloth. Buff the entire cabinet surface firmly, moving with the grain. This friction generates a small amount of heat, helping wax-based products level out perfectly. Continue buffing until your finger glides across the wood without leaving a smudge.
What Are The Best Products For Wood Cabinets?
The best products for wood cabinets depend on whether you are performing routine maintenance, dissolving heavy grease, or restoring a damaged finish. You must select a cleaning agent that matches your specific goal, ranging from zero-cost household mixtures to specialized commercial waxes formulated for polyurethane.
Selecting the wrong chemical can ruin your cabinetry. A common error is assuming that all natural products are safe. While natural, pure lemon juice and white vinegar are highly acidic and will slowly dissolve factory topcoats. Conversely, cheap aerosol furniture sprays often contain silicone. Silicone creates a permanent, impenetrable barrier on the wood. If you ever want to touch up a scratch or repaint the cabinets, new paint will physically repel away from any wood previously treated with silicone.
Everyday Household Methods
Dish soap and warm water remains the absolute safest and most cost-effective method for weekly maintenance. A few drops of standard Dawn dish soap will handle 90 percent of normal kitchen grime without posing any risk to the wood finish.
Diluted white vinegar is effective for cutting tough water spots around the sink area, but it must be heavily diluted (one part vinegar to two parts water). You must use vinegar sparingly and wipe it completely dry within seconds to prevent the acetic acid from etching the varnish.
Commercial Cleaners And Degreasers
Commercial sprays offer convenience and rapid drying times for busy households. Method Wood Polish and Cleaner is a plant-based daily spray that cleans dust and leaves a very light sheen without causing heavy wax buildup. It is ideal for quick touch-ups.
For kitchens with severe grease problems, Parker & Bailey Kitchen Cabinet Cream is engineered specifically to cut through heavy, polymerized cooking oils. Murphy Oil Soap is a traditional, vegetable-oil-based concentrated cleaner that safely lifts dirt from finished wood surfaces. A typical bottle of Murphy Oil Soap costs between $5 and $15 and will last a household for over a year.
Deep Conditioners And Shining Polishes
When your cabinets look chronically dry, faded, or dull, you need a heavy-duty restorer. Howard Feed-N-Wax Wood Polish & Conditioner blends beeswax, carnauba wax, and orange oil. It penetrates deep into parched wood fibers and leaves a highly protective, water-resistant coating.
Bona Five-Star Cabinet Cleaner is a professional-grade, residue-free spray that restores luster specifically to modern polyurethane-finished woods. This product typically costs $12 to $18 and is ideal for newer cabinets that simply need their factory gloss restored without the heavy buildup of traditional paste waxes.
Comparison Of Main Cleaning And Shining Methods
| Method Type | Primary Benefit | Notable Drawback | Best Used For | Typical Cost |
| Dish Soap & Water | Safest for all finishes, no residue accumulation | Will not fill scratches or add high-gloss shine | Weekly maintenance | Under $5 |
| Commercial Sprays | Highly convenient, rapid drying times | Can become costly, minimal scratch repair | Quick surface dusting | $6 to $12 |
| Kitchen Cabinet Cream | Cuts thick, polymerized cooking grease | Requires scrubbing, can leave a temporary film | Heavy grease removal | $8 to $15 |
| Wax Conditioners | Deep rich glow, excellent water resistance | Requires heavy physical buffing | Annual restoration | $10 to $20 |
How Does Cabinet Finish Alter The Cleaning Process?
Cabinet finishes dictate exactly which cleaning chemicals and polishing agents you can safely apply to the surface. You must identify whether your cabinets are sealed with traditional polyurethane, coated in matte paint, or wrapped in a synthetic laminate before choosing a cleaning method.
Applying a heavy carnauba wax to a textured wood grain will create a beautiful shine, but applying that same wax to a modern matte-painted cabinet will cause severe blotching and discoloration. Understanding your specific finish ensures you do not inadvertently destroy the aesthetic of your kitchen.
Polyurethane And Varnish
Most traditional stained wood cabinets are sealed with polyurethane or catalyzed conversion varnish. These hard, clear coats are highly durable and water-resistant. You can safely clean them with diluted dish soap or Murphy Oil Soap. They respond exceptionally well to deep conditioners like Howard Feed-N-Wax, which fills the micro-scratches in the clear coat to restore the factory gloss.
Painted Or Matte Wood Finishes
Painted cabinets require a much gentler approach. The paint layer is softer than polyurethane and highly susceptible to chemical peeling. Stick exclusively to dish soap and water. Never apply abrasive baking soda, and absolutely never apply traditional wood polish or wax to painted cabinets. Wax will leave a greasy, uneven smear across the paint that is incredibly difficult to remove.
Laminate And Veneer Surfaces
Laminate and thermofoil cabinets consist of a printed synthetic layer glued over an MDF core. Because they have no actual wood grain, they cannot absorb conditioning oils. Cleaning them with an oil-based soap will just leave a smeared, cloudy mess on the plastic surface. Clean laminates with a basic multi-purpose spray or diluted dish soap. Be extremely careful around the edges of the doors; if water seeps under the laminate seam, the MDF core will swell and destroy the door entirely.
| Finish Type | Recommended Cleaner | Prohibited Product | Polish Suitability |
| Stained Polyurethane | Diluted dish soap, Murphy Oil Soap | Silicone-based aerosols | High (wax or oil works well) |
| Painted Wood | Highly diluted dish soap | Abrasive pads, baking soda | None (will smear and discolor) |
| Laminate / Thermofoil | Standard multi-purpose spray | Acidic cleaners, pure vinegar | None (cannot absorb into plastic) |
| Raw / Unfinished Wood | Dry dusting only | Liquid water, heavy soaps | Requires specialized sealing first |
What Are The Most Common Mistakes To Avoid?
The most common mistakes when cleaning wood cabinets involve using excess water, scrubbing with abrasive materials, and applying irreversible chemical sprays. You must avoid saturating the wood joints, keep scouring pads far away from the cabinetry, and ban cheap silicone polishes from your home entirely to protect your investment.
Typical professional restoration costs range from $1,500 to $3,000 for a standard kitchen. The vast majority of these costly restorations are necessitated by improper homeowner maintenance rather than natural wear and tear. Abrasive damage and moisture intrusion are the two leading causes of cabinet failure.
Using Excess Water: Saturation causes wood to warp, seams to split, and finishes to delaminate. Water finds its way into the smallest cracks in the varnish. Once inside, it expands the wood fibers. Always use a damp, tightly wrung-out cloth, and never spray liquid directly onto the wood.
Abrasive Scrubbing Pads: Never use steel wool, synthetic scouring pads (like the rough side of a kitchen sponge), or stiff plastic brushes to remove stubborn food. These materials permanently scratch and dull the top varnish. Once the clear coat is scratched away, the bare wood is exposed to moisture and bacteria.
Undiluted Vinegar Or Baking Soda: Baking soda is highly abrasive, acting like microscopic gravel against your cabinet finish. Pure white vinegar is highly acidic. Repeated use of pure vinegar will slowly dissolve polyurethane protective coatings, leaving the wood looking hazy and bleached.
Silicone-Based Sprays: Avoid cheap aerosol furniture polishes containing silicone. Silicone creates a permanent, synthetic layer on the wood. This makes it utterly impossible to touch up a scratch, apply a new coat of varnish, or repaint the cabinets in the future. Paint and lacquer will simply bead up and roll off a silicone-contaminated surface.
How Can You Fix Common Cabinet Damage And Stains?
You can fix common cabinet damage by stripping away product buildup, breaking down stubborn grease chemically, and drawing out trapped moisture with mild abrasives. You must diagnose whether the wood is cloudy from excess soap, sticky from polymerized oil, or marked by white heat rings before applying the correct targeted solution.
Even with meticulous routine cleaning, specific areas of the kitchen take heavy abuse. The cabinets directly above the stove bear the brunt of steam and grease, while the cabinets below the sink face constant water splashing. Knowing how to troubleshoot these specific problems will save you from having to replace individual doors.
Resolving Cloudy Or Streaky Finishes
If the wood looks streaky or cloudy immediately after polishing, the cause is either excess product buildup or trapped moisture. This happens frequently when homeowners apply a new layer of wax without washing away the old layer first.
To fix this, wipe the cloudy area down with a damp cloth mixed with a single drop of concentrated dish soap. This mild surfactant will strip away the excess surface film. Dry the area thoroughly with a towel, and buff it vigorously with a clean, dry microfiber cloth. The heat from buffing will evaporate any remaining surface moisture and level out the clear coat.
Removing Stubborn, Sticky Grease
When a cabinet feels sticky to the touch even after a basic wash, the cooking grease has fully polymerized into a resin. Standard dish soap is no longer strong enough to break the chemical bonds.
Apply a specialized product like Parker & Bailey Kitchen Cabinet Cream or a dedicated citrus-based wood degreaser. Apply the cream directly to the sticky spot and let it sit undisturbed for exactly 60 seconds. This dwell time allows the solvents to penetrate the resin. Gently agitate the area with a soft toothbrush, then wipe the dissolved grease away with a damp cloth.
Eliminating White Water Rings
White rings or heat marks occur when moisture gets trapped beneath the surface of the clear coat but has not yet penetrated the raw wood below. This often happens from wet hands grabbing handles or steam rising from a countertop appliance like a toaster or rice cooker.
Mix a tiny amount of standard, non-gel toothpaste with a pinch of baking soda to create a very mild polishing paste. Rub this paste gently into the white spot using a soft flannel cloth, moving with the wood grain. The ultra-fine abrasives in the toothpaste will carefully shave down the top microscopic layer of the finish, releasing the trapped moisture. Wipe the area clean with a damp cloth and immediately apply a wood conditioner to restore the shine.
Which Routine Fits Your Household Best?
Your ideal cabinet maintenance routine depends on your available time, your kitchen usage, and your preference for commercial versus natural products. You must select a cleaning cadence that prevents grease from polymerizing while respecting your household budget and environmental preferences.
A kitchen that boils pasta once a week requires a vastly different maintenance schedule than a kitchen that fries food daily on a high-BTU gas range. Gas ranges atomize significantly more oil into the air, necessitating more frequent degreasing. Identify your persona below to establish a sustainable routine.
The Busy Parent And Quick Cleaner
For households prioritizing speed, stick to a convenient weekly spray like Method Wood Polish and Cleaner. Keep a bottle under the sink alongside a stack of 300 GSM microfiber cloths. Once a week, lightly spray a cloth and quickly wipe down the high-traffic cabinets near the stove and the trash pull-out. This requires no rinsing, dries streak-free instantly, and prevents grease from hardening into a stubborn film.
The Deep-Cleaning Perfectionist
For those who want a showroom-quality kitchen, execute a deep clean every three months. Clean the entire kitchen thoroughly using diluted Murphy Oil Soap. Follow up by rinsing with pure water and drying completely. Once a year, preferably in the dry winter months, apply a heavy coat of Howard Feed-N-Wax Wood Polish & Conditioner. Buff this deep into the grain to lock in moisture and produce a stunning, deep-grained glow that repels future spills.
The Eco-Conscious Budget DIYer
If you prefer avoiding commercial chemicals, utilize a simple homemade solution. Mix two tablespoons of Dawn dish soap into two cups of warm water for your primary cleaning agent. For the final shine, mix one part white vinegar with three parts food-grade olive oil. Wipe this mixture onto the wood very sparingly, and buff it completely dry with a flannel cloth. The vinegar cuts any remaining grime while the oil conditions the wood, costing just pennies per application.
Frequently Asked Questions
How often should I polish my wood cabinets?
You should apply a deep conditioning polish or wax to wood cabinets once or twice a year. Polishing more frequently leads to a thick, cloudy buildup of wax that traps dust and requires heavy chemical stripping to remove. Stick to weekly dusting and washing for routine care.
Can I use olive oil to shine my cabinets?
You can use a tiny amount of olive oil mixed with vinegar as a short-term DIY polish, but it is not ideal for long-term care. Food-grade oils can eventually turn rancid if applied heavily, leaving a sour smell. Commercial mineral oils or natural beeswax are vastly superior for wood conditioning.
Do I need to remove the cabinet hardware before cleaning?
You do not need to remove cabinet hardware for routine weekly cleaning. However, for an annual deep clean, removing the knobs and pulls allows you to easily wipe away the dense rings of grime that accumulate behind the metal plates without scratching the surrounding wood.
Why do my cabinets look worse after I clean them?
Cabinets often look worse after cleaning if you fail to rinse away the soap residue or if you air-dry them. Dried soap leaves a cloudy film, and water left sitting on the finish will seep into the grain, causing the wood to look dull, hazy, and uneven.
Is it safe to use a steam cleaner on wood cabinets?
You should never use a steam cleaner on wood cabinets. The extreme heat and pressurized moisture will instantly force water through the clear coat, melt the polyurethane, and cause the wood veneer to peel away from its structural core.
Final Thoughts On How To Clean Wood Cabinets And Make Them Shine
Mastering how to clean wood cabinets and make them shine comes down to consistency, proper chemical selection, and immediate drying. By cutting through polymerized kitchen grease with a mild soap and protecting the vulnerable clear coat with a quality conditioner, you ensure your cabinetry remains beautiful and structurally sound for decades. Avoid harsh abrasives, keep water exposure to a minimum, and let the microfiber cloth do the heavy lifting.


