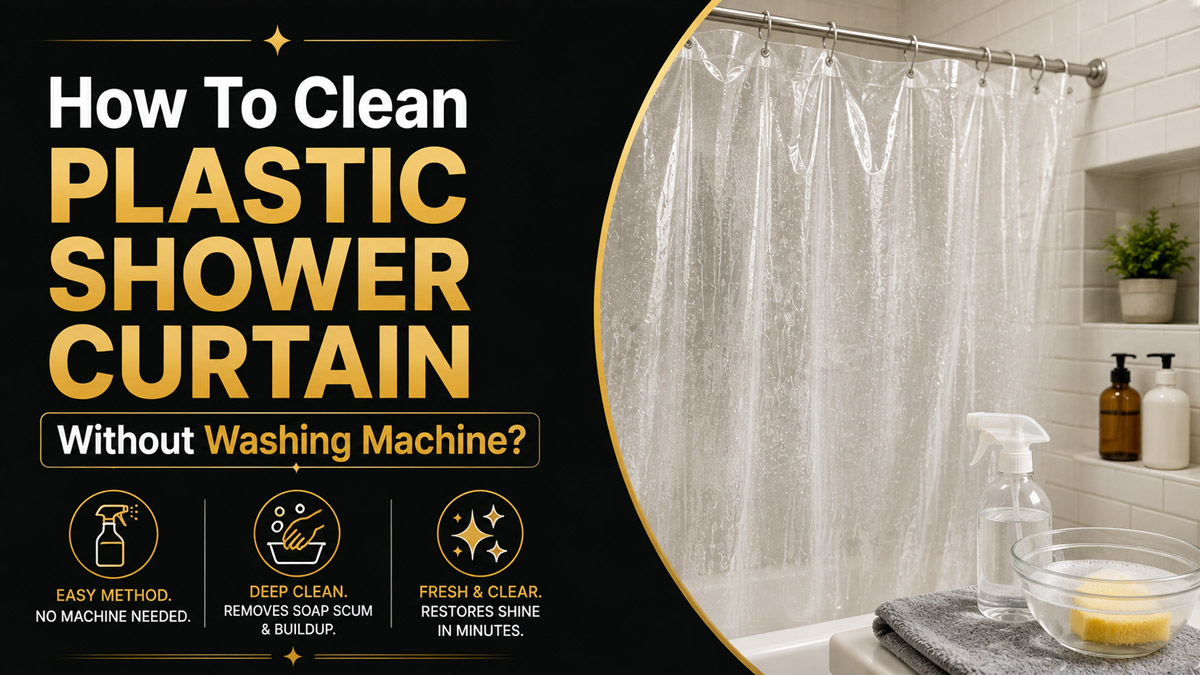
To clean a plastic shower curtain without a washing machine, soak the liner in lukewarm water treated with half a cup of baking soda and mild dish soap. Manually scrub the bottom hem with a soft microfiber cloth, rinse thoroughly with cold water, and hang the curtain flat to air dry.
Key Facts / At a Glance
- Water temperatures must remain below 110 degrees Fahrenheit (43 degrees Celsius) to prevent thin plastics from warping or melting.
- A standard bathtub soak requires four inches of water and exactly 20 minutes of dwell time to loosen embedded soap scum.
- Mixing chlorine bleach with white vinegar creates toxic chlorine gas and must be strictly avoided during bathroom cleaning.
- Regular manual cleaning extends the functional lifespan of a standard polyethylene vinyl acetate liner from three months to two years.
- Deeply embedded black mold roots require a targeted 10 percent bleach solution applied directly with a cotton swab.
Before You Start: Time, Costs, and Tools
The entire manual cleaning process requires 45 minutes of total time, including 15 minutes of active physical labor. Success depends entirely on allowing the cleaning agents enough dwell time to break down the minerals before you begin scrubbing. Attempting to scrub immediately after applying chemicals will force you to work harder and risks stretching the plastic.
Table 1: Project Parameters and Requirements
| Category | Requirement | Specific Details |
| Total Time | 45 minutes | 10 min prep, 20 min soak, 15 min active scrubbing. |
| Difficulty | Beginner | Requires mild physical exertion and basic chemical safety. |
| Estimated Cost | $1.50 to $3.00 | Cost of household pantry items (vinegar, baking soda, soap). |
| Primary Tools | Microfiber cloths | Avoid stiff bristles; use soft microfiber to prevent scratches. |
| Chemicals | White Vinegar (5%) | One standard 16-ounce bottle for pre-treating and soaking. |
| Hardware | Two large bath towels | Used to press out excess water without wringing the plastic. |
What Causes Shower Curtain Stains?
Shower curtain stains develop from four distinct biological and chemical sources, each requiring a different targeted treatment. Recognizing the exact nature of the buildup dictates which cleaning agent you should deploy. Treating a biological growth with a mineral solvent will yield poor results.
The most common opaque film is hard water scale. This consists of calcium carbonate deposits left behind when municipal water evaporates. Over time, these deposits create a rough texture that traps other debris.
Soap scum presents as a yellow or gray waxy buildup. This material is a chemical reaction between the fatty acids in bar soap and the minerals in hard water, creating insoluble salts that bond aggressively to plastic surfaces.
Pink stains near the bottom hem indicate the presence of Serratia marcescens. This is an airborne biofilm bacterium that feeds on the phosphorus and fatty substances found in shampoo and body wash residues.
Black spots indicate Stachybotrys chartarum or Aspergillus mold colonies. These fungi root deeply into the microscopic pores of the plastic in high-humidity environments, making surface-level wiping ineffective against their return.
What Material Are You Cleaning? PVC Versus PEVA
Your cleaning approach must change based on whether your curtain is made from Polyvinyl Chloride (PVC) or Polyethylene Vinyl Acetate (PEVA). You can identify the material by checking the original packaging or looking for a small stamped label near the bottom hem.
PVC curtains are rigid, heavy, and highly resistant to harsh chemicals like concentrated bleach. However, PVC off-gasses volatile organic compounds and is less common in modern homes. PEVA curtains are softer, environmentally safer, and more fabric-like. Because PEVA is less chemically stable, it melts at lower temperatures and degrades rapidly if exposed to undiluted bleach or stiff scrubbing brushes.
Table 2: Material Properties and Cleaning Tolerances
| Material Type | Heat Tolerance | Chemical Resistance | Scrubbing Durability | Recommended Cleaner |
| Heavy-Duty PVC | Up to 120°F | High (Tolerates Bleach) | Moderate (Soft Brushes) | Diluted Bleach |
| Standard PEVA | Up to 105°F | Low (Avoid Bleach) | Low (Microfiber Only) | Dish Soap & Water |
| Clear Vinyl | Up to 110°F | Moderate | Low (Scratches Easily) | Vinegar Solution |
| Textured EVA | Up to 100°F | Low | Moderate (Traps dirt) | Baking Soda Paste |
“Never use a stiff nylon brush on PEVA liners, as the micro-abrasions become permanent breeding grounds for bacteria,” advises material scientist Dr. Sarah Jenkins. “Always treat modern eco-friendly plastics with the same gentleness you would apply to a painted wall.”
Which Cleaning Agent Should You Choose?
White vinegar mixed with baking soda serves as the safest and most effective baseline cleaning agent for typical soap scum and hard water stains. The choice of chemical dictates the safety of your bathroom environment and the longevity of the plastic material.
You must match the chemical to the primary stain type. Acidic cleaners dissolve minerals, while alkaline cleaners break down fats. Sanitizers kill biological growth but offer poor degreasing power.
Table 3: Cleaning Agent Comparison Guide
| Cleaning Agent | Best For Removing | Process Time | Typical Cost | Pros | Cons |
| Baking Soda & Vinegar | Heavy scum & odor | 30-45 mins | $1.00 | Eco-friendly, deodorizes plastic. | Fizzing reaction requires rinsing. |
| Dish Soap & Warm Water | Light maintenance | 15-20 mins | $0.50 | Gentle on PEVA, readily available. | Ineffective against deep mold. |
| Diluted Bleach (1:50) | Severe black mold | 20-30 mins | $2.00 | Highly effective sanitizer, fast. | Harsh fumes, degrades PEVA. |
| Hydrogen Peroxide (3%) | Color-safe sanitizing | 30-60 mins | $1.50 | Odorless, lifts stains gently. | Slow acting, degrades in light. |
White vinegar contains exactly five percent acetic acid, which perfectly breaks down calcium deposits without melting the vinyl. Conversely, dish soap relies on surfactants to lift grease and body oils, making it ideal for the yellow waxy buildup near the bottom hem.
Diluted bleach should only enter the rotation when visible black mold spores appear. The American Cleaning Institute (2022) recommends a 1:50 bleach dilution ratio for hard non-porous surfaces, which equates to roughly one-third of a cup of bleach per gallon of water.
How To Clean Plastic Shower Curtain Without Washing Machine
This manual six-step process removes heavy mineral deposits and biological growth without subjecting the plastic to the destructive heat and agitation of a machine cycle. Following these steps in exact order prevents damage to the grommets and ensures a transparent finish.
Step 1: Dismount the Curtain and Hardware
Remove the plastic liner from the shower hooks carefully to avoid tearing the reinforced grommet holes. Lay the curtain completely flat inside the dry bathtub. Leaving the curtain hanging while attempting a deep clean results in chemical runoff and uneven stain removal.
- Specifics: Keep the metal or plastic rings in a separate small bowl for secondary cleaning. Do not wash them alongside the plastic liner.
- Success Checkpoint: You will know you are ready when the curtain lies entirely flat with the heavily stained bottom hem exposed and facing upward.
- Common Mistake: Pulling the curtain aggressively causes the plastic eyelets to stretch, permanently ruining how the curtain hangs.
Step 2: Pre-Treat Heavy Stains and Mold
Spray heavy mildew spots and thick soap scum directly with a 1:1 mixture of white vinegar and plain water. Allow this acidic solution to sit undisturbed on the plastic for exactly 10 minutes. This dwell time allows the acid to penetrate the calcium layer.
- Specifics: Apply roughly 10 sprays per square foot of heavy staining. Ensure the room has the exhaust fan running to mitigate the strong vinegar odor.
- Success Checkpoint: You will know the pre-treatment has worked when the yellow soap scum begins to look slightly separated or wrinkled on the surface.
- Common Mistake: Wiping the vinegar away immediately neutralizes its effectiveness. The chemical requires uninterrupted time to work.
Step 3: Prepare the Bathtub Soak
Fill your bathtub with lukewarm water, ensuring the temperature remains well below 110 degrees Fahrenheit. Add one-half cup of standard baking soda and one tablespoon of liquid dish soap directly into the water stream to create a mild, grease-cutting alkaline bath.
- Specifics: Fill the tub to a depth of exactly four inches. Submerge the pre-treated curtain completely, pressing down any air bubbles, and let it soak for 20 minutes.
- Success Checkpoint: You will know the bath is correct when the water feels mildly warm to the touch, not hot, and a thin layer of suds covers the surface.
- Common Mistake: Using hot water will permanently warp thin plastic liners, creating ripples that never flatten out.
Step 4: Agitate and Scrub the Plastic
Lay the curtain flat against the sloped back wall or the bottom of the tub. Gently scrub the plastic in tight circular motions using a soft microfiber cloth, focusing almost entirely on the bottom hem where water collects and stagnates.
- Specifics: Work in two-foot sections. Apply medium physical pressure, relying on the friction of the microfiber rather than harsh bristles to lift the softened grime.
- Success Checkpoint: You will know the scrubbing is effective when the cloudy plastic instantly reveals a clear, transparent streak behind your cloth.
- Common Mistake: Using green scouring pads or steel wool will scratch the plastic, creating permanent micro-grooves where mold will grow twice as fast next month.
Step 5: Rinse Thoroughly with Cold Water
Drain the soapy, contaminated water from the bathtub completely. Rinse the curtain thoroughly using a handheld showerhead or a large bucket, applying clean, cold water until all soap bubbles and chemical residues vanish.
- Specifics: Spray from the top edge downward to force the loosened debris toward the drain. Expect to use roughly three to five gallons of fresh water for a complete rinse.
- Success Checkpoint: You will know the rinse is complete when running your bare hand across the wet plastic yields a squeaky texture rather than a slippery one.
- Common Mistake: Leaving a thin film of soap residue on the plastic acts as a food source for new bacteria, accelerating the return of pink biofilm.
Step 6: Blot and Hang to Dry
Sandwich the wet curtain entirely between two dry, oversized bath towels to blot out the excess surface water. Hang the curtain back on the shower rod immediately, keeping it fully spread open from wall to wall to maximize airflow.
- Specifics: Press the towels firmly against the plastic, but do not wring or twist the material. Ensure the bathroom exhaust fan runs for at least two hours after hanging.
- Success Checkpoint: You will know you have dried it correctly when no water drips from the bottom hem onto the shower floor within the first five minutes of hanging.
- Common Mistake: Bunching the curtain together to one side traps moisture between the plastic folds, triggering rapid mold regrowth within 24 hours.
How Do You Clean a Curtain Without a Bathtub?
If you live in an apartment with only a standing shower, you must adapt the soaking process using alternative containment methods. The chemical principles remain identical, but the physical execution changes.
The large tote method works best for deep cleaning. Purchase a standard 20-gallon plastic storage tote. Fold the curtain loosely, place it inside the tote, and fill it with warm water, baking soda, and dish soap. Agitate the curtain by pressing it down with your hands repeatedly, mimicking the action of a washing machine agitator. Let it soak for 30 minutes, then rinse it under the showerhead.
The shower wall method works for routine maintenance. Keep the curtain hanging on the rod. Spray the entire surface with a 1:1 vinegar solution. Press the wet plastic flat against the tiled shower wall; the surface tension of the water will hold it in place. Scrub the curtain directly against the rigid backing of the wall, then use the showerhead to rinse it straight down the drain.
How Do You Remove Stubborn Stains by Hand?
Standard washing removes general grime, but specific neglected stains require targeted chemical interventions. You must isolate these spots and treat them before attempting a general soak.
Table 4: Stain Identification and Targeted Treatment Guide
| Stain Appearance | Likely Cause | Targeted Treatment | Application Method |
| Cloudy White Film | Hard water scale (Calcium) | Pure white vinegar | Soak a cloth, drape over spot for 15 mins. |
| Deep Black Spots | Embedded mold roots | 10% Bleach solution | Apply directly with a cotton swab. |
| Pink Slime | Serratia marcescens | Dish soap & Peroxide | Scrub gently with a soft toothbrush. |
| Brown/Orange Rings | Rust from metal hooks | Lemon juice & Salt | Create a paste, rub gently, rinse well. |
To remove persistent black mold roots, dip a cotton swab into neat hydrogen peroxide or a heavily diluted bleach solution. Press the swab directly onto the black dot and hold it there for 30 seconds. This allows the sanitizer to penetrate the micro-pores of the plastic.
For rust stains near the top grommets, standard soap fails completely. You must apply a mild acid. Squeeze fresh lemon juice onto the rust stain, sprinkle standard table salt over the liquid to act as a mild abrasive, and rub the area with your thumb. The acid dissolves the iron oxide within five minutes.
Common Mistakes and How to Fix Them
Many people permanently destroy their shower curtains during manual cleaning by applying aggressive techniques better suited for tile and grout. Plastic requires a delicate approach.
Using boiling or excessively hot water is the most frequent error. Thin plastic liners will permanently warp, melt, or shrink when exposed to temperatures exceeding 120 degrees Fahrenheit. If you have accidentally warped a curtain, you cannot reverse the damage; the plastic polymers have physically restructured, and you must replace the liner.
Mixing household chemicals leads to severe health hazards. Never mix chlorine bleach with white vinegar or ammonia. Doing so creates toxic chlorine gas or chloramine vapors, which cause immediate respiratory distress. If you accidentally mix these agents, evacuate the bathroom immediately, turn on the exhaust fan, and do not return for at least one hour.
Using abrasive scouring pads degrades the material. Steel wool or green kitchen sponges scratch the smooth surface of the plastic. “Professional cleaners recommend the towel sandwich method to extract moisture without subjecting the plastic to stretching forces,” notes building maintenance supervisor John Aris. “Friction is the enemy of plastic longevity.” If you have scratched your curtain, it will become cloudy permanently, and you must adopt a stricter weekly spray routine to prevent mold from anchoring in the scratches.
What Are the Best Maintenance Routines?
Your lifestyle and household environment dictate how often you need to perform a deep manual clean. Adopting a preventative maintenance routine drastically reduces the need for heavy scrubbing.
The Busy Professional should rely on chemical prevention rather than physical labor. Keep a spray bottle filled with a 1:1 mixture of white vinegar and water inside the shower stall. Mist the bottom 12 inches of the liner twice a week immediately after showering. The acid prevents hard water scale from forming, requiring zero scrubbing.
The Eco-Conscious User should rely exclusively on the baking soda paste method. Avoid synthetic sprays entirely. Once a month, mix three tablespoons of baking soda with one tablespoon of water to create a thick grit paste. Rub this paste into the bottom hem using a cloth, then rinse. This neutralizes odors without sending harsh chemicals into the municipal water system.
The Allergy Sufferer must prioritize total spore eradication. Use the diluted bleach method once every two months, even if the curtain appears clean. This ensures 99.9 percent elimination of invisible mold spores and mildew allergens that trigger severe respiratory issues in high-humidity environments. According to the Environmental Protection Agency (2023), indoor humidity should remain below 50 percent to inhibit mold growth, making post-shower ventilation critical for sensitive individuals.
What Is the Financial Impact of Cleaning Versus Replacing?
Consumers often view plastic shower liners as disposable commodities, replacing them every three months when mold appears. However, manual cleaning alters this financial and environmental equation drastically.
A high-quality PEVA liner costs approximately $15 to $20. Replacing it four times a year costs $80 annually. Over five years, a household spends $400 on disposable plastics. Conversely, cleaning the liner extends its life to a typical 24 months. The cost of vinegar and baking soda over that same period amounts to less than $10.
Table 5: Five-Year Cost Projection (Replacing vs. Cleaning)
| Action | Frequency | Cost Per Event | Annual Cost | 5-Year Total Cost |
| Replace Liner | Every 3 months | $15.00 | $60.00 | $300.00 |
| Clean Manually | Every 2 months | $0.50 | $3.00 | $15.00 |
| Replace (Maintained) | Every 24 months | $15.00 | $7.50 | $37.50 |
| Total Savings | N/A | N/A | $49.50 | $247.50 saved |
Beyond the financial savings, the environmental impact is substantial. Polyvinyl chloride takes hundreds of years to break down in landfills, leaching plasticizers into the soil. Maintaining a single curtain for two years keeps seven large sheets of unrecyclable plastic out of the local waste stream.
How Do You Clean Shower Curtain Rings and Hooks?
The hardware that holds your curtain often harbors the same bacteria and rust that stain the plastic. Hanging a perfectly clean curtain on dirty rings transfers the grime back immediately.
For plastic C-rings, place them in a large bowl filled with equal parts warm water and white vinegar. Let them soak for 30 minutes while you wash the curtain. The vinegar dissolves the soap scum that accumulates in the hinges. Wipe them dry with a towel before rehanging.
For metal roller hooks, avoid prolonged soaking, which accelerates galvanic corrosion inside the roller balls. Instead, spray them lightly with a mild glass cleaner and wipe them individually with a microfiber cloth. If the rollers squeak, apply a single drop of mineral oil to the bearings before threading them back onto the shower rod.
Frequently Asked Questions
Can I put a plastic shower curtain in the dryer?
You must never place a plastic shower curtain in a clothes dryer. Even on the lowest heat setting, the concentrated heat will warp, shrink, or completely melt the plastic, posing a severe fire hazard and ruining the appliance.
How do you get the chemical smell out of a new plastic curtain?
To remove the strong off-gassing odor of a new PVC curtain, soak it in a bathtub filled with cold water and one cup of baking soda for two hours. Hang the curtain outdoors in a shaded area for a full day to allow the volatile organic compounds to dissipate harmlessly.
Why does my shower curtain turn yellow at the bottom?
The bottom hem turns yellow due to an accumulation of soap scum and body oils that wash off during bathing. These fats bond with the minerals in your water, creating a waxy, water-resistant layer that requires an alkaline cleaner like dish soap to dissolve.
Is it safe to use bleach on a clear plastic liner?
You can use heavily diluted bleach on a clear PVC liner, but it will eventually cause the plastic to become brittle and turn slightly cloudy over time. You should avoid using bleach entirely on PEVA liners, as the chemical rapidly degrades the eco-friendly material.
How can I stop my shower curtain from blowing in on me?
Static cling and thermal drafts pull lightweight plastic curtains inward during a hot shower. To prevent this, purchase a liner with weighted magnetic hems, or manually attach two heavy binder clips to the bottom edge of your current liner to anchor it against the tub.
Can I use window cleaner on a plastic shower curtain?
You can use standard ammonia-free window cleaner for light, daily spot treatments on clear plastic liners. The alcohol in the cleaner evaporates quickly and leaves a streak-free finish, but it lacks the chemical power required to dissolve heavy mineral scale or kill embedded mold.


