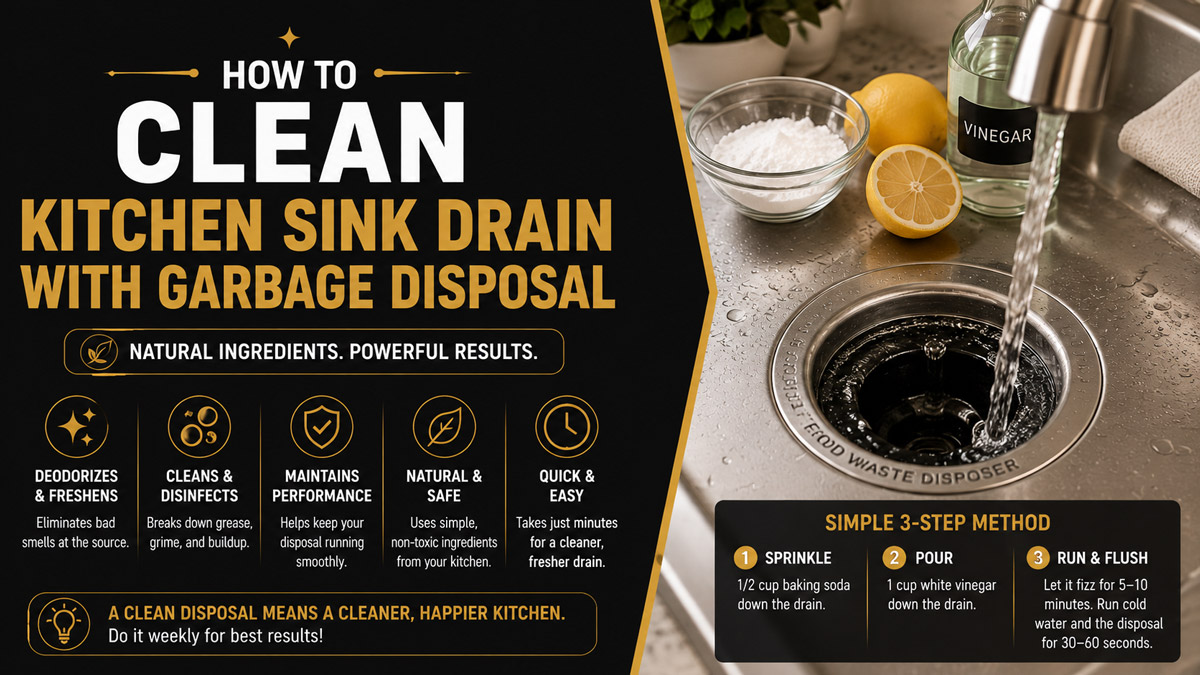
To clean a kitchen sink drain with a garbage disposal, disconnect the unit’s power, scrub both sides of the rubber splash guard, remove visible debris with tongs, grind ice with salt, deodorize with baking soda, and flush the drain correctly. The process usually takes 20-30 minutes and works best when odor-causing residue is removed physically before any deodorizer is added.
Key Facts at a Glance
- Disconnect the disposal from electrical power before touching the splash guard or grinding chamber.
- Most disposal odors come from residue beneath the rubber splash guard, not from the visible sink basin.
- Ice cleans the grinding chamber through physical impact, but it does not sharpen blades because most disposals use blunt impellers.
- Cold water should run whenever the disposal is grinding food, ice, or cleaning material.
- Baking soda and vinegar can loosen light organic film but will not clear a solid clog.
- Standing water, recurring backups, leaks, or sewage odors require diagnosis rather than repeated deodorizing.
Before You Start
Cleaning a garbage disposal is a low-cost maintenance task, but the combination of electricity, moving components, sharp debris, and water requires strict safety precautions. Never place a hand inside the grinding chamber, even when the wall switch appears to be off.
| Requirement | Typical amount or condition | Purpose |
| Total time | 20-30 minutes | Routine cleaning and deodorizing |
| Difficulty | Beginner | No plumbing disassembly required |
| Dish soap | 1-2 teaspoons | Cuts film on the splash guard |
| Baking soda | 1/2 cup | Absorbs odor and loosens light residue |
| White vinegar | 1 cup | Reacts with baking soda and wets buildup |
| Ice cubes | 2 cups | Physically agitates chamber residue |
| Coarse or table salt | 1/2 cup | Adds abrasion during ice grinding |
| Cold running water | 1-2 minutes | Moves loosened debris through the drain |
| Long-handled brush | 1 | Scrubs inaccessible surfaces |
| Tongs or pliers | 1 pair | Removes safe-to-grab foreign objects |
What Should You Never Put Inside the Disposal?
Never insert fingers, metal utensils, a hand-held sponge, or a loose cloth into the grinding chamber. A disposal may restart unexpectedly after an overload resets, electrical power returns, or a second person touches the switch.
Use long-handled tongs for loose objects and a narrow dish brush for accessible surfaces. Do not use a tool that can become trapped in the impeller plate.
Step 1: Disconnect the Garbage Disposal Power
Disconnect the disposal before lifting the splash guard or removing debris. Unplug the unit beneath the sink when a plug is accessible; otherwise, switch off the correct circuit breaker and confirm that the disposal does not respond to the wall switch.
Turn off the wall switch first. Place a piece of tape over the switch so another person does not activate it. Press the switch briefly only after unplugging the unit or turning off the breaker to confirm that no power reaches the motor.
Use a flashlight to inspect the chamber. Do not rely on darkness, silence, or a switched-off wall control as proof that the appliance is electrically isolated.
Success checkpoint: The unit remains completely silent when the wall switch is moved.
Common mistake: Turning off only the countertop switch while leaving the disposal electrically connected.
Step 2: Scrub the Splash Guard and Sink Flange
The underside of the rubber splash guard is often the main source of garbage disposal odor. Food droplets, grease, starch, and bacterial slime collect where normal sink rinsing cannot reach.
If the splash guard is removable, lift it out after the power is disconnected. Wash both sides with hot water, dish soap, and a stiff nylon brush. Pay close attention to the folds, flaps, center opening, and lower rim.
If the guard is fixed, lift each rubber flap carefully and scrub its underside with a narrow brush or old toothbrush. Wipe loosened residue from the sink flange, the metal ring surrounding the drain opening.
Use about one teaspoon of dish soap. Excess soap can create foam inside the chamber without improving cleaning.
Success checkpoint: The underside feels clean rather than slippery, and no dark residue transfers to a white cloth.
Common mistake: Cleaning only the visible top of the rubber guard.
Step 3: Remove Visible Debris Safely
Remove foreign objects and large food pieces before running a cleaning cycle. Bones, glass, bottle caps, fruit pits, metal tabs, utensils, and fibrous scraps may block the rotating plate or damage internal components.
Shine a flashlight into the chamber. Use long-handled tongs or needle-nose pliers to retrieve anything clearly visible and loose. Rotate the impeller plate only with the manufacturer-approved wrench or jam-clearing tool when needed.
Do not force an object that is wedged tightly. Sharp glass or metal can shift suddenly, damage the chamber, or injure the person holding the tool.
Success checkpoint: No loose foreign object remains visible, and the rotating assembly can move without obvious obstruction.
Common mistake: Running the disposal to “grind through” an unknown object.
Step 4: Grind Ice and Salt
Ice and salt can loosen soft residue from the grinding chamber through physical agitation. Use about two cups of ice cubes and one-half cup of coarse salt for a standard residential disposal.
Reconnect the power only after all brushes and tools have been removed. Add the ice and salt, start a moderate stream of cold water, and switch on the disposal. Run it for 20-30 seconds or until the grinding sound becomes smooth.
The disposal may sound louder than usual while processing ice. That is expected. Switch it off immediately if you hear metal striking, severe rattling, or a stalled humming sound.
Ice does not sharpen garbage disposal blades. Most modern units use blunt impellers that push material against a stationary grinding ring. The ice helps knock residue from these surfaces.
Success checkpoint: The initial rough grinding sound becomes even, and the draining water carries fewer particles.
Common mistake: Filling the chamber completely with tightly packed ice before starting the motor.
Step 5: Use Baking Soda and Vinegar for Odor
Baking soda and vinegar can loosen light organic film and reduce odors, but their fizzing reaction is not strong enough to dissolve a serious grease plug or compacted food clog. Physical cleaning should come first.
Turn the disposal off. Pour one-half cup of baking soda around the drain opening, allowing some powder to reach the splash guard and chamber walls. Slowly add one cup of white vinegar.
Let the mixture react for 10 minutes. During that period, scrub the upper side of the splash guard again if residue remains accessible.
Baking soda and vinegar partially neutralize each other. Their main value here is agitation, wetting, odor reduction, and light-film removal, not industrial-strength drain clearing.
Success checkpoint: The sour or decomposing-food odor is noticeably reduced after rinsing.
Common mistake: Assuming heavy foam proves that a deep clog has dissolved.
Step 6: Flush the Drain Correctly
Flush loosened residue with water after the cleaning reaction. Use hot tap water while the disposal is off to rinse soap, grease film, and baking soda from the upper chamber, then use cold water whenever the motor is running.
Run hot tap water for 30-60 seconds with the disposal off. Avoid pouring a kettle of boiling water into PVC plumbing, older seals, or an unknown drainage system.
Next, switch to cold water. Turn on the disposal for 15-20 seconds, switch it off, and continue running cold water for another 15 seconds. The final cold-water flow carries particles beyond the disposal outlet and toward the P-trap.
Cold water is preferred during grinding because it helps keep fats more solid. Hot water can liquefy grease temporarily, allowing it to move farther into the pipe before cooling and sticking to the walls.
Success checkpoint: Water drains quickly without bubbling, rising, or returning through the second sink basin.
Common mistake: Stopping the water at the exact moment the disposal is switched off.
Step 7: Deodorize With a Small Amount of Citrus
Citrus peel can provide a temporary fresh scent, but it should be used sparingly. Large strips, thick rinds, seeds, and fibrous peel can contribute to jams or drain buildup.
Cut one or two thin pieces of lemon, lime, or orange peel into sections no larger than a coin. Start cold water, switch on the disposal, and feed the pieces one at a time.
Run the disposal for 10-15 seconds. Continue the cold water briefly after switching it off.
Citrus does not replace cleaning. A lemon scent can mask decaying residue for several hours while slime remains beneath the splash guard or inside the drain.
Success checkpoint: The drain smells neutral or lightly fresh, not strongly sour, rotten, or sewage-like.
Common mistake: Feeding half a lemon, whole wedges, or several thick peels into a small disposal.
Which Cleaning Method Works Best?
The best method depends on whether the problem is surface film, odor, grinding-chamber residue, grease, or a real drain blockage. No single household mixture solves every condition.
| Method | Typical time | Typical cost | Best use | Main limitation |
| Dish soap and brush | 5-10 minutes | Under $1 | Splash guard slime | Cannot reach pipe clogs |
| Ice and salt | 3-5 minutes | $1-$3 | Chamber residue | Does not disinfect or unclog pipes |
| Baking soda and vinegar | 10-15 minutes | $1-$3 | Light odor and film | Weak against grease plugs |
| Commercial foaming cleaner | 5-15 minutes | $5-$15 | Convenient upper-chamber cleaning | Recurring cost and product restrictions |
| Enzyme drain treatment | Several hours | $8-$20 | Slow organic buildup | Works slowly and not on solid objects |
| Plumber or drain technician | 30-120 minutes | $100-$350 typical | Recurring clogs or backups | Highest cost |
Are Commercial Disposal Cleaners Necessary?
Commercial cleaners are optional for routine maintenance. A properly brushed splash guard, ice cycle, and thorough water flush usually address normal household residue.
Foaming packets may help users who cannot easily scrub beneath a fixed splash guard. Choose a product specifically labeled for garbage disposals and compatible with the home’s pipe and septic system.
Do not combine a commercial cleaner with bleach, drain opener, ammonia, vinegar, or another cleaning product. Mixed chemicals can release dangerous gases or create heat inside the drain.
How Do You Remove Grease Buildup?
Light grease film can be removed with dish soap, brushing, and a controlled hot-tap-water rinse while the disposal is off. A thick grease blockage usually requires mechanical drain cleaning because household fizzing mixtures cannot reliably dissolve a hardened plug.
Add one teaspoon of grease-cutting dish soap around the splash guard. Scrub accessible surfaces, then rinse with hot tap water for 30-60 seconds. Finish with cold water.
Do not pour cooking oil or rendered fat into the sink. Even when hot water carries grease past the disposal, the fat can cool inside the P-trap or branch drain and trap food particles.
A practitioner rule is simple: if water drains slowly after the disposal chamber is visibly clean, the restriction is probably farther inside the drainage line.
Common Mistakes and How to Fix Them
Using Bleach as a Routine Cleaner
Concentrated bleach can damage some rubber components, react with other drain products, and create hazardous fumes. It may reduce microorganisms temporarily without removing the food film that causes recurring odor.
Fix: Rinse the drain thoroughly with water and avoid adding any other chemical. Clean the splash guard physically with dish soap.
Pouring Chemical Drain Opener Into the Disposal
Caustic or acidic drain openers may damage seals, corrode metal, soften some plastic components, or remain trapped above a blockage. A technician opening the drain may then encounter hazardous liquid.
Fix: Stop adding products. Follow the disposal manufacturer’s instructions and call a plumber for a persistent blockage.
Running Hot Water While Grinding Grease
Hot water keeps fat liquid only temporarily. The grease can travel into a cooler pipe section, solidify, and form a larger clog.
Fix: Grind only approved food residue with cold running water. Dispose of oil and grease in a sealed container.
Putting Too Much Citrus Peel Inside
Thick citrus rind is fibrous and can wrap around moving parts or collect in the drain.
Fix: Disconnect power and remove visible peel with tongs. Use only one or two thin pieces for deodorizing.
Cleaning Without Scrubbing the Splash Guard
Powders, liquids, ice, and foam may pass beneath the guard without removing firmly attached slime.
Fix: Disconnect the power and scrub each flap manually.
Treating a Clog as a Cleaning Problem
Standing water, repeated backups, and gurgling usually indicate restricted drainage rather than a dirty disposal.
Fix: Stop operating the unit. Diagnose the trap and branch drain or arrange professional service.
What If the Sink Has Standing Water?
Standing water means the drain is blocked or restricted. Do not keep running the disposal because the motor may overheat, wastewater may splash from the sink, and the blockage may become more compacted.
Turn off the disposal and disconnect power. Remove loose debris from the drain opening. For a double sink, place a stopper over the unaffected basin before using a sink plunger on the disposal side.
Use 10-15 controlled plunges. Restore power and test only after the water level drops completely.
Do not use chemical drain opener before plunging or disassembling the P-trap. The chemical can splash onto skin or eyes.
Call a plumber when water backs up repeatedly, both basins fill, the dishwasher causes sink water to rise, or plunging produces no improvement.
Why Does the Disposal Still Smell After Cleaning?
Persistent odor usually means residue remains beneath the splash guard, inside the P-trap, in the dishwasher drain connection, or farther down the branch pipe. Sewage odor may indicate a plumbing vent, trap, leak, or drainage problem rather than dirty disposal components.
| Odor pattern | Likely cause | Recommended action |
| Rotten food smell at drain opening | Splash guard slime | Remove power and scrub underside |
| Odor after dishwasher runs | Dishwasher hose residue or poor routing | Inspect and clean hose connection |
| Sour smell with slow drainage | Organic pipe buildup | Use enzyme treatment or mechanical cleaning |
| Sewage smell | Dry trap, leak, vent issue, or backup | Stop deodorizing and inspect plumbing |
| Burning smell | Overheated motor or electrical fault | Disconnect power and request repair |
| Odor returns within 24 hours | Hidden buildup or partial clog | Clean P-trap or call a plumber |
A clean disposal should smell neutral. Strong fragrance is not proof that the source has been removed.
How Do You Unjam a Humming Garbage Disposal?
A humming disposal has electrical power but cannot rotate. Switch it off immediately because prolonged humming can overheat the motor.
Disconnect the power. Insert the correct disposal wrench or a 1/4-inch hex key into the bottom-center socket when the model includes one. Move the wrench back and forth until the rotating plate turns freely.
Remove the wrench before reconnecting power. Press the red reset button on the bottom of the unit, restore power, run cold water, and test briefly.
Stop and call a technician if the unit leaks, repeatedly trips the breaker, smells burned, has damaged wiring, or remains seized after manual movement.
What If the Disposal Will Not Turn On?
A silent disposal may have lost power, tripped its overload protector, jammed internally, failed electrically, or reached the end of its service life. Check the simplest causes first without opening the motor housing.
Confirm that the plug is secure. Check the circuit breaker and any nearby GFCI receptacle. Press the disposal’s reset button once after allowing an overheated unit to cool for 10-15 minutes.
Do not repeatedly reset a unit that trips again. Repeated tripping suggests a jam, overload, short circuit, water intrusion, or motor failure.
Special Cleaning Situations
Double-Basin Sink
A double sink often shares one trap and one branch drain. Water rising in the opposite basin while the disposal runs suggests a blockage after the two drain lines join.
Stop the disposal. Seal the second drain before plunging so pressure reaches the blockage rather than escaping into the other basin.
Septic System
A garbage disposal adds organic solids to a septic system. Use it sparingly, avoid grease, and choose cleaners labeled septic-safe.
Routine disposal cleaning does not replace septic pumping or correct an overloaded system.
Dishwasher Connected to the Disposal
Many dishwashers drain through a hose connected near the disposal outlet. Odor may come from food residue in the hose, an improperly routed line, or stagnant water.
The hose should generally rise high beneath the countertop or connect through an approved air gap according to local plumbing requirements.
Older or Leaking Disposal
Do not deep-clean a disposal that leaks from its motor housing, electrical area, or corroded body. Water around electrical components creates a serious hazard.
Leaks at the sink flange, dishwasher connection, or drain elbow may be repairable. A leak through the disposal body usually requires replacement.
How Often Should You Clean the Disposal?
Clean the splash guard every one to two weeks in a frequently used kitchen. Perform a complete ice, salt, baking soda, and flush routine about once a month, or sooner when odor appears.
| Frequency | Maintenance task | Trigger |
| After each use | Run cold water 15 seconds after grinding | Normal food-waste processing |
| Weekly | Wipe sink flange and top of splash guard | Visible film |
| Every 1-2 weeks | Scrub beneath splash guard | Frequent household use |
| Monthly | Ice, salt, baking soda, and rinse cycle | Preventive cleaning |
| As needed | Remove objects and inspect chamber | Rattle, jam, or unusual sound |
| Immediately | Stop use and diagnose | Leak, smoke, burning odor, or backup |
Households that rarely use the disposal may need less frequent cleaning. Kitchens processing greasy, starchy, or fibrous scraps may need more.
How Much Does Cleaning Cost?
Routine cleaning generally costs $1-$5 when household materials are already available. Commercial cleaners typically cost $5-$15 per package, while professional drain service often ranges from about $100-$350 depending on the blockage, access, location, and service time.
A disposal replacement may cost several hundred dollars once the unit, labor, fittings, electrical work, and removal are included. Cleaning cannot repair a cracked housing, burned motor, severe corrosion, or failed bearing.
Expert Rules for Preventing Future Odors and Clogs
- Run cold water before, during, and after grinding. Start the water first and continue it for about 15 seconds after switching off the unit.
- Feed small amounts gradually. Overloading the chamber can stall the motor and send incompletely processed food into the drain.
- Keep grease out of the sink. Collect cooking oil, fat, and pan drippings in a container.
- Limit fibrous and expandable foods. Corn husks, celery fibers, onion skins, artichoke leaves, large amounts of rice, pasta, and coffee grounds can contribute to jams or pipe buildup.
- Clean the hidden surfaces. The underside of the splash guard deserves more attention than the visible sink opening.
- Treat recurring symptoms as plumbing evidence. A drain that repeatedly backs up after cleaning needs diagnosis, not stronger fragrance.
Frequently Asked Questions
Can I pour boiling water into a garbage disposal?
Boiling water is unnecessary for routine disposal cleaning and may stress some PVC pipes, seals, adhesives, or older plumbing connections. Use hot tap water while the disposal is off to rinse light soap and grease film. Use cold running water whenever the disposal motor is grinding material.
Does baking soda damage a garbage disposal?
Baking soda is generally mild when used in a small quantity and flushed thoroughly. About one-half cup is enough for routine deodorizing. Large amounts can compact into a paste when water flow is insufficient, so do not pack the chamber with powder or leave it unrinsed.
Can I use dish soap and ice together?
Dish soap and ice can be used in the same cleaning session, but they work best in separate stages. Scrub the splash guard with a small amount of soap first, rinse it, then grind ice with cold water. Excess soap may create foam without improving chamber cleaning.
Why does my sink gurgle after using the disposal?
Gurgling usually indicates restricted airflow or slow drainage. Possible causes include a partial clog, blocked vent, poorly routed dishwasher hose, or buildup in the P-trap. Clean visible disposal residue first, but investigate the drain line if gurgling continues.
Can coffee grounds clean a garbage disposal?
Coffee grounds do not clean a garbage disposal effectively. Fine grounds can collect in pipe sludge, combine with grease, and contribute to drain restrictions. Put used grounds in compost or household waste instead of using them as an abrasive cleaner.
When should I replace the garbage disposal?
Consider replacement when the unit leaks through its body, repeatedly trips electrical protection, has severe corrosion, makes persistent bearing noise, jams frequently, or no longer grinds effectively. Cleaning may restore odor and hygiene, but it cannot repair structural or electrical failure.
Conclusion
The safest way to clean a kitchen sink drain with a garbage disposal is to disconnect the power, scrub the hidden splash-guard surfaces, remove loose debris, grind ice with salt, deodorize lightly, and flush with the correct water temperature. Physical residue removal matters more than foam, fragrance, or chemical strength.
Routine cleaning can prevent odor and soft buildup, but it cannot repair a failed motor or clear every drain obstruction. Stop using the disposal when water backs up, the unit leaks, the motor burns, or electrical protection repeatedly trips.


