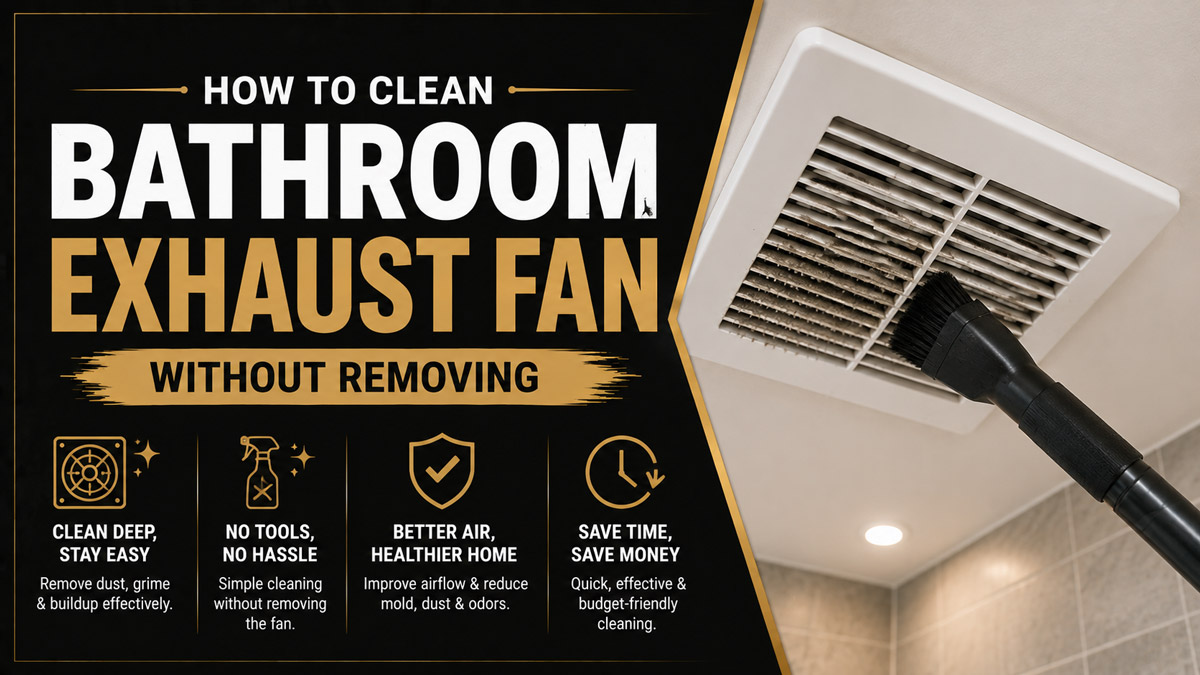
To clean a bathroom exhaust fan without removing it, switch off its circuit breaker, detach only the grille, wash and dry the grille, then vacuum and carefully wipe the accessible fan blades, blower wheel, motor casing, and housing. The process usually takes 20-30 minutes, and the installed housing, wiring, duct, and motor assembly stay in place.
Key Facts at a Glance
- The circuit breaker must be switched off before the grille or internal components are touched.
- The grille can usually be removed without removing the fan housing or disconnecting wiring.
- A vacuum with a soft brush attachment removes dust more safely than forceful scrubbing.
- Water must never enter the motor, lamp holder, heater, wiring, or electrical connections.
- Routine in-place cleaning typically takes 20-30 minutes and costs $0-$15 with basic household tools.
- Cleaning cannot correct a crushed duct, blocked exterior vent, failed motor, or inaccessible inline fan.
What Does Cleaning Without Removing the Fan Mean?
Cleaning a bathroom exhaust fan without removing it means leaving the metal or plastic housing secured in the ceiling or wall. You also leave the motor, electrical wiring, duct connection, and mounting hardware installed unless the manufacturer designed the motor plate as a tool-free service component.
The removable grille does not count as the entire fan. Most routine cleaning requires taking off this lightweight cover because dust collects both on its slots and immediately behind it. Removing the grille provides access to the blower opening while avoiding electrical disconnection, ceiling damage, and reinstallation work.
This method is appropriate when the fan operates normally but has visible dust, reduced airflow, mild humming, or a dirty cover. It is not a complete internal restoration. Dust hidden behind the blower wheel, inside the motor, above the housing, or farther along the duct remains inaccessible.
The Home Ventilating Institute recommends turning off the circuit breaker, washing the grille with mild detergent, vacuuming the fan body, wiping it with a damp cloth, drying it, and reinstalling the grille. HVI also warns against harsh chemicals and allowing water into the motor or electrical connections.
Before You Start
Plan for approximately 20-30 minutes of work, plus additional drying time for the grille. The task is suitable for most homeowners and renters who can use a stepladder safely, identify the correct breaker, and avoid disturbing electrical components.
Time, Difficulty, and Cost
| Item | Typical requirement | Practical limit |
| Active cleaning time | 20-30 minutes | Add 10-20 minutes for heavy dust |
| Grille drying time | 20-60 minutes | Reinstall only when fully dry |
| Difficulty | Beginner | Moderate for light or heater combinations |
| DIY cost | $0-$15 | Assumes a vacuum and ladder are available |
| Cleaning reach | Grille, housing opening, visible blower surfaces | Does not reach deep ductwork |
| Recommended helpers | 1 person | Use a helper if the ladder feels unstable |
Tools and Materials
| Tool or material | Quantity | Purpose |
| Stable stepladder | 1 | Provides safe ceiling access |
| Vacuum with soft brush | 1 | Lifts loose dust without scratching parts |
| Crevice attachment | 1 | Reaches housing corners and narrow gaps |
| Microfiber cloths | 2-3 | Damp cleaning and final drying |
| Mild dish detergent | 2-3 drops | Loosens grime on washable surfaces |
| Warm water | 1 basin | Washes the detached grille |
| Soft toothbrush or paintbrush | 1 | Loosens dust in narrow openings |
| Safety glasses | 1 pair | Protects against falling debris |
| Dust mask | 1 | Reduces inhalation of disturbed dust |
| Drop cloth or towel | 1 | Protects the floor and captures debris |
| Screwdriver | 1 | Removes a screw-mounted grille |
| Flashlight | 1 | Reveals dirt, wires, and housing edges |
Do not use oven cleaner, bleach spray, solvent, degreaser, abrasive powder, steel wool, or a dripping sponge. HVI specifically advises against solvents and harsh chemicals, while Broan-NuTone maintenance guidance recommends vacuuming the fan interior with a dusting brush.
Check the Fan Type First
| Fan configuration | What you can clean from the bathroom | Main precaution |
| Standard ceiling fan | Grille, housing opening, visible blower wheel and motor casing | Do not bend the blower fins |
| Wall-mounted fan | Cover, visible blades, frame, and accessible housing | Prevent liquid from running downward into the motor |
| Fan with light | Grille, lens, bulb area, and accessible fan chamber | Keep moisture away from sockets and LED drivers |
| Fan with heater | Grille and manufacturer-approved accessible surfaces | Do not touch or wet heating elements |
| Inline or remote fan | Bathroom intake grille and visible duct opening | Motor usually requires attic or crawlspace access |
| Continuous-run fan | Same accessible parts as a standard fan | Confirm the fan is fully de-energized before touching it |
Fan-light and heater-fan-light combinations contain additional components beyond the ventilation motor. HVI identifies these combination units as a distinct fan type, so their manufacturer instructions should control whenever the general cleaning method conflicts with the model design.
How to Clean Bathroom Exhaust Fan Without Removing It
The safest process has seven stages: isolate power, remove the grille, wash the grille, vacuum loose dust, detail the blower area, wipe safe surfaces, and reassemble after everything dries. Dust removal, not aggressive washing, produces most of the airflow improvement.
Step 1: Switch Off and Verify the Power
Turn the bathroom exhaust fan off at the wall switch, then switch off the corresponding circuit breaker. Do not rely on the wall switch alone because another person could turn it on, a timer could activate it, or the switch may not isolate every conductor inside a combination unit.
Test the fan switch after turning off the breaker. The fan, light, and heater should remain off. When a combination unit has more than one switch, test every control.
Place a note over the breaker panel or ask household members not to restore power. If the breaker is unlabelled, repeatedly trips, feeds equipment you cannot identify, or fails to shut down the unit completely, stop and contact a qualified electrician.
Success checkpoint: The fan, light, and heater do not operate from any wall control.
Common mistake: Assuming a motion sensor, humidity sensor, timer, or smart control cannot start the fan. These controls may activate automatically unless the circuit is isolated.
HVI’s official maintenance sequence begins by turning off the power at the circuit breaker and confirming that the fan and light cannot be activated by the wall switch.
Step 2: Lower and Detach the Grille
Place a towel or drop cloth beneath the fan, put on safety glasses and a mask, then position the ladder on a dry, level floor. Keep your hips between the ladder rails and avoid leaning sideways.
For a spring-clip grille, pull the cover straight down approximately 2-3 inches. Two V-shaped wire springs will usually appear. Squeeze the sides of one spring together and slide it out of its slot, then repeat with the second spring while supporting the cover.
For a screw-mounted grille, support the cover with one hand while loosening the screws. Put the screws in a container immediately.
A grille with a light may remain connected by a plug or socket. Do not pull on the wire. Follow the model manual if the light assembly does not separate with light hand pressure.
Paint may glue an older cover to the ceiling. Cut the paint line gently with a utility knife held nearly parallel to the ceiling, but do not push the blade into the housing or concealed wiring.
Success checkpoint: The grille is detached without cracked plastic, stretched springs, pulled wires, or damaged ceiling paint.
Common mistake: Pulling the grille forcefully because it appears stuck. Force can deform spring clips, break brittle plastic, or tear a light connector.
Step 3: Wash and Dry the Grille
Vacuum loose dust from the grille before placing it in water. This prevents a basin of muddy residue and makes the remaining film easier to remove.
Soak a plain plastic or metal grille in warm water with two or three drops of mild dish detergent for 5-10 minutes. Use a microfiber cloth or soft toothbrush to clean each slot, corner, and spring-clip area. Rinse with clean water and wipe it dry.
Do not submerge a grille containing a light socket, LED module, speaker, humidity sensor, motion sensor, or exposed wiring. Clean those parts according to the manufacturer’s instructions, usually with dry vacuuming and a barely damp cloth on non-electrical surfaces.
Set the grille on a towel until every slot and recess is dry. Trapped water can drip into the fan when the cover is reinstalled.
Success checkpoint: Light passes through every grille opening, no sticky residue remains, and the cover is completely dry.
Common mistake: Using very hot water on an old plastic grille. Heat can soften, warp, or discolor brittle plastic.
HVI recommends washing a detached grille with mild detergent and water, drying it with a clean cloth, and keeping water away from lamp holders and electrical components.
Step 4: Vacuum the Housing Interior
Inspect the fan with a flashlight before touching anything. Identify the blower wheel or propeller, motor casing, wiring, brackets, damper opening, and any light or heater parts.
Hold the soft brush attachment close to the housing and vacuum the ceiling edge, housing walls, motor exterior, and loose dust around the blower. Work from the cleanest upper surfaces toward the dirtiest lower areas so falling material can be captured afterward.
Use the crevice attachment around corners, but keep hard plastic nozzles from striking thin blower fins. Maintain a small gap from wiring and connectors rather than pulling them with suction.
For thick lint, loosen a small section with a soft paintbrush while holding the vacuum immediately beside it. This captures debris before it spreads through the bathroom. CPSC guidance notes that cleaning can temporarily resuspend fine particles, which supports using local vacuum capture rather than blowing dust freely into the room.
Success checkpoint: Loose dust no longer falls when the housing is brushed lightly.
Common mistake: Pushing a vacuum nozzle deep behind the motor. Hidden wires, capacitors, plugs, and dampers can be damaged even when the power is off.
Broan-NuTone advises removing the grille and using a vacuum wand to clear accumulated dust from inside the fan housing.
Step 5: Clean the Visible Blower Wheel or Blades
Rotate the blower wheel gently by hand only after power has been verified off. Support it near its hub and avoid pressing sideways on the outer fins.
Place the vacuum brush beneath the section being cleaned. Use a dry toothbrush, cotton swab, or narrow paintbrush to loosen dust from visible blade edges, moving one section at a time. Rotate the wheel slightly and repeat until the accessible circumference is reasonably clean.
Do not chase perfect cleanliness into inaccessible spaces. Excess pressure can crack plastic fins, bend metal blades, move balance weights, or strain the motor shaft. An unbalanced blower may become louder than it was before cleaning.
Compressed air is optional and usually unnecessary. If used, apply only short, low-pressure bursts while vacuuming simultaneously. Never spin the blower rapidly with compressed air, direct air into the motor vents, or scatter debris through the bathroom.
Success checkpoint: The blower turns smoothly by hand, visible fins have similar dust levels, and no large clump remains on one side.
Common mistake: Cleaning only half of the wheel. Uneven residue can preserve an imbalance and rhythmic vibration.
Broan-NuTone identifies dust buildup on the grille, blower wheel, and motor housing as a possible cause of excessive fan noise and recommends vacuum cleaning as an initial remedy.
Step 6: Wipe Safe Internal Surfaces
Mix warm water with a few drops of mild detergent. Dampen a microfiber cloth, then wring it until it feels barely moist and cannot release a drop when squeezed.
Wipe accessible housing walls, brackets, non-electrical plastic surfaces, and the exterior of the motor casing. Fold the cloth around one finger for narrow edges, but keep that finger away from wire terminals, motor vents, sockets, sensors, capacitors, heater elements, and connectors.
Use a dry cloth immediately after the damp cloth. The purpose is to lift sticky residue left after vacuuming, not to wash the installed assembly.
Do not spray cleaner into the fan. Even a product labelled natural, non-toxic, or bathroom-safe can enter the motor, attack plastic, leave conductive residue, or damage a finish.
Success checkpoint: Accessible surfaces feel dry, no droplets are visible, and wires or electrical parts have not been disturbed.
Common mistake: Treating the housing like a washable vent cover. The housing contains electrical and mechanical components that require controlled moisture.
HVI’s maintenance instructions allow a cloth dampened with mild detergent on the fan body, followed by drying, but explicitly state that water must not enter the motor, lamp holder, or electrical connections.
Step 7: Reinstall the Grille and Test the Fan
Confirm that the housing, blower area, and grille are fully dry. Remove tools and cloths from the ladder before reassembly.
For spring clips, insert one compressed spring into its matching slots, then attach the second. Push the grille upward evenly until it sits flat against the ceiling. Do not force it if a wire, clip, light connector, or insulation prevents proper seating.
For screw-mounted covers, start every screw by hand before tightening. Tighten only until the grille is secure. Excess torque can crack the cover or strip the mounting hole.
Restore power at the breaker. Run the fan and listen from beneath it, then from the bathroom doorway. The sound should be steady rather than pulsing, scraping, rattling, or repeatedly changing pitch.
Hold one square of lightweight toilet tissue against the grille. A working fan should hold it in place while running, although the tissue test is a screening method rather than a measurement of cubic feet per minute.
Success checkpoint: The grille sits flat, the fan starts normally, airflow is present, and no new vibration or rubbing sound occurs.
Common mistake: Restoring power while the grille or internal surfaces remain damp.
How Clean Is Clean Enough?
A no-removal cleaning is complete when the grille openings are clear, loose dust has been removed from the housing, accessible blower surfaces are reasonably even, and the fan operates without new noise. The fan does not need to look factory-new inside.
Stop cleaning when reaching farther would require bending blades, unplugging the motor, removing a motor plate, disconnecting wiring, entering an attic, or opening ductwork. Those actions are outside a strict no-removal procedure.
The practical objective is improved air passage and reduced imbalance. Removing the thickest deposits usually matters more than polishing every hidden surface.
No-Removal Cleaning Versus Deep Cleaning
| Decision factor | Cleaning without removal | Deep cleaning or service |
| Typical time | 20-30 minutes | 60-120 minutes |
| Parts detached | Grille only | Grille, motor plate, blower, or housing parts |
| Electrical disconnection | None | Possible |
| Duct access | Only visible entry | Partial duct and damper access |
| Hidden blower surfaces | Limited | Usually accessible |
| Best use | Routine maintenance | Severe buildup or mechanical diagnosis |
| Main risk | Bent blades or moisture exposure | Wiring, fastener, ceiling, and reassembly damage |
| Suitable for renters | Usually, with lease permission | Usually requires landlord approval |
Choose in-place cleaning for normal dust, mild noise, and routine maintenance. Choose deeper service when the wheel remains heavily coated on inaccessible surfaces, the damper cannot open, the motor plate must be removed to reach debris, or performance remains poor after the accessible areas are clean.
A neglected fan may also have a blocked duct, exterior hood, roof cap, or backdraft damper. Cleaning the bathroom-side opening cannot reach those locations.
Common Mistakes and How to Fix Them
| Mistake | Likely result | Corrective action |
| Cleaning with the breaker on | Shock or unexpected startup | Stop, isolate the breaker, and verify every control |
| Spraying cleaner into the housing | Wet motor or electrical connections | Leave power off and arrange inspection if liquid entered components |
| Using a dripping cloth | Water migration into hidden parts | Blot visible moisture and allow complete drying |
| Bending blower fins | Vibration or scraping | Stop the fan and inspect for visibly displaced fins |
| Reinstalling a damp grille | Water drips and trapped dirt | Remove it and dry every recess |
| Pulling a light grille by its wire | Loose or damaged connector | Support the assembly and follow the model instructions |
| Vacuuming aggressively around wires | Disconnected plug or damaged insulation | Stop and obtain electrical service if wiring moved or was damaged |
| Using harsh chemicals | Plastic discoloration or deterioration | Rinse removable non-electrical parts and switch to mild detergent |
| Ignoring uneven dust | Persistent imbalance | Clean accessible sections evenly around the wheel |
| Forcing a stuck grille | Broken clips or ceiling damage | Identify springs, screws, paint, or connectors before pulling |
What If the Fan Is Still Weak or Noisy?
Persistent problems after cleaning usually indicate a restriction, installation issue, worn component, or inaccessible deposit rather than a dirty grille alone. Diagnose the symptom before repeating the same cleaning steps.
| Symptom | Likely cause | Simple check | Next action |
| Tissue will not stay on grille | Weak airflow or blocked path | Open bathroom door slightly | Inspect duct, damper, and exterior termination |
| Fan improves with door open | Inadequate make-up air | Compare door open versus closed | Clear the door undercut or transfer grille |
| Rhythmic vibration | Uneven dirt or bent blower fin | Watch and listen for repeating pulses | Reclean evenly or service the blower |
| Metallic scraping | Wheel contacting housing | Switch power off immediately | Inspect alignment and obtain repair |
| Loud hum with slow rotation | Binding motor or wheel | Observe startup from a safe distance | Stop use and arrange service |
| Normal sound but mirror stays fogged | Low capacity, long duct, or obstruction | Check whether the exterior damper opens | Correct duct or fan sizing |
| Fan does not start | Breaker, switch, connector, or motor fault | Verify breaker and other bathroom devices | Use an electrician or fan technician |
| Water drips from fan | Duct condensation or roof leak | Note weather and shower conditions | Inspect duct insulation and exterior cap |
HVI recommends approximately 1 cubic foot per minute of fan capacity for each square foot of bathroom area up to 100 square feet. A clean fan may therefore remain inadequate if it was undersized for the room from the beginning.
Bathroom exhaust fans also require a path for replacement air. When the door seals tightly against the floor, airflow may improve noticeably when the door is opened. This does not prove the fan is defective.
The exterior damper should open while the fan runs. Do not climb onto a roof for this check. Use a safe ground-level view, an accessible wall termination, or a qualified service provider.
Variations for Different Fan Designs
How Do You Clean a Fan With a Light?
Switch off the breaker controlling both the fan and light, allow the bulb to cool, and determine whether the grille contains a bulb, lens, LED panel, or electrical connector. Wash only parts that the manufacturer identifies as removable and washable.
Vacuum around sockets and drivers without touching them. Use a dry or barely damp cloth on surrounding plastic, never on exposed contacts. Reconnect plugs by holding the connector body rather than pulling or pushing the wire.
How Do You Clean a Fan With a Heater?
A heater combination requires greater caution because it contains heating elements, thermal protection, reflectors, and additional wiring. Clean only the grille and clearly accessible dust unless the model manual provides a specific service procedure.
Do not wet, bend, brush aggressively, or vacuum directly against a heating element. Stop using a heater-fan unit that smells burned, shows heat damage, repeatedly trips a breaker, or has a heater fan that does not rotate correctly.
CPSC has previously recalled bathroom fan-heater products where heater blades could fail to rotate and cause overheating, which demonstrates why heat-related symptoms should not be treated as an ordinary cleaning issue.
Can You Clean an Inline Fan From the Bathroom?
You can clean the room-side intake grille and the visible section of the duct opening, but you generally cannot clean an inline fan motor from inside the bathroom. The motor is installed remotely in an attic, ceiling void, or crawlspace.
If the intake is clean but airflow remains weak, the remote fan, duct, backdraft damper, or exterior termination needs inspection from its installation location.
How Do You Clean a Wall-Mounted Bathroom Fan?
Use the same power-isolation and dry-vacuuming process, but control moisture more carefully because liquid can run downward toward the motor. Hold the barely damp cloth below the area being cleaned and follow immediately with a dry cloth.
Wall-mounted covers may use screws, rotating tabs, or snap clips rather than ceiling-style springs. Do not pry until the retention method is identified.
How Often Should a Bathroom Exhaust Fan Be Cleaned?
Clean a bathroom exhaust fan at least once a year, then shorten the interval when visible dust, heavy use, hairspray, shedding textiles, renovation debris, or weak airflow causes faster buildup. HVI recommends routine cleaning at least annually.
| Bathroom condition | Inspection interval | Typical cleaning interval |
| Low-use guest bathroom | Every 6 months | Every 12 months |
| Daily household bathroom | Every 3-4 months | Every 6-12 months |
| Large family bathroom | Every 2-3 months | Every 4-6 months |
| Frequent hairspray or aerosol use | Every 1-2 months | Every 3-4 months |
| Recent drywall or remodeling work | Immediately after work | As soon as dust appears |
| Continuous-run ventilation fan | Every 2-3 months | Every 6 months or per manual |
| Visible grille matting | Immediately | Clean immediately |
Use condition rather than the calendar alone. A visible gray layer across the grille, increasing operating noise, falling dust, or reduced tissue-test suction indicates that cleaning is due.
When Should You Stop and Call a Professional?
Stop the project when you find burned insulation, melted plastic, dark heat marks, damaged wiring, a loose electrical box, water inside the motor area, repeated breaker trips, persistent scraping, a non-rotating blower, or a strong electrical odor.
Professional help is also appropriate when the fan vents into an attic, the duct is crushed or disconnected, the exterior termination is inaccessible, mold extends into porous building materials, or the fan requires electrical disconnection for cleaning.
A fan that is clean but substantially undersized may require replacement rather than repeated maintenance. HVI describes a bathroom exhaust fan as a mechanical device that should be ducted to the exterior to remove humid and contaminated air. A fan discharging into an attic or wall cavity does not satisfy that intended airflow path.
Expert Rules of Thumb
Remove Dust Before Adding Moisture
Vacuum first and wipe second. Adding water to a dusty housing creates paste that moves into seams, motor vents, and corners, while dry extraction removes most contamination without spreading it.
Clean the Blower Evenly
A thin, even film is often less disruptive than one heavy clump on a single section of the wheel. Uneven mass causes imbalance, which can create pulsing noise and bearing stress.
Do Not Diagnose Every Airflow Problem as Dirt
A clean grille cannot compensate for a stuck damper, long undersized duct, crushed flex duct, blocked roof cap, sealed bathroom door, weak motor, or fan that was too small for the room. Cleaning is maintenance, not a universal repair.
Conclusion
The safest way to clean a bathroom exhaust fan without removing it is to switch off and verify the breaker, detach only the grille, wash and dry that cover, vacuum accessible dust, clean the visible blower evenly, and wipe safe surfaces with a barely damp cloth. Restore power only after every part is dry and securely reassembled.
This method works well for routine maintenance, visible dust, mild airflow loss, and minor noise. It cannot clean hidden ductwork, repair a motor, correct bad installation, or safely resolve burned wiring, heater faults, water intrusion, or severe mechanical damage.
Frequently Asked Questions
Can I Vacuum a Bathroom Exhaust Fan Without Taking Off the Cover?
You can vacuum the visible grille without removing it, but this cleans only the outer surface. Dust commonly accumulates behind the grille and on the blower opening. For meaningful routine maintenance, switch off the breaker and detach the grille while leaving the fan housing, motor, wiring, and duct installed.
Can I Spray Compressed Air Into a Bathroom Exhaust Fan?
Compressed air should be used sparingly, if at all. A strong air stream can force dust into the motor, spin the blower at excessive speed, or distribute debris throughout the bathroom. A soft brush used beside an operating vacuum provides better control and captures loosened particles immediately.
Can I Use a Hair Dryer to Dry the Fan?
Air-drying and wiping with a dry microfiber cloth are safer than using a hair dryer. Heat can deform old plastic, disturb lightweight insulation, or push remaining moisture deeper into electrical areas. Keep the breaker off until the grille, housing surfaces, and surrounding components are fully dry.
Why Is Dust Falling From My Bathroom Fan?
Dust falls when buildup on the grille, blower, or housing loosens due to vibration, humidity changes, or airflow. Switch off the breaker, remove and wash the grille, then vacuum the accessible interior. Continued debris after cleaning may indicate hidden buildup that requires deeper service.
Will Cleaning a Bathroom Fan Make It Quieter?
Cleaning can reduce noise when uneven dust, a clogged grille, or loose debris causes turbulence and imbalance. It will not repair worn bearings, a bent blower, loose mounting hardware, a failing motor, or duct vibration. Stop the fan if cleaning produces scraping, pulsing, or stronger vibration.
How Do I Know Whether the Exhaust Duct Is Blocked?
Suspect a duct blockage when the fan spins normally, the grille and blower are clean, but suction remains weak and the exterior damper barely opens. A professional can inspect for crushed flex duct, lint, nests, disconnected sections, condensation, or a stuck backdraft damper without damaging the ceiling.


