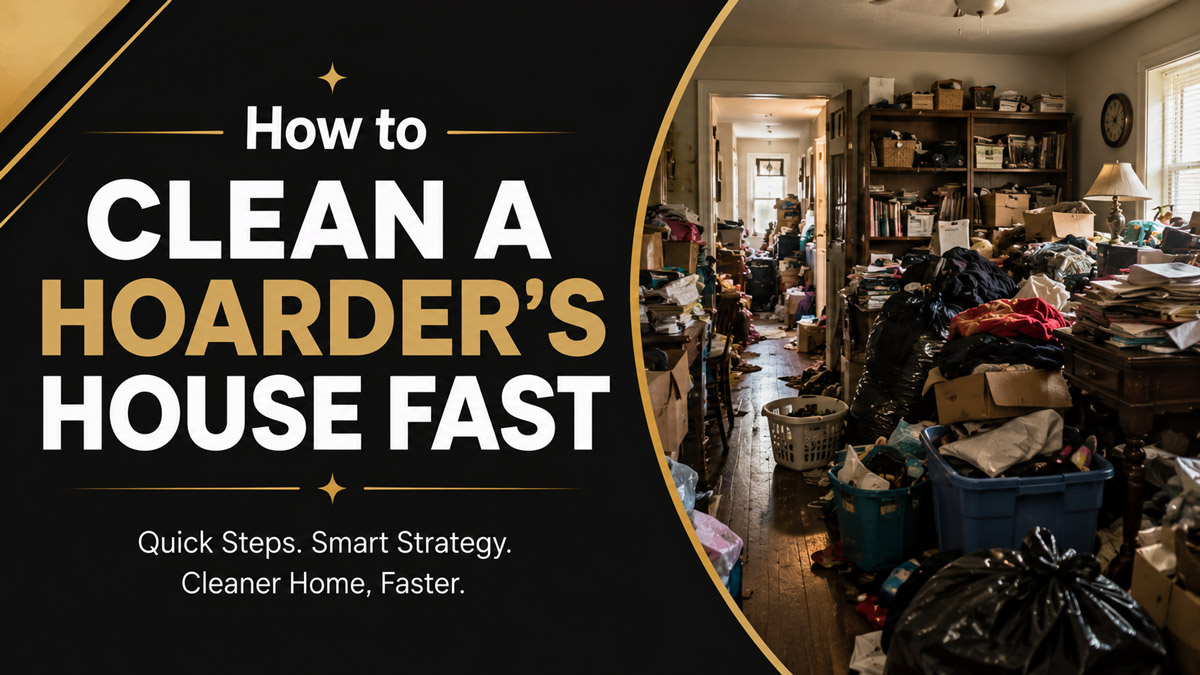
Clearing a severely hoarded property requires military precision, rather than basic decluttering tactics. You will learn how to clean a hoarder’s house fast through an industrial five-step extraction process requiring 27 to 51 hours for a standard home. Strict adherence to rapid disposal decision timelines ultimately dictates your success in this difficult environment.
Before You Start
Do not enter the property until you assemble the correct commercial-grade equipment. Amateurs fail when their basic household trash bags tear or their residential vacuums aerosolize toxic mold spores.
Time Required: 27-51 hours (based on a 3-person team).
Difficulty: Extreme (Requires high physical stamina and strict biohazard discipline).
Typical Cost Range: $1,200 to $3,500 (Equipment and waste fees).
Prerequisites: All municipal dumpster permits secured, active water and electricity on site, and the hoarding resident relocated off-site.
Master Equipment and Materials Inventory
| Item / Specification | Quantity Required | Typical Cost | Operational Purpose |
| 30 or 40-Yard Roll-Off Dumpster | 1 to 2 | $450 – $800 each | Bulk structural clearing and fast disposal. |
| 42-Gallon Contractor Bags (3.0 mil) | 3 to 5 boxes (50/box) | $35 – $50 per box | Puncture-resistant containment of sharp debris. |
| Tyvek Hazmat Suits (Heavy Duty) | 3 per person, per day | $12 – $18 each | Prevents bio-contaminant transfer to human skin. |
| NIOSH P100 Respirators | 1 per person | $35 – $50 each | Filters 99.9% of airborne particulates and mold. |
| 15-Mil Nitrile Gloves | 1 box (50 pairs) | $25 – $35 | Resists tears from hidden glass and sharp metal. |
| Commercial HEPA Air Scrubber | 1 to 2 units | $150/day rental | Continuously cleans ambient air during extraction. |
| EPA-Registered Disinfectant | 2 to 4 gallons | $30 – $45/gal | Hospital-grade biological eradication. |
| Industrial Ozone Generator | 1 unit | $80/day rental | Destroys volatile organic odor compounds. |
| Square-Point Steel Shovels | 2 | $25 each | Scraping compacted floor debris directly into bags. |
| Heavy-Duty Construction Plastic | 1 roll (100 ft) | $40 – $60 | Protecting subfloors in the primary walking path. |
Process Overview at a Glance
| Phase | Core Action | Time Allocation | Most Common Failure Point |
| Step 1 | Site Stabilization | 1-2 Hours | Failing to establish a clean donning zone outside. |
| Step 2 | Golden Pathway | 2-3 Hours | Stopping to sort items instead of pure extraction. |
| Step 3 | Bulk Clearing | 8-16 Hours | Emotional micro-sorting delaying the process. |
| Step 4 | Sanitization | 4-6 Hours | Wiping disinfectant before the 10-minute dwell time. |
| Step 5 | Odor Lockdown | 12-24 Hours | Leaving pets or plants inside during ozone cycles. |
Phase 1: Setup
Step 1: Stabilize the Site and Deploy Safety Gear
Establish a localized clean zone immediately outside the primary entrance and activate baseline atmospheric controls inside.
First, lay out a 10-by-10 foot plastic tarp on the front lawn or driveway to serve as your designated drop-zone for donning (putting on) and doffing (taking off) Personal Protective Equipment (PPE). Suit up completely in your Tyvek coveralls, P100 respirator, and 15-mil nitrile gloves before turning the doorknob. Enter the structure and immediately plug in your commercial HEPA air scrubbers near the entryway. Turn the dials to their maximum Airflow/CFM setting to begin capturing aerosolized mold spores, dust mites, and rodent dander disturbed by your entry. Conduct a rapid 10-minute hazard sweep with a heavy flashlight. You are looking specifically for signs of structural collapse, exposed live wiring, black water pooling, or active pest nests.
You’ll know it worked when the HEPA scrubbers create a distinct negative air pressure draft at the front door, and your team can breathe comfortably without smelling the ambient decay.
The most frequent mistake here is entering the home in street clothes just to “take a quick look” before setting up. This exposes your respiratory system to concentrated pathogens instantly. Always assemble your staging area and wear your P100 mask before breaching the threshold.
Phase 2: Golden Path
Step 2: Excavate the Main Arterial Pathway
Carve a physical extraction corridor measuring exactly 4 to 5 feet wide from the primary exterior door all the way to the furthest back room.
Position your dumpster as close to the front door as legally permissible. Using your square-point steel shovels, break into the compacted wall of debris at the entryway. Scoop the loose material directly into your 3.0 mil contractor bags without looking at what you are bagging. Toss heavy, bulky items directly out the door into the dumpster. Once you expose the bare floor, unroll your heavy-duty adhesive construction plastic and stick it directly to the ground. Roll it forward as you advance. This plastic creates a smooth, frictionless surface for dragging heavy bags while protecting the underlying subfloor from absorbing liquefied bio-contaminants tracked on the soles of your boots. Maintain a strict linear progression. Do not diverge into side rooms until the central artery connects the front door to the furthest rear point of the house.
You’ll know it worked when two crew members can easily pass each other carrying full 42-gallon trash bags without brushing against debris piles on either side.
A critical failure during this step is attempting to sort items for donation or salvage. The golden pathway requires brutal, indiscriminate extraction. Every object in this 5-foot lane is legally and procedurally classified as trash to guarantee rapid ingress and egress for the remainder of the project.
Phase 3: Bulk Clear
Step 3: Execute High-Speed Structural Clearing
Clear the remaining rooms systematically by working from the outer walls inward and from the ceiling downward to the floor.
Divide your 3-person team strategically. One person manages the bagging, one shuttles full bags to the dumpster, and one handles the heavy lifting of degraded furniture. Enforce the absolute 3-second rule for every object you touch. You have exactly three seconds to designate an item into one of three categories: Trash (goes in the dumpster), Donate (goes in an exterior staging bin), or Keep (placed in a secure plastic tote). Limit the “Keep” category strictly to legal documents, government IDs, physical currency, and verifiable high-value jewelry. Use wide plastic snow shovels for lightweight top-layer debris, switching to steel square-point shovels to scrape up the bottom layers cemented to the floor by moisture. According to OSHA bloodborne pathogen standards (29 CFR 1910.1030), if you uncover needles or feces, halt shoveling immediately. Upgrade to puncture-proof outer gloves, use mechanical grabbers to place sharps into a designated container, and flood the 10-foot radius with a sporicidal agent for 20 minutes before resuming.
You’ll know it worked when you can see the baseboards across the entire perimeter of every room and no loose objects remain on the floors.
The fatal mistake in this phase is allowing the homeowner to participate in the physical clearing process. Extreme emotional anchors trigger severe arguments over mundane items, halting physical progress completely. Relocate the resident off-site with a trusted advocate until Phase 3 concludes.
Phase 4: Sanitize
Step 4: Perform Deep Chemical Sanitization
Extract microscopic particulate matter from the bare structure before applying a heavy chemical washdown to all hard surfaces.
Attach brush heads to your industrial HEPA vacuums. Start at the highest point in the room, vacuuming exposed ceiling joists, window frames, bare drywall, and finally the scraped subfloors. Do not use standard household vacuums, which will simply blow dangerous fungal spores back into the air. Next, mix your EPA-registered hospital-grade disinfectant into a commercial pump sprayer at a strict ratio of exactly 2 ounces of chemical per gallon of warm water. Pump the sprayer to build pressure and mist all hard, non-porous surfaces starting from the top down. Apply enough liquid so the surfaces look heavily wet, not just damp. Allow the chemical to dwell on the surfaces for a minimum of 10 continuous uninterrupted minutes. This specific wet dwell time is a federally mandated baseline for chemical biological eradication. After 10 minutes, use heavy-duty push brooms wrapped in clean microfiber towels to mop up the remaining liquid.
You’ll know it worked when the heavy, musty odor of organic decay is replaced by a sharp, clinical chemical scent, and no visible dirt transfers when you wipe a white cloth across the baseboards.
Premature fine cleaning ruins this phase. Beginners often try wiping down walls in one room while bulk debris is still being shoveled in the adjacent hallway, causing the wet walls to act like magnets for airborne dust. Never introduce liquid cleaners until 100% of the bulk debris is locked inside the exterior dumpster.
Phase 5: Odor Lock
Step 5: Lock Down Airborne Contaminants and Odors
Deploy highly reactive ozone gas in a sealed environment to destroy embedded volatile organic compounds at the molecular level.
Walk the perimeter of the home with blue painter’s tape and heavy plastic sheeting. Tightly seal all windows, exterior doors, chimney flues, and HVAC return vents. You must create an airtight envelope. Place your industrial Ozone Generator on a central, elevated platform like a fiberglass step ladder. Ozone gas is heavier than air, so placing it high ensures it cascades downward to cover the entire volume of the house. Program the machine’s onboard timer for 12 to 24 hours, depending on the severity of the remaining odors. Turn the machine on and immediately vacate the building. Post bright, highly visible danger signs on all exterior doors. Return after the timer finishes, wearing your P100 respirator. Open all windows and doors, set up high-velocity fans blowing outward, and allow the house to aerate for a full 4 hours before removing your respiratory protection.
You’ll know it worked when the air inside the home smells faintly metallic and crisp (similar to the air after a heavy lightning storm), with zero underlying notes of ammonia or mold.
The catastrophic mistake at this final step is failing to respect the toxicity of ozone. Zero humans, pets, or houseplants can remain inside during an active ozone cycle. The gas attacks respiratory tissues aggressively, and exposure can cause permanent lung damage or death.
Common Mistakes and How to Fix Them
Even experienced crews encounter structural and biological surprises. Understanding how to recover from these failures separates professional operators from overwhelmed amateurs.
Mistake: Severe Structural Odor Persists Post-Ozone Treatment
- The Cause: Liquid waste (usually animal urine or decay fluid) has soaked deeply into the porous wood subfloors, bypassing surface disinfectants.
- The Fix: Purchase a handheld ultraviolet (UV) tracking light and scan the floors in the dark to map the exact boundaries of the biological stains. Sand away the loose, contaminated top grains of the wood using a floor sander with 60-grit paper. Vacuum the dust thoroughly. Finally, apply a thick, continuous coat of an oil-based or shellac-based stain-and-odor blocking primer (like B-I-N Shellac) directly over the sanded subfloor. This chemically seals the micro-pores and permanently traps the odor molecules.
Mistake: Municipal Code Enforcement Threatens to Halt the Project
- The Cause: Neighbors complain about the visual blight or smell of your exterior staging areas, prompting a visit from city inspectors.
- The Fix: Designate one articulate team member as the sole point of contact. Present your formal written clearing plan, your waste management permits, and the rental receipts for your roll-off dumpsters. Instantly move all bagged garbage, scrap metal, or loose debris into the dumpster or a closed garage. Removing the visible public nuisance typically secures a 48-to-72 hour operational extension from reasonable inspectors.
Mistake: Running Out of Dumpster Space Prematurely
- The Cause: Throwing hollow, rigid items (like empty dressers, large cardboard boxes, or intact chairs) into the dumpster without breaking them down, creating massive air pockets.
- The Fix: Pull the hollow items out. Use a sledgehammer or reciprocating saw to smash wooden furniture flat. Cut down cardboard with utility knives. Walk heavily over the trash bags in the dumpster to compress the load. You can reclaim up to 30% of a dumpster’s volume simply by eliminating empty air gaps.
Mistake: Crew Experiences Cognitive Fatigue and Freezes
- The Cause: Decision fatigue from looking at thousands of micro-items, causing the team to slow down and argue over minor objects.
- The Fix: Stop operations and force a 15-minute outdoor hydration break. Re-establish the 3-second rule violently. If an item cannot be immediately identified as a vital document or expensive jewelry within three seconds, it automatically defaults to the trash bag. Remove the crew member who cannot adhere to this rule from sorting duties and assign them strictly to hauling bags.
Process Variations for Specific Hoarding Types
The baseline protocol assumes a standard mixture of dry goods and mild waste. You must alter your approach when facing specific, extreme hoarding archetypes.
Animal Hoarding and Biohazard Saturation
When dealing with dozens of feral cats or unchecked dog populations, the risk of zoonotic diseases skyrockets. You cannot use push brooms under any circumstances, as sweeping dried feces aerosolizes Hantavirus and toxoplasmosis spores. Instead, you must lightly mist the floor debris with your pump sprayer (using water mixed with a mild surfactant) before scraping it up with shovels. The moisture weighs down the dust particles. Double-bag all biological waste, and tape the seams of your Tyvek suits at the wrists and ankles to prevent fleas from breaching your suit.
Dry Paper and Information Hoarding
Homes packed floor-to-ceiling with newspapers, magazines, and mail present a massive structural weight issue and extreme fire hazard. Do not use shovels, which simply slide off stacks of paper. Instead, use heavy-duty plastic recycling bins. Slide a flat piece of cardboard under a stack of magazines, tip the stack into the bin, and carry the heavy bin to the dumpster to dump it. Because paper absorbs moisture from the air over decades, the weight can collapse floor joists. Always clear the second floor of a paper hoard first to relieve the structural load on the house.
“Shopping Addiction” Retail Hoarding
This variation involves thousands of newly bought items, often still in original shipping boxes with tags attached. The challenge here is entirely psychological and logistical. The 3-second rule remains, but your “Donate” staging area must be massive. Partner with a local charity that provides box trucks for immediate pickup at the end of each day. Do not attempt to resell these items online during the clearing phase. Photographing, listing, and shipping items halts momentum. Everything unopened goes straight into the charity truck.
How Long Does It Take and What Does It Cost?
Time and cost scale non-linearly depending on the severity of the hoard and the structural integrity of the home.
Time Estimates:
- Level 1-2 Hoard (Clutter blocking some pathways, mostly dry): A 3-person team can complete the extraction and basic sanitization in 12-16 hours.
- Level 3-4 Hoard (Rooms unusable, heavy odors, mild biological waste): Requires 25-40 hours for a 3-person team, split across 3 to 4 days to prevent physical exhaustion.
- Level 5 Hoard (Severe structural damage, feces, narrow goat trails): Demands 50-70 hours, often requiring partial drywall removal and extensive subfloor treatment.
Cost Breakdown:
- Dumpster Rentals: The largest expense. A 30-yard roll-off dumpster costs between $450 and $800 per pull, depending on local landfill tipping fees. A standard 1,500 square foot Level 3 hoard usually requires three to four pulls ($1,350 to $3,200).
- Commercial PPE and Chemicals: Budget $250 to $400. You will run through multiple Tyvek suits daily (they tear on sharp debris) and burn through heavy-duty contractor bags at a rate of roughly 100 bags per day.
- Equipment Rentals: Renting two commercial HEPA scrubbers and an ozone generator costs roughly $250 to $350 for a weekend rental from major hardware chains.
Frequently Asked Questions
What is the fastest way to clean a hoarder house alone?
Working alone is highly discouraged due to injury risks. If mandatory, break the project into micro-zones. Clear a 5-by-5 foot grid entirely before moving. Do not sort; shovel directly into contractor bags. Renting a dumpster is mandatory, as municipal trash pickup cannot handle the volume.
Should I hire a professional hoarding cleanup company or DIY?
Hire professionals if you encounter black water leaks, structural sagging, widespread mold colonies, or excessive biological waste. DIY is viable for dry hoarding (paper, clothes, general clutter) provided you possess strong physical endurance and the emotional detachment necessary to execute rapid disposal.
How do I get rid of the hoarder house smell permanently?
Scented sprays only mask odors. Permanent removal requires a three-step chemical process: extract all porous debris, wash all hard surfaces with EPA-registered sporicidal disinfectants, and run an industrial ozone generator for 24 hours to destroy airborne molecules. Severely stained subfloors must be sealed with a shellac-based primer.
What happens if I find needles or weapons during cleanup?
Stop work in that immediate zone. Put on puncture-proof leather outer gloves. Use long-handled mechanical grabbers to place syringes directly into a hard plastic Sharps container. If you uncover firearms or questionable chemicals, leave them untouched and immediately contact local non-emergency police for safe removal protocols.
Can I save the carpets in a hoarded home?
Almost never. Wall-to-wall carpet acts as a massive sponge, absorbing years of spilled liquids, pet urine, and biological decay. Attempting to steam clean hoarded carpet merely reactivates dormant mold spores through heat and moisture. Cut the carpet into strips with a utility knife and throw it away.
Properly executing how to clean a hoarder’s house fast hinges on your ability to separate emotion from operation. Secure your safety equipment, establish your disposal pathway, and let the 3-second rule drive your momentum toward a fully sanitized property.


