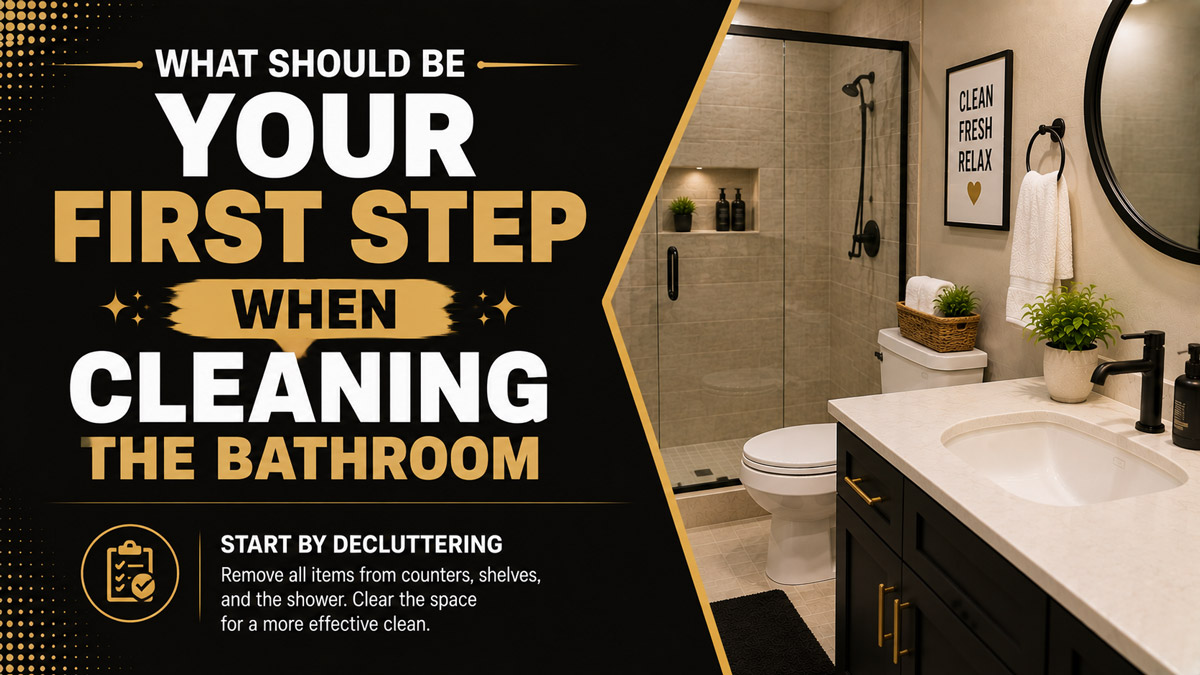
The first step when cleaning the bathroom is to prepare and clear the room before applying water or cleaner. Remove portable items, start ventilation, collect laundry and trash, then remove loose hair and dust from dry surfaces so the bathroom is accessible and dry soil does not become wet sludge.
Key Facts at a Glance
- Bathroom cleaning should begin with preparation, not immediate spraying or scrubbing.
- Remove towels, rugs, toiletries, waste, and movable accessories before cleaning fixed surfaces.
- Ventilation should begin before using products that release fumes or strong fragrances.
- Dry hair and dust should be vacuumed, swept, or wiped before surfaces become wet.
- Cleaning removes soil, while disinfecting targets remaining germs after the surface is clean.
- Every disinfectant must remain visibly wet for the contact time printed on its label.
What Should Be Your First Step When Cleaning the Bathroom?
Your first step should be a short clear, ventilate, and dry-remove routine. Open a window or start the exhaust fan, remove portable belongings, empty the trash, take out washable textiles, and collect loose hair and dust before spraying the sink, shower, toilet, or floor.
This sequence takes about 3-10 minutes in a typical residential bathroom. It saves time later because every fixed surface becomes reachable, cleaning products contact the actual surface rather than a layer of debris, and you do not repeatedly move wet bottles or contaminated accessories.
The phrase “first step” can refer to two levels:
- The first safety action: Start ventilation and read the product label.
- The first physical cleaning action: Clear portable items and remove dry debris.
Both actions belong to the same preparation stage. Spraying cleaner across a cluttered, dusty bathroom is not an efficient first step.
Why Should You Clear the Bathroom First?
Clearing the bathroom first exposes the full cleaning area and prevents you from transferring dirt between bottles, towels, tools, counters, and freshly cleaned surfaces. A cleared room also reveals hidden spills, mildew, rust marks, soap deposits, damaged caulk, and leaks that clutter can conceal.
A bathroom may look only mildly cluttered, yet a typical vanity can contain toothbrush holders, soap pumps, cosmetics, medicine containers, grooming tools, cups, and damp cloths. Cleaning around those objects leaves narrow untreated borders where hair, toothpaste, water, and cosmetic residue accumulate.
Clearing also prevents accidental chemical contact. A spray intended for tile or toilet surfaces should not settle on toothbrushes, contact-lens cases, razors, medication, towels, or personal-care packaging.
Sort Removed Items Into Four Groups
Do not place every object into one mixed pile. Sort items as you remove them.
| Group | Typical items | Immediate action |
| Laundry | Towels, bathmats, washcloths | Place in a hamper or washing machine |
| Waste | Empty containers, tissues, used packaging | Put in the trash or recycling |
| Relocation | Products belonging elsewhere | Place in a carry basket |
| Needs cleaning | Soap dishes, holders, bins, organizers | Set on a washable tray |
A portable basket is useful when the counter contains many products. It is a temporary handling tool, not permission to return expired, leaking, or unused items afterward.
Before You Start
A routine bathroom clean usually requires 20-45 minutes after preparation. A heavily soiled bathroom may require 60-120 minutes because mineral deposits, soap scum, neglected grout, or repeated product applications add labor and waiting time.
| Requirement | Routine bathroom | Heavily soiled bathroom |
| Preparation time | 3-10 minutes | 10-20 minutes |
| Active cleaning time | 20-45 minutes | 60-120 minutes |
| Difficulty | Beginner | Moderate |
| Typical supply cost | $1-$5 per session | $5-$20 per session |
| Cloths | 3-5 microfiber cloths | 5-8 microfiber cloths |
| Gloves | 1 reusable pair | 1 chemical-resistant pair |
| Brushes | Toilet brush plus detail brush | Toilet, grout, and detail brushes |
These costs are typical household estimates, not fixed retail prices. The actual amount depends on product concentration, bathroom size, local pricing, and whether tools are already available.
Basic Supplies
Prepare the supplies before wet cleaning begins:
- Gloves compatible with the product label
- Microfiber cloths or disposable towels
- Vacuum, broom, or dry microfiber mop
- Toilet brush
- Non-scratch sponge or approved surface brush
- Soap or detergent-based bathroom cleaner
- Optional EPA-registered disinfectant
- Optional surface-compatible mineral-deposit remover
- Trash bag and laundry basket
Use separate cloths for the toilet and other surfaces. A simple method is to reserve one clearly marked cloth for the toilet exterior and never use it on the faucet, counter, or door handle.
Step 1: Ventilate and Check the Product Labels
Start the exhaust fan or open a window before applying strong bathroom products. Ventilation reduces the concentration of irritating vapors, while label review identifies required gloves, compatible surfaces, dilution instructions, rinsing requirements, and contact times.
The CDC advises users to provide good ventilation when using bleach indoors and to check whether gloves or eye protection are required.
Labels matter because “bathroom cleaner” is a broad category. One bottle may be a mild detergent, another may contain an acid for mineral deposits, and another may be a registered disinfectant. These products are not interchangeable.
Do Not Mix Cleaning Products
Never mix bleach with vinegar, acidic toilet-bowl cleaner, ammonia, or another cleaner. Bleach mixed with an acid can release chlorine gas, while bleach mixed with ammonia can produce chloramine gas that irritates the eyes, throat, and lungs.
Do not assume two products are compatible because they are both marketed for bathrooms. Use one product at a time, rinse when the label requires it, and do not create homemade combinations unless their safety and purpose are established.
Step 2: Remove Laundry, Trash, and Portable Objects
Remove towels, bathmats, shower curtains scheduled for washing, wastebaskets, scales, toilet brushes, stools, storage baskets, and floor-standing products. Then clear the vanity, sink rim, tub ledge, shower shelves, windowsill, and toilet tank.
Place clean reusable items outside the spray zone. Empty rather than merely reposition the wastebasket because the floor beneath it and the bin itself may need cleaning.
You will know this step is complete when:
- The floor is unobstructed.
- The vanity and sink rim are empty.
- Shower and tub ledges are accessible.
- No personal-care item remains in the likely spray path.
- Movable accessories have been sorted for cleaning or return.
A common mistake is shifting everything from one side of the counter to the other. That doubles handling and leaves one side contaminated while the opposite side is cleaned.
Step 3: Remove Hair and Dust While Surfaces Are Dry
Remove dry debris before introducing moisture. Start high with the exhaust grille, light fixture exterior, upper shelves, window ledges, and doorframe, then move downward to counters, baseboards, corners, and the floor.
Dry hair is easier to vacuum or collect than wet hair. Once mixed with cleaner, it clings to grout, cloths, toilet bases, shower edges, and mop heads.
Choose the Right Dry-Removal Method
| Area | Preferred tool | Typical time | Main reason |
| Exhaust grille exterior | Vacuum brush attachment | 1-2 minutes | Captures lint without scattering it |
| Shelves and ledges | Dry microfiber cloth | 1-3 minutes | Traps fine dust |
| Floor corners | Crevice vacuum tool | 1-2 minutes | Removes hair near edges |
| Tile or vinyl floor | Vacuum or dry mop | 2-5 minutes | Prevents muddy residue |
| Textured bathmat area | Vacuum | 1-3 minutes | Pulls out embedded hair |
| Damp floor | Disposable towel first | 1-2 minutes | Prevents vacuum exposure to moisture |
Do not vacuum wet material unless the equipment is specifically designed for wet pickup. Dry visible puddles first and investigate recurring water, since a persistent wet area may indicate a leak rather than ordinary cleaning moisture.
Step 4: Inspect the Surfaces Before Choosing a Cleaner
Identify the surface and the type of soil before spraying. Soap residue, body oils, limescale, rust transfer, mildew staining, and ordinary dust respond differently, and a product that solves one problem can damage another surface.
This inspection takes one or two minutes but prevents expensive errors. Look for cracked grout, loose caulk, peeling coatings, corroded metal, etched stone, and damaged laminate seams. Cleaning cannot repair these conditions.
Bathroom Cleaner Selection Table
| Surface or soil | Suitable starting option | Avoid or verify first |
| Glazed ceramic tile | Mild detergent or labeled tile cleaner | Abrasives that scratch glaze |
| Porcelain sink or toilet | Non-abrasive bathroom cleaner | Metal tools and harsh scouring |
| Acrylic tub or shower | Manufacturer-approved mild cleaner | Solvents and abrasive powders |
| Fiberglass enclosure | Mild detergent and soft sponge | Stiff brushes and aggressive abrasives |
| Glass shower door | Glass-safe cleaner or compatible descaler | Abrasive pads |
| Chrome faucet | Mild soap and soft cloth | Long acid exposure |
| Natural stone | Stone-safe, pH-appropriate cleaner | Vinegar and acidic descalers |
| Cement-based grout | Compatible alkaline cleaner | Unverified strong acid |
| Hard-water deposits | Surface-approved acidic descaler | Natural stone and sensitive metals |
| General body oil or soap film | Detergent-based cleaner | Disinfectant used as the only cleaner |
Vinegar is not a universal bathroom solution. Its acidity may help dissolve some mineral deposits, but acidic products can damage calcium-based stone such as marble and may affect certain grout, metal finishes, sealants, or coatings.
Baking soda is mildly abrasive. It may help with limited soil on compatible durable surfaces, but repeated scrubbing can dull finishes or scratch softer materials. Test any unfamiliar method in an inconspicuous area.
Step 5: Apply Cleaner and Allow the Correct Dwell Time
Apply the selected cleaner according to its label, beginning with areas that need time to soften deposits. Keep spray controlled and close enough to limit airborne mist, especially in small bathrooms.
“Dwell time” can describe the period a cleaner sits to loosen soil. “Contact time” has a more specific meaning for disinfectants: the surface must remain visibly wet for the label-stated duration to achieve the registered claim.
There is no universal 5-minute or 10-minute rule. EPA-registered products have label-specific contact times. Some products require one minute, while others require ten minutes, depending on the formula, organism, surface, and intended claim. EPA guidance states that a surface must remain visibly wet throughout the listed contact time.
Cleaner and Disinfectant Timing
| Product purpose | Typical label-directed period | Surface condition | Main checkpoint |
| Mild detergent cleaning | 1-5 minutes | Damp, not dried out | Soil releases with light wiping |
| Soap-scum cleaner | 3-10 minutes | Evenly coated | Film softens |
| Mineral descaler | 1-10 minutes | Product-specific | Deposit begins dissolving |
| Fast disinfectant | About 1 minute | Visibly wet | Full label time completed |
| Standard disinfectant | 5-10 minutes | Visibly wet | No premature drying |
| Toilet-bowl cleaner | Label-specific | Bowl surface coated | Required time completed |
These are typical categories, not instructions for a particular bottle. The product label controls.
Should You Clean or Disinfect First?
Clean first, then disinfect when disinfection is needed. Cleaning removes soil and many germs with soap or detergent, while disinfection uses a registered chemical to kill remaining target organisms on a previously cleaned surface.
The CDC states, “First, clean visibly dirty surfaces with household cleaners containing soap or detergent before disinfecting with household bleach.”
Dirt, soap film, body oils, and other impurities can interfere with disinfectant performance. CDC household guidance therefore recommends cleaning surfaces before sanitizing or disinfecting them.
When Is Routine Cleaning Usually Enough?
Routine detergent cleaning is generally appropriate for ordinary household soil when no one is ill and surfaces do not require a specific sanitation or disinfection standard. CDC guidance notes that cleaning alone removes most harmful viruses or bacteria from household surfaces.
Consider targeted disinfection for:
- High-touch surfaces during or after household illness
- Shared bathrooms used by many people
- Surfaces contaminated with body fluids
- Situations directed by public-health or medical guidance
- Facilities governed by workplace or health regulations
Focus disinfection on appropriate hard, nonporous, high-touch surfaces such as flush handles, faucet controls, doorknobs, light switches, and toilet seats. Do not indiscriminately disinfect every ceiling, wall, textile, or decorative object.
What Order Should You Clean the Bathroom After Preparation?
After preparation, work from high to low, relatively clean to more contaminated, and dry tasks to wet tasks. Finish the toilet and floor near the end so tools used on dirtier areas do not return to the vanity or faucet.
A practical sequence is:
- Ventilate and prepare supplies.
- Remove textiles, trash, and portable items.
- Dust or vacuum from high to low.
- Pre-treat the shower, tub, sink, and toilet bowl as appropriate.
- Clean mirrors and upper fixtures.
- Clean shower walls, tub, and enclosure.
- Clean the vanity, sink, and faucet.
- Clean high-touch points.
- Clean the toilet exterior and seat.
- Clean the floor toward the exit.
- Allow surfaces to dry.
- Return only clean, needed items.
This order is a workflow, not an inflexible rule. A cleaner that requires a long dwell period may be applied early, while a mirror can be cleaned during the waiting period.
Why Should the Toilet Be Cleaned Near the End?
The toilet is usually treated as one of the most contaminated bathroom fixtures. Cleaning it near the end reduces the chance that a toilet cloth, glove, brush, or hand will move back to the sink, faucet, or personal-care area.
Use a dedicated cloth or disposable towels for the toilet exterior. Clean from less contaminated exterior sections toward dirtier sections, and change or isolate the cloth afterward.
The floor should usually follow the toilet because splashes, dust, hair, and loosened debris may fall during fixture cleaning.
Common First-Step Mistakes and How to Fix Them
| Mistake | What goes wrong | Recovery |
| Spraying before decluttering | Cleaner lands on belongings and inaccessible edges remain dirty | Remove items, wipe affected packaging, restart with clear surfaces |
| Wetting hair and dust | Debris becomes sticky sludge | Blot excess moisture, collect debris, then clean normally |
| Mixing products | Toxic fumes or chemical reactions may occur | Leave the area, seek fresh air, and follow poison-control guidance |
| Ignoring the label | Surface damage or failed disinfection may result | Stop, rinse if directed, and review compatibility |
| Wiping disinfectant early | Required contact time is not achieved | Reapply and keep the surface wet for the full label time |
| Returning dirty containers | Clean counters are recontaminated | Wipe bottle bases and organizers before replacing them |
| Using one cloth everywhere | Soil spreads between toilet and sink areas | Assign separate cloths and launder them after use |
| Closing the room immediately | Moisture and vapors remain trapped | Continue ventilation until surfaces and air have cleared |
If strong fumes, coughing, eye irritation, chest discomfort, or breathing difficulty occurs after using cleaners, stop cleaning and move to fresh air. Chemical exposure may require immediate advice from local emergency services or a poison center.
How Long Does the First Step Take?
Preparation usually takes 3-10 minutes in a routinely maintained bathroom and 10-20 minutes in a cluttered or neglected one. The room size matters less than the number of objects, amount of dry debris, and distance to laundry, trash, and storage areas.
| Bathroom condition | Clearing time | Dry debris removal | Total preparation |
| Small, maintained half bath | 2-3 minutes | 1-2 minutes | 3-5 minutes |
| Standard family bathroom | 3-6 minutes | 2-4 minutes | 5-10 minutes |
| Cluttered shared bathroom | 6-12 minutes | 3-6 minutes | 9-18 minutes |
| Neglected bathroom | 10-20 minutes | 5-10 minutes | 15-30 minutes |
Preparation may feel like a delay because no fixture has been scrubbed yet. In practice, it reduces repeated movement and makes the wet-cleaning stage faster.
How Should the First Step Change for Special Conditions?
When Someone in the Home Is Ill
Clear personal objects carefully and avoid sharing towels or cleaning cloths. Clean visibly dirty high-touch surfaces first, then use an appropriate registered disinfectant according to its label.
Do not estimate contact time from memory. Confirm that the surface remains visibly wet for the full required period.
When the Bathroom Has Heavy Hard Water Deposits
Inspect the surface before selecting an acid-based product. Hard-water removers may work on compatible glass or glazed tile, but they can damage natural stone and some metal finishes.
Treat a small test area first. Mineral deposits may require repeated short applications rather than one excessive exposure.
When You See Mold-Like Growth
Do not begin by aggressively dry-brushing suspected mold because that can disturb particles. Address moisture sources, ventilation failure, plumbing leaks, damaged caulk, and porous materials as part of the problem.
Large, recurring, hidden, or water-damage-related growth may require professional assessment. Cleaning the visible surface alone will not repair a leak or remove contamination inside damaged materials.
When Children or Pets Use the Bathroom
Remove toys, cups, toothbrushes, pet bowls, and grooming items from the treatment zone. “Natural” does not automatically mean safe, non-irritating, edible, or compatible with every surface.
Store products in original containers and keep them inaccessible. Rinse surfaces when the label requires rinsing, especially surfaces likely to contact skin or objects placed in the mouth.
When Cleaning a Shared or Commercial Restroom
Preparation should include blocking access, displaying warning signs, checking dispensers, and separating clean tools from contaminated tools. Shared facilities may require written cleaning and disinfection procedures.
CDC healthcare guidance prioritizes high-touch toilet-area surfaces such as sinks, faucets, handles, toilet seats, and door handles, though household bathrooms do not need to follow healthcare schedules.
Expert Rules That Improve Bathroom Cleaning
Use Contact Time as a Measured Requirement
Do not treat contact time as a vague waiting period. Start timing after the target surface has been fully wetted, and reapply only when the label permits and the surface begins drying too early.
Separate Soil Removal From Germ Reduction
A shiny surface is not necessarily disinfected, and a disinfected surface can still look dirty if soil was not removed correctly. Cleaning and disinfection have different purposes, even when one product claims to perform both.
Clean the Containers Before Returning Them
Soap pumps, shampoo bottles, organizers, toilet-brush holders, and wastebaskets often have sticky or dusty bases. Returning them without wiping immediately transfers residue to the cleaned counter, shelf, or floor.
What the First Step Cannot Solve
Clearing and preparing the room cannot repair cracked grout, loose caulk, leaking plumbing, failed ventilation, etched stone, corroded metal, damaged coatings, or moisture trapped behind walls. Cleaning may reveal these problems more clearly, but repeated chemical treatment is not a substitute for repair.
Preparation also cannot guarantee safe product use. The user must still follow each manufacturer’s label, observe surface restrictions, provide ventilation, and avoid mixing chemicals.
Frequently Asked Questions
Should I remove everything from the bathroom?
Remove portable items that obstruct cleaning or could be exposed to spray, including towels, rugs, toiletries, bins, scales, and shower products. Fixed cabinets and securely mounted accessories can remain. You do not need to empty every drawer unless you are cleaning inside it or dealing with pests, leaks, contamination, or a full move-out clean.
Should I dust or declutter first?
Declutter first, then dust. Removing objects exposes the surfaces beneath them and prevents you from repeatedly lifting bottles while handling a dusty cloth or vacuum. After clearing, remove dust from high areas before vacuuming or sweeping the floor, since debris naturally falls downward during the process.
Should I put cleaner in the toilet before cleaning anything else?
You may apply a label-approved toilet-bowl cleaner early if it needs dwell time, but only after ventilation, label review, and basic clearing. Keep the toilet lid controlled to reduce splashing, use a dedicated brush, and do not combine toilet-bowl cleaner with bleach or another chemical product.
Can I use vinegar as the first cleaner?
Vinegar may help with limited mineral deposits on compatible surfaces, but it is not suitable for every bathroom material and should not be presented as a universal disinfectant. Avoid vinegar on marble and other acid-sensitive stone, and never use it before, after, or with bleach unless the surfaces have been fully separated and safely rinsed.
Is it better to sweep or vacuum a bathroom floor first?
Vacuuming usually captures hair and fine dust more effectively, provided the floor is dry and the vacuum is suitable for the surface. Sweeping is acceptable when a vacuum is unavailable. Use a dry microfiber mop for delicate flooring, and never use a standard dry vacuum on puddles or wet debris.
What should be the last thing cleaned in a bathroom?
The floor is usually the last major surface because debris and droplets fall while fixtures are cleaned. Work from the farthest corner toward the doorway so you do not walk across the cleaned area. Afterward, allow surfaces to dry, wash reusable tools, remove gloves safely, and wash your hands.
The Bottom Line
What should be your first step when cleaning the bathroom? Begin by ventilating and clearing the room, then remove loose dry debris before applying liquid cleaner. This short preparation stage creates access, protects personal belongings, prevents wet hair and dust from becoming sludge, and supports a clean-to-dirty workflow.
After preparation, choose products by surface and soil type, clean before disinfecting, keep disinfected surfaces visibly wet for the label-stated contact time, and never mix bathroom chemicals. A correct first step does more than make the room look organized. It makes every later cleaning step safer, faster, and more reliable.


