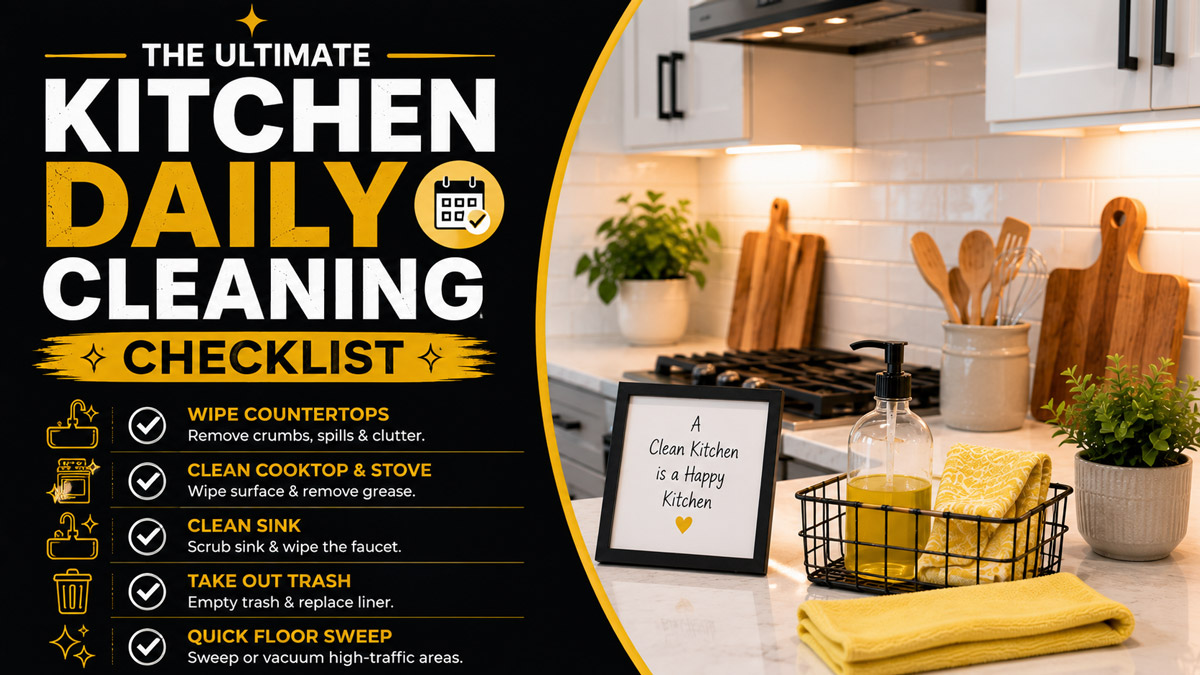
A kitchen daily cleaning checklist is a structured schedule of maintenance tasks performed every 24 hours to preserve hygiene, food safety, and appliance efficiency. Implementing this protocol prevents the buildup of grease, food residue, and pathogenic bacteria like Salmonella or E. coli.
Key Facts / At a Glance
- Daily kitchen cleaning requires 15 to 20 minutes of active labor.
- Disinfectant sprays demand a minimum 10-minute wet contact time to kill 99.9% of bacteria.
- Microfiber cloths withstand 100 to 500 wash cycles before their static-cling efficacy degrades.
- Vinegar contains acetic acid that permanently etches natural stone surfaces like granite and marble.
- Top-to-bottom sequencing prevents dislodged dust from contaminating freshly sanitized lower surfaces.
What Is A Kitchen Daily Cleaning Checklist?
A kitchen daily cleaning checklist serves as a preventative maintenance schedule that systematically resets a food preparation space to baseline sanitary conditions. This daily routine targets high-traffic zones, food contact surfaces, and waste receptacles. Facility managers and public health inspectors classify daily cleaning as the first line of defense against foodborne illness, pest infestations, and cross-contamination. Unlike deep weekly or monthly cleaning schedules that focus on descaling appliances or washing inside cabinets, the daily protocol isolates immediate biological hazards.
Executing this routine creates predictable hygiene standards. A properly implemented schedule ensures that soils, fats, and starches never sit long enough to harden into permanent stains. The process relies on specific chemical reactions. Alkaline cleaners break down lipid chains from cooking oils, while surfactants lift loose particulate matter away from non-porous surfaces. Following a standardized list removes decision fatigue. You simply execute the predefined steps using the correct tools and specified chemical agents.
How Does The Kitchen Daily Cleaning Process Work?
The daily cleaning process works by combining mechanical friction, chemical sanitizers, and strategic task sequencing to neutralize bacterial threats efficiently. Success depends entirely on moving through the space in a specific, repeatable order. Breaking the sequence guarantees wasted effort.
The Clean As You Go Workflow
Professional chefs rely on the “clean as you go” workflow to maintain sanitary stations during heavy service hours. You wipe spills the exact moment they occur. You wash preparation tools like knives and cutting boards immediately after portioning raw ingredients. This constant micro-cleaning eliminates end-of-day pileups. Waiting until dinner concludes allows starches to solidify into concrete-like deposits, requiring aggressive scrubbing instead of a simple wipe.
The Top-to-Bottom Logic
Cleaning higher surfaces before lower surfaces dictates the physical direction of your workflow. Gravity pulls dislodged crumbs, dust, and aerosolized grease downward during the cleaning process. You must wipe cabinet doors, countertops, and stovetops first. If you mop the floor and subsequently wipe a flour-dusted counter, debris will fall onto the wet floor, creating an unsanitary paste.
Dry-to-Wet Sequencing
Dry-to-wet sequencing dictates that you must remove loose particulate matter before introducing any liquid cleaning agents. You must sweep, vacuum, or dust dry crumbs entirely. Spraying an all-purpose cleaner onto a surface covered in loose flour or dirt instantly creates mud. This mud smears across the surface, requiring multiple rinse cycles to remove completely.
What Are The Step-By-Step Tasks For Daily Kitchen Cleaning?
Executing a kitchen daily cleaning checklist requires moving systematically through eight distinct phases. Completing these steps in this exact order guarantees a sanitary environment while minimizing total labor time.
Step 1: Clear And Soak Food Soils
Begin by removing all loose items from the primary workspaces. Empty the sink completely. Scrape heavy food remnants from plates directly into the compost bin or trash receptacle. Place heavily soiled pans, particularly those coated in hardened sugars or proteins, into the sink. Fill these pans with water exceeding 120 degrees Fahrenheit and a few drops of concentrated dish detergent. Hot water melts fats, while the detergent enzymes break down protein bonds. Allow these to soak while you complete the remaining checklist items.
Step 2: Run The Dishwasher Overnight
Load the dishwasher systematically, placing heavily soiled plates facing the water jets. Verify that the bottom filter is free of large food particles before closing the door. Start the machine on a standard or heavy cycle. Running the dishwasher overnight ensures you wake up to clean tools, and it utilizes electricity during off-peak municipal hours. You will know this step is successful when the sink is completely empty of daily dishes.
Step 3: Disinfect The Countertops
Remove appliances, mail, and cooking utensils from the countertops. Spray the entire surface with an appropriate all-purpose cleaner. Allow the solution to sit for the manufacturer-recommended dwell time, which typically ranges from two to five minutes for standard residential cleaners. Wipe the surface using a clean microfiber cloth in an overlapping “S” pattern. This technique pulls soil toward you rather than pushing it around the perimeter.
Step 4: Degrease The Stovetop
Wait for the stovetop burners to cool completely before applying any liquid. Remove the grates if you operate a gas range. Spray a dedicated degreaser or apply warm, soapy water to the surface. For glass-top ranges, use a specialized non-abrasive cream and a plastic scraper to remove polymerized oil splatters. Wipe the control knobs carefully, as these harbor significant bacterial loads from raw food handling.
Step 5: Sanitize The Sink Basin
The sink acts as a highly contaminated biological zone. Scrub the stainless steel or porcelain basin using a mild abrasive like baking soda combined with standard dish soap. Scrub in the direction of the metal grain to prevent micro-scratches. Rinse the basin entirely with hot water. Dry the sink using a separate towel. Eliminating standing water prevents calcium deposit formation and removes the primary drinking water source for nocturnal pests like cockroaches.
Step 6: Wipe High-Touch Surfaces
Locate every handle and switch in the room. This includes the refrigerator doors, microwave handle, oven pull, faucet levers, and primary cabinet hardware. Wipe these specific touchpoints using a dedicated disinfectant wipe or spray. These locations transfer bacteria directly from unwashed hands to the next user. Ensure the surface remains visibly wet for the required contact time to neutralize pathogens completely.
Step 7: Manage Trash And Recycling
Inspect the primary waste receptacles. Empty the bins immediately if they are full or contain organic matter that will decay overnight. Wipe the interior and exterior of the lid using a disinfectant spray, as lids frequently catch food splatters. Replace the plastic liner securely. Sprinkling two tablespoons of baking soda into the bottom of the fresh liner absorbs future odors and deters insect attraction.
Step 8: Sweep And Spot-Mop Floors
Save the flooring for the final phase. Use a broom with flagged bristles (split ends) to capture fine dust and salt, or utilize a cordless stick vacuum on hard floors. Sweep from the baseboards toward the center of the room. Once the loose debris is collected, inspect the floor for sticky spots or spills. Spot-mop these specific areas using a damp microfiber mop and a neutral pH floor cleaner.
Expert Insight: Never use the same microfiber cloth for the sink and the countertops. Facility managers use strict color-coding. Use blue cloths exclusively for food preparation counters, green cloths for the sink basin, and yellow cloths for floor spills. This prevents cross-contaminating your chopping board with sink bacteria.
Which Types Of Daily Kitchen Checklists Work Best?
Different living situations demand distinct approaches to daily sanitation. Choosing the correct protocol ensures compliance without inducing unnecessary fatigue.
The Minimalist Checklist For Busy Professionals
This routine focuses strictly on immediate health essentials and pest prevention. It requires under ten minutes. The user clears the sink, wipes the main food preparation counter, and empties the trash. It ignores deep stove cleaning or floor mopping unless a massive spill occurs. This protocol stops bug infestations and keeps the kitchen functional for morning coffee preparation.
The Deep Daily Checklist For Large Families
Heavy-use households generate significant biological waste. This checklist demands twenty to thirty minutes. It involves soaking stove grates nightly, wiping down high-chair zones, sweeping the floor twice daily, and disinfecting all high-touch cabinet handles. Large families must aggressively manage cross-contamination risks, especially during cold and flu seasons.
The Regulated Protocol For Commercial Food Service
Commercial kitchens operate under strict health department codes. This checklist requires specialized tools and detailed record-keeping. Staff must log sanitizing solution parts-per-million (PPM) strengths on a physical clipboard. Duties include sweeping walk-in refrigerator floors, draining commercial hood filters, and sanitizing prep stations with industrial quaternary ammonium compounds.
The Pet-Safe Household Routine
Homes with animals require specific chemical awareness. This routine bans the use of phenol-based cleaners, ammonia, and heavy bleach on lower surfaces. The user must sweep pet hair daily to prevent HVAC filter clogs. Food bowls are lifted and washed nightly, while the surrounding floor area is sanitized using diluted white vinegar or a hydrogen peroxide-based solution.
How Do Different Surface Materials Affect Your Cleaning Routine?
Matching the cleaning agent to the physical surface prevents catastrophic, irreversible damage to your home investments. Applying the wrong chemical to a natural surface causes rapid degradation.
| Surface Material | Approved Daily Cleaner | Banned Substance | Primary Risk Profile |
| Granite / Marble | pH-neutral stone spray or dish soap | Vinegar, Lemon juice, Bleach | Acid permanently etches and dulls the stone sealant. |
| Stainless Steel | Glass cleaner or dedicated steel polish | Abrasive powders, Steel wool | Scratches the grain and removes the protective chromium oxide layer. |
| Quartz (Engineered) | Mild dish soap and water | Harsh solvents, Oven cleaners | Solvents break down the synthetic resin binding the crushed quartz. |
| Butcher Block Wood | Damp cloth with mild soap | Heavy water saturation, Bleach | Standing water causes warping, splitting, and rot in the wood fibers. |
| Glass Stovetops | Specialized non-abrasive cream | Coarse scrubbing pads, Ammonia | Ammonia causes glass streaking; pads leave micro-scratches that weaken the glass. |
What Are The Best Methods For Kitchen Disinfection?
Choosing between eco-friendly solutions and chemical conventional cleaners requires balancing safety, speed, and efficacy. Each method presents distinct advantages and specific operational limitations.
Eco-Friendly Cleaning Solutions
Eco-friendly methods utilize natural compounds like acetic acid (white vinegar), sodium bicarbonate (baking soda), and castile soap. These solutions present zero toxicity risks to small children and pets. They cost pennies per application. However, natural cleaners act slowly. Vinegar struggles to cut through heavy, polymerized grease deposits left by frying meat. You cannot use acidic natural cleaners on natural stone countertops.
Chemical Conventional Cleaners
Conventional cleaners rely on synthetic compounds like sodium hypochlorite (bleach) and heavy-duty degreasers. These products act instantly. They cut through burned-on grease rapidly and deliver clinical-level disinfection against tough viruses. The drawbacks include strong respiratory fumes, potential skin irritation, and higher environmental impact during wastewater disposal.
| Comparison Criterion | Eco-Friendly (Vinegar/Baking Soda) | Chemical Conventional (Bleach/Quats) |
| Bacterial Kill Rate | Moderate (leaves some pathogens) | High (99.9% clinical efficacy) |
| Degreasing Speed | Slow (requires heavy scrubbing) | Fast (dissolves lipids instantly) |
| Surface Safety Risk | High on stone (acid etching) | High on wood (bleaching/drying) |
| Toxicity / Fumes | Zero to low | High (requires good ventilation) |
| Cost Per Month | Under $2.00 | $15.00 to $30.00 |
How Much Time And Money Does Daily Kitchen Cleaning Cost?
Maintaining a daily kitchen cleaning checklist requires a modest but consistent investment of resources. A standard residential kitchen demands 15 to 20 minutes of labor per day. If you skip a single day, the required time on the subsequent day frequently doubles due to hardened food soils.
Financial costs remain highly predictable. A basic starter kit costs between $15 and $30 upfront. This kit includes a high-quality dish soap, an all-purpose spray, a dedicated degreaser, and a pack of microfiber cloths. Microfiber cloths represent the highest return on investment. A quality microfiber towel rated above 300 GSM (grams per square meter) lasts through 100 to 500 machine washes before its microscopic fibers degrade.
Expert Insight: Never wash your microfiber cleaning cloths with fabric softener. Fabric softener coats the fibers in a waxy synthetic lipid. This completely destroys the static cling and absorption properties of the cloth, rendering it useless for picking up kitchen grease.
What Are The Most Common Daily Cleaning Mistakes?
Even diligent homeowners frequently execute their cleaning routines incorrectly. These common failures compromise hygiene and damage expensive fixtures.
Wiping Disinfectants Immediately
The most widespread failure involves spraying a surface and wiping it dry within five seconds. Disinfectants require a specific “dwell time” or “wet contact time” to actually kill bacterial cell walls. If you wipe the liquid away immediately, you merely move living bacteria to a new location. You must leave the surface visibly wet for two to ten minutes, depending on the product label.
Using The Same Cloth Everywhere
Using a single sponge or towel for the entire room guarantees cross-contamination. If you wipe the floor to absorb a spilled drink, and then use that same cloth to wipe your cutting board, you transfer floor pathogens directly to your food preparation zone. You must switch cloths between distinct zones or implement a strict color-coding system.
Ignoring The Sink Drain
Many people scrub the sink basin but ignore the rubber garbage disposal baffle and the drain itself. The underside of the rubber baffle collects massive amounts of rotting food slime. This oversight generates severe odors and serves as a breeding ground for drain flies. You must lift the rubber flaps and scrub the underside weekly, while flushing the drain with hot water daily.
Overusing Chemical Sprays
Applying excess chemical cleaner does not result in a cleaner surface. Over-saturating a countertop leaves a sticky, chemical residue behind. This sticky film actually attracts dust and dirt faster than a clean surface. Apply a light, even mist, and rely on the mechanical friction of the microfiber cloth to remove the soil.
Frequently Asked Questions
Can I use glass cleaner on my kitchen countertops?
No, you should avoid using glass cleaner on most countertops. Glass cleaners frequently contain ammonia, which strips the protective sealants from natural stone and dulls the finish of synthetic quartz over time. Stick to pH-neutral all-purpose cleaners or simple dish soap and water.
How often should I replace my kitchen sponge?
You must replace synthetic kitchen sponges every one to two weeks. Sponges trap moisture and food particles in their porous structure, creating an ideal incubation environment for harmful bacteria. If a sponge smells sour or musty, it is already heavily contaminated and must be discarded immediately.
What is the fastest way to clean a microwave daily?
The fastest daily maintenance involves steam. Place a microwave-safe bowl containing one cup of water and a tablespoon of white vinegar inside. Heat the bowl on high for three minutes. Leave the door closed for two additional minutes. The trapped steam loosens all hardened food splatters, allowing you to wipe the interior perfectly clean with one swipe.
Should I sweep or vacuum the kitchen floor?
A cordless stick vacuum handles hard kitchen floors more effectively than a traditional broom. Brooms tend to kick fine dust and pet dander into the air, which eventually settles back onto your clean countertops. A vacuum captures the particulate matter entirely within its filtration system.
Why does my stainless steel sink look cloudy after cleaning?
Cloudiness on stainless steel usually results from hard water calcium deposits or leftover soap residue. You can fix this by drying the sink entirely with a clean towel after your final rinse. For heavy cloudiness, wiping the dry basin with a few drops of mineral oil restores the factory shine.
The Bottom Line on Daily Maintenance
Mastering your kitchen daily cleaning checklist transforms a chaotic, stressful environment into a sanitary and functional workspace. By adhering to the top-to-bottom principles and respecting chemical dwell times, you protect your household from foodborne pathogens. Consistency is the ultimate mechanism for success. Investing fifteen minutes into this protocol every evening guarantees you wake up to a pristine, ready-to-use kitchen.


