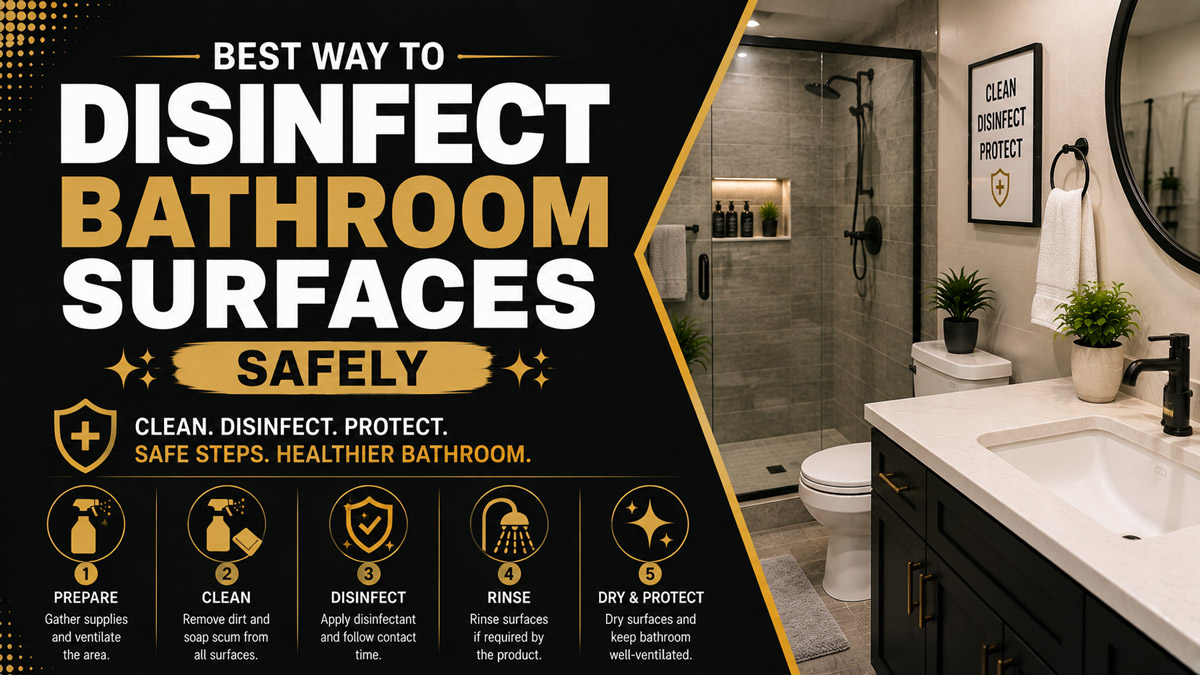
The best way to disinfect bathroom surfaces is to remove hair, dust, soap scum, and body oils first, then apply a compatible EPA-registered disinfectant for the full contact time stated on its label. The treated surface must remain visibly wet throughout that period, followed by rinsing or wiping when the label or surface use requires it.
Key Facts at a Glance
- Cleaning must remove visible soil before a separate disinfectant is applied.
- The product label, not a universal estimate, determines the required contact time.
- A disinfectant must keep the entire treated surface visibly wet during contact time.
- Bathroom products should never be mixed unless the manufacturer explicitly permits it.
- Toilet tools and cloths should remain separate from sink, faucet, and counter tools.
- Routine household cleaning does not require whole-room disinfection every day.
Before You Start
A normal full-bathroom cleaning and targeted disinfection takes approximately 30-60 minutes. A heavily soiled bathroom, a shared commercial restroom, or an illness cleanup may require 60-120 minutes because organic material must be removed before the disinfection stage begins.
| Planning factor | Typical requirement | Practical guidance |
| Total time | 30-60 minutes | Add 20-40 minutes for heavy soap scum or illness cleanup |
| Difficulty | Beginner to moderate | Product compatibility and contact time need the most attention |
| Supply cost | $8-$30 | Assumes reusable cloths, detergent, gloves, and one disinfectant |
| Disposable gloves | 1 pair per cleaning zone | Replace torn or heavily contaminated gloves |
| Microfiber cloths | 4-6 cloths | Separate toilet, general surfaces, glass, and final drying |
| Disinfectant | 1 EPA-registered product | Confirm bathroom use, surface compatibility, and pathogen claim |
| Ventilation | Entire cleaning period | Run the exhaust fan or open an exterior window |
| Contact timer | 1 phone or kitchen timer | Use the exact time printed on the product label |
Prepare two groups of supplies. The first group should contain detergent, bathroom cleaner, brushes, and cloths for soil removal. The second should contain the disinfectant, application cloths, disposable towels if needed, and a timer.
Wear household gloves when the product label recommends them. Eye protection is sensible when working with splash-prone concentrates, overhead surfaces, or toilet bowls. Keep children and pets out of the room until treated surfaces are dry and the space has been ventilated.
What Is the Difference Between Cleaning and Disinfecting?
Cleaning removes hair, dust, mineral deposits, soap residue, body oils, and a portion of the microorganisms present on a surface. Disinfecting uses an antimicrobial product to inactivate specified microorganisms on compatible, usually hard and nonporous, surfaces.
The Centers for Disease Control and Prevention advises cleaning surfaces before sanitizing or disinfecting them. A disinfectant cannot reliably reach the surface when a layer of soil stands between the chemical and the microorganisms.
Sanitizing and disinfecting are also different. Sanitizing reduces microorganisms to a level defined by a regulatory standard or product claim. Disinfecting carries a stronger claim against named organisms, but it still does not make a bathroom sterile.
Sterilization destroys or removes all forms of microbial life under validated conditions. That standard belongs mainly to medical, laboratory, pharmaceutical, and specialized industrial processes. It is neither necessary nor realistic for a residential bathroom.
Why Must You Clean Before Disinfecting?
Visible contamination absorbs, reacts with, or physically blocks a disinfectant. Soap scum, mucus, urine residue, fecal material, skin oils, and dust may therefore reduce the amount of active ingredient that reaches the underlying surface.
A “cleaner and disinfectant” may permit a one-step process on lightly soiled surfaces. However, many labels still require pre-cleaning when a surface has heavy soil, body fluids, grease, or visible organic matter. Read both the cleaning and disinfection directions rather than relying on the front label.
Pre-cleaning also improves coverage. Water beads or runs around greasy material, which creates untreated gaps. After detergent loosens and removes the film, the disinfectant can spread more evenly across tile, porcelain, sealed counters, handles, and toilet exteriors.
This sequence is the foundation of effective bathroom disinfection:
- Remove dry debris.
- Wash away visible contamination.
- Rinse when the cleaner requires it.
- Apply the disinfectant.
- Maintain wet contact time.
- Rinse, wipe, or air-dry according to the label.
How to Choose the Best Bathroom Disinfectant
The best bathroom disinfectant is an EPA-registered product that lists the required use site, surface type, and target organism while remaining compatible with the bathroom material. Fragrance, foam level, and marketing terms matter less than the registration, directions, and contact-time requirements.
Look for an EPA registration number on products sold as disinfectants in the United States. The label should identify the microorganisms the product controls, the surfaces on which it can be used, whether dilution is required, and how long the surface must remain wet.
EPA guidance explains that a product with a 10-minute contact time must keep the surface visibly wet for the full 10 minutes. More product may be necessary if part of the surface dries early.
Bathroom Disinfectant Comparison
| Disinfectant type | Typical labeled contact time | Best uses | Main limitations |
| Sodium hypochlorite bleach | 1-10 minutes | Toilet exteriors, certain tile, outbreak cleanup | Corrodes some metals, fades fabrics, irritates airways |
| Hydrogen peroxide products | 1-10 minutes | Sealed counters, fixtures, many general surfaces | May discolor some materials; exact formula matters |
| Quaternary ammonium products | 3-10 minutes | Routine hard-surface disinfection | May leave residue; not every product controls every organism |
| Alcohol, usually 70% or higher | 30 seconds-10 minutes | Small compatible touchpoints | Evaporates quickly and performs poorly through visible soil |
| Citric-acid disinfectants | 5-10 minutes | Lower-odor routine disinfection | Can damage acid-sensitive stone |
| Thymol-based disinfectants | About 10 minutes | Households seeking botanical active ingredients | Strong odor and longer wet time on some labels |
| Ready-to-use wipes | 1-10 minutes | Switches, handles, flush levers | One wipe may not keep a large surface wet long enough |
| Concentrated commercial disinfectants | 1-10 minutes | High-traffic restrooms | Dilution errors can reduce efficacy or damage surfaces |
Contact times differ substantially between products and sometimes between organisms listed on the same product. One EPA bathroom-cleaner label, for example, requires treated surfaces to remain wet for 10 minutes before wiping or rinsing.
Is Bleach Always the Best Choice?
Bleach is effective for many hard, nonporous surfaces, but it is not the universal best choice. Bleach can corrode metals, discolor textiles, damage some finishes, irritate the respiratory tract, and become ineffective when incorrectly diluted or stored.
CDC instructions state that users should follow the bleach manufacturer’s directions. When a label lacks disinfection instructions, the CDC’s general household guidance says to keep a properly diluted bleach solution on the surface for at least one minute while the surface remains visibly wet.
Do not automatically apply an old online recipe to a modern bottle. Household bleach concentrations vary. CDC guidance for some applications specifies regular unscented bleach containing 5%-9% sodium hypochlorite, but illness-specific concentrations can be very different.
Does Vinegar Disinfect a Bathroom?
Vinegar can dissolve some mineral deposits and soap residue, but ordinary household vinegar is not a substitute for an EPA-registered disinfectant when a verified antimicrobial claim is needed. It may help clean compatible glass or tile, yet cleaning performance should not be confused with regulated disinfection.
Vinegar is also unsafe for marble, limestone, travertine, and other acid-sensitive materials. Repeated use can etch the surface and create a dull, rough area that no amount of additional cleaning will remove.
Never apply vinegar after bleach or combine the two. Acid mixed with sodium hypochlorite can release chlorine gas, which may injure the eyes, throat, and lungs.
The Best Way to Disinfect Bathroom Surfaces
The best way to disinfect bathroom surfaces is a seven-stage process: prepare the room, remove dry debris, wash visible soil, rinse incompatible cleaner residue, apply disinfectant, maintain contact time, and complete any required rinse or drying step. Working from cleaner areas toward the toilet reduces cross-contamination.
Step 1: Ventilate and Clear the Bathroom
Turn on the exhaust fan and open an exterior window when available. Remove toothbrushes, razors, cosmetics, towels, bath mats, children’s toys, medication, and open containers before spraying or wiping chemicals.
Read the entire disinfectant label before starting. Confirm the required protective equipment, approved surfaces, dilution rate, contact time, rinsing directions, storage conditions, and first-aid instructions.
Do not assume two products can be layered. If you have already used an acidic descaler, ammonia-containing glass cleaner, toilet-bowl cleaner, or another strong chemical, rinse the surface thoroughly and allow the room to ventilate before applying a different product.
Success checkpoint: Personal items are removed, air is moving, supplies are separated, and every product’s directions have been reviewed.
Common mistake: Spraying the room before removing toothbrushes and towels exposes personal items to unnecessary droplets and residue.
Step 2: Remove Hair, Dust, and Loose Debris
Vacuum or sweep the floor before wet cleaning. Collect hair from baseboards, behind the toilet, around the vanity, inside dry tubs, and near drains.
Use a dry microfiber cloth or disposable towel on dusty exhaust covers, ledges, light fixtures, and the top of the toilet tank. Spraying disinfectant directly onto dry dust creates a muddy film and wastes product.
Work from high areas downward. Debris that falls during cleaning will then land on a surface that has not yet received its final treatment.
Success checkpoint: No visible hair, lint, dust, or loose particles remain on the surfaces scheduled for disinfection.
Common mistake: Wetting loose hair first makes it cling to grout, caulk, cloths, and fixture edges.
Step 3: Wash Away Soap Scum and Body Soil
Apply a compatible detergent or bathroom cleaner to the sink, tub, shower, counter, toilet exterior, and floor. Agitate the cleaner with a microfiber cloth, non-scratch pad, or appropriate brush.
Pay particular attention to the underside of faucet handles, toilet-seat hinges, flush levers, shower controls, grab bars, and the lower wall beside the toilet. These areas are frequently touched or exposed but easily missed.
Cleaning requires enough friction to lift the soil. Disinfectant should not be expected to remove a thick calcium deposit, mold-stained caulk, hardened urine scale, or months of soap residue.
Success checkpoint: Surfaces feel free of greasy or chalky film and no visible body-fluid contamination remains.
Common mistake: Using the toilet cloth on the sink or faucet transfers contamination to a cleaner, higher-touch area.
Step 4: Rinse Cleaner Residue When Required
Rinse detergent, abrasive paste, acidic descaler, and other incompatible residues before applying disinfectant. Use clean water and a separate cloth, then remove excess water without necessarily drying the surface completely.
This step prevents one chemical from reacting with or neutralizing another. It also keeps leftover soap from diluting the disinfectant unevenly across the surface.
A combination cleaner-disinfectant may allow cleaning and disinfecting with the same formula. Follow its label carefully because heavy soil may still require a separate first cleaning pass.
Success checkpoint: The surface is visibly clean and free of foamy, oily, acidic, or abrasive residue.
Common mistake: Applying bleach immediately over toilet-bowl cleaner is dangerous because some bowl cleaners contain acids or ammonia-related ingredients.
Step 5: Apply the Disinfectant Evenly
Apply enough product to cover the hard, nonporous surface completely. Spray close to the cloth when the label allows, or apply with a saturated cloth to reduce airborne droplets.
Avoid misting the entire room. Targeted application is more controllable and makes it easier to verify coverage. Electrical switches should be wiped with a dampened cloth rather than saturated directly.
For a ready-to-use wipe, continue using fresh wipes until the complete surface is wet. A nearly dry wipe dragged over several fixtures may clean fingerprints without delivering the disinfectant dose required by the label.
Success checkpoint: The treated surface has an unbroken wet film, including corners, edges, hinges, and handle undersides.
Common mistake: A few scattered droplets do not equal full surface coverage.
Step 6: Maintain the Full Contact Time
Start a timer immediately after the entire surface becomes wet. The disinfectant must remain visibly wet for the complete contact time printed on its label.
The CDC defines contact time as the period during which a disinfectant must remain in contact with a surface to achieve the intended disinfection. For most disinfectants, that means maintaining a wet surface.
Reapply product when sections begin drying early, provided the label permits reapplication. Warm bathrooms, strong ventilation, absorbent grout, textured tile, and alcohol-rich products may dry faster than smooth porcelain.
Contact time is not universally 10 minutes. Some products require one or two minutes, while others require five or ten. The correct value is the one tied to the target organism and application on the product label.
Success checkpoint: Every treated section remains wet until the timer ends.
Common mistake: Spraying and wiping within seconds provides little more than another cleaning pass.
Step 7: Rinse, Wipe, or Air-Dry as Directed
After contact time, follow the product’s finishing directions. Some surfaces may air-dry, while others require wiping or rinsing with clean water.
Rinse surfaces that will have prolonged skin contact when the label instructs you to do so. Pay attention to toilet seats, bathtub interiors, child-accessible fixtures, and surfaces where personal-care items will be replaced.
CDC healthcare cleaning guidance similarly notes that disinfectant residue should be removed with clean water when required after the wet contact period.
Allow the bathroom to ventilate until surfaces are dry and strong odors have cleared. Wash reusable cloths separately according to their care instructions, discard contaminated disposable materials, remove gloves without touching the outer surface, and wash your hands.
Success checkpoint: The required finishing step is complete, the room is ventilated, and personal items are returned only after surfaces dry.
Common mistake: Rinsing immediately after application removes the disinfectant before it completes its contact time.
Which Bathroom Areas Should Be Disinfected First?
Disinfect cleaner, high-touch surfaces before working on the toilet zone. A practical route starts at the door and sink, continues through shower controls and grab bars, then ends with the toilet exterior and nearby floor.
| Priority | Bathroom location | Specific touchpoints |
| 1 | Entry area | Inside door handle, lock, light switch |
| 2 | Vanity | Faucet handles, soap dispenser, counter edge, drawer pulls |
| 3 | Shower or tub | Controls, grab bars, handheld shower handle |
| 4 | Storage | Cabinet knobs, medicine-cabinet handle |
| 5 | Toilet | Flush lever, lid, seat, hinges, exterior bowl |
| 6 | Floor | Area beside toilet, vanity edge, traffic path |
| 7 | Shared accessories | Towel-bar ends, accessible shelves, waste-bin lid |
Use separate tools for the toilet and non-toilet zones. A simple professional system assigns one cloth color to toilet surfaces, another to sinks and counters, and a third to glass or general fixtures.
Fold each microfiber cloth into quarters. Use one clean face per section and refold rather than scrubbing the entire bathroom with the same contaminated area.
What Disinfectant Is Safe for Each Bathroom Surface?
Surface compatibility is as important as germ-killing performance. A product can disinfect effectively and still ruin metal plating, acrylic, natural stone, wood coatings, colored grout, or fabric.
| Surface | Usually suitable approach | Avoid or verify first |
| Glazed ceramic tile | Compatible EPA-registered spray or wipe | Strong acids on damaged grout |
| Porcelain toilet | Labeled bathroom disinfectant | Mixing bowl cleaner with bleach |
| Acrylic tub | Mild cleaner plus acrylic-safe disinfectant | Abrasives, solvents, concentrated bleach |
| Fiberglass shower | Nonabrasive cleaner and compatible disinfectant | Scouring powder and harsh solvents |
| Stainless steel | Manufacturer-approved disinfectant, then dry | Prolonged bleach contact |
| Chrome fixtures | Mild cleaner and compatible wipe | Strong acids and long chemical exposure |
| Marble or limestone | Neutral-pH stone-safe cleaner and approved product | Vinegar, citric acid, harsh bleach |
| Sealed granite | Stone-safe cleaner and approved disinfectant | Acidic products and damaged sealant |
| Painted wood vanity | Damp-cloth cleaning and finish-approved product | Saturation and prolonged wet contact |
| Grout | Labeled tile-and-grout product | Excessive acid, uncontrolled bleach use |
| Mirrors | Glass cleaner for soil; compatible touchpoint disinfection | Overspray onto frame or backing |
| Vinyl flooring | Floor-compatible disinfectant at label dilution | Concentrate applied undiluted |
Always test an inconspicuous area when the surface manufacturer and disinfectant label do not provide clear compatibility information. A hidden test cannot guarantee long-term safety, but it may reveal immediate discoloration, softening, dullness, or coating damage.
How Should You Disinfect After Someone Is Sick?
When someone has a contagious illness, prioritize the bathroom they use, limit sharing when possible, and disinfect high-touch surfaces more frequently. Product selection should match the suspected or confirmed organism because no disinfectant controls every pathogen under identical conditions.
Respiratory Illness
Clean and disinfect frequently touched surfaces such as faucets, switches, flush handles, door hardware, and cabinet pulls. Do not spray disinfectant into the air as a substitute for surface cleaning or ventilation.
The CDC advises leaving disinfectant on the surface for the label’s complete contact time and keeping the surface wet throughout that period.
Vomit or Diarrhea
Wear disposable or rubber gloves. Remove visible material with disposable towels, place the waste in a plastic bag, clean the surrounding area, and then apply a disinfectant whose label includes the organism of concern.
Norovirus requires special attention because many general-purpose products do not carry a norovirus claim. CDC guidance recommends an EPA-registered product against norovirus or an appropriate chlorine solution, with the bleach left on the affected area for at least five minutes under the cited procedure.
Illness-specific bleach concentrations may be much stronger than routine household recipes. Do not improvise. Follow current public-health guidance and the product label for the specific incident.
Blood or Other Body Fluids
Keep people away from the area, wear suitable gloves, absorb visible material, clean with detergent, and disinfect using a product labeled for the required application. Use disposable materials when contamination is extensive.
Avoid splashing, vigorous brushing, or high-pressure spraying. These actions can spread droplets beyond the original area.
C. difficile
C. difficile spores are more resistant than many common organisms. Choose a product carrying an EPA claim for C. difficile and follow its organism-specific directions, including pre-cleaning and contact time.
The EPA emphasizes that effectiveness changes with use conditions and that users must follow the C. difficile directions and contact time carefully.
How Often Should a Bathroom Be Disinfected?
A normally used household bathroom usually needs routine cleaning once a week, with targeted disinfection based on contamination, household vulnerability, and illness. Daily whole-room disinfection is generally unnecessary in a healthy household.
| Household situation | Cleaning frequency | Disinfection priority |
| One or two healthy adults | Weekly | Toilet and high-touch points after contamination |
| Family bathroom | 1-2 times weekly | Handles, toilet exterior, faucets |
| High-traffic shared home | 2-3 times weekly | Touchpoints and toilet zone |
| Guest bathroom used rarely | Before and after guests | Touchpoints and toilet |
| Active respiratory illness | Daily or after heavy use | Shared high-touch surfaces |
| Vomiting or diarrhea illness | Immediately after incidents | Entire affected zone using organism-appropriate product |
| Immunocompromised household member | Based on medical guidance | Frequently touched and contamination-prone surfaces |
Cleaning frequency should increase when visible soil appears, even if the scheduled cleaning day has not arrived. A visibly dirty surface needs cleaning before any meaningful disinfection can occur.
Common Bathroom Disinfection Mistakes
Wiping Too Soon
Removing disinfectant before the label contact time expires prevents the product from completing its tested process. Start a timer and re-wet prematurely drying areas when permitted.
Using One Cloth Everywhere
A single cloth can move organisms from the toilet to the faucet, counter, or door handle. Assign cloths by zone and finish with the toilet.
Mixing Products
Bleach mixed with an acid can produce chlorine gas. Bleach mixed with ammonia can produce chloramine gas. Poison Control advises never mixing household cleaning chemicals because dangerous reactions can occur.
Leave the room and seek fresh air immediately if accidental mixing produces strong fumes, coughing, eye burning, chest tightness, or breathing difficulty. Contact local emergency or poison-control services for exposure guidance.
Guessing the Dilution
Too little concentrate may fail to achieve the label claim. Too much may damage surfaces, increase residue, waste product, and expose users to stronger fumes.
Measure water and concentrate with dedicated tools. Never use food utensils that will return to kitchen use.
Using an Unregistered DIY Recipe
A homemade mixture may clean or deodorize without providing a validated disinfectant claim. Use an appropriately registered product when disinfection, rather than ordinary cleaning, is required.
Ignoring Surface Damage
Cracked grout, damaged caulk, unsealed stone, swollen wood, and peeling coatings cannot always be disinfected like intact nonporous surfaces. Repair or replacement may be necessary when contamination penetrates damaged material.
Spraying Excessively
Heavy airborne mist increases inhalation exposure without improving coverage. Apply the product close to the surface or through a cloth when the label permits.
Expert Rules for Better Results
The Wetness Rule
A surface that dries before the timer ends has not completed the labeled contact period. Product quantity should therefore be judged by sustained wet coverage, not by the number of trigger pulls.
The Clean-to-Dirty Rule
Begin with door hardware and the vanity, then progress toward the toilet and floor. Reversing that route increases the chance of carrying toilet contamination to hand-contact surfaces.
The One-Product Rule
Using fewer compatible products reduces reaction risks and simplifies training. A separate detergent and one suitable disinfectant are usually enough for routine bathroom care, with a specialized descaler added only when mineral buildup requires it.
The Label Beats the Internet Rule
Online dilution charts and contact-time lists become unreliable when formulas, bleach concentrations, pathogens, or regulatory claims change. The current product label remains the controlling instruction.
How Much Does Bathroom Disinfection Cost?
A routine residential bathroom usually requires $1-$4 in consumable product per session when reusable tools are already available. Initial supplies commonly cost $8-$30, while specialized stone-safe products, illness-specific disinfectants, disposable materials, or commercial concentrates can raise the total.
The largest cost is often labor. A lightly soiled bathroom may require 30 minutes. Heavy mineral buildup, neglected grout, body-fluid contamination, or repeated wet contact periods can extend the work beyond one hour.
Do not choose solely by bottle price. A concentrate may cost more initially but produce many gallons of ready-to-use solution. Conversely, a cheap product with a 10-minute contact time may consume more labor than a compatible product carrying a shorter labeled time.
When Is Professional Cleaning Appropriate?
Professional cleaning is appropriate when contamination is extensive, sewage has entered the bathroom, porous materials are affected, odors persist after cleaning, or the occupants cannot safely handle the required chemicals or protective equipment.
Professional help is also sensible when the bathroom contains delicate natural stone, damaged finishes, widespread mold, recurring plumbing leaks, or contamination beneath flooring and walls. Surface disinfection cannot correct hidden moisture or structural damage.
A cleaning company should be able to explain its product labels, contact times, cross-contamination controls, ventilation practices, and surface limitations. Claims such as “kills everything instantly” should be treated cautiously.
Frequently Asked Questions
Can I use disinfecting wipes throughout the bathroom?
Disinfecting wipes work well on small compatible touchpoints, but one wipe may not treat an entire bathroom. The surface must remain wet for the label’s contact time, so several wipes may be necessary for faucets, counters, toilet exteriors, switches, and handles.
Should a bathroom floor be disinfected?
A bathroom floor should be cleaned routinely and disinfected after body-fluid contamination, illness incidents, or when household circumstances justify it. Use a floor-compatible product at the labeled dilution. Remove hair and soil first, then keep the floor wet for the required contact time.
Can I use rubbing alcohol on bathroom surfaces?
Rubbing alcohol may disinfect small compatible hard surfaces when its concentration and use match appropriate guidance, but it evaporates quickly and may damage some coatings or plastics. It is not ideal for dirty floors, large shower areas, porous grout, or surfaces requiring prolonged wet contact.
Do I need to rinse a disinfectant from a toilet seat?
Rinse or wipe a toilet seat after the full contact time when the product label requires rinsing or when residue is not approved for prolonged skin contact. Never rinse early. Choose a toilet-seat-compatible product and inspect the material for discoloration or coating damage.
Does hot water improve disinfectant performance?
Hot water does not automatically improve disinfectant performance and may destabilize some diluted products or increase fumes. Use room-temperature water unless the label specifies another temperature. The correct dilution, complete coverage, compatible surface, and full wet contact time matter more.
Can steam replace chemical disinfectant?
Steam can reduce microorganisms when a validated machine reaches the required temperature for sufficient time across the complete surface. Household steamers vary, and uneven movement can leave untreated areas. Follow the equipment manufacturer’s instructions and avoid heat-sensitive surfaces, seals, coatings, and fixtures.
Conclusion
The best way to disinfect bathroom surfaces is to clean away visible contamination, apply a surface-compatible EPA-registered disinfectant, and maintain the exact wet contact time on the label. Effective disinfection depends less on aggressive chemicals than on correct preparation, coverage, timing, cloth control, ventilation, and product compatibility.
Use routine cleaning for ordinary soil and reserve targeted disinfection for high-touch surfaces, body-fluid contamination, illness, and higher-risk household situations. Never mix products, never guess dilution rates, and never assume that a surface is disinfected merely because it was sprayed.


