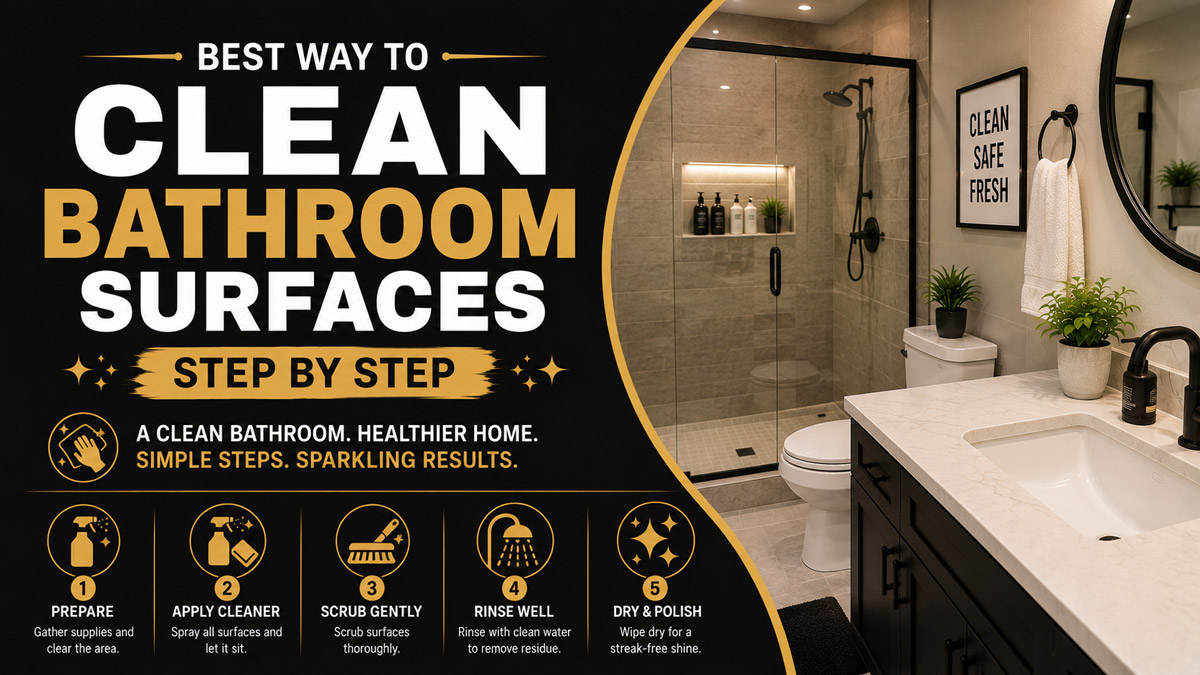
The best way to clean bathroom surfaces is to remove loose dust first, apply the correct cleaners with adequate dwell time, and work from high, relatively clean areas toward the toilet and floor. A standard bathroom usually requires eight stages and 30-60 minutes, with surface material and soil type determining which products are safe.
Key Facts at a Glance
- Dry hair and dust should be removed before liquid cleaners are applied.
- Cleaning removes soil, while disinfecting reduces microorganisms according to the product label.
- Tub, tile, and toilet products work more effectively when allowed to remain wet for their stated dwell time.
- Acidic products remove mineral scale but can etch marble, limestone, travertine, and other calcium-based stone.
- Toilet cloths and brushes should never be used on sinks, counters, showers, or other bathroom surfaces.
- The floor should be cleaned last, starting at the farthest corner and ending at the doorway.
Before You Start
A prepared bathroom is faster and safer to clean than a cluttered one. Gather everything before applying products so chemical dwell time does not expire while you search for a brush, towel, or replacement trash bag.
| Preparation factor | Typical requirement | Practical guidance |
|---|---|---|
| Standard cleaning time | 30-60 minutes | Suitable for a weekly household clean |
| Neglected bathroom time | 1-2.5 hours | Allow extra time for scale, grout, and buildup |
| Difficulty | Beginner to moderate | Material identification is the main challenge |
| Product cost | $10-$35 | Assumes reusable brushes and microfiber cloths |
| Microfiber cloths | 4-6 | Separate mirror, counter, shower, toilet, and floor cloths |
| Cleaning gloves | 1 pair | Use chemical-resistant household gloves |
| Scrub tools | 2-4 | Soft brush, grout brush, toilet brush, non-scratch pad |
| Ventilation | Entire cleaning period | Open a window or run the exhaust fan |
What Do You Need to Clean a Bathroom?
A basic bathroom-cleaning kit should contain a neutral all-purpose cleaner, bathroom scale remover, toilet bowl cleaner, disinfectant, glass cleaner, microfiber cloths, a non-scratch sponge, a small detailing brush, a toilet brush, a vacuum, and a mop.
Choose tools according to the surfaces in the room. A stiff brush may be suitable for durable ceramic grout but too aggressive for acrylic, fiberglass, painted finishes, plated fixtures, or polished stone.
A practical kit includes:
- Four to six color-coded microfiber cloths
- One non-scratch sponge or white nylon pad
- One small nylon detailing brush
- One dedicated toilet brush
- One vacuum or dry floor sweeper
- One flat microfiber mop
- Neutral cleaner for general surfaces
- Glass cleaner or diluted dish-soap solution
- Material-safe tub and tile cleaner
- EPA-registered disinfectant when disinfection is needed
Never assume one product is safe for every bathroom material. Read both the cleaning-product label and the fixture manufacturer’s care instructions.
What Is the Correct Bathroom-Cleaning Order?
The correct bathroom-cleaning order is decluttering, dry dust removal, chemical pre-treatment, mirrors and vanity, shower and tub, toilet, touch-point disinfection, and floor cleaning. This sequence prevents falling dust or dirty rinse water from contaminating surfaces that have already been cleaned.
Three workflow rules control the process:
Work from dry to wet. Loose hair becomes difficult to collect after it is soaked with cleaner.
Work from top to bottom. Dust and droplets fall onto unfinished areas rather than clean ones.
Work from relatively clean to heavily contaminated. Mirrors and counters should be completed before the toilet and floor.
The toilet is an isolated cleaning zone. Use a dedicated cloth, paper towels, brush, and gloves where practical. Do not return to the vanity or shower with tools that touched the toilet.
Step 1: Remove Clutter and Prepare the Room
Remove bath mats, towels, laundry, toiletries, wastebaskets, scales, children’s bath toys, and movable storage items. Emptying the room exposes hidden dust and prevents cleaner from splashing onto personal-care products.
Place washable textiles directly into a laundry basket. Do not shake dusty rugs inside the bathroom because the movement redistributes hair, skin particles, and lint across damp surfaces.
Empty the trash and fit a replacement liner, but leave the wastebasket outside until the floor is dry. Open the window when available and run the exhaust fan throughout the cleaning process.
Inspect the bathroom before spraying anything. Identify polished stone, acrylic panels, specialty coatings, wood cabinetry, damaged grout, loose caulk, rust, and leaking fixtures. Some apparent dirt is permanent material wear or mineral etching, which cleaning cannot reverse.
Success checkpoint: Countertops, floor edges, shower ledges, and the tub are unobstructed.
Common mistake: Cleaning around bottles and decorations. This leaves rings, trapped moisture, and untreated dirt beneath each object.
Step 2: Dust and Vacuum While Everything Is Dry
Remove dry soil from the ceiling area downward. Dust the exhaust-fan cover, light fittings, upper ledges, door frame, shelves, window trim, towel bars, baseboards, toilet exterior, and floor edges.
Use a vacuum with a soft brush attachment for the exhaust grille and high ledges. Avoid forcing dust deeper into an operating fan. If the grille is removable according to the manufacturer’s instructions, switch off the fan and clean the cover separately.
Vacuum the entire floor, including behind the toilet and beneath the vanity overhang. Pay particular attention to corners where hair collects. A crevice tool is more effective than a wet mop for removing loose debris from narrow gaps.
Dry removal improves every later stage. Once hair mixes with spray cleaner, it sticks to cloths, brushes, grout lines, and fixture bases.
Success checkpoint: A dry cloth wiped along a baseboard or floor corner collects little visible hair or dust.
Common mistake: Spraying the room first. Wet dust forms streaks and sludge that require additional passes.
Step 3: Pre-Treat the Shower, Tub, Sink, and Toilet
Apply suitable cleaners to the surfaces that need dwell time. Begin with shower walls, the tub, glass panels, the sink basin, and the inside of the toilet bowl.
Dwell time is the period a product needs to loosen soil or achieve a disinfecting claim. These are not automatically the same. A soap-scum remover may loosen residue in several minutes, while a disinfectant may require the surface to remain visibly wet for a specific contact time stated on its label.
Apply enough cleaner to cover the soil without flooding seams, electrical fittings, wood, or adjacent stone. Keep the room ventilated and do not combine products.
| Soil or objective | Suitable approach | Avoid on |
|---|---|---|
| Soap scum and body oil | Surfactant bathroom cleaner | Follow label restrictions |
| Calcium and limescale | Material-safe acidic descaler | Marble, limestone, travertine |
| General light dirt | Diluted neutral cleaner | Avoid over-wetting wood |
| Mold staining | Labeled mold or bleach-based product | Fabrics, sensitive metal, some sealants |
| Toilet mineral ring | Toilet descaler or wet pumice for porcelain | Plastic, colored glaze, dry porcelain |
| Surface disinfection | Registered disinfectant | Any material excluded by its label |
Do not place vinegar in the toilet tank or combine it with chlorine bleach. Do not apply a bleach product over acidic toilet cleaner. Chlorine bleach mixed with acids can release chlorine gas, while bleach mixed with ammonia can produce hazardous chloramine vapors.
Success checkpoint: Treated surfaces remain evenly wet for the manufacturer’s specified time.
Common mistake: Spraying and immediately wiping. Premature removal limits the product’s ability to break down residue or meet a disinfecting claim.
Step 4: Clean Mirrors, Vanity, Sink, and Fixtures
Clean the mirror before the lower vanity because drips will land on the unfinished counter. Apply glass cleaner to a microfiber cloth rather than heavily spraying the mirror, especially when the frame, backing, wall paint, or nearby cabinetry could be damaged by overspray.
Wipe from the upper corner downward using overlapping strokes. Finish with a clean, dry, tightly woven cloth. Smears usually indicate excessive product, a dirty cloth, oily residue, or moisture left on the glass.
Move to cabinet fronts, drawer pulls, countertops, faucet handles, and the sink. Use a small nylon brush around the faucet base, overflow opening, drain edge, and seams where toothpaste and soap collect.
Rinse the sink basin after scrubbing. Dry the faucet and counter to reduce water spots and expose any remaining residue.
Which Cleaner Is Safe for the Vanity?
The safest vanity cleaner depends on its material. Neutral cleaner is the most versatile choice, but natural stone, engineered stone, laminate, solid-surface material, wood, and painted cabinetry have different limitations.
| Vanity material | Routine cleaner | Main restriction |
|---|---|---|
| Marble or limestone | pH-neutral stone cleaner | No vinegar, lemon, or acidic descaler |
| Granite | Stone-safe neutral cleaner | Avoid prolonged acid exposure |
| Quartz | Mild dish soap or approved cleaner | Avoid aggressive abrasives and strong solvents |
| Laminate | Diluted neutral cleaner | Keep water out of seams and edges |
| Solid surface | Mild soap and soft cloth | Avoid coarse scouring unless approved |
| Sealed wood | Damp cloth and wood-safe cleaner | Do not saturate joints or panels |
Success checkpoint: The mirror is streak-free, the sink feels smooth, and no cleaner remains around the faucet or drain.
Common mistake: Using the same wet cloth for the mirror, counter, and sink. Residue transferred from the sink causes cloudy glass and countertop streaks.
Step 5: Scrub and Rinse the Shower or Bathtub
Scrub the pre-treated shower from the highest wall downward. Use a non-scratch sponge on broad surfaces and a small nylon brush along grout lines, tracks, corners, fixture bases, and textured areas.
Soap scum and mineral deposits require different chemistry. Soap scum contains oils, soap residues, and minerals, so a surfactant bathroom cleaner often performs better than plain glass cleaner. White, crusty deposits around faucets or glass edges are usually mineral scale and may require a material-compatible acidic product.
Rinse thoroughly after scrubbing. Product left on tile, metal, acrylic, or glass can create haze, attract dirt, discolor finishes, or make the floor slippery.
Dry glass panels with a squeegee, then wipe the edges and hardware with a clean cloth. Drying is part of cleaning because remaining droplets redeposit dissolved minerals as they evaporate.
How Should Shower Materials Be Cleaned?
| Shower material | Recommended tool | Product approach | Main risk |
|---|---|---|---|
| Glazed ceramic tile | Soft brush or non-scratch pad | Neutral or tile-safe bathroom cleaner | Damaged grout from harsh scrubbing |
| Porcelain tile | Nylon pad or brush | Neutral cleaner, targeted descaler | Residue in textured finishes |
| Acrylic tub | Soft cloth or soft sponge | Mild approved cleaner | Permanent scratches from abrasives |
| Fiberglass | Non-scratch sponge | Mild surfactant cleaner | Dullness from abrasive powder |
| Glass panel | Non-scratch pad and squeegee | Glass-safe scale remover | Etching or coating damage |
| Natural stone | Soft cloth | Stone-safe neutral cleaner | Acid etching and sealer damage |
| Chrome fixture | Soft microfiber cloth | Mild soap and water | Pitting from prolonged chemicals |
| Grout | Nylon grout brush | Appropriate alkaline cleaner | Erosion from aggressive acids |
Success checkpoint: Rinse water sheets cleanly, surfaces no longer feel greasy, and dried glass does not show fresh residue.
Common mistake: Repeatedly applying acid to grout. Strong or frequent acid use can weaken cement-based grout and damage nearby stone or metal.
Step 6: Clean and Sanitize the Toilet
Clean the toilet after the shower and vanity so toilet tools never move back into cleaner zones. Start inside the bowl, then clean the exterior from the least contaminated upper surfaces toward the base.
Scrub beneath the rim, around water outlets, along the bowl sides, and into the trap opening with a dedicated toilet brush. Flush while holding the brush in the rinsing water, then allow the brush to dry according to its holder design before storage.
For the exterior, clean in this order:
- Tank top and sides
- Flush handle or button
- Seat lid
- Upper and lower seat surfaces
- Hinges and mounting points
- Exterior rim and bowl
- Pedestal and floor connection
- Area behind the toilet
Use disposable towels or a dedicated washable toilet cloth. Fold the cloth to expose a clean section as you work. Do not place a used toilet cloth on the vanity, floor, or cleaning caddy.
Cleaning and disinfecting are separate actions. Visible soil can prevent disinfectants from contacting the surface effectively, so clean first when the product label requires it. Apply disinfectant afterward and keep the surface wet for the label’s full contact time. The EPA’s practical rule is, “The label is the law.”
Success checkpoint: No residue remains under the rim, around hinges, at the base, or behind the toilet.
Common mistake: Spraying the entire toilet and wiping it once with one side of a cloth. This spreads contamination rather than removing it systematically.
Step 7: Disinfect High-Touch Points When Needed
Disinfecting is useful after illness, contamination, toilet overflow, shared high-traffic use, or when a household member has increased infection vulnerability. Routine household cleaning does not require aggressive disinfection of every surface every day.
High-touch bathroom points include the flush control, toilet seat, faucet handles, door handle, light switch, cabinet pulls, shower controls, towel-bar ends, and grab rails.
First remove visible dirt. Then apply a compatible disinfectant and leave the surface visibly wet for the contact time printed on the label. Some products require several minutes and may need reapplication to prevent premature drying.
Do not apply disinfectant indiscriminately to mirrors, unfinished wood, porous stone, fabrics, or specialty fixture coatings. A product can be effective against microorganisms and still be unsuitable for the material beneath them.
After the required contact time, wipe or rinse the surface if the label instructs you to do so. Food-contact rules generally do not apply to bathrooms, but skin-contact surfaces may still require rinsing depending on the formulation.
Success checkpoint: Each selected touch point remained wet for the required contact time.
Common mistake: Assuming a quick spray and immediate wipe disinfects. Contact time determines whether the labeled antimicrobial claim is achieved.
Step 8: Clean the Floor and Exit the Room
Clean the bathroom floor last because dust, hair, cleaning droplets, and rinse water collect there throughout the process. Vacuum again if scrubbing dislodged visible debris.
Spot-clean sticky residue and hand-wipe the narrow area behind the toilet. Use a neutral or floor-manufacturer-approved cleaner. Excessively strong disinfectant or repeated bleach use may discolor grout, degrade finishes, and leave a sticky film.
Start at the farthest corner and mop toward the doorway. Use overlapping passes while keeping the mop damp rather than dripping. Replace dirty solution instead of spreading visibly gray water across the floor.
Tile and grout should not remain saturated. Standing water can enter failed grout, loose transitions, wall edges, cabinetry, or flooring seams.
Keep people and pets outside the room until the floor is completely dry. Ventilation shortens drying time and reduces lingering odors.
Success checkpoint: The floor is free of hair, footprints, sticky patches, and visible cleaner film.
Common mistake: Mopping before cleaning the toilet and shower. Later splashes force a second floor-cleaning cycle.
Which Bathroom-Cleaning Method Works Best?
No single cleaner is best for every type of bathroom soil. Select the least aggressive product that can remove the specific deposit without harming the underlying material.
| Method | Best use | Typical time | Main advantage | Main limitation |
|---|---|---|---|---|
| Neutral cleaning | Weekly dirt and light residue | 5-10 minutes | Compatible with many surfaces | Weak against heavy scale |
| Acidic descaling | Calcium and hard-water deposits | 5-15 minutes | Dissolves mineral buildup | Damages acid-sensitive stone |
| Alkaline degreasing | Body oils and organic film | 5-10 minutes | Cuts greasy residue | May affect coatings or sealers |
| Mechanical scrubbing | Adhered residue | 2-10 minutes | Immediate localized action | Can scratch soft finishes |
| Steam cleaning | Grout, tracks, and crevices | 15-45 minutes | Reduces chemical use | Heat and moisture can damage materials |
| Disinfection | High-touch or contaminated surfaces | Label-specific | Reduces specified microorganisms | Requires prior cleaning and contact time |
Are Vinegar and Baking Soda the Best Natural Options?
Vinegar can dissolve some mineral deposits, while baking soda provides mild abrasive action. They are not universal bathroom cleaners, and combining them in the same container largely neutralizes their useful acid and alkaline properties.
Vinegar should not be applied to marble, limestone, travertine, terrazzo containing calcium-based stone, or unknown stone surfaces. It can also affect grout, plated metal, rubber components, and manufacturer-applied coatings when used too strongly or too often.
Baking soda may scratch glossy acrylic, soft plastic, polished metal, glass coatings, or delicate stone if rubbed aggressively. Test any homemade method in an inconspicuous area.
For routine cleaning, a properly diluted neutral cleaner is often safer and more predictable than a homemade mixture.
Common Mistakes and How to Fix Them
Mixing Bleach with Vinegar or Toilet Cleaner
Stop using the products, leave the area, and move to fresh air if irritating fumes develop. Do not attempt to neutralize the mixture with another chemical.
Bleach reacts dangerously with acids, including many toilet bowl cleaners and descalers. Bleach must also be kept separate from ammonia-containing products. Use only one product at a time, rinse when directed, ventilate the room, and read every label.
Using Abrasives on Acrylic or Fiberglass
Discontinue the abrasive product and rinse the surface. Fine scratches generally cannot be cleaned away because they are physical damage.
Switch to a soft cloth, non-scratch sponge, and manufacturer-approved liquid cleaner. Scratched surfaces trap dirt more readily, so future maintenance may need to be more frequent.
Applying Acid to Natural Stone
Rinse the stone with clean water, dry it, and stop using the acidic product. A cloudy mark that remains after rinsing may be etching rather than removable residue.
Stone etching changes the finish itself. Polishing or professional refinishing may be required. Use a pH-neutral stone cleaner for future maintenance.
Leaving Cleaner on Too Long
Rinse the surface thoroughly and inspect it after drying. Extended contact may discolor metal, weaken grout, bleach fabric, soften coatings, or leave a permanent haze.
More dwell time is not automatically better. Follow the product’s minimum and maximum instructions instead of allowing cleaner to dry.
Reusing Toilet Cloths Elsewhere
Remove the cloth from the cleaning rotation immediately. Launder reusable cloths at an appropriate temperature with detergent and dry them fully before reuse.
A color-coded system simplifies separation. Red can be reserved for toilets, blue for glass, yellow for counters, and another color for showers or floors.
Treating Mold Without Fixing Moisture
Clean the affected non-porous surface, dry it, and correct the moisture source. Repeated surface spraying will not permanently solve condensation, leaking plumbing, failed caulk, poor ventilation, or water entering behind tile.
Large, recurring, hidden, or moisture-damaged areas may require professional assessment. Porous materials with established growth sometimes need replacement rather than repeated bleaching.
How Do You Fix Common Bathroom-Cleaning Problems?
Cloudy Shower Glass
Cloudy glass may contain soap film, mineral deposits, damaged coating, or permanent etching. Clean a small test area first with a glass-safe soap-scum remover, rinse it, and assess the result after drying.
Use a suitable descaler only when the glass and hardware manufacturer permits it. A razor blade, coarse pad, or strong acid can scratch glass, damage protective coatings, and corrode nearby metal.
Pink or Orange Slime
Pink or orange film commonly develops where moisture and soap residue persist. Clean the residue physically, apply a suitable disinfectant when needed, rinse according to the label, and dry the area.
Prevent recurrence by improving airflow, removing soap residue, laundering shower curtains, and drying wet ledges. Persistent color near failed caulk may indicate growth beneath the sealant, which can require caulk replacement.
Stubborn Toilet Bowl Ring
A toilet ring is often a mineral deposit rather than ordinary dirt. Begin with a porcelain-safe toilet descaler and adequate dwell time.
A wet pumice stone may be suitable for some white porcelain bowls, but both the stone and bowl must remain wet. Do not use pumice on plastic, colored finishes, specialty coatings, or surfaces not confirmed as porcelain.
Dark Grout Lines
Dark grout may contain surface soil, absorbed residue, mold staining, or permanent discoloration. Apply a grout-compatible cleaner, scrub with a nylon brush, rinse, and let the area dry before judging the result.
Avoid wire brushes because they can remove grout and scratch adjacent tile. Repeatedly failing grout, cracks, loose sections, or moisture returning from beneath the tile require repair rather than stronger cleaner.
How Long Should Bathroom Cleaning Take?
A weekly bathroom clean usually takes 30-60 minutes. A lightly used bathroom may require less, while a neglected room with hard-water scale, stained grout, heavy dust, or multiple fixtures can require 1-2.5 hours.
| Bathroom condition | Typical time | Main tasks |
|---|---|---|
| Daily reset | 3-7 minutes | Wipe sink, squeegee glass, hang towels |
| Light weekly clean | 20-35 minutes | Toilet, sink, mirror, shower rinse, floor |
| Standard weekly clean | 35-60 minutes | Full eight-stage process |
| Monthly detail clean | 60-90 minutes | Grout, tracks, fan cover, baseboards |
| Neglected bathroom | 1-2.5 hours | Repeated treatment, scale, stains, clutter |
| High-traffic shared bathroom | 45-75 minutes | Extra touch-point disinfection and floor work |
Product choice affects labor. Correct dwell time often saves more effort than forceful scrubbing. Material damage, however, cannot be solved by extending the dwell time or increasing chemical strength.
What Is the Best Bathroom-Cleaning Schedule?
The best schedule prevents soil from becoming bonded buildup. Small daily actions reduce the frequency and intensity of deep cleaning.
| Frequency | Tasks | Typical time |
|---|---|---|
| After each shower | Squeegee glass, remove standing water, run fan | 1-3 minutes |
| Daily | Wipe sink splashes, hang towels, remove visible hair | 3-7 minutes |
| Weekly | Clean toilet, mirror, vanity, shower, tub, and floor | 30-60 minutes |
| Monthly | Detail grout, tracks, fan cover, baseboards, and storage | 45-90 minutes |
| Every 3-6 months | Wash curtains, inspect caulk, clean exhaust housing | 1-2 hours |
| Annually | Inspect grout sealer, leaks, ventilation, and failed seals | Condition-based |
Run the exhaust fan during bathing and for the manufacturer-recommended period afterward. A fan that is clogged, undersized, vented incorrectly, or rarely used will not control moisture effectively.
Keep a squeegee in the shower and wipe droplets from glass and tile after use. This habit removes water before dissolved minerals can dry onto the surface.
Variations for Different Bathrooms
Bathroom with Natural Stone
Use pH-neutral stone cleaner, soft cloths, and minimal water. Keep vinegar, acidic scale remover, abrasive powder, and unknown mold products away from marble, limestone, and travertine.
Treat scale on nearby fixtures carefully so runoff does not touch the stone. When deposits are embedded in the stone or the finish looks dull, consult a stone-care professional.
Bathroom with Heavy Hard Water
Clean more frequently and dry fixtures after use. Use a compatible descaler only on materials that tolerate acid, and rinse it before it dries.
A water-softening or conditioning system may reduce new mineral deposits, but it will not remove existing scale. Persistent white haze may also be etched material rather than removable calcium.
Bathroom Used by Several People
Increase the frequency of sink, toilet, touch-point, and floor cleaning. Assign separate towel storage, empty trash more often, and improve ventilation to manage added moisture.
Color-coded cleaning tools reduce cross-contamination. Replace or launder cloths after each bathroom rather than using one set throughout the house.
Honest Limitations of Bathroom Cleaning
Cleaning cannot repair cracked grout, failed caulk, corroded chrome, etched stone, scratched acrylic, leaking plumbing, damaged coatings, or mold hidden behind walls. Stronger chemicals may temporarily change the appearance while worsening the underlying material.
A bathroom that quickly develops stains or odors may have a ventilation, drainage, sealing, or moisture problem. Correcting the source is more effective than repeatedly bleaching the visible symptom.
Professional help is appropriate when growth covers a large area, sewage is involved, water has entered building materials, fumes cause symptoms, a leak is concealed, or the surface manufacturer’s cleaning requirements are unclear.
Frequently Asked Questions
What Should Be the First Step When Cleaning a Bathroom?
The first step is to remove toiletries, towels, mats, trash, and other movable objects. Next, dust and vacuum the bathroom while surfaces are dry. This prevents hair and dust from becoming wet sludge and gives cleaning products direct access to sinks, showers, ledges, floors, and fixture bases.
Should You Clean the Toilet or Shower First?
Clean the shower before the toilet. The toilet is generally the most contamination-sensitive fixture, so completing it near the end limits the risk of transferring toilet residue to the shower, sink, vanity, or mirror. Use dedicated toilet tools and wash or discard them appropriately afterward.
Can You Clean an Entire Bathroom with Dish Soap?
Mild dish soap can remove light body oil and general soil from some washable surfaces, but it does not remove every mineral deposit or satisfy disinfectant claims. Excess soap can also leave a slippery film. Confirm material compatibility, dilute it appropriately, rinse thoroughly, and use specialized products only where needed.
How Often Should a Bathroom Be Deep-Cleaned?
Most household bathrooms benefit from a standard clean every week and a more detailed clean every month. High-traffic bathrooms, poorly ventilated rooms, and homes with hard water may need shorter intervals. Daily drying and sink wiping can prevent buildup and reduce the time needed for each deep-cleaning session.
Is It Better to Clean a Bathroom with Hot or Cold Water?
Warm water is useful for rinsing oily residue and detergent, but extremely hot water is unnecessary and may affect some coatings, plastics, or sealants. Use the temperature recommended by the cleaning-product and surface manufacturers. Disinfectant performance depends on label directions, not on making the rinse water as hot as possible.
How Can You Keep a Bathroom Smelling Clean?
Remove the source of odor rather than masking it. Empty trash, wash damp textiles, clean the toilet base, clear drain residue, dry wet surfaces, and operate effective ventilation. Persistent sewage, musty, or ammonia-like odors may signal a plumbing, moisture, urine, or hidden-contamination problem that fragrance cannot correct.
The Bottom Line
The best way to clean bathroom surfaces is to work in a controlled sequence: declutter, remove dry soil, pre-treat deposits, clean upper fixtures, scrub and rinse the shower, isolate the toilet, disinfect selected touch points, and mop out through the doorway. Product compatibility, adequate dwell time, clean-to-dirty movement, and complete drying matter more than aggressive scrubbing.
Use neutral products for routine maintenance and reserve acidic, alkaline, abrasive, or disinfecting products for soils and surfaces that actually require them. Never mix cleaning chemicals, avoid acids on calcium-based stone, and treat recurring mold, scale, stains, or odors as possible signs of moisture or material problems.


