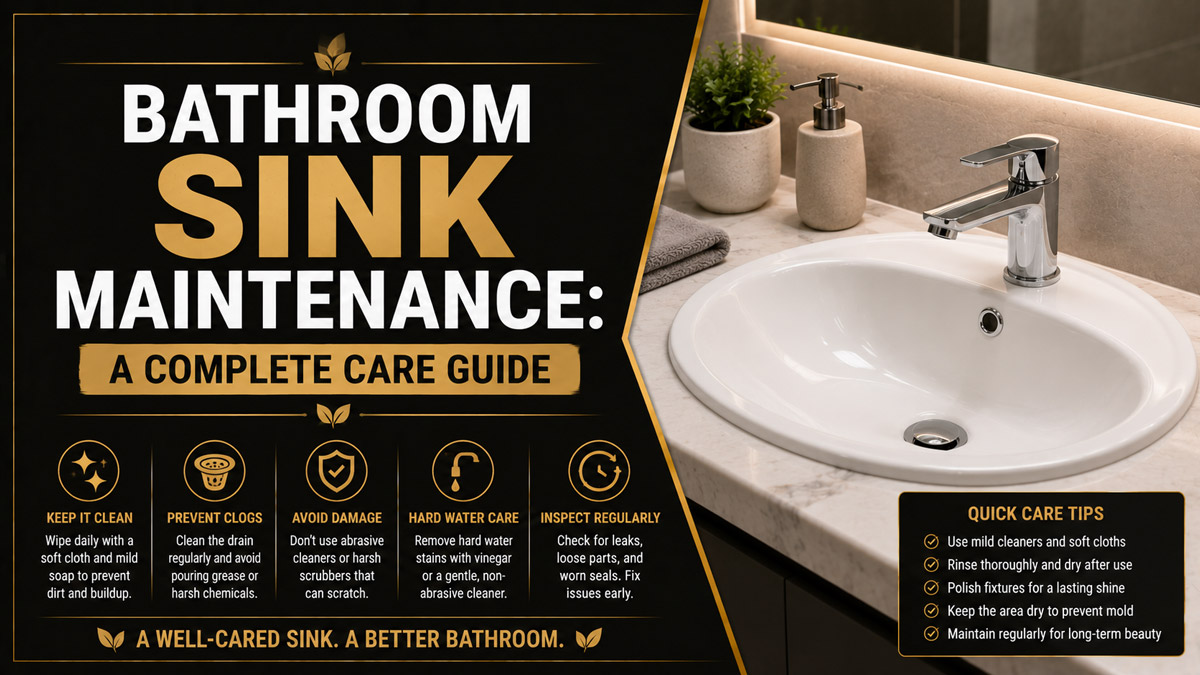
Bathroom sink maintenance combines surface cleaning, drain clearing, faucet care, leak inspection, and periodic plumbing checks. A reliable routine takes about 10 minutes weekly, plus 30-60 minutes every few months, and prevents most hair clogs, mineral buildup, cabinet damage, unpleasant odors, and avoidable fixture repairs.
Key Facts at a Glance
- Bathroom sink maintenance should include the basin, faucet, aerator, stopper, overflow channel, P-trap, shutoff valves, supply lines, drain joints, and vanity cabinet.
- A slow bathroom drain usually begins with hair and residue around the stopper, not deep inside the plumbing system.
- WaterSense-labeled bathroom faucets use no more than 1.5 gallons per minute at 60 PSI.
- A P-trap retains a water seal that blocks sewer gases, but an unused sink can lose that protection when the water evaporates.
- Persistent moisture beneath a sink requires immediate investigation because cabinet materials can swell, delaminate, or support mold growth.
- Mechanical clog removal is usually safer and more controllable than repeated use of caustic drain-opening chemicals.
What Does Bathroom Sink Maintenance Include?
Bathroom sink maintenance includes cleaning visible surfaces, removing debris from the drain assembly, preserving faucet flow, inspecting pressurized water connections, and confirming that wastewater leaves without leaks or odors. It is broader than wiping the basin because several serious failures begin beneath the sink where they remain unnoticed.
A complete routine covers four maintenance categories:
- Hygiene: Remove toothpaste, soap film, cosmetics, hair, and microbial residue.
- Function: Keep the faucet, aerator, stopper, overflow, and drain moving freely.
- Leak prevention: Inspect supply hoses, shutoff valves, drain washers, and cabinet surfaces.
- Asset protection: Use cleaners compatible with the basin, faucet finish, countertop, caulk, and plumbing materials.
Cosmetic cleaning cannot correct a leaking cartridge, loose drain flange, deteriorated hose, or blocked trap. Plumbing work also cannot protect a natural-stone countertop from acidic cleaner. Effective maintenance treats the sink as one connected fixture system.
How Does a Bathroom Sink Work?
A bathroom sink uses pressurized supply plumbing for incoming water and gravity drainage for outgoing wastewater. Hot and cold lines feed the faucet through shutoff valves, while the basin directs used water through the drain, tailpiece, P-trap, trap arm, and wall drainage system.
The P-trap’s curved body retains water after each use. That water forms a barrier between the bathroom and the drainage system. Plumbing guidance commonly describes a P-trap as the U-shaped or curved section beneath the sink, while plumbing codes regulate the depth of the retained liquid seal.
Most bathroom sinks also contain an overflow passage. Water entering the overflow opening travels through a concealed channel and rejoins the drain near the basin outlet. Soap, shaving residue, and biofilm can collect inside that channel even when the main drain remains clear.
Main Sink Components and Maintenance Needs
| Component | Function | Typical maintenance | Warning sign |
| Basin | Holds and directs water | Clean weekly; dry after use | Stains, cracks, dull finish |
| Faucet body | Controls water delivery | Wipe weekly; inspect monthly | Drips, stiffness, corrosion |
| Aerator | Shapes flow and traps sediment | Clean every 1-3 months | Uneven spray, low flow |
| Drain stopper | Opens and closes drain | Remove hair every 1-3 months | Slow drainage |
| Overflow passage | Prevents minor overfilling | Flush every 3-6 months | Musty odor |
| Tailpiece | Connects drain to trap | Inspect every 3 months | Moisture at upper joint |
| P-trap | Holds water seal and catches debris | Inspect regularly; clean when needed | Odor, clog, leaking joint |
| Supply hoses | Carry pressurized water | Inspect every 3 months | Bulging, rust, dampness |
| Shutoff valves | Isolate faucet water | Exercise every 6-12 months | Seized stem, leakage |
| Cabinet base | Reveals hidden plumbing problems | Check monthly | Swelling, staining, mold |
Bathroom Sink Maintenance Specifications
Bathroom sink specifications help homeowners choose replacement parts, diagnose poor performance, and avoid mismatched plumbing. Measurements vary by building code, fixture design, and region, so confirm the installed component before purchasing a trap, tailpiece, aerator, cartridge, or supply connector.
| Specification | Common residential value | Maintenance relevance |
| Bathroom drain connection | Often 1-1/4 inches nominal | Match trap and washer sizes |
| WaterSense faucet maximum | 1.5 GPM at 60 PSI | Confirms efficient rated flow |
| WaterSense tested minimum | At least 0.8 GPM at 20 PSI in current technical criteria | Helps preserve usable low-pressure flow |
| Typical preferred house pressure | About 40-60 PSI | Limits stress while providing usable flow |
| Plumbing trap seal | Commonly 2-4 inches under IPC rules | Blocks sewer-gas movement |
| Basic weekly care time | 5-10 minutes | Basin, faucet, drain opening |
| Quarterly service time | 20-45 minutes | Stopper, overflow, aerator, inspection |
| Deep drain service | 30-60 minutes | Trap removal only when conditions justify it |
The U.S. Environmental Protection Agency states that WaterSense bathroom sink faucets use a maximum flow rate of 1.5 GPM, which is at least 30 percent below the traditional 2.2 GPM federal maximum. EPA documentation uses the exact requirement, “maximum flow rate of 1.5 gpm at 60 psi.”
A 1.5 GPM aerator should not automatically be replaced because a user considers the stream narrower than an older 2.2 GPM fixture. Low flow becomes a maintenance issue when the stream weakens suddenly, sprays sideways, differs sharply between hot and cold, or fails to improve after aerator cleaning.
How Often Should You Maintain a Bathroom Sink?
A bathroom sink should receive light care every day or week, component cleaning every one to three months, and a detailed plumbing inspection at least once a year. Homes with hard water, long hair, multiple users, heavy cosmetic use, or aging plumbing need shorter intervals.
Recommended Maintenance Schedule
| Frequency | Maintenance task | Time | Trigger for earlier service |
| After heavy use | Rinse toothpaste, dye, shaving residue | 1 minute | Visible residue |
| Weekly | Clean basin, faucet, handles, drain rim | 5-10 minutes | Shared bathroom |
| Monthly | Inspect cabinet, joints, hoses, valves | 5 minutes | Musty smell or dampness |
| Every 1-3 months | Clean aerator and stopper | 15-30 minutes | Weak flow or slow drain |
| Every 3-6 months | Clean overflow opening and drain rim | 10-20 minutes | Odor near basin |
| Every 6-12 months | Test shutoff valves and examine caulk | 10 minutes | Older fixture |
| As needed | Remove and clean P-trap | 30-60 minutes | Confirmed trap blockage |
| Annually | Full leak and condition inspection | 20-30 minutes | Rental or second home |
| Before long vacancy | Clean sink and fill trap | 10 minutes | Property unused for weeks |
| After vacancy | Flush hot and cold water | Several minutes | Stagnant plumbing |
A fixed schedule is a starting point, not a substitute for observation. For example, a rarely used powder-room sink may have a clean stopper but a dry P-trap. A family sink may preserve its trap seal while developing a hair clog every six weeks.
Step-by-Step Bathroom Sink Maintenance
A complete maintenance session follows seven stages: clear the area, clean the basin, service the faucet, remove stopper debris, clean the overflow, inspect below the sink, and test the system. Most households can finish the procedure in 35-60 minutes without disconnecting the P-trap.
Before You Start
- Difficulty: Beginner
- Active time: 35-60 minutes
- Typical consumable cost: $2-$10
- Tools: Microfiber cloths, soft brush, old toothbrush, bucket, flashlight, plastic drain tool, adjustable pliers, and dry tissue
- Materials: Mild dish detergent, warm water, cleaner approved for the sink material, and replacement aerator washer if needed
- Safety: Never combine bleach, ammonia, acids, vinegar, or commercial drain products
Step 1: Empty and Inspect the Vanity
Remove bottles, paper products, electrical tools, and stored cleaners from beneath the sink. Use a flashlight to examine the cabinet base, rear wall, supply hoses, shutoff valves, tailpiece, P-trap, and every threaded joint.
Look for green or white corrosion, dark staining, swollen particleboard, rust, mineral trails, water droplets, and softened caulk. Place dry tissue around suspicious connections. Tissue reveals slight moisture more clearly than a fingertip.
Success checkpoint: The cabinet is dry, visible, and free from stored items that could conceal leakage.
Common mistake: Assuming moisture came from a spilled bottle. Dry the area and retest the plumbing before returning storage.
Step 2: Clean the Basin Safely
Apply a material-compatible cleaner and allow only the contact time listed on its label. Agitate residue with a soft cloth or non-scratch sponge, paying attention to the drain rim, faucet base, overflow opening, and backsplash seam.
Rinse the basin completely. Drying matters because evaporating droplets leave minerals behind, especially in hard-water areas.
Success checkpoint: The surface feels smooth, shows no cleaner film, and contains no residue around fittings.
Common mistake: Using vinegar as a universal bathroom cleaner. Acid can damage marble, limestone, travertine, cement-based grout, and some specialty finishes.
Step 3: Clean the Faucet and Aerator
Close the drain or place a towel over it so small aerator parts cannot fall into the pipe. Unscrew the aerator by hand, noting the order of the housing, washer, screens, flow regulator, and insert.
Rinse loose sediment. Soak mineral-coated removable parts in a compatible descaling solution, then scrub gently with a toothbrush. Avoid soaking decorative faucet finishes unless the manufacturer permits it.
Reassemble the parts in their original order. Run cold and hot water separately, then inspect the aerator connection.
Success checkpoint: The stream is centered, consistent, and free from side spray.
Common mistake: Reinstalling the aerator screen backward or losing its rubber washer, which can create leakage around the threads.
Step 4: Remove Hair From the Stopper
Lift out a removable stopper or follow the installed drain’s release method. A traditional pop-up often connects to a horizontal pivot rod beneath the sink, while some push-button drains lift or unscrew from above.
Pull hair and residue from the stopper shaft, drain opening, and reachable crossbars. Use a plastic barbed drain tool when debris sits just below the opening. Clean the stopper seal before reinstalling it.
Success checkpoint: A full basin drains rapidly without forming a persistent pool around the outlet.
Common mistake: Forcing a rigid metal tool into the drain. Metal can scratch finishes, damage seals, or push debris deeper.
Step 5: Clean the Overflow Passage
The overflow passage needs cleaning when odor remains after the stopper and drain opening are clean. Feed warm water mixed with a small amount of mild detergent into the overflow opening using a narrow funnel or squeeze bottle.
Work slowly. Confirm that water exits through the drain without appearing beneath the basin. A flexible non-metallic brush can loosen residue when the passage design permits access.
Do not create a baking soda and vinegar mixture expecting strong drain-cleaning action. The ingredients react quickly and largely neutralize each other. More importantly, neither method removes a solid hair blockage as reliably as physical extraction.
Success checkpoint: Water travels through the overflow freely, and odor decreases after the passage dries.
Common mistake: Pouring large amounts rapidly. Overflow assemblies are not designed for high-pressure flushing.
Step 6: Inspect the Drain and Supply Connections
Run cold water for one minute, hot water for one minute, and both together for another minute. Fill the basin partially, release the stopper, and watch each drain connection during the higher-volume discharge.
Touch dry tissue to the tailpiece, trap nuts, wall connection, supply-line fittings, and shutoff valve stems. Inspect supply hoses for kinks, abrasion, rusted braiding, bulges, or dampness.
Success checkpoint: Every tissue remains dry during faucet use and basin discharge.
Common mistake: Tightening a plastic slip-joint nut before checking washer alignment. A misaligned washer can leak even when the nut feels tight.
Step 7: Test the Stopper and Shutoff Valves
Close the stopper and add enough water to cover the drain by 1-2 inches. Mark or observe the level for five minutes. A falling water level suggests stopper misalignment, seal contamination, or drain wear.
Open and close each shutoff valve gently. A valve that has remained untouched for years may begin leaking at the stem, so keep a towel and bucket nearby. Do not force a seized valve.
Success checkpoint: The stopper holds water, the faucet shuts off fully, and both valves move without leakage.
Common mistake: Turning an old valve aggressively with pliers. Excess force can break the stem or damage the pipe connection inside the wall.
Which Cleaner Is Safe for Your Sink?
The safest bathroom sink cleaner depends on the basin and countertop material. Mild detergent and a soft cloth suit most surfaces, while strong acids, abrasive powders, harsh pads, and prolonged chemical contact create unnecessary finish risk.
| Sink or surface | Routine cleaner | Avoid | Maintenance note |
| Glazed porcelain | Mild detergent and water | Steel wool, hard impact | Repair deep chips that expose substrate |
| Ceramic | pH-neutral cleaner | Abrasive pads | Dry to reduce mineral spots |
| Vitreous china | Mild detergent | Aggressive scouring | Inspect drain area for crazing or chips |
| Cultured marble | Manufacturer-approved mild cleaner | Vinegar, acetone, abrasive powder | Protect gel-coat finish |
| Natural marble | Stone-safe pH-neutral cleaner | Vinegar, lemon, acidic scale remover | Reseal according to stone condition |
| Granite countertop | Stone-safe cleaner | Prolonged acidic contact | Inspect faucet-base seal |
| Glass vessel sink | Mild detergent and microfiber | Rough pads, sudden temperature shock | Clean underside splash marks |
| Stainless steel | Mild detergent, grain-direction wiping | Chloride residue, steel wool | Rinse and dry completely |
| Copper | Mild soap if preserving patina | Abrasive polish unless restoration is intended | Patina change is normal |
| Solid surface | Mild non-abrasive cleaner | High heat, harsh scouring | Fine damage may be repairable |
CDC guidance states that mold on hard household surfaces can be removed using household products or soap and water. CDC also warns users not to mix cleaning products.
Mold beneath a sink indicates a moisture problem, not merely a cleaning problem. Stop the leak or condensation source first. People with respiratory conditions, mold allergies, or weakened immune systems should follow appropriate exposure precautions and seek qualified remediation help when contamination is extensive.
How Do You Prevent Bathroom Sink Clogs?
Bathroom sink clogs are best prevented by keeping hair, dental floss, cotton fibers, thick cosmetics, and grooming residue out of the drain. A monthly stopper inspection usually prevents more blockages than pouring homemade mixtures into an unobstructed pipe.
Adopt these rules:
- Wipe loose hair from the basin before rinsing.
- Never place dental floss, contact lenses, cotton swabs, wipes, or tissues in the drain.
- Remove thick face masks and cosmetic products with a cloth before washing.
- Clean the stopper as soon as drainage slows.
- Use a removable hair catcher when the drain design supports one.
- Address low flow from the faucet because inadequate rinsing can let residue accumulate.
- Avoid dropping bottle caps, jewelry, razor covers, or toothpaste caps into an open drain.
When Should You Clean the P-Trap?
Clean the P-trap when evidence points to a blockage inside it, such as poor drainage after the stopper area has been cleared, a visible object inside the trap, or compacted residue reachable from below. Routine automatic disassembly every six months is unnecessary for a normally functioning trap.
Oatey states that P-traps do not require routine maintenance, although they must remain correctly installed and retain a functional water seal. Frequent removal can create new leaks when washers are reversed, nuts are cross-threaded, or brittle components crack.
To clean a removable trap:
- Turn off the faucet and place a bucket beneath the trap.
- Photograph the assembly before loosening anything.
- Support the trap while loosening both slip-joint nuts.
- Empty the retained water into the bucket.
- Remove debris with a flexible brush.
- Inspect washers, threads, and pipe ends.
- Reassemble without forcing misaligned tubing.
- Hand-tighten plastic nuts, then make only a slight additional adjustment if leakage appears.
- Fill and release the basin while checking with dry tissue.
Stop when the wall pipe is blocked, a metal trap is corroded in place, the assembly is glued, or the plumbing shifts inside the wall.
PVC Versus Metal P-Traps
PVC or polypropylene traps are practical inside enclosed vanities because they resist corrosion, cost less, and are easy to service. Chrome-plated brass traps suit exposed installations, but metal assemblies cost more and can corrode, dent, or become difficult to disassemble.
| Trap material | Typical part cost | Best use | Main limitation | Service approach |
| Polypropylene tubular | $5-$15 | Enclosed vanity | Can crack from impact or overtightening | Usually hand-tightened |
| PVC Schedule 40 | $8-$25 | Permanent solvent-welded drainage | Less convenient to remove | Cut and refit if glued |
| Chrome-plated brass | $25-$70+ | Exposed plumbing | Corrosion and finish wear | Use padded tools |
| Solid brass specialty | $50-$150+ | Premium exposed vanity | High purchase cost | Match finish and gauge |
| Flexible accordion pipe | $8-$20 | Temporary alignment only | Internal ridges collect debris | Replace with smooth-wall pipe |
Flexible accordion-style drain connectors solve alignment problems cheaply, but their internal ridges retain hair and sludge. A properly aligned smooth-wall trap is the better permanent installation.
Pop-Up Rod Versus Push-Button Drains
Traditional lift-rod pop-ups are adjustable and repairable, while push-button drains provide easier top access when their stopper can be removed without disconnecting linkage. Selection should also account for basin overflow compatibility, available space, and access beneath the sink.
| Drain type | Cleaning access | Typical issue | Typical part cost | Best situation |
| Lift-rod pop-up | Pivot rod may need release | Linkage misalignment | Included or $15-$40 | Standard vanity faucet |
| Push-button click-clack | Often removed from above | Spring or seal wear | $15-$40 | Modern basin |
| Lift-and-turn | Unscrews from top | Set screw loosens | $15-$35 | Simple manual control |
| Grid drain | No closing stopper | Hair around openings | $20-$60 | Vessel or commercial-style basin |
| Pop-down removable | Top-access cartridge | Replacement-part matching | $25-$60 | Frequent cleaning access |
A replacement drain must match the sink’s overflow design. Installing a drain intended for a non-overflow basin in an overflow-equipped sink, or the reverse, can interfere with drainage and sealing.
How Do You Find a Hidden Sink Leak?
A hidden bathroom sink leak is found by drying the assembly, testing one water pathway at a time, and observing where moisture first appears. Testing everything simultaneously makes diagnosis harder because water can travel along pipes before dripping elsewhere.
Use this sequence:
- Faucet off: Check whether supply fittings leak under constant pressure.
- Cold water running: Observe the cold supply and faucet body.
- Hot water running: Observe the hot side and expansion-related movement.
- Stopper closed: Check the drain flange while water remains in the basin.
- Stopper released: Check the tailpiece, P-trap, and wall connection.
- Water around faucet base: Determine whether splash water passes beneath the faucet.
- Overflow test: Add controlled water to the overflow opening and inspect below.
Mineral deposits identify a long-term leak but not necessarily an active one. Clean and dry the connection, then retest.
Common Leak Locations
| Moisture location | Likely source | First corrective action |
| Faucet handle | Cartridge, O-ring, packing | Identify faucet model |
| Faucet spout | Cartridge or valve seat | Isolate supply and service valve |
| Aerator threads | Missing washer or loose housing | Reseat washer |
| Faucet base | Failed gasket or splash entry | Dry and controlled-test |
| Supply valve stem | Packing or stem seal | Avoid forcing valve |
| Hose connection | Loose fitting or failed hose | Isolate water immediately |
| Drain flange | Failed putty or gasket | Reseat drain assembly |
| Upper tailpiece | Washer or thread issue | Align and reseal |
| Trap nut | Misaligned slip washer | Reassemble correctly |
| Wall connection | Trap arm or concealed drainage defect | Stop use and inspect professionally |
Why Does a Bathroom Sink Smell?
A bathroom sink can smell because of biofilm inside the stopper or overflow, decomposing debris in the trap, an evaporated trap seal, a venting problem, or a damaged drainage connection. The correct repair depends on whether the odor appears during use, after vacancy, or continuously.
Start with the accessible components. Clean the stopper, drain rim, and overflow channel. Run water for 30-60 seconds in a sink that has not been used for several weeks.
An unused P-trap can lose water through evaporation, allowing drain odor to enter the room. Plumbing professionals also recognize dried traps, damaged venting, and cracked sewer piping as distinct odor sources.
Call a plumber when:
- Odor returns soon after the trap is refilled.
- The sink gurgles when another fixture drains.
- Several drains smell simultaneously.
- The trap empties without visible leakage.
- Odor comes from the wall or cabinet rather than the drain opening.
- Wastewater appears inside the cabinet.
- The home contains an unvented or obsolete trap arrangement.
Do not mask sewer odor with fragrance. Odor is diagnostic evidence.
Common Maintenance Mistakes
Bathroom sink damage often results from an aggressive repair applied before the failure has been identified. The safest sequence is inspect, clean mechanically, test, isolate the component, and then replace only the defective part.
Using Chemical Drain Cleaner First
Caustic and acidic products may expose users to splash hazards, damage some materials, complicate later plumbing work, and remain trapped above a complete blockage. Remove accessible hair first. Use a plunger only when the overflow opening can be sealed and the fixture condition permits pressure.
Overtightening Plastic Nuts
Slip-joint washers create the seal. Excessive torque can distort the washer, crack the nut, or split thin tubular pipe.
A practitioner’s rule is simple: align first, tighten second. A joint that requires heavy force to stop leaking is usually misassembled or damaged.
Treating Vinegar as Universal
Vinegar removes some mineral deposits, but it is inappropriate for acid-sensitive stone and can affect certain coatings or nearby grout. Use it only where the fixture manufacturer and surface material allow acidic cleaning.
Ignoring Small Faucet Drips
A slow drip can indicate cartridge wear, damaged seals, debris, or excessive pressure. Delayed repair also leaves mineral staining around the outlet and increases wear on the drain area.
Storing Absorbent Items Under Plumbing
Paper products, towels, and cardboard conceal slow leakage and hold moisture against cabinet surfaces. Store plumbing-safe items in a removable plastic tray, leaving joints visible.
Replacing Parts Without Identifying the Model
Faucet cartridges, aerators, stoppers, and drain components are not universally interchangeable. Photograph the fixture, record the brand, measure the connection, and bring the old part when sourcing a replacement.
How Much Does Sink Maintenance Cost?
Routine bathroom sink maintenance usually costs $5-$25 per year when the plumbing is functional and the household already owns basic cleaning tools. Costs rise when mineral buildup, worn cartridges, leaking valves, damaged supply lines, or concealed drainage faults require parts or professional labor.
| Item or service | Typical DIY cost | Typical professional cost | Main cost variable |
| Mild cleaners and cloths | $5-$20 yearly | Not applicable | Product type |
| Plastic hair-removal tool | $3-$10 | $100-$250 service visit | Clog location |
| Replacement aerator | $5-$25 | $100-$225 installed | Thread and finish |
| Pop-up drain assembly | $15-$60 | $150-$400 installed | Access and drain type |
| Tubular plastic P-trap | $5-$20 | $150-$350 installed | Alignment |
| Decorative metal P-trap | $25-$150+ | $200-$500+ installed | Metal and finish |
| Faucet cartridge | $15-$80 | $150-$400 installed | Brand and access |
| Pair of supply lines | $15-$50 | $150-$350 installed | Valve condition |
| Shutoff valve replacement | $10-$40 part | $175-$500 each | Pipe material |
| Faucet replacement | $50-$500+ | $250-$900+ total | Fixture and countertop access |
These are broad typical ranges rather than fixed quotes. Labor rates, emergency service, wall access, corroded parts, premium finishes, and regional pricing can change the final amount substantially.
When Should Sink Parts Be Replaced?
Bathroom sink parts should be replaced according to condition, compatibility, and failure risk rather than age alone. A clean 12-year-old supply line may still require replacement if its manufacturer specifies a shorter service interval, while a newer hose with corrosion or bulging requires immediate action.
Replace or professionally assess a component when:
- A supply hose bulges, frays, rusts, kinks sharply, or leaks.
- A shutoff valve will not close or leaks after gentle operation.
- A faucet cartridge repeatedly drips after correct installation.
- A drain body is cracked, severely corroded, or incompatible with the basin.
- A plastic trap shows stress whitening, deformation, or split threads.
- A metal trap has pinhole corrosion.
- A stopper cannot seal after cleaning and adjustment.
- The faucet finish peels or corrosion compromises the body.
- A basin crack extends through the fixture or leaks.
- Repeated clogs occur beyond the removable trap.
Published lifespan estimates are useful for budgeting, but inspection evidence should control the decision. Pressurized supply components deserve more conservative treatment because their failure can release water continuously until the valve or main supply is closed.
Maintenance for Different Bathroom Situations
Hard-Water Homes
Hard-water bathrooms need more frequent aerator inspection and immediate drying of faucet and basin surfaces. Remove deposits before they harden, but select a descaler compatible with the finish and countertop.
A sudden reduction in both hot and cold flow often points to the aerator. A reduction on only one side may involve a supply valve, hose, cartridge passage, or pipe debris.
Guest Bathrooms and Vacant Homes
Run water periodically in seldom-used sinks to preserve the P-trap seal. Clean the drain before vacancy, confirm that shutoff valves are accessible, and remove absorbent items from the cabinet.
After an extended closure, building-water guidance may require systematic flushing rather than a brief faucet run, especially in larger or managed properties. CDC guidance for reopened buildings includes flushing water-using fixtures and addressing detected dampness or mold at its source.
Rental Properties
Renters should report active leaks, damaged valves, unstable fixtures, and recurring drainage problems promptly. Non-destructive cleaning of the aerator, removable stopper, and visible basin is usually reasonable, but lease terms may restrict trap removal or fixture disassembly.
Property managers benefit from standardized inspection records. Document hose condition, valve operation, cabinet moisture, drain speed, fixture model, and repair date during each turnover.
Children’s Bathrooms
Use removable drain screens where compatible and keep small objects away from the basin. Check the overflow and stopper more frequently because toothpaste, craft residue, and small items can enter concealed passages.
Do not store hazardous cleaners within reach. Child-resistant packaging does not replace secure storage.
Accessible and Open Vanities
Exposed plumbing needs both functional and visual inspection. Protective pipe covers must remain secure, and decorative traps should be cleaned with finish-compatible products.
Do not conceal corrosion with polish. Surface changes near a joint may reveal an active leak.
When Should You Call a Plumber?
Call a licensed plumber when the problem extends into concealed piping, pressurized connections cannot be isolated safely, or repeated DIY work fails to correct the cause. Professional help is also appropriate when repair requires code knowledge, wall access, soldering, press fittings, or replacement of seized valves.
Stop using the sink and request service when:
- A shutoff valve does not stop an active leak.
- Water enters the wall, floor, or adjacent cabinet.
- The trap or drain pipe is cracked and cannot be safely removed.
- Several fixtures drain slowly at once.
- Wastewater backs into the sink.
- The drain repeatedly clogs after the stopper and trap are clear.
- Sewer odor persists after restoring the trap seal.
- Mold or cabinet damage extends beyond a small cleanable area.
- The faucet or basin moves when touched.
- A supply connection shows bulging, severe corrosion, or active spraying.
An honest limitation is important: maintenance cannot reverse damaged cabinet material, repair a cracked pipe inside a wall, restore a failed valve body, or correct an improperly vented drainage system. Cleaning helps only when contamination or accessible buildup is the actual cause.
Bathroom Sink Maintenance FAQ
Can boiling water damage a bathroom sink drain?
Boiling water can stress some basin materials, weaken certain sealants, and soften or deform vulnerable plastic piping, especially when poured repeatedly into a cold fixture. Use hot tap water rather than kettle-temperature water unless the sink and drain manufacturer explicitly permit boiling water.
Should I use baking soda and vinegar monthly?
No routine monthly treatment is necessary for a freely draining sink. Baking soda and vinegar create visible fizz but do not reliably extract hair or repair a plumbing defect. Cleaning the stopper mechanically, rinsing residue, and inspecting the overflow provide more direct maintenance value.
Why does my sink drain slowly only when full?
A sink that drains slowly under high volume may have partial obstruction in the stopper, trap, trap arm, or branch drain. The overflow can also affect perceived drainage. Clear accessible debris first, then test the trap before assuming the blockage is deep inside the wall.
How can I tell whether the aerator is clogged?
Remove the aerator and briefly test the faucet at a controlled flow. Strong, even water without the aerator indicates sediment or scale inside the aerator assembly. Weak flow without it suggests a cartridge, supply hose, shutoff valve, or upstream plumbing restriction.
Can I leave the cabinet empty after finding moisture?
Yes. Keep the cabinet empty until the source is identified, repaired, and the material is completely dry. Mark the moisture area, photograph it, and retest each plumbing pathway. Returning paper goods or bottles too early can conceal continued leakage.
What should I do when an object falls into the drain?
Stop running water and remove the stopper. Retrieve the object from above when visible, or place a bucket beneath the P-trap and remove the trap if the installation is safely serviceable. Do not push the object farther with a rigid tool. Call a plumber when the trap is inaccessible, corroded, or glued.
Conclusion
Bathroom sink maintenance works best as a layered routine: clean the visible fixture weekly, service the aerator and stopper every few months, inspect pressurized and drainage connections regularly, and respond immediately to moisture, odors, or changing performance. Mechanical cleaning, material-compatible products, and controlled testing prevent more damage than aggressive chemicals or unnecessary disassembly.
A maintained sink should deliver an even stream, drain promptly, remain odor-free, hold water when stopped, and stay completely dry beneath the vanity. When one of those conditions changes, identify the affected component first. Early diagnosis keeps a minor cleaning task from becoming a cabinet repair, concealed leak, or plumbing emergency.


