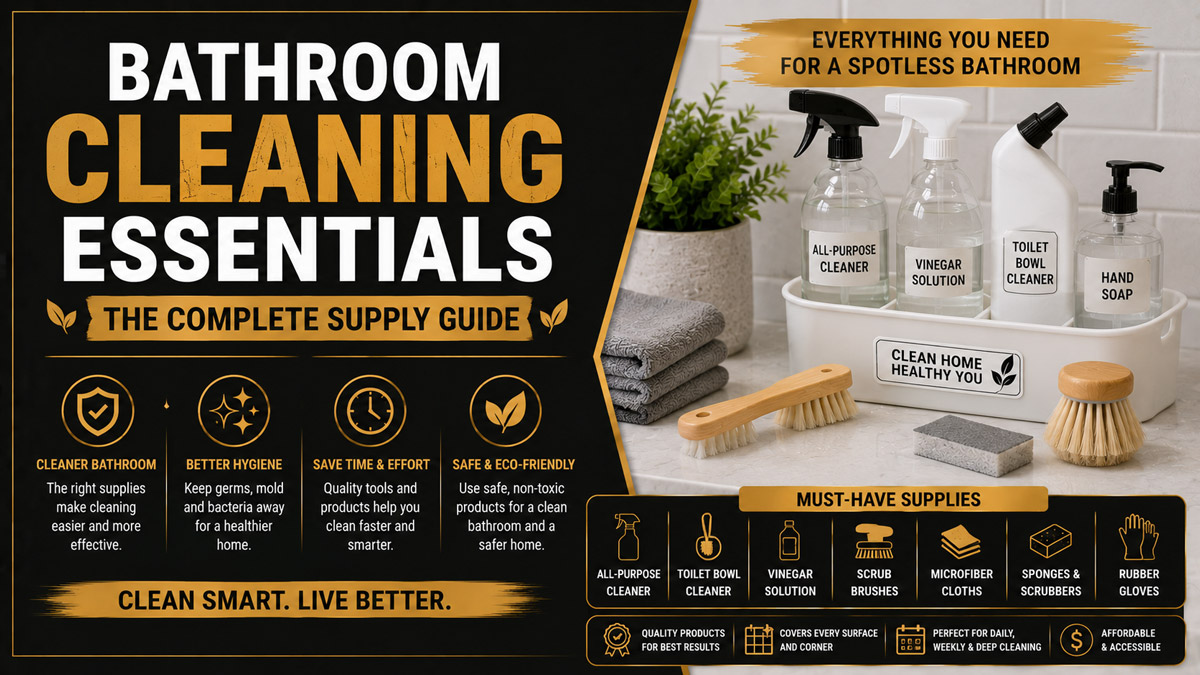
Bathroom cleaning essentials are the products, tools, and protective supplies needed to remove hair, body oils, soap scum, mineral deposits, stains, odors, and microorganisms from bathroom surfaces. A complete basic kit includes a multipurpose cleaner, toilet bowl cleaner, compatible scale remover, glass cleaner, microfiber cloths, brushes, gloves, a squeegee, and a floor-cleaning tool.
Key Facts at a Glance
- A functional household bathroom kit usually contains 8-12 core products and tools.
- Cleaning removes soil, while disinfecting uses a registered product to kill specified microorganisms.
- Disinfectant effectiveness depends on keeping the surface visibly wet for the label’s full contact time.
- Acidic products dissolve mineral scale but can permanently etch marble, limestone, and travertine.
- A standard starter kit typically costs $35-$65, excluding a vacuum.
- Weekly bathroom cleaning usually takes 20-35 minutes when buildup is controlled.
What Are Bathroom Cleaning Essentials?
Bathroom cleaning essentials are supplies selected to address the distinct soils and surfaces found in a moisture-heavy room. They include chemical products that loosen or dissolve contamination, physical tools that lift it away, protective equipment that reduces exposure, and organizational items that prevent cross-contamination.
A bathroom does not need a separate bottle for every fixture. Most homes can handle routine cleaning with four compatible cleaning products and six reusable tools. Specialist products become necessary when the room contains natural stone, persistent mold, heavy hard-water scale, delicate metal finishes, or inaccessible grout.
The practical distinction is:
- Essential supplies handle weekly cleaning in nearly every bathroom.
- Situational supplies address a specific surface or recurring problem.
- Optional equipment saves time but does not improve every cleaning result.
- Professional supplies prioritize durability, speed, and cross-contamination control.
The 10 True Bathroom Cleaning Essentials
A minimalist kit can clean most ceramic, porcelain, glass, sealed laminate, vinyl, and painted bathroom surfaces. Choose products according to their labels and test an inconspicuous area before widespread use.
- Multipurpose bathroom cleaner
- Toilet bowl cleaner
- Glass cleaner
- Surface-compatible scale or soap-scum remover
- Four to eight microfiber cloths
- Toilet brush
- Handheld scrub brush
- Grout or detailing brush
- Shower squeegee
- Protective cleaning gloves
A vacuum, broom, or microfiber floor mop is also required, but many households already own one outside the bathroom kit.
Essential quantities and replacement timing
| Item | Practical quantity | Typical replacement point | Primary purpose |
| Multipurpose cleaner | 1 bottle | When empty or expired | Sinks, counters, exterior fixtures |
| Toilet bowl cleaner | 1 bottle | When empty or expired | Interior porcelain bowl |
| Glass cleaner | 1 bottle | When empty or expired | Mirrors and compatible glass |
| Scale remover | 1 bottle | When empty or expired | Mineral deposits and soap scum |
| Microfiber cloths | 4-8 cloths | When fibers mat, tear, or retain odor | Wiping, drying, polishing |
| Toilet brush | 1 dedicated brush | About every 6-12 months, or after damage | Bowl cleaning |
| Hand scrub brush | 1 brush | When bristles flatten or split | Tub, tile, and shower floor |
| Grout brush | 1 narrow brush | When bristles lose stiffness | Grout lines and edges |
| Squeegee | 1 | When blade cracks or skips | Removing water from glass and tile |
| Gloves | 1-2 pairs | After punctures, cracking, or contamination | Skin protection |
Replacement timing varies with frequency, construction quality, cleaning chemicals, and how thoroughly the tools are washed and dried.
How Do Bathroom Cleaning Products Work?
Bathroom cleaners work by matching a chemical or mechanical action to a particular type of soil. No single chemistry is ideal for body oil, calcium scale, rust, mold staining, microorganisms, and loose hair at the same time.
Surfactants loosen oily and organic grime. Acids react with alkaline mineral deposits. Alkaline cleaners help break down greasy soils. Oxidizing agents attack color-producing organic compounds. Disinfectants deactivate specific microorganisms when applied at the correct concentration and kept wet for the required contact time.
Surfactants remove oils and general soil
Surfactants reduce water’s surface tension, allowing the cleaning solution to spread and penetrate grime. One end of the surfactant molecule associates with water, while the other associates with oils and soil.
Multipurpose bathroom sprays usually rely on surfactants because they work across many sealed surfaces. They are appropriate for toothpaste splatter, skin oils, dust, light soap residue, and ordinary grime.
Surfactants do not reliably dissolve thick calcium deposits. They also do not automatically disinfect unless the product label makes an antimicrobial claim.
Acids dissolve hard-water deposits
Acidic cleaners react with mineral scale composed largely of calcium and magnesium compounds. Citric, lactic, sulfamic, glycolic, phosphoric, and oxalic acids appear in different household descalers.
The product’s strength matters less than its compatibility with the surface. An acidic cleaner may work quickly on glazed ceramic tile yet etch marble in seconds. The Natural Stone Institute warns that products containing vinegar, lemon, or other acids may dull or etch calcareous stone.
Alkaline and oxidizing products target organic grime
Alkaline products are useful against body oils, greasy residues, and some cosmetic contamination. Chlorine bleach and hydrogen peroxide are oxidizers that may lighten organic staining and support disinfection when the product is formulated and labeled for that purpose.
Bleach is not the best universal cleaner. Organic matter can reduce its effectiveness, and bleach does not remove mineral scale efficiently. A surface should generally be cleaned before it is disinfected when visible grime is present.
Disinfectants require contact time
Disinfectants work only when used according to their labels. The contact time specifies how long the treated surface must remain visibly wet to achieve the stated antimicrobial result.
The U.S. Environmental Protection Agency explains that a product requiring a 10-minute contact time must keep the surface visibly wet for at least 10 minutes. More product may be needed if the area dries early.
Spraying a disinfectant and wiping it off immediately may clean the surface, but it does not necessarily complete the labeled disinfection process.
Essential Bathroom Cleaning Products
A strong bathroom kit uses the fewest products that can safely address the home’s actual surfaces and soil problems. Product duplication wastes storage space and increases the chance of mixing incompatible chemicals.
| Product category | Best use | Typical dwell or contact time | Typical price | Main limitation |
| Multipurpose bathroom cleaner | Counters, sinks, sealed vanities, fixture exteriors | 1-5 minutes for soil loosening | $4-$8 | Weak on thick mineral scale |
| Toilet bowl cleaner | Bowl walls, under rim, waterline | 5-10 minutes unless label differs | $3-$7 | Dedicated use, may damage metals |
| Acidic scale remover | Glass, glazed tile, compatible fixtures | 2-10 minutes | $5-$12 | Unsafe for acid-sensitive stone |
| Glass cleaner | Mirrors and compatible glass | Wipe before drying | $3-$7 | Poor on thick soap scum |
| EPA-registered disinfectant | High-touch, nonporous surfaces | Label-specific, often 1-10 minutes | $4-$10 | Surface must stay visibly wet |
| Neutral-pH cleaner | Stone, delicate finishes, routine floors | Usually 1-5 minutes | $7-$15 | Slower on heavy scale |
| Oxygen-based stain cleaner | Grout and organic discoloration | 5-15 minutes | $5-$12 | May lighten colored materials |
| Enzymatic odor cleaner | Organic odor around toilets or drains | 5-15 minutes or label time | $7-$15 | Does not remove mineral scale |
Multipurpose bathroom cleaner
A multipurpose cleaner should handle ordinary weekly soil without harming the room’s common surfaces. Look for a label that explicitly lists the counter, sink, vanity, ceramic, porcelain, or fixture material you plan to clean.
A neutral or mildly alkaline formula is usually easier to use across multiple surfaces than a strong acid or bleach product. Fragrance is not evidence of cleaning power. A strong scent may also become unpleasant in a small room with limited ventilation.
Toilet bowl cleaner
Toilet bowl cleaners use thickened formulas that cling to vertical porcelain. Some rely on acids to dissolve mineral rings and rust. Others contain chlorine-based chemistry for staining and disinfection.
Apply the cleaner under the rim and around the bowl wall. Allow the labeled dwell time, scrub with a dedicated toilet brush, then flush. Avoid splashing the cleaner onto flooring, metal hinges, textiles, natural stone, or nearby products.
Soap-scum and scale remover
Soap scum combines fatty soap ingredients, body oils, minerals, and debris into a film that resists ordinary wiping. Hard-water scale is predominantly mineral buildup. Both may respond to an acidic descaler, but the surface must tolerate acid.
Use a neutral soap-scum product on marble, travertine, limestone, cement-based decorative tile, and other acid-sensitive materials. Severe scale on a delicate surface may require professional restoration rather than stronger household chemicals.
Glass cleaner
Glass cleaner removes fingerprints, toothpaste mist, light oils, and cleaner residue from mirrors. It normally uses fast-evaporating solvents and low-residue surfactants.
Use one lightly dampened cloth to loosen the contamination and a second dry cloth to buff the glass. Spraying too much product creates more residue to remove. Avoid allowing cleaner to collect behind mirror edges, where moisture may affect the backing.
Disinfectant
A disinfectant is useful for toilet exteriors, flush handles, faucet handles, door handles, light switches, and other frequently touched hard, nonporous surfaces. Routine disinfection of every bathroom wall and floor is generally unnecessary in a healthy household unless illness, bodily-fluid contamination, or another specific risk is present.
The Centers for Disease Control and Prevention distinguishes cleaning from disinfecting: cleaning uses water, soap, and scrubbing to remove dirt and germs, while disinfecting kills remaining germs with chemicals.
Neutral-pH specialty cleaner
Neutral-pH cleaner is essential when a bathroom contains marble, limestone, travertine, terrazzo, or a finish that the manufacturer identifies as acid-sensitive. It is also useful for frequent maintenance because it is less likely to strip coatings or attack mineral-based materials.
Neutral does not mean harmless to every material. Read dilution directions, inspect sealant condition, and avoid letting water remain in joints or cracks.
Essential Bathroom Cleaning Tools
Chemical products loosen or alter soil, but tools provide the mechanical action that removes it. The correct tool improves results while reducing scratches and repetitive effort.
Microfiber cloths
Microfiber cloths collect fine dust, hair, oils, and moisture with less lint than many cotton rags. Keep at least four cloths available so the same contaminated fabric is not used on the toilet and vanity.
A practical color system is:
- Red or dark cloths for toilet exteriors
- Blue cloths for mirrors and glass
- Green cloths for sinks and counters
- Yellow cloths for showers, tubs, and general surfaces
Wash microfiber separately from lint-producing towels. Avoid fabric softener because residue can coat the fibers and reduce absorbency. Dry on low heat when the care label permits it.
Toilet brush
A toilet brush must remain dedicated to the bowl. A curved head reaches under the rim, while moderately stiff bristles scrub the waterline and trapway entrance.
After use, rinse the brush in clean flush water and allow it to drip-dry over the bowl before placing it in the holder. Enclosing a wet brush creates an odor-prone environment.
Handheld scrub brush
A handheld brush supplies more pressure than a cloth or sponge. Nylon bristles suit many tile, grout, porcelain, and textured shower surfaces.
Use softer bristles on acrylic, fiberglass, polished metal, or scratch-sensitive coatings. A stiff brush can permanently dull a glossy finish even when the chemical cleaner is compatible.
Grout and detailing brush
A narrow grout brush concentrates force inside recessed grout lines and corners. An old toothbrush can handle light detailing, but its soft, worn bristles are usually ineffective against established buildup.
Do not use a wire brush on grout, tile, porcelain, chrome, or acrylic. Metal bristles can scratch surfaces and remove weakened grout.
Shower squeegee
A squeegee removes water before evaporation leaves mineral deposits. Use it after cleaning and after routine showers, moving from top to bottom in overlapping passes.
The squeegee is preventive rather than restorative. It will not remove existing hard-water deposits, but daily use can reduce how quickly new spotting and soap film develop.
Floor mop or vacuum
Dry debris should be removed before wet mopping. Hair becomes difficult to collect once it is saturated and mixed with cleaner.
A vacuum with a hard-floor setting is fastest for loose hair and dust. A microfiber flat mop reaches around toilets and vanities while controlling the amount of water applied to grout, wood-look flooring, and perimeter joints.
Gloves and ventilation
Reusable nitrile, neoprene, or other chemical-resistant household gloves reduce direct skin contact. Inspect them for cracks and rinse the exterior before removal.
Open a window, run an exhaust fan, and keep the door open when product labels call for ventilation. Eye protection is sensible when working overhead, using splash-prone chemicals, or scrubbing a toilet bowl.
Which Cleaner Is Safe for Each Bathroom Surface?
The safest cleaner is determined by the surface material, finish, sealant condition, and manufacturer’s instructions. Visual appearance alone is unreliable because engineered stone, acrylic, cultured marble, porcelain, and natural stone can resemble one another.
| Surface | Routine cleaner | Suitable tool | Avoid | Test location |
| Glazed ceramic tile | Neutral or labeled tile cleaner | Microfiber or nylon brush | Metal brush and excessive abrasion | Low corner |
| Porcelain toilet | Bowl cleaner labeled for porcelain | Dedicated toilet brush | Mixing products inside bowl | Back of bowl exterior |
| Acrylic tub | Mild nonabrasive cleaner | Soft cloth or soft nylon brush | Scouring powder and harsh solvents | Hidden side wall |
| Fiberglass shower | Mild bathroom cleaner | Soft sponge or cloth | Stiff abrasives and aggressive scraping | Low rear corner |
| Shower glass | Glass-safe scale remover | Non-scratch pad and squeegee | Metal blades without approval | Bottom corner |
| Marble or limestone | Neutral-pH stone cleaner | Soft microfiber cloth | Vinegar, lemon, acidic descaler | Inconspicuous edge |
| Chrome fixture | Mild cleaner and water | Soft microfiber cloth | Prolonged acid contact and abrasives | Underside |
| Matte black fixture | Manufacturer-approved mild cleaner | Soft damp cloth | Wax, abrasives, strong acids | Hidden underside |
| Sealed grout | Neutral tile cleaner | Nylon grout brush | Wire brush and excessive acid | Behind toilet |
| Painted vanity | Diluted mild detergent | Damp microfiber cloth | Saturation and harsh solvents | Interior edge |
| Wood vanity | Manufacturer-approved wood cleaner | Nearly dry cloth | Standing water and bathroom descaler | Inside door |
| Vinyl floor | Neutral floor cleaner | Damp flat mop | Solvents and flooding | Behind toilet |
Surface compatibility takes priority over stain-removal speed. A slower compatible cleaner is less expensive than repairing etched stone, stripped plating, scratched acrylic, or swollen cabinetry.
How Should You Use Bathroom Cleaning Essentials?
The most efficient bathroom-cleaning sequence is dry to wet, high to low, and cleanest zone to dirtiest zone. This prevents dust from turning into sludge, stops dirty water from falling onto finished surfaces, and keeps toilet contamination away from sinks and counters.
A maintained bathroom usually requires 20-35 minutes. Heavy scale, mold staining, neglected grout, or excessive clutter can extend the process to 1-2 hours.
Step 1: Ventilate and prepare the room
Turn on the exhaust fan and open a window when available. Read each product label before opening it, especially the safety, compatibility, dilution, and contact-time instructions.
Remove bath mats, towels, toiletries, waste, and movable accessories. Place chemicals upright in a stable location where children and pets cannot reach them.
Step 2: Remove dry hair and dust
Dust exhaust grilles, light fixtures, shelves, mirror tops, window ledges, baseboards, and the toilet exterior. Vacuum the floor and accessible corners.
Do not begin by spraying a dusty toilet. Moisture binds hair and dust to porcelain, hinges, and floor edges, increasing the number of wipes required.
Step 3: Apply products that need dwell time
Apply toilet bowl cleaner beneath the rim. Apply compatible soap-scum or scale remover to the shower and tub.
Follow the label’s maximum dwell time. Do not assume leaving a product longer improves performance. Extended exposure can discolor grout, attack metal, soften sealant, or damage acrylic.
Step 4: Clean mirrors and upper surfaces
Lightly mist glass cleaner onto a cloth rather than saturating the mirror. Wipe the mirror, medicine cabinet, shelves, and upper fixture surfaces.
Follow with a dry microfiber cloth. Successful glass cleaning leaves no cloudy film when viewed from an angle.
Step 5: Clean the vanity and sink
Apply a compatible cleaner to the countertop, faucet handles, sink basin, drain surround, backsplash, and cabinet pulls. Agitate buildup around faucet bases with a detailing brush.
Rinse or wipe away the cleaner as directed. Dry metal fixtures immediately to reduce spots and reveal any remaining residue.
Step 6: Scrub the shower or tub
Work from the upper wall downward. Agitate corners, shelves, grout lines, door tracks, and the textured floor with the appropriate brush.
Rinse thoroughly where the product label requires rinsing. Remove remaining water with the squeegee, then dry metal hardware and ledges.
Step 7: Clean the toilet bowl
Scrub beneath the rim, around the waterline, and into the trapway opening. Flush according to the product instructions.
Never add a second cleaner to a bowl that already contains toilet product. Flush thoroughly and ventilate before changing chemistry.
Step 8: Clean the toilet exterior
Use a toilet-only cloth. Start with the tank top and flush handle, then clean the lid, seat, hinges, outer bowl, sides, and base.
Replace or fold the cloth as it becomes soiled. Do not return the same wiping surface to the flush handle after it has touched the base.
Step 9: Disinfect selected touchpoints
Pre-clean visibly dirty surfaces. Apply a compatible registered disinfectant to the flush handle, faucet handles, door handle, switch plate, and other high-touch areas when disinfection is warranted.
Keep each surface visibly wet for the label’s contact time. The CDC advises that the surface remain wet for the entire stated contact period.
Step 10: Mop the floor and dry the tools
Mop from the farthest corner toward the doorway. Use the minimum amount of solution required by the floor-product label.
Rinse reusable tools, remove trapped hair, and let everything dry completely. Launder cloths after toilet use or after a full cleaning session.
Cleaning Versus Disinfecting: Which Do You Need?
Routine cleaning is sufficient for much of a healthy household bathroom because physical soil removal also reduces microbial contamination. Disinfection adds value on high-touch surfaces, after illness, following bodily-fluid contamination, or when a vulnerable household member requires additional precautions.
Cleaning and disinfecting are sequential rather than interchangeable tasks. Visible dirt can block disinfectant from reaching the surface and may interfere with certain active ingredients. Clean first unless the product is explicitly labeled as a one-step cleaner-disinfectant for the soil level present.
Use disinfection selectively because unnecessary application increases chemical exposure, consumes time, and may shorten the life of finishes. Follow the product label rather than applying a homemade concentration or combining cleaners.
What Cleaning Products Must Never Be Mixed?
Never mix bleach with another cleaning product unless the manufacturer explicitly directs that combination. Bleach mixed with acids can release chlorine gas, while bleach mixed with ammonia can release toxic chloramine compounds.
The CDC states that household bleach or disinfectants should never be mixed with other cleaners because dangerous vapors may be released. A CDC safety page also advises ventilation and protective equipment when bleach is used indoors.
| Combination | Potential result | Common source products | Safe response |
| Bleach plus ammonia | Toxic chloramine gases | Some glass, floor, and multipurpose cleaners | Leave area, seek fresh air, contact emergency services if symptoms occur |
| Bleach plus acid | Chlorine gas | Vinegar, descaler, toilet cleaner | Leave immediately and ventilate only if safe |
| Two toilet bowl cleaners | Unpredictable toxic reaction | Acid bowl cleaner and bleach bowl cleaner | Never combine, flush between products |
| Hydrogen peroxide plus vinegar in one container | Irritating peracetic acid mixture | Homemade cleaner ingredients | Use separately, never combine or store |
| Multiple disinfectants | Hazardous fumes or incompatible chemistry | Bleach, quaternary ammonium, acid products | Select one labeled product |
| Cleaner plus boiling water | Increased fumes or splashing | Strong chemicals in drains or bowls | Use label-specified water temperature |
Do not attempt to neutralize an accidental mixture with another chemical. Move away from the fumes, seek fresh air, and follow local poison-control or emergency guidance.
How Much Does a Bathroom Cleaning Kit Cost?
A practical consumer bathroom kit typically costs $35-$65 when the household already owns a vacuum or mop. A minimalist kit can cost about $20-$35, while a specialist setup for natural stone, severe hard water, or professional work may exceed $100.
| Kit level | Included supplies | Initial typical cost | Recurring annual cost |
| Minimalist | 3 cleaners, cloths, gloves, toilet brush, scrub brush | $20-$35 | $25-$55 |
| Standard household | 4-5 cleaners, 6 cloths, 3 brushes, squeegee, gloves | $35-$65 | $40-$90 |
| Low-toxicity focused | Concentrates, reusable bottles, cloths, gentle tools | $45-$85 | $25-$70 |
| Hard-water kit | Standard kit plus descaler and detailing tools | $50-$90 | $50-$100 |
| Natural-stone kit | Neutral stone cleaner, soft tools, stone-safe stain product | $55-$100 | $45-$100 |
| Professional starter kit | Color-coded tools, caddy, mop, extension tools, concentrates | $100-$180 | $80-$200 |
The cheapest bottle is not always the lowest-cost choice. Concentrates may deliver a lower cost per use, while overly aggressive products can create expensive surface damage.
How Long Does Bathroom Cleaning Take?
A maintained bathroom takes less time because stains are addressed before they harden. Daily drying and weekly cleaning often reduce the need for repeated chemical applications.
| Bathroom condition | Powder room | Standard full bathroom | Large primary bathroom |
| Daily touch-up | 3-5 minutes | 5-8 minutes | 7-12 minutes |
| Weekly maintenance | 10-15 minutes | 20-35 minutes | 30-50 minutes |
| Monthly detail clean | 20-30 minutes | 40-70 minutes | 60-100 minutes |
| Neglected deep clean | 35-60 minutes | 1-2 hours | 2-3 hours |
| Heavy scale or mold staining | Not typical | Add 20-60 minutes | Add 30-90 minutes |
Dwell time is productive time. Apply compatible products first, then clean another zone while the chemistry loosens deposits.
Which Bathroom Cleaning Kit Should You Build?
The best kit reflects the bathroom’s surfaces, water quality, frequency of use, and household sensitivities. Adding stronger products without identifying the soil usually increases risk rather than cleaning performance.
Best kit for busy households
Choose a multipurpose bathroom cleaner, toilet gel, glass cleaner, preapproved disinfectant, six color-coded cloths, a squeegee, and a flat mop. Store the kit in a portable caddy.
Prioritize prevention. Squeegee the shower after use, wipe the sink daily, and clean the toilet weekly. Five minutes of frequent maintenance can prevent a one-hour restorative session.
Best kit for hard-water homes
Add a surface-compatible acidic descaler, a non-scratch scrub pad, a detailing brush, and a squeegee. Use the descaler only where the material allows it.
Frequent light treatment is safer than waiting for thick deposits. Dry faucets and glass after use because each evaporated droplet can leave more minerals behind.
Best kit for marble or natural stone
Use neutral-pH stone cleaner, soft microfiber cloths, a soft nylon brush, a squeegee, and a manufacturer-approved stone stain treatment. Remove water promptly.
Do not use vinegar, lemon juice, acidic toilet cleaner, calcium remover, or generic bathroom descaler on calcareous stone. Acid damage is chemical etching, not ordinary dirt, so another cleaner will not reverse it.
Best kit for families with children or pets
Use lockable storage, clearly labeled original containers, gloves, washable cloths, and the least aggressive compatible products that complete the task. Keep products inaccessible during both use and storage.
“Natural” does not automatically mean safe. Concentrated acids, essential oils, and improperly stored homemade mixtures can still irritate skin, damage surfaces, or create ingestion hazards.
Best kit for renters
Choose portable tools and low-risk products: neutral multipurpose cleaner, glass cleaner, toilet bowl cleaner, microfiber cloths, soft brushes, gloves, and a squeegee.
Avoid aggressive restoration attempts on finishes you do not own. Photograph pre-existing discoloration, failed sealant, rust, cracked grout, and ventilation problems before treating them.
Best kit for professional cleaners
Use durable color-coded cloths, replaceable brush heads, concentrated labeled products, chemical-resistant gloves, eye protection, a divided caddy, a flat mop, an extension duster, and a HEPA-filter vacuum where appropriate.
Professionals gain more from consistent procedures than from carrying many products. Standardize dilution, dwell time, cloth color, cleaning order, and tool decontamination across every property.
Are Vinegar and Baking Soda Good Alternatives?
Vinegar can dissolve light mineral deposits on acid-resistant materials, while baking soda can provide mild abrasive action. Neither is a universal bathroom cleaner, and mixing them together largely neutralizes their useful acid and alkaline properties.
Vinegar should not be used on marble, limestone, travertine, many grout installations, damaged sealants, or finishes whose manufacturers prohibit acid. It is also not automatically a registered disinfectant.
Baking soda may scratch polished acrylic, soft metal, decorative coatings, and some glass when used aggressively. It can leave a powdery film that requires extensive rinsing.
Use homemade products only when all four conditions are met:
- The surface manufacturer permits the ingredient.
- The target soil responds to that chemistry.
- Disinfection is not being falsely assumed.
- No incompatible commercial product remains on the surface.
Common Problems and How to Fix Them
Why do mirrors remain streaky?
Mirror streaks usually come from excess product, a contaminated cloth, hard-water residue, or incomplete drying. Clean with a lightly dampened microfiber cloth, then buff immediately with a separate dry cloth.
Wash polishing cloths without fabric softener. Replace the cloth when it begins redistributing residue instead of collecting it.
Why does soap scum return quickly?
Soap scum returns when mineral-rich water, bar-soap fats, body oils, and moisture remain on the shower surface. Remove existing buildup, rinse thoroughly, and squeegee after each shower.
Switching from traditional bar soap to a lower-residue body wash may reduce fatty deposits. It will not eliminate mineral spots from hard water.
Why does grout still look dirty after scrubbing?
Grout may contain embedded soil, mineral discoloration, mold staining, deteriorated sealer, or permanent pigment variation. Cleaning can remove surface contamination but cannot restore missing grout or reverse every stain.
Apply a compatible cleaner, allow proper dwell time, and agitate with a nylon grout brush. Persistent discoloration may require oxygen-based treatment, professional steam cleaning, recoloring, resealing, or grout replacement.
Why does mold keep returning?
Recurring mold indicates persistent moisture, inadequate ventilation, leakage, wet porous material, or failed sealant. Surface cleaning alone cannot correct the moisture source.
Run the exhaust fan during bathing and for a period afterward, dry wet surfaces, inspect caulk and grout, and investigate plumbing or building-envelope leaks. Extensive or hidden growth may require professional assessment.
How do you remove a toilet ring safely?
First identify whether the ring is organic staining, rust, or mineral scale. Use a toilet product labeled for that deposit and porcelain.
A fully wetted pumice stone may be used on compatible porcelain when its manufacturer permits it, but it can scratch other materials. Never use pumice on plastic, fiberglass, colored coatings, metal, or an unidentified finish.
Why do cleaning tools smell?
Cleaning tools smell when organic residue and moisture remain trapped during storage. Rinse tools, remove hair, disinfect them when appropriate, and let them dry completely in moving air.
Do not return a dripping toilet brush to a sealed holder. Clean the holder as well because contaminated liquid often collects at its base.
Expert Rules That Improve Bathroom Cleaning
Let chemistry reduce scrubbing
More pressure is not always better. A compatible cleaner given sufficient dwell time can loosen deposits with less risk than aggressive abrasion.
The limitation is that dwell time must remain within the product label’s instructions. Allowing acid or bleach to dry on a surface can create damage and concentrated residue.
Drying is part of cleaning
A surface that is rinsed but left wet can immediately begin collecting mineral spots. Drying mirrors, fixtures, ledges, glass, and stone improves appearance and slows new buildup.
The same principle applies to tools. Brushes, cloths, mops, and squeegees should dry before enclosed storage.
Use the least aggressive effective method
Start with dry removal, water, mild detergent, and soft tools. Escalate to specialized chemistry only when the soil and surface justify it.
This rule protects sealants, plating, grout, acrylic, natural stone, paint, and decorative finishes. It also makes accidental chemical interactions less likely.
Bathroom Cleaning Essentials Checklist
Cleaning products
- Multipurpose bathroom cleaner
- Toilet bowl cleaner
- Glass cleaner
- Surface-compatible soap-scum or scale remover
- Neutral-pH cleaner for delicate surfaces
- Registered disinfectant when needed
- Optional oxygen-based stain treatment
- Optional enzymatic odor cleaner
Reusable tools
- Four to eight microfiber cloths
- Toilet brush and holder
- Handheld scrub brush
- Grout or detailing brush
- Non-scratch sponge or pad
- Shower squeegee
- Microfiber floor mop
- Vacuum or broom
- Portable caddy
Protective and organizational supplies
- Chemical-resistant gloves
- Optional eye protection
- Original labeled product containers
- Ventilation from a fan, window, or open door
- Separate storage for toilet tools
- Laundry bag or container for used cloths
FAQ About Bathroom Cleaning Essentials
How many microfiber cloths do I need for one bathroom?
Keep at least four microfiber cloths for one bathroom: one for mirrors, one for the sink and vanity, one for the shower or tub, and one dedicated to the toilet exterior. Six to eight cloths are more practical because a fresh cloth can replace one that becomes saturated or contaminated.
Can one multipurpose cleaner clean the whole bathroom?
One multipurpose cleaner can handle many counters, sinks, fixture exteriors, tiles, and sealed surfaces, but it may not dissolve heavy scale, clean the toilet bowl effectively, or protect natural stone. Check every surface and product label. Most bathrooms still need separate toilet, glass, and scale-control solutions.
Should bathroom floors be cleaned with disinfectant?
Bathroom floors usually need soil removal more than routine disinfection. Vacuum or sweep first, then mop with a floor-compatible cleaner. Disinfect when bodily fluids, illness, or another defined contamination risk makes it necessary, and only when the floor material can tolerate the labeled product and required wet contact time.
How often should bathroom cleaning tools be washed?
Rinse brushes and squeegees after every use, launder microfiber cloths after a complete cleaning session, and clean mop pads after each bathroom or contamination zone. Toilet tools should remain separate. Allow every item to dry completely before storage because trapped moisture supports odor and microbial growth.
Do bathroom cleaners expire?
Many bathroom cleaners have manufacturer-defined shelf lives, especially disinfectants whose active ingredients must remain within a tested concentration. Check the package for an expiration date, production code, or storage instructions. Replace products that separate abnormally, leak, lose labeling, develop damaged containers, or fall outside the manufacturer’s usable period.
What is the most important bathroom cleaning tool?
Microfiber cloths are the most versatile bathroom cleaning tool because they remove dust, oils, cleaner residue, and moisture from many surfaces. A cloth cannot replace a toilet brush, grout brush, or floor tool, but a small color-coded set improves cleaning quality and reduces cross-contamination throughout the room.
Conclusion
The most useful bathroom cleaning essentials are not the strongest chemicals or the largest collection of bottles. They are a compact set of surface-compatible products, dedicated tools, protective supplies, and repeatable procedures that remove each type of soil without damaging the material underneath.
Build the kit around the bathroom’s actual surfaces. Clean before disinfecting, observe label dwell and contact times, never mix chemicals, separate toilet tools from other cloths, and dry both surfaces and equipment after use. Those practices reduce buildup, shorten weekly cleaning time, and prevent the most expensive cleaning mistakes.


