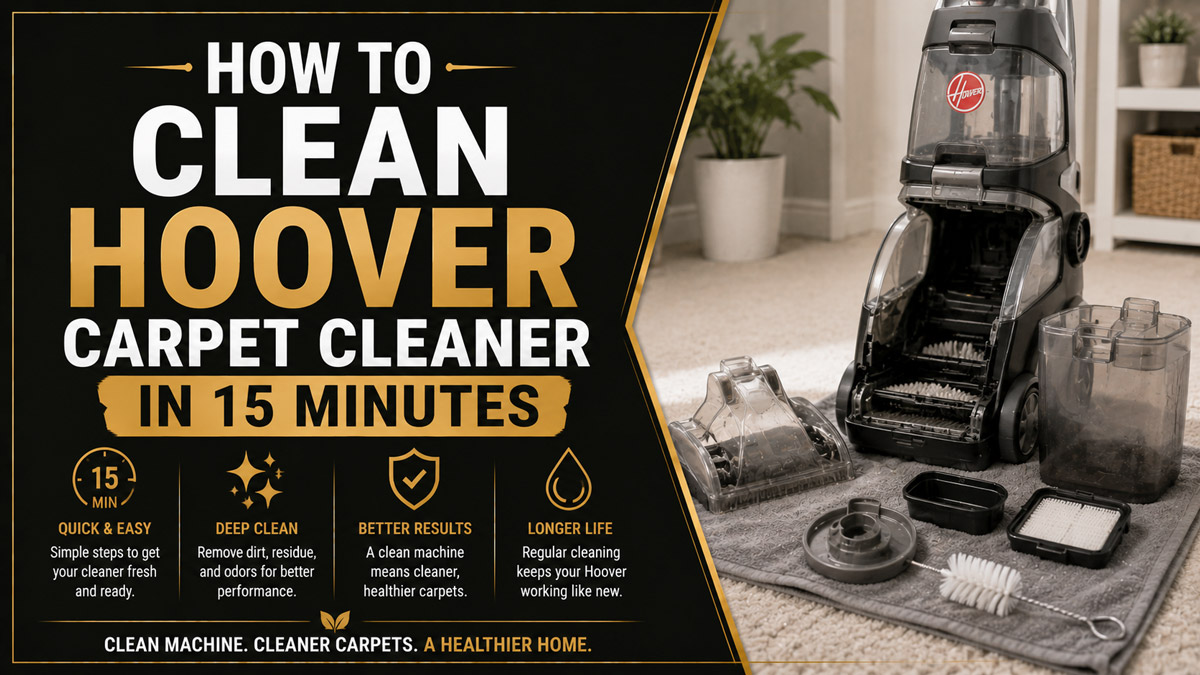
To clean a Hoover carpet cleaner, unplug the machine, empty and rinse the dirty-water tank, wash the nozzle and brush assembly, clear the filters, flush the hose if used, and air-dry every removable part before reassembly. Routine cleaning takes about 10-15 minutes, while complete drying commonly takes 12-24 hours.
Key facts at a glance
Clean a Hoover carpet cleaner after every wet-cleaning session, especially after pet accidents or muddy spills.
Never store dirty water, unused cleaning solution, or a damp filter inside a Hoover carpet washer.
Use warm tap water, not boiling water; follow the model manual for the maximum temperature.
A self-cleaning hose port flushes the hose, but it does not replace cleaning the dirty tank, nozzle, brushes, or filters.
Carpet drying usually takes 4-6 hours, whereas removable machine parts may need 12-24 hours to dry fully.
The most common causes of lost water pickup are a full tank, blocked nozzle, raised float, loose lid, or poorly seated cover.
What You Need Before Cleaning a Hoover Carpet Cleaner
Cleaning a Hoover carpet cleaner requires warm water, a towel, a soft brush, and scissors for wrapped hair. A Phillips screwdriver is only necessary if the owner’s manual specifically permits access to a cover or brush housing; routine maintenance should not require opening the motor compartment.
| Item | Typical amount or specification | Purpose |
|---|---|---|
| Warm tap water | 1-2 gallons | Rinsing tanks, nozzle, brushes, and filters |
| Microfiber towels | 2-3 towels | Wiping seals, housings, and the machine base |
| Soft toothbrush | 1 brush | Cleaning lint screens and narrow channels |
| Small scissors | 1 pair | Cutting hair and threads from brush rolls |
| Shallow tray | 1 tray, 30-40 cm wide | Catching rinse water from small parts |
| Hoover-approved formula | Label-marked amount | Preventing excess foam and residue |
Before touching the machine, turn the power switch off and remove the plug from the outlet. Keep water away from the motor housing, electrical cord, control panel, and exhaust openings. Hoover models differ in latch design, brush access, filter position, and hose-port location, so the model manual overrides generic instructions.
Use only the cleaning formula specified for the machine. Dish soap, laundry detergent, and household shampoo can create excessive foam, trigger the dirty-tank float, leave sticky residue, and reduce water recovery. For formula concentration, use the tank’s fill lines or the bottle instructions rather than assuming every Hoover reservoir has the same capacity.
How to Clean Hoover Carpet Cleaner Step by Step
The complete Hoover carpet-cleaner maintenance sequence has six stages: drain the dirty tank, rinse the nozzle, clean the brushes, wash the filters, flush the hose, and dry the parts before storage. The procedure is straightforward, but the dirty-water tank lid and front suction path determine whether the machine will recover water correctly afterward.
Step 1: Empty and Rinse the Dirty-Water Tank
Remove the dirty-water tank from the Hoover carpet cleaner, empty it, rinse the tank and lid with warm water, and clean the internal float or lint basket if the model includes one. Continue rinsing until no visible sediment, hair, or detergent film remains.
- Release the tank latch or handle and lift the tank from the base.
- Carry the tank upright to a toilet, utility sink, or drain.
- Remove the lid, filter basket, foam screen, and float components only if the manual identifies them as removable.
- Pour out the recovered water.
- Fill the tank about halfway with warm water, replace the lid loosely, swirl the tank, and empty it.
- Repeat until the rinse water is visibly clear.
- Wipe the tank’s lid gasket and seating edge with a clean towel.
Success checkpoint: The tank has no sludge around the corners, the lid closes evenly, and the float moves freely without sticking.
Common mistake: Do not pour dirty water into a kitchen sink if it contains heavy carpet grit or pet debris. A toilet or utility drain reduces the chance of clogging a household sink trap.
A dirty-water tank is also an air-management component. If the lid is not fully latched, the vacuum loses its seal and water pickup can stop even when the motor sounds normal.
Step 2: Clean the Nozzle and Suction Opening
Remove the clear front nozzle or nozzle cover, rinse debris from its opening, and clear the narrow suction channel with a soft brush. The nozzle must sit flush against the base when reinstalled because even a small air gap can reduce extraction.
- Release the nozzle latch according to the model design.
- Pull the transparent cover forward without twisting it.
- Remove carpet fibers, pet hair, and compacted mud by hand.
- Rinse the nozzle under warm running water.
- Brush the suction slit and corners with a soft toothbrush.
- Inspect the rubber edges for cracks, distortion, or embedded grit.
- Wipe the mating surface on the machine foot before reinstalling the cover.
Success checkpoint: Light passes through the nozzle opening, the suction slit is unobstructed, and the cover clicks into place without rocking.
Common mistake: Do not force a paperclip deep into the suction path. A metal object can scratch plastic, dislodge a gasket, or push debris farther into the intake elbow. Use a soft cleaning tool whenever possible.
The nozzle often collects more debris than the visible brush roll because it receives dirty water, loose fibers, and detergent foam at the point of extraction. Clean it after every use when the machine has handled pet hair or upholstery fibers.
Step 3: Remove Hair and Rinse the Brush Assembly
Cut wrapped hair, threads, and rug fibers from the Hoover brush assembly before rinsing the bristles. Brush access varies: PowerScrub models commonly use a removable SpinScrub block, SmartWash models use quick-release horizontal rollers, and PowerDash models generally use a narrower single-roll design.
- Recline or position the machine as instructed by the manual.
- Release the brush cover, brush deck, or roller tabs.
- Remove the brush block or individual rollers.
- Cut hair along the length of the roll, keeping scissors away from bristle roots and drive belts.
- Pull loosened debris from the bristles and end caps.
- Rinse washable brush parts with warm water.
- Check the gear ends, bearings, and belt area for wrapped fibers.
- Shake off excess water and place the assembly on a towel.
Success checkpoint: Each brush rotates by hand without a tight spot, the drive ends are free of thread, and the bristles are not packed with lint.
Common mistake: Do not reinstall a brush roll with hair still wrapped around its end cap. A small thread bundle can create enough resistance to stop the roller or overload the drive system.
A brush roll can look clean while remaining jammed at its ends. Practitioners usually inspect the end caps first because hair migrates there and creates resistance before the center bristles appear dirty.
Step 4: Wash the Filters and Float Screen
Rinse removable Hoover carpet-cleaner filters with warm water and remove lint from the machine’s intake screen. Foam filters must dry completely before installation, because a wet filter restricts airflow and can expose the motor to moisture.
- Locate the filter basket, mesh screen, foam filter, or float screen near the dirty-water tank connection.
- Remove loose lint with your fingers or a soft brush.
- Rinse washable foam or mesh parts under warm water.
- Press foam gently between towels to remove excess water. Do not twist it aggressively.
- Wipe the filter seat and surrounding tank connection.
- Inspect for tears, crushed foam, hardened detergent, or permanent deformation.
- Replace a damaged filter rather than modifying it with household material.
Success checkpoint: The filter is visibly clear, intact, and completely dry before the machine is used again.
Common mistake: Never operate the carpet cleaner without a required filter or float screen. The machine may lose suction, allow debris into the recovery path, or suffer motor damage.
Hoover’s UK service guidance emphasizes regular filter and container maintenance for floor-care appliances. Exact replacement intervals vary by model and frequency of use, but a heavily used pet-owner machine may need inspection after every session and replacement sooner than a seasonal machine.
Step 5: Flush the Hose and Upholstery Tool
Flush the Hoover hose immediately after using an upholstery or stair tool, because dirty water trapped inside corrugated tubing becomes a concentrated source of odor. A self-cleaning port rinses the hose line, but the tank and hand tool still need separate washing.
- Empty and rinse the dirty-water tank first.
- Reinstall the empty tank so the recovery system can operate.
- Remove the upholstery or stair tool from the hose.
- Attach the hose to the machine’s self-clean port if the model has one.
- Run the port cycle or draw clean warm water through the hose according to the manual.
- Hold the hand-tool trigger briefly to rinse its internal channel.
- Disconnect the hose and raise both ends so residual water can drain.
- Wash the hand tool separately and leave its opening exposed.
Success checkpoint: Clear water exits the hose, no visible debris remains in the tool opening, and the hose no longer smells sour.
Common mistake: Do not assume a self-clean port flushes the main floor nozzle or brush system. It only addresses the hose circuit and connected hand-tool path.
For a model without a self-clean port, use the manual’s approved rinse method. Do not improvise by pressurizing the hose with a garden hose or forcing water into the machine’s electrical body.
Step 6: Dry and Reassemble the Machine
Air-dry the dirty tank, lid, nozzle, brushes, filters, hose, and hand tools separately before reassembly. A typical drying period is 12-24 hours, although thick foam and enclosed brush housings may require longer in a humid room.
- Place cleaned components on absorbent towels.
- Keep tank openings, filter surfaces, and hose ends facing upward or downward so air can circulate.
- Leave lids and caps open.
- Keep parts in a dry, ventilated area away from children and pets.
- Do not use a heat gun, radiator, clothes dryer, or direct high heat.
- Reassemble only when no surface or internal component feels cool and damp.
- Store the Hoover carpet cleaner upright with tanks empty and lids ajar.
Success checkpoint: No water drips from the hose, foam feels dry throughout, and the tank has no condensation after standing open.
Common mistake: Reassembling wet parts to save space. Enclosed moisture causes sour odors, microbial growth, sticky residue, and recurring smells that rinsing alone may not remove.
The carpet and the appliance have different drying windows. Hoover carpet-cleaning instructions commonly describe carpet drying in hours, while removable machine parts need longer because tank corners, foam pores, and hose ridges retain water.
How Hoover Models Differ During Cleaning
Hoover carpet cleaners share the same maintenance logic, but access points differ enough that forcing a component can cause damage. Identify the machine family before removing a brush cover or filter.
| Hoover machine type | Typical brush design | Main cleaning difference | Typical post-use time |
|---|---|---|---|
| PowerScrub Deluxe | Removable SpinScrub block | Release brush deck and clean multiple rotating brushes | 10-15 minutes |
| SmartWash+ | Quick-release horizontal rollers | Remove rollers from the top or front release mechanism | 10-15 minutes |
| PowerDash Pet | Narrow single horizontal roll | Inspect narrow nozzle and single brush end caps | 8-12 minutes |
| CleanSlate portable | Hose and hand tool | Prioritize hose, tool, small recovery tank, and nozzle | 5-10 minutes |
| Spotless portable | Integrated hose pathway | Use the self-clean port, then wash tool and tank separately | 5-10 minutes |
SmartWash automatic dispensing does not eliminate maintenance. Triggerless operation changes how the machine delivers solution, but the recovery tank, rollers, nozzle, and filter still collect the same extracted soil.
PowerDash machines have less internal volume than full-size uprights. That compact design makes them convenient for apartments and spot work, but hair and lint can block the narrow intake more quickly.
How Long Does Cleaning and Drying Take?
Routine cleaning takes 5-15 minutes, depending on tank size, brush complexity, and whether a hose was used. Complete drying normally takes 12-24 hours, while a cleaned carpet commonly takes 4-6 hours to dry under ordinary indoor conditions.
| Maintenance task | Typical duration | Frequency | Stop condition |
|---|---|---|---|
| Empty dirty tank | 1-2 minutes | After every use | No liquid remains |
| Rinse tank and lid | 2-4 minutes | After every use | Water runs clear |
| Clean nozzle and brushes | 3-6 minutes | After every use | No hair or grit remains |
| Wash filter and screen | 1-3 minutes | After every use or as needed | Filter is clean |
| Flush hose | 1-3 minutes | After upholstery use | Clear rinse water |
| Air-dry components | 12-24 hours | After wet cleaning | No dampness remains |
Actual carpet drying depends on extraction quality, carpet pile, humidity, airflow, room temperature, and the amount of solution applied. Open windows when outdoor humidity is low, run fans across the carpet, and avoid replacing furniture until the fibers are dry.
Over-wetting is often mistaken for poor carpet ventilation. If the recovery tank contains little water after a wet pass, inspect the nozzle seal and dirty-tank lid before adding more solution.
Manual Rinsing Versus a Self-Cleaning Port
Manual rinsing provides more direct access to the dirty tank, nozzle, and brushes, while a self-cleaning port saves time by flushing the hose. Neither system cleans every wetted surface automatically.
| Feature | Manual-rinse model | Self-cleaning-port model | Practical consequence |
|---|---|---|---|
| Hose flushing | Separate rinse procedure | Integrated rinse cycle | Port models reduce hose-cleaning time |
| Main brush cleaning | Fully manual | Still manual | Hair removal remains necessary |
| Dirty-tank cleaning | Fully manual | Fully manual | Sediment still accumulates in the tank |
| Nozzle cleaning | Fully manual | Fully manual | Suction openings still require inspection |
| Typical odor risk | Higher if hose is neglected | Lower in hose pathway | Wet tank remains the main odor source |
The self-cleaning port is useful after upholstery work because narrow hose channels retain contaminated water. It is not a substitute for disassembling washable parts, and it cannot repair a cracked hose, damaged gasket, or blocked nozzle.
Common Problems After Cleaning and Their Fixes
Why Has the Hoover Carpet Cleaner Lost Suction?
A Hoover carpet cleaner usually loses water pickup because the dirty tank is full, the float has risen, the lid leaks air, or the front nozzle is blocked. Turn the machine off, empty the tank, reset the float if it moves freely, and reseat the lid and nozzle.
Check these points in order:
- Confirm the dirty-water tank is below its maximum fill line.
- Inspect the float for hair, dried detergent, or a stuck position.
- Press the lid down until every latch is secure.
- Remove and rinse the transparent nozzle.
- Check the hose and hand tool if upholstery mode was used.
- Confirm the brush cover is fully seated.
If suction remains weak, inspect the gasket for flattening or cracks. A damaged seal can create an air leak that cleaning will not resolve.
Why Did the Brushes Stop Spinning?
Hoover brushes stop spinning when hair, rug fringe, or thread jams the roll, when the drive belt is damaged, or when the handle is not in the operating position. Unplug the appliance before touching the brush assembly and never pull debris from a powered roller.
Remove the brush and rotate it by hand. A stiff end indicates wrapped fibers or a damaged bearing. If the roller turns freely but does not operate after reassembly, check the handle position, brush cover, and belt according to the model manual.
Why Does the Machine Smell Sour?
A sour smell usually comes from dirty water, detergent film, damp foam, or water trapped in the hose. Rewash the tank, lid, filter, nozzle, brush assembly, and hose, then air-dry them separately for at least one day.
Do not mix bleach, ammonia, vinegar, or commercial descalers inside the machine. Chemical mixtures can create hazardous vapors or damage seals. If an odor persists after thorough cleaning, replace the affected foam filter or have the recovery path inspected.
What Causes a Hoover Carpet Cleaner to Leak?
Leaks commonly originate at a misaligned tank, loose cap, damaged gasket, cracked hose, or nozzle cover that is not fully clipped into position. Stop using the machine, unplug it, dry the base, and identify whether the liquid is clean solution or recovered water.
Clean solution leaking from the bottom usually points toward the clean-tank cap, valve, or seal. Dirty water appearing near the front often indicates a recovery-tank, nozzle, or suction-gate problem. Do not operate the machine if water reaches the motor housing or electrical controls.
Maintenance Schedules for Pets, Upholstery, and Storage
Pet owners should remove brush hair and rinse the nozzle after every session because fur and dander accumulate faster than ordinary household lint. After cleaning urine or vomit, wash the hand tool and hose immediately, then follow the formula label for any approved odor-treatment product.
Upholstery users should flush the hose and hand tool after each job. Narrow channels hold more residue than the broad floor nozzle, so a hose that looks clean externally can still release stale water during the next use.
Seasonal users should empty every reservoir, dry all components completely, and store the machine with tank lids open or loosely positioned. Inspect the hose, belt, brush ends, and seals before the next season because rubber components can harden during long storage.
Hard-water users may see white mineral deposits around tank valves and nozzle edges. Wipe removable plastic parts with diluted manufacturer-approved cleaner, rinse thoroughly, and avoid putting acidic solutions through pumps or internal water lines unless the manual explicitly allows it.
What Not to Do When Cleaning a Hoover Carpet Washer
- Do not use boiling water. Hot tap water within the model’s stated limit is safer for plastic tanks and seals.
- Do not add dish soap, laundry detergent, or carpet shampoo made for another machine.
- Do not store liquid in either tank.
- Do not run the appliance with a missing filter, float screen, or damaged tank lid.
- Do not cut a brush roll while it is connected to power.
- Do not force a nozzle latch or pry open a sealed motor housing.
- Do not place wet foam filters back into the machine.
- Do not use bleach and vinegar together.
- Do not ignore a burning smell, electrical odor, repeated breaker trip, or water near controls.
One counterintuitive maintenance rule matters most: more detergent does not mean a cleaner carpet. Excess formula creates foam that occupies recovery volume, lifts the float prematurely, leaves residue in carpet fibers, and makes the machine appear to have weak suction.
When Should You Replace Parts or Seek Service?
Replace a brush roll when bristles are permanently flattened, the roll wobbles, or the end bearings remain noisy after cleaning. Replace a filter when foam has torn, collapsed, hardened, or no longer seals in its frame.
| Symptom | Likely part or cause | User action | Typical part-cost range |
|---|---|---|---|
| Persistent weak pickup | Nozzle seal or tank gasket | Inspect and replace seal | $10-$30 |
| Roller will not turn freely | End bearing or wrapped fiber | Clean, then replace roller if stiff | $15-$40 |
| Repeated sour odor | Foam filter or trapped hose residue | Rewash, dry, then replace filter | $10-$30 |
| Clean tank leaks | Cap, valve, or tank crack | Replace cap or tank | $15-$60 |
| Motor smell or sparks | Electrical or motor fault | Stop use and seek service | Model-specific |
Hoover’s official product-manual and parts resources should be used to verify compatible filters, brush rolls, caps, and tank assemblies. Part names and release mechanisms differ even among machines in the same product family.
Stop troubleshooting at home when the cord is damaged, the motor sparks, the appliance trips a breaker repeatedly, or liquid has entered the electrical housing. Cleaning cannot correct an electrical safety fault.
FAQ
Can I Use Vinegar to Clean a Hoover Carpet Cleaner?
Use vinegar only on removable plastic parts if the model manufacturer permits it, and rinse those parts thoroughly afterward. Do not pour vinegar through the pump, solution lines, or recovery motor unless the manual specifically approves that procedure, because acidic liquid may affect seals and internal components.
Should I Vacuum Before Using a Hoover Carpet Cleaner?
Yes, vacuum loose dirt, hair, crumbs, and grit before wet cleaning. Dry vacuuming reduces the debris entering the nozzle and recovery tank, lowers the chance of brush tangles, and helps the Hoover carpet cleaner spend its extraction capacity on soil suspended in the carpet fibers.
Can I Leave Water in a Hoover Carpet Cleaner Overnight?
No. Empty both the clean-solution and dirty-water tanks after use, rinse the recovery tank, and leave openings exposed while parts dry. Overnight storage with liquid promotes odor, detergent residue, and microbial growth, particularly in warm rooms or machines used for pet messes.
How Often Should Hoover Carpet Cleaner Filters Be Replaced?
Inspect washable filters after every use and replace them when they tear, deform, harden, or remain odorous after cleaning. A lightly used machine may keep a filter for about 12 months, but frequent pet use, heavy soil, and poor drying can shorten that interval.
Why Is My Hoover Carpet Cleaner Foaming?
Excess foam usually results from too much formula or an unapproved detergent. Empty and rinse the tank, use the Hoover fill line or bottle instructions, and avoid dish soap or laundry detergent. Foam can lift the safety float and stop water recovery before the tank is actually full.
Can I Use a Hoover Carpet Cleaner on Hardwood Floors?
Use a Hoover carpet cleaner on hardwood only when the specific model is designed and approved for sealed hard floors. Carpet-washer suction and water delivery can force moisture into seams, damage finishes, or leave standing water, so the owner’s manual and flooring manufacturer’s instructions control the decision.
The Bottom Line
The reliable answer to how to clean hoover carpet cleaner is to empty the tanks, rinse the dirty-water path, remove hair from the brushes, wash the nozzle and filters, flush the hose after tool use, and dry every component before storage. Spend 10-15 minutes after each wet-cleaning session, then inspect seals and floats whenever water pickup declines.


