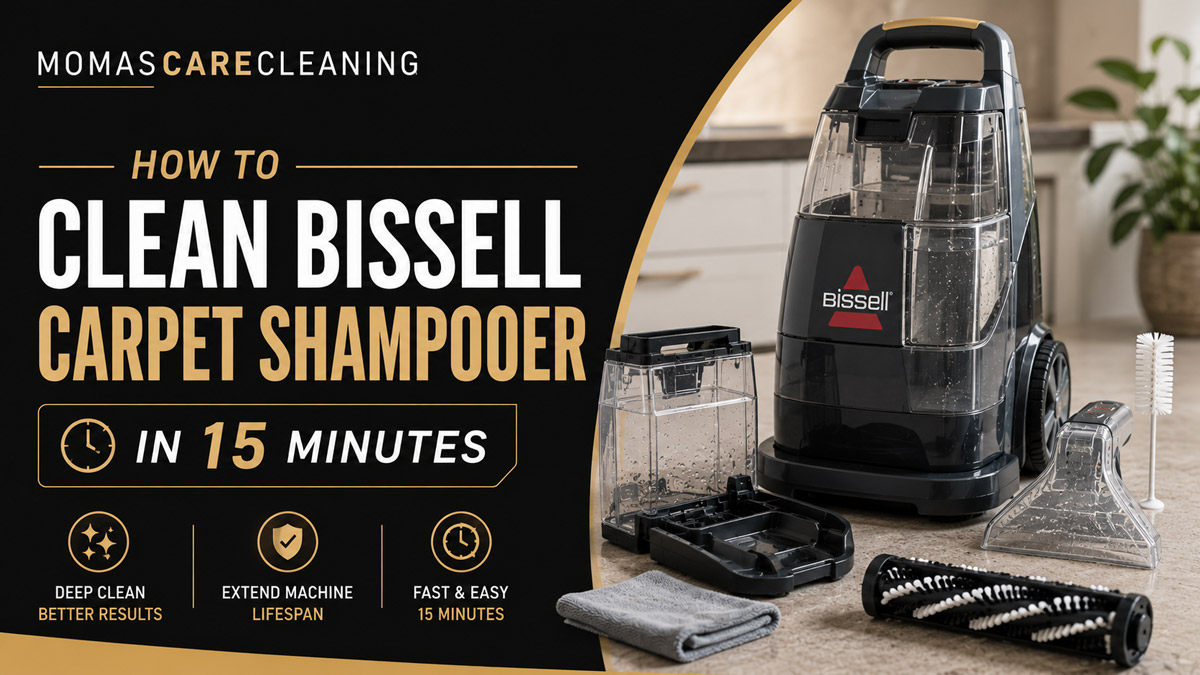
To clean a Bissell carpet shampooer, empty both tanks, flush the internal spray and suction paths with clean warm water, rinse removable parts, clear the nozzle and brush area, then air-dry every component before storage. The complete routine usually takes 10-15 minutes of active work, while separated parts may need 12-24 hours to dry.
Key Facts at a Glance
- Bissell recommends cleaning and maintaining removable tanks, nozzles, brushes, and filters according to the exact model manual.
- A dirty-water float can stop suction when the recovery tank reaches its fill limit.
- Bissell cleaning formula is safer for pumps, seals, and residue control than dish soap, laundry detergent, or vinegar.
- Hair around a brush roll can restrict movement, increase motor load, and reduce extraction performance.
- Air-drying parts separately for 12-24 hours reduces sour odors caused by trapped moisture.
- Portable SpotClean and Little Green machines need hose and hand-tool cleaning after upholstery or stair work.
Why Does a Bissell Carpet Cleaner Need Cleaning?
A Bissell carpet cleaner needs cleaning because detergent residue, extracted soil, pet hair, and warm moisture remain in the tanks, nozzle, brush chamber, hose, and suction path after carpet washing. If those materials dry inside the machine, they can restrict airflow, cause odor, jam moving parts, and make later cleaning less effective.
Bissell deep cleaners inject solution, agitate carpet fibers with rotating brushes, and recover dirty liquid through a floor nozzle. Portable models perform the same basic extraction cycle through a flexible hose and hand tool. The components that contact dirty water therefore require attention even when the carpet itself looks clean.
Do not treat the machine as a sealed appliance. Tanks, lids, filters, brush windows, hose tools, and nozzles are serviceable contact points, although the release method differs by model. Bissell’s official support instructions for the ProHeat 2X Revolution and ProHeat 2X Lift-Off identify model-specific cleaning sequences, so the owner’s manual takes priority over a generic procedure.
What Parts Need Cleaning?
| Component | Residue commonly found | Cleaning action | Inspect for |
|---|---|---|---|
| Clean-water tank | Formula film and mineral deposits | Empty and rinse with warm water | Cracked cap or leaking valve |
| Dirty-water tank | Soil, hair, foam, and standing water | Empty, rinse, and dry open | Float obstruction or poor seal |
| Floor nozzle | Wet fuzz and carpet fibers | Remove window and rinse channel | Blocked suction opening |
| Brush roll or brush chamber | Hair, thread, and lint | Pull or cut away tangles | Stiff rotation or damaged bristles |
| Hose and hand tool | Pet residue and detergent | Flush with clean water | Persistent odor or weak flow |
| Red lint filter, where fitted | Hair and loose fibers | Wipe or rinse as the manual allows | Torn screen or packed debris |
How to Clean Bissell Carpet Shampooer After Use
The safest sequence is to flush the machine first, then unplug it and clean the tanks, nozzle, brush assembly, filter, hose, and exterior. Cleaning the internal path before removing wet debris prevents concentrated formula from drying inside the pump, spray line, hose, or suction channel.
Before You Start
| Requirement | Typical amount or time | Practical specification |
|---|---|---|
| Active cleaning time | 10-15 minutes | Add 5 minutes for heavy pet hair |
| Air-drying time | 12-24 hours | Leave tanks, lids, and nozzle separated |
| Water | 1-2 liters | Use warm tap water, not boiling water |
| Tools | 3-4 items | Towel, soft brush, scissors, and nozzle tool |
| Electricity | 0 volts during disassembly | Unplug before opening the machine |
| Cleaning agent | 0 added chemicals | Use clean water for flushing |
Place the cleaner near a sink, utility basin, or washable hard floor. Keep the power cord and plug away from standing water. If the model manual prohibits a component from being submerged, rinse only the surfaces identified by Bissell.
Step 1: Empty the Cleaning Solution
Switch off the Bissell carpet cleaner and remove the clean-water tank. Pour unused formula into an appropriate container rather than leaving it in the reservoir overnight, because detergent can settle and form a sticky film around the cap, valve, and tank walls.
Rinse the tank with warm water until the water runs clear. Wipe the cap and sealing surfaces with a lint-free cloth, then check that the valve moves freely without forcing it.
Success checkpoint: The tank contains no visible formula film, foam, or colored liquid.
Common mistake: Adding more formula to a tank that still contains old solution, which changes the intended dilution ratio.
Step 2: Flush the Internal Spray System
Fill the clean-water tank with warm tap water and reinstall it firmly. Recline the upright handle if the model requires that position, switch on the machine, and hold the spray trigger for approximately 15 seconds while moving across a clean, washable surface.
Release the trigger and make extraction passes for another 15 seconds. Repeat once if the recovered water remains strongly colored or foamy. For a portable cleaner, run clean water through the hand tool or use the manufacturer’s HydroRinse tool when the model supports it.
Success checkpoint: The spray is steady and the recovered water contains little or no foam.
Common mistake: Using boiling water, which can deform plastic components or damage seals.
Step 3: Empty and Rinse the Dirty-Water Tank
Unplug the machine before removing the recovery tank. Carry the tank upright to a sink or toilet, unlatch the lid, and empty the contents slowly so hair and sludge do not splash onto the seal.
Rinse the tank, lid, gasket, and float assembly with warm water. Some upright models have a removable tank stack or float component; remove it only as shown in the manual. A float must move freely because it can shut down suction when the tank is full.
Success checkpoint: No sludge remains around the float, lid channel, or tank outlet.
Common mistake: Reinstalling a wet tank immediately, which traps contaminated moisture in a dark enclosed cavity.
Step 4: Remove Hair From the Brush Area
Inspect the rotating brush roll or brush chamber from the front and underside. Pull away loose hair by hand, then use blunt scissors to cut long strands parallel to the brush shaft. Avoid cutting bristles, belts, spray tubing, or brush-roll end caps.
Portable machines usually have a smaller hand tool rather than a powered floor brush. Clean the tool head, underside, spray opening, and suction slot, because pet hair can form a plug where the tool meets the hose.
Success checkpoint: The brush roll turns with light finger pressure when the machine is unplugged.
Common mistake: Pulling a tightly wrapped thread without cutting it, which can dislodge a brush bearing or stretch a belt.
Step 5: Clean the Floor Nozzle and Suction Channel
Remove the clear nozzle window, floor nozzle, or front cover using the release tabs specified for your Bissell model. Rinse the channel with warm water and remove wet fuzz with a nozzle-cleaning tool, soft brush, or folded paper towel.
Do not push a sharp metal object deep into the suction path. A paper clip may clear a shallow obstruction, but it can puncture a flexible seal or scratch plastic if forced. Check the nozzle edge for compacted carpet fibers that prevent a flat seal against the floor.
Success checkpoint: Water can pass through the nozzle channel without backing up.
Common mistake: Replacing the transparent cover before its gasket and locking tabs are seated, which causes air leaks and weak recovery.
Step 6: Wash the Lint Filter and Small Screens
Some Bissell upright cleaners include a small red lint filter or screen near the dirty-tank base. Remove visible hair and lint with a paper towel, then rinse the component only if the manual permits washing it.
Portable models may use a float screen, tank filter, or tool screen instead. Never operate the cleaner with a filter that is visibly blocked, torn, or incorrectly positioned. A clean filter cannot compensate for a dirty tank seal, so inspect both areas.
Success checkpoint: The screen has open passages and no felt-like mat of hair.
Common mistake: Reassembling a filter while it is saturated, which can restrict airflow and spread moisture into the tank housing.
Step 7: Purge the Hose and Hand Tool
If you used a hose attachment, connect the HydroRinse tool if supplied for your model. Run clean water through the hose into the empty dirty tank, then continue suction briefly to remove remaining liquid from the hose wall.
Without a HydroRinse tool, place the hand-tool nozzle into a bowl of clean water and suction the water through the hose. Do not submerge an electrical switch, motor housing, or hose connection that the manual identifies as non-washable.
Success checkpoint: The hose no longer releases foam, dark particles, or a sour smell.
Common mistake: Flushing the hose into a full dirty tank, which can force contaminated water back toward the hose connection.
Step 8: Wipe the Exterior and Inspect Seals
Wipe the handle, switches, tank bay, cord, hose exterior, and base with a damp cloth. Remove dried formula around the tank valves and nozzle joints, but keep water away from the motor, control panel, and electrical connections.
Inspect the dirty-tank gasket, clean-tank valve, nozzle cover, hose collar, and tank latches. A flattened gasket or broken latch can cause air leakage, dripping, or poor spray even after the machine is clean.
Success checkpoint: The plug, motor housing, and controls are dry, and each latch closes without unusual force.
Common mistake: Treating a leak as a cleaning problem when the actual cause is a damaged seal or cracked tank.
Step 9: Air-Dry Before Storage
Separate the clean tank, dirty tank, lids, nozzle cover, brush-access parts, filter, hose tool, and any removable brush assembly. Set the parts on a towel with openings facing upward in a ventilated room.
Allow 12-24 hours for complete drying, depending on humidity and the part’s internal channels. Store the machine with tanks and lids open or loosely positioned when the manual allows it, so residual moisture can evaporate instead of producing a stale odor.
Success checkpoint: No part feels cool, damp, or slimy inside its channels.
Common mistake: Closing every lid and putting the cleaner into a closet while the interior is still wet.
Which Parts Differ by Bissell Model?
Bissell upright deep cleaners, portable SpotClean units, Little Green machines, and commercial extractors share the same water-recovery principle but do not share identical release tabs, filters, brush systems, or hose procedures. Use universal cleaning steps for tanks and residue, then follow the model manual for disassembly.
| Bissell layout | Main cleaning parts | Typical capacity pattern | Special concern |
|---|---|---|---|
| ProHeat 2X upright | Two tanks, floor nozzle, powered brushes | Larger room-cleaning tanks | Multiple covers and brush access points |
| ProHeat 2X Revolution | Clean tank, recovery tank, brush rolls | Upright full-room capacity | Model-specific nozzle and brush removal |
| Little Green portable | Solution tank, dirty tank, hose tool | Small tanks under 1 gallon | Hose and hand-tool odor |
| SpotClean portable | Two tanks, flexible hose, tool head | Small spot-cleaning capacity | Frequent tank emptying |
| Big Green commercial | Large tanks, wide head, heavy brush system | Commercial-sized reservoirs | Extra weight and slower drying |
Model names do not guarantee identical parts. For example, two SpotClean variants may use different tools or tank lids. Photograph the assembly before removal if the manual is unavailable, and never force a cover that does not release with moderate finger pressure.
Which Cleaner and Water Should You Use?
Use the Bissell formula approved for the specific machine, mixed at the ratio printed on the tank or formula label. Use warm tap water for routine flushing unless the manual specifies another temperature. Dish soap, laundry detergent, vinegar, bleach, essential oils, and homemade mixtures can create excess foam, leave residue, or affect seals and warranty coverage.
| Substance | Recommended use in machine | Main risk | Safer alternative |
|---|---|---|---|
| Bissell formula | Use at labeled dilution | Incorrect concentration | Measure with the supplied tank markings |
| Warm tap water | Use for flushing | Excess heat if boiling | Warm, not steaming, water |
| Dish soap | Do not add | Heavy foam and residue | Plain warm-water flush |
| Laundry detergent | Do not add | Suds and incomplete extraction | Approved carpet formula |
| White vinegar | Do not add routinely | Odor, material compatibility, warranty concern | Water rinse and air drying |
| Bleach | Never add | Corrosion, fumes, fabric damage | Replace contaminated parts if needed |
The cleaning solution should match the carpet fiber and manufacturer instructions as well as the machine. Test any formula on an inconspicuous area, especially on wool, natural fibers, delicate rugs, or fabric with unstable dye.
How Often Should You Clean a Bissell Shampooer?
Clean the tanks and rinse the dirty-water path after every use, clear visible hair after each session, and inspect brushes and filters weekly during frequent pet cleaning. A deeper inspection before seasonal storage should include the hose, seals, spray tips, brush drive, and any belt-access area.
| Use pattern | After every use | Weekly or monthly check | Storage action |
|---|---|---|---|
| Occasional household use | Empty, rinse, air-dry tanks | Inspect monthly | Flush before storage |
| Weekly carpet cleaning | Full flush and nozzle rinse | Inspect every 2-4 uses | Dry 12-24 hours |
| Pet-heavy home | Hair removal and hose purge | Inspect after each large job | Clean filter every session |
| Upholstery and stairs | Flush hand tool and hose | Check tool screen weekly | Leave tool disconnected |
| Seasonal storage | Empty all liquid | Inspect seals and brushes | Store completely dry |
A machine used for one small spill still needs tank emptying. A small volume of dirty water can become more odorous than a large volume because it remains in contact with residue for longer between uses.
Common Problems and How to Fix Them
Why Does the Bissell Cleaner Have No Suction?
No suction usually results from an incorrectly seated dirty tank, a full tank, a blocked nozzle, a closed float, or a damaged gasket. Empty the recovery tank first, reseat it until the latch closes correctly, inspect the nozzle channel, and confirm that the float moves freely.
| Symptom | First check | Likely cause | Corrective action |
|---|---|---|---|
| Motor runs, no recovery | Dirty tank seating | Air leak at tank | Remove and reinstall tank |
| Suction stops suddenly | Tank liquid level | Float shutoff activated | Empty and rinse recovery tank |
| Weak pickup at floor | Clear nozzle | Hair or wet fuzz blockage | Remove cover and clear channel |
| Hose has weak pickup | Tool and hose path | Tool plug or collapsed seal | Flush tool and inspect collar |
| Water leaks below tank | Gasket and valve | Damaged or displaced seal | Reseat or replace the seal |
A clean nozzle does not prove the recovery path is sealed. Test suction only after the tank, lid, float, and nozzle cover are correctly assembled.
Why Has the Machine Stopped Spraying?
A Bissell cleaner that runs without spraying usually has an empty or poorly seated clean-water tank, an unprimed pump, blocked spray tips, or a worn pump belt on models that use one. Refill and reseat the tank, hold the trigger briefly, and inspect the spray openings without forcing debris inward.
Do not open a pump housing while the cleaner is plugged in. If the motor runs, the tank is seated, and the spray tips remain clear but no water appears, consult the model-specific Bissell support page or arrange service rather than repeatedly running the pump dry.
Why Does the Carpet Cleaner Smell Sour?
A sour smell usually comes from dirty water, formula residue, pet contamination, or moisture trapped inside a closed tank, hose, nozzle, or brush chamber. Empty the tanks, flush with clean warm water, wash removable parts as directed, and dry them separately for 12-24 hours.
Vinegar may mask an odor temporarily while leaving the underlying moisture problem unresolved. If odor returns after a complete wash and drying cycle, inspect hidden hose channels, the float area, brush end caps, and tank gaskets for retained debris.
What If Mineral Deposits Block the Spray Tips?
Mineral deposits can restrict small spray openings, particularly where hard water is common. Wipe the tip exterior with a damp cloth and follow the manual’s cleaning method; do not enlarge the opening with a drill, knife, or aggressively forced wire.
If the machine sprays unevenly after cleaning, the pump may have an internal blockage or the spray assembly may be damaged. Bissell support documentation for the exact model is more reliable than a generic nozzle procedure because spray-tip access varies.
What Mistakes Damage Bissell Carpet Cleaners?
The most damaging maintenance mistakes are storing the machine wet, adding unapproved chemicals, forcing release tabs, ignoring wrapped hair, and running the pump with an empty tank. These errors create different failures: odor, foam, broken plastic, overheated brush drives, or premature pump wear.
- Leaving dirty water in the recovery tank: Soil and bacteria remain in warm moisture, producing odor and coating the float.
- Using excess formula: Foam occupies recovery space and can reduce effective extraction.
- Flushing with boiling water: Heat can deform tanks, valves, or soft seals.
- Cutting hair near belts or tubing: Scissors can damage components that are costly to replace.
- Closing wet tanks: Limited airflow slows evaporation and preserves odor.
- Forcing a model-specific cover: Tabs and transparent nozzle windows can crack before the blockage is removed.
A practical rule is to clean the parts that touched dirty water before cleaning the exterior. External wiping cannot repair a restricted internal path.
How Do You Adapt the Routine for Different Situations?
The routine changes mainly by soil type, attachment, and surface. Pet hair requires more mechanical removal, upholstery work requires hose purging, and seasonal storage requires longer drying and a final inspection.
Pet Hair and Heavy Soil
Vacuum the carpet thoroughly before wet extraction, then clear brush hair immediately after cleaning. For dense pet hair, make short controlled passes instead of forcing the cleaner quickly across the carpet, because loose hair can accumulate at the nozzle faster than suction removes it.
Upholstery, Stairs, and Cars
Flush the hand tool and hose after every upholstery or stair session. These jobs often leave concentrated detergent and body oils inside the smaller tool channel, where odor develops faster than in a wide floor nozzle.
Hard Floors
Only use a Bissell carpet cleaner on hard floors when the specific model and attachment are approved for that surface. Place the cleaner on a surface that tolerates water during flushing, and stop if the machine leaks or the floor nozzle does not maintain a stable seal.
Seasonal Storage
Perform a full clean-water flush, empty both tanks, rinse removable parts, inspect the cord and seals, and dry everything for at least 24 hours when humidity is high. Store the unit upright with airflow around the tank area, not sealed inside a plastic bag.
How Much Does Routine Maintenance Cost?
Routine maintenance costs almost nothing beyond tap water and a cloth. Typical replacement expenses are approximately $5-$15 for a belt, $8-$20 for a filter or screen, and $15-$30 for a bottle of Bissell formula, although model, region, and retailer change the price.
| Maintenance item | Typical cost | Replacement interval | Replace when |
|---|---|---|---|
| Warm-water flush | $0-$1 | Every use | Water supply is available |
| Bissell formula | $15-$30 | Several cleaning sessions | Formula is empty or contaminated |
| Brush belt | $5-$15 | Model and use dependent | Brush stops turning or belt cracks |
| Filter or screen | $8-$20 | Model and condition dependent | Torn, warped, or permanently blocked |
| Tank gasket | $5-$20 | As needed | Tank leaks despite correct seating |
| Nozzle assembly | $20-$60 typical | As needed | Cracked, warped, or unsealable |
Replacement prices are typical retail ranges, not fixed Bissell prices. Confirm the part number from the rating label and model manual before ordering, because visually similar tanks and belts may not fit.
Frequently Asked Questions
Can I Clean a Bissell Carpet Cleaner Without Running It?
Yes. Empty and rinse both tanks, clean the nozzle, brush chamber, filter, hose tool, and exterior without powering the machine. Running a short clean-water flush is useful for internal spray and suction paths, but unplug the cleaner before disassembly and never put electrical components under water.
Can I Use Vinegar in a Bissell Carpet Shampooer?
Vinegar is not a routine substitute for Bissell formula or clean-water flushing. Vinegar can leave an acidic smell, interact unpredictably with materials, and conflict with warranty guidance. Use the approved formula for carpet cleaning and plain warm water for post-use rinsing.
How Long Can I Leave Water in a Bissell Carpet Cleaner?
Empty dirty water immediately after use and do not store clean solution in the tank between sessions. Even a few hours can allow residue and contaminated moisture to develop odor, while overnight storage increases the chance of film forming around the tank lid and float.
Why Is My Bissell Carpet Cleaner Leaving Water Behind?
Water left on carpet can result from fast passes, a full recovery tank, a blocked nozzle, poor tank seating, or a worn suction seal. Empty the tank, clear the nozzle, reseat the lid, and make slower extraction passes without pressing the spray trigger.
Should I Vacuum Before Using a Bissell Carpet Cleaner?
Yes. Dry vacuuming removes loose grit, hair, and soil before water activates them. This reduces the amount of debris entering the nozzle and brush chamber, which helps preserve airflow and makes post-cleaning maintenance faster.
When Should I Contact Bissell Support?
Contact Bissell support when the machine still leaks, fails to spray, loses suction, trips a breaker, smells electrical, or makes grinding sounds after basic cleaning. Provide the exact model number, symptom, tank condition, and any blinking light or error pattern to shorten diagnosis.
The Bottom Line
To clean a Bissell carpet shampooer, empty the clean and dirty tanks, flush the internal water path, rinse the recovery components, remove hair from brushes and nozzles, purge any hose, wipe the exterior, and air-dry every removable part. The 10-15 minute routine protects suction and reduces odor, while 12-24 hours of open-air drying prevents damp storage. Always use the exact Bissell manual for model-specific disassembly, and do not add vinegar, dish soap, bleach, or laundry detergent to the machine.


