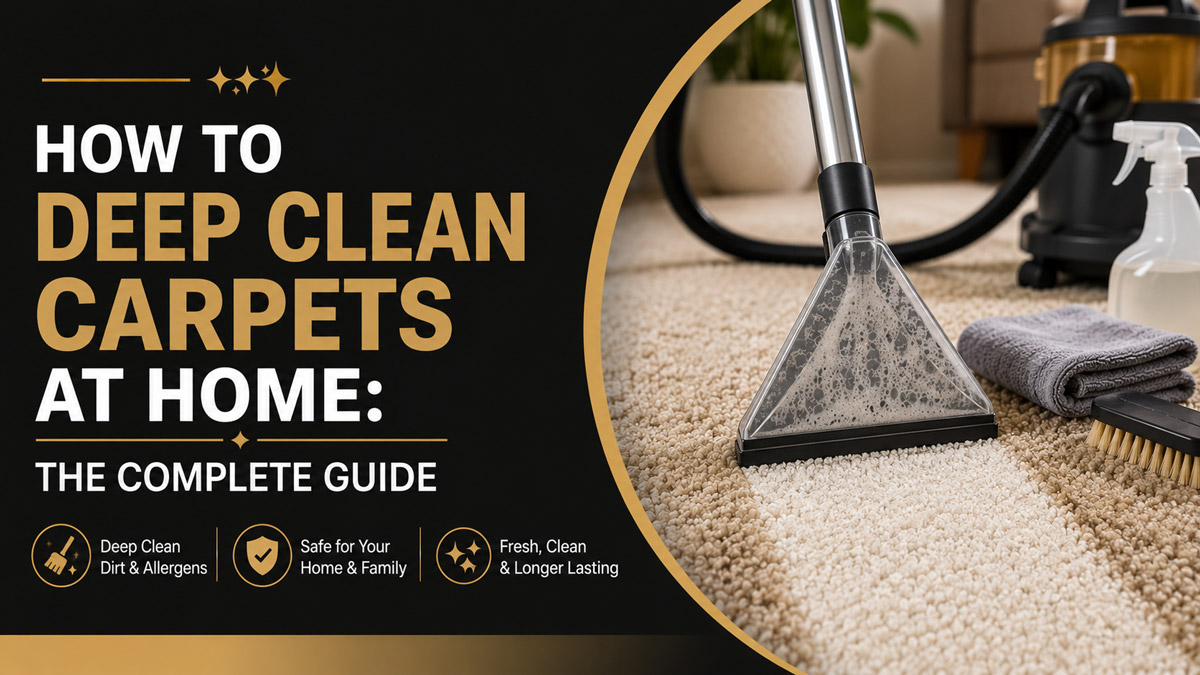
How to deep clean carpets at home requires breaking down the molecular bonds that hold soil, oil, and biological allergens inside textile fibers. You must apply a precise combination of chemical suspension, mechanical agitation, heat, and high-powered vacuum extraction to achieve complete soil removal. Executing this scientific process correctly restores fiber texture and eliminates the abrasive dirt that degrades your flooring over time.
Key Facts / At a Glance
- Ideal Frequency: Every 12 to 18 months for standard households, or every 6 months for homes with large pets.
- Extraction Principle: 80 percent of all carpet soil is dry and must be removed with a dry vacuum before any water touches the floor.
- Temperature Threshold: Cleaning solutions operate most effectively between 140 and 160 degrees Fahrenheit.
- The Rinse Rule: Leaving chemical detergent residue in the fibers attracts new dirt rapidly, making a pure water rinse pass mandatory.
- Drying Time: A properly extracted floor should dry completely in 6 to 12 hours with adequate air circulation.
Before You Start: Project Requirements
Successfully washing your floors requires gathering the right materials and blocking out sufficient time. Rushing the procedure guarantees trapped moisture and sticky residues.
- Total Time Required: 2 to 3 hours of active labor for a standard living room, plus 6 to 12 hours of uninterrupted drying time.
- Difficulty Level: Moderate. The process requires physical stamina to operate heavy extraction machinery and patience to complete slow, overlapping passes.
- Total Estimated Cost: $40 to $80 for a 24-hour machine rental and commercial-grade cleaning chemicals.
- Required Tools: An upright or canister vacuum, a hot water extraction machine, an alkaline enzymatic pre-spray, a low-foaming carpet shampoo, and multiple floor fans.
How Does Deep Carpet Cleaning Actually Work?
Deep cleaning works by systematically manipulating the chemical and physical state of embedded dirt so a machine can pull it out of the carpet backing. According to the Institute of Inspection, Cleaning and Restoration Certification (IICRC) 2021 standards, professional textile cleaners rely on the CHAT formula (Chemical, Heat, Agitation, Time) to dictate cleaning efficiency. Removing dirt is a strict four-part sequence.
First, chemical suspension utilizes targeted surfactants to break the surface tension of oily soils. These chemicals surround the dirt particles and detach them from the plastic carpet yarns. Second, thermodynamics enter the equation. Applying hot water lowers the viscosity of oils and accelerates the chemical reaction of the surfactants. Third, mechanical agitation via rotating brush rolls separates the twisted yarn tips, exposing buried particulate matter. Finally, evacuation uses high-velocity airflow (measured in cubic feet per minute) to lift the suspended mud out of the padding and into a recovery tank. If you skip any single component of this four-part system, the soil remains trapped.
What Are The Common Carpet Fiber Materials?
Carpet fibers fall into four primary material categories: nylon, polyester, olefin, and natural wool. Identifying your specific floor material dictates the maximum water temperature, the ideal cleaning method, and the chemical pH you can safely apply. Using the wrong chemistry on specific fibers causes permanent texture damage.
Nylon dominates the residential market due to its extreme resilience, but it absorbs liquids easily and requires acid-based stain treatments. Polyester resists liquid stains naturally but acts as an absolute magnet for human body oils and pet sebum. Olefin thrives in outdoor or basement environments because it completely ignores water, yet it melts under high friction. Wool requires the most delicate handling, as high-alkaline chemicals will physically dissolve the protein bonds of the animal hair.
| Fiber Material Type | Liquid Stain Resistance | Oil Stain Resistance | Maximum Heat Tolerance | Primary Vulnerability |
| Nylon (Polyamide) | Low (Absorbs quickly) | Moderate | 160 Degrees Fahrenheit | Acid-based dyes (Red 40) |
| Polyester (PET) | High (Repels water) | Very Low (Absorbs oil) | 140 Degrees Fahrenheit | Friction-induced crushing |
| Olefin (Polypropylene) | Very High | Very Low | 120 Degrees Fahrenheit | High-heat friction melting |
| Natural Wool | Moderate | Moderate | 100 Degrees Fahrenheit (Warm) | High pH chemical melting |
Which Deep Cleaning Method Should You Choose?
Selecting the correct intervention method depends entirely on your fiber type, your available drying time, and the depth of the contamination. Hot water extraction cleans the deepest, but alternative low-moisture methods provide excellent maintenance capabilities.
| Cleaning Method | Typical Drying Time | Soil Removal Depth | Ideal Chemical pH Range | Cost Per Square Foot |
| Hot Water Extraction | 6 to 12 Hours | Sub-Surface & Padding | pH 8.0 to 10.0 | $0.20 to $0.50 |
| Dry Powder Compound | 20 to 45 Minutes | Surface Yarn Tips | pH 6.5 to 7.5 | $0.15 to $0.35 |
| Encapsulation Polymer | 30 to 60 Minutes | Mid-Level Fiber | pH 7.0 to 8.5 | $0.10 to $0.25 |
Hot Water Extraction Mechanics
Hot water extraction, commonly referred to as steam cleaning, injects pressurized water and detergent deep into the carpet pile before immediately extracting it via vacuum suction. This method removes the highest volume of biological allergens, heavy dirt, and pet dander. You should choose this method for heavily soiled synthetic carpets. This method is not appropriate for rooms with zero ventilation or for delicate silk rugs.
Very Low Moisture Encapsulation
Encapsulation utilizes liquid acrylic polymers sprayed directly over the floor. As the solution dries, it forms brittle, microscopic crystals around the soil molecules. Subsequent routine vacuuming fractures these crystals and removes the dirt. Encapsulation prevents rapid re-soiling because it leaves no sticky detergent residue behind. You should choose this for high-traffic hallways and commercial loop-pile carpets.
Dry Powder Absorbent Compounds
Dry powder cleaning relies on spreading a moist, sponge-like cellulosic powder across the floor and scrubbing it into the fibers with counter-rotating brushes. The powder absorbs oils and dirt through capillary action before you vacuum the entire mixture away. This technique involves practically zero moisture. Choose this method for natural wool carpets, expensive Persian rugs, or commercial spaces requiring zero downtime.
Step 1: Perform Meticulous Dry Soil Extraction
Executing a thorough dry vacuuming pass represents the single most important step in the entire deep cleaning process. Data published by the Carpet and Rug Institute (CRI) in 2022 confirms that nearly 80 percent of all carpet soil consists of dry, abrasive particulate matter like silica sand and dead skin cells. If you introduce water to these dry particles, you immediately manufacture dense mud at the base of your carpet padding.
Remove all movable furniture from the room. Equip your vacuum with a motorized brush roll to agitate the fibers. Push the vacuum across the entire floor in a north-to-south pattern, moving slowly to allow the suction motor time to lift heavy sand out of the backing. Once you complete the entire room, turn 90 degrees and vacuum the exact same area in an east-to-west pattern. This cross-hatching technique ensures you manipulate the carpet pile from all angles, breaking loose particles trapped under twisted yarn tips.
You will know this step is complete when the vacuum canister stops collecting visible dust during a pass. The most common mistake at this stage is rushing. Moving the vacuum faster than one foot per second completely nullifies the machine’s ability to extract deep-seated grit.
Step 2: Apply Targeted Chemical Pre-Treatment
Chemical pre-treatment breaks the molecular bonds holding sticky soils to your floor fibers before the extraction machine ever arrives. Carpet shampoos mixed into a water tank dilute too rapidly to break down heavy proteins. You must apply a concentrated pre-spray directly to the high-traffic pathways and visible stains.
Purchase a dedicated, alkaline-based enzymatic pre-spray for standard synthetic carpets. Fill a standard pump-up garden sprayer with the solution and mist the main walking paths until the fibers feel damp to the touch. Do not soak the floor. Once applied, you must allow the chemical to sit completely undisturbed for 10 to 15 minutes. This timeframe, known in the textile industry as dwell time, gives the enzymes the necessary runway to physically consume protein stains and dissolve oxidized oils.
You will know the pre-treatment is working when dark traffic lanes begin to look slightly brighter and grease spots visually soften. The most common mistake during this step is allowing the pre-spray to dry completely. If the room is very warm and the chemical begins evaporating, lightly mist it with plain water to keep the enzymes active.
Step 3: Prepare The Hot Water Extraction Machine
Preparing your extraction equipment correctly prevents mechanical failure and chemical oversaturation. Whether you rent a commercial unit or use a consumer upright model, the basic architecture remains the same. The machine contains a clean water supply tank and a dirty water recovery tank.
Fill the supply tank with the hottest tap water your system provides, aiming for temperatures between 140 and 160 degrees Fahrenheit. Measure your dedicated, low-foaming carpet extraction detergent precisely according to the manufacturer instructions, and pour it into the clean water tank. Never exceed the recommended chemical ratio. Using extra soap does not generate cleaner floors. It simply produces a dense layer of foam that chokes the vacuum motor and leaves a sticky film on the textile.
If you are dealing with pet urine, add a specialized liquid defoamer directly into the empty dirty water recovery tank. Urine contains complex proteins that foam violently when agitated by high-speed airflow. This foam will bypass the machine’s float switch and spray dirty water out of the exhaust vent.
Step 4: Execute The Wet And Dry Pass Technique
The physical extraction phase requires strict mechanical discipline to balance liquid injection with vacuum recovery. Start in the corner of the room furthest from the doorway so you never have to step backward onto freshly washed, damp carpet.
Position the machine head against the wall. Squeeze the trigger to release the pressurized hot water solution and slowly pull the machine backward at a rate of one foot per second. This is your wet pass. Release the spray trigger completely. Push the machine forward over the exact same track, and then pull it backward again. These are your two dry passes. The golden rule of hot water extraction is executing two slow dry passes for every single wet pass. Once you complete a track, shift the machine over, overlapping your previous path by exactly two inches to prevent leaving dirty streaks.
You will know your technique is correct when the water visible in the suction nozzle turns from dark brown to a cloudy gray. The most frequent failure during extraction is treating the machine like a traditional vacuum cleaner. Pushing and pulling the extractor rapidly back and forth forces pressurized water deep into the latex backing without giving the suction motor adequate time to retrieve it.
Step 5: Execute The Pure Water Neutralizing Flush
Flushing the carpet with pure water constitutes the secret step that separates professional results from amateur failures. Traditional extraction shampoos utilize anionic surfactants that carry a negative electrical charge. If you leave these chemicals in the carpet, they will actively attract and bind to positively charged dirt particles from your shoes the moment the floor dries.
Empty the dirty water recovery tank completely. Rinse out the clean water supply tank to remove all traces of detergent, and refill it exclusively with blazing hot tap water. Return to the furthest corner of the room and repeat the entire extraction process (one wet pass, two dry passes) over the whole floor using only the hot water.
This neutralizing flush dissolves the sticky chemical binders left behind by the detergent and pulls them into the recovery tank. Your floors will feel remarkably softer to the touch, and they will resist re-soiling for months longer than a chemically saturated floor. Do not skip this step under any circumstances, even if you are exhausted.
Step 6: Accelerate The Final Room Drying Phase
Leaving a carpet wet for longer than 24 hours invites catastrophic structural damage and biological growth. The styrene-butadiene rubber adhesive that glues the carpet layers together will delaminate if subjected to prolonged moisture, causing the carpet to ripple and buckle permanently.
To accelerate evaporation, you must manipulate the room’s relative humidity and airflow. Open opposing windows to create a cross-breeze. Turn on all ceiling fans and place at least two axial floor fans directly on the wet carpet, aiming the air current parallel to the ground. If you live in a humid climate, close the windows and turn your HVAC system’s air conditioning to 68 degrees while running a standalone dehumidifier in the center of the room. The vapor pressure deficit created by cold, dry air pulls moisture out of the fibers rapidly.
Keep all furniture off the floor until you can press a dry white paper towel into the deepest part of the pile without retrieving any moisture. If you must move heavy wood furniture back into the room early, place small squares of aluminum foil underneath the wooden legs. This impermeable barrier prevents wood tannins from bleeding outward and permanently staining the damp yarn.
How To Deep Clean Carpets At Home Without A Machine
You can effectively deep clean localized areas, area rugs, and specific stains without spending money on heavy extraction machinery. Manual deep cleaning relies on intense chemical dwell time and manual agitation rather than pressurized water.
First, vacuum the target area thoroughly. Mix a solution of warm water and an enzymatic bio-formula in a spray bottle. Saturate the stained fibers down to the base, but avoid flooding the underlying pad. Allow the mixture to dwell for 15 minutes. Next, use a natural horsehair brush to agitate the fibers gently. Work the brush from the outside rim of the stain toward the center to prevent spreading the perimeter.
Once agitated, take a clean, dry, white microfiber towel and press it heavily into the spot using your body weight. The dry towel absorbs the suspended dirt and moisture through capillary action. Swap the towel for a fresh one as soon as it becomes damp. Continue pressing dry towels into the floor until the moisture transfer stops entirely. Finally, mist the area with pure water and blot it dry one last time to remove any residual enzymes.
What Are The Most Common Deep Cleaning Mistakes?
Even with high-end equipment, improper technique destroys flooring. Recognizing and avoiding the primary failure modes saves thousands of dollars in replacement costs. As stated in the IICRC S100 reference guide, over-wetting represents the single greatest cause of carpet damage during restorative cleaning.
Over-Saturating The Primary Backing
Forcing massive volumes of liquid into the floor without adequate vacuum lift saturates the underlying polyurethane foam pad. This pad acts like a giant sponge, trapping water in a dark, warm environment. Within 48 hours, anaerobic bacteria begin digesting the organic compounds in the moisture, producing a distinct “wet dog” odor. If you accidentally over-wet a room, immediately rent commercial centrifugal air movers and place a high-capacity dehumidifier directly over the saturated zone.
Wicking And Cellulosic Browning
Wicking occurs when deeply buried stains in the backing migrate up the yarn shafts as the surface evaporates, causing brown or red spots to magically reappear two days after washing. Cellulosic browning happens when jute carpet backing gets overly wet and releases brown tannins into the fiber tips. To fix both issues, lightly mist the dry, browned tips with a mildly acidic rinsing agent (or a 1:2 white vinegar and water solution), and blot the very tips of the yarn gently with a dry microfiber cloth. Do not re-saturate the floor.
Applying Aggressive Mechanical Scrubbing
Scrubbing a raw stain aggressively back and forth with a stiff nylon bristle brush destroys synthetic fibers. This harsh friction unravels the tightly twisted tips of the carpet yarn, a permanent physical damage known as “blossoming.” The untwisted fibers fray outward, permanently altering the texture and causing that specific spot to look fuzzy and dark forever. Always blot stains with downward pressure, and if you must use a brush, use a soft horsehair brush and move it gently in one direction.
What Does Carpet Deep Cleaning Equipment Cost?
Understanding the financial tradeoffs between sourcing options helps determine your long-term maintenance strategy. Buying a consumer machine works well for sudden pet accidents, but renting commercial hardware provides the necessary water lift (measured in inches of lift) to properly extract heavy soils.
| Equipment Sourcing Option | Upfront Cost | Recurring Cost Per Use | Water Lift (Suction Power) |
| Consumer Upright Machine | $150 to $300 | $10 to $20 (Chemicals) | Low (Surface Cleaning) |
| Hardware Store Rental | $0 | $40 to $60 (Rent + Soap) | High (Padding Extraction) |
| Independent Professional | $0 | $120 to $180 per visit | Maximum (Truck-Mounted) |
A major limitation of consumer upright machines is their lack of vacuum motor power. They simply do not possess the CFM or water lift required to pull sub-surface pet urine out of the carpet padding. If you are dealing with deep padding contamination, renting a commercial unit or hiring a truck-mounted professional is strictly mandatory.
The Bottom Line
Achieving professional-grade results requires adhering strictly to the underlying chemistry and physics of textile maintenance. You must extract dry soils first, allow your pre-treatment chemicals time to break molecular bonds, balance your wet and dry extraction passes, and execute a pure water flush to remove sticky residues. Controlling the room’s relative humidity guarantees rapid evaporation and prevents structural delamination. By following these precise protocols, you protect your flooring investment and maintain a sanitary home environment.
Frequently Asked Questions About Carpet Care
How soon can you walk on freshly washed carpets?
You should wait until the carpet is entirely bone dry, which typically takes 6 to 12 hours. Walking on damp fibers compresses the pile permanently and transfers oily dirt directly from your socks or bare feet into the open, vulnerable textile pores.
Does baking soda actually pull dirt out of carpet padding?
No. Baking soda cannot reach the underlying padding. It acts purely as a mild surface abrasive and a temporary odor masker. Furthermore, standard vacuums struggle to extract the ultra-fine baking soda dust, which frequently clogs vacuum filters and embeds itself permanently into the backing.
Can you use standard laundry detergent in a carpet extractor?
Never put laundry detergent inside a carpet extraction machine. Laundry detergents are highly concentrated, high-foaming agents designed for washing machines that execute massive dilution rinses. Using them on floors creates an impossible-to-remove sticky foam layer that destroys vacuum motors and rapidly attracts dark soil.
Why do carpets sometimes look darker a week after washing?
Carpets darken rapidly when operators fail to execute a pure water rinse pass. Leaving alkaline carpet shampoo in the fibers creates a sticky, cationic chemical film. This film acts like a magnet, grabbing dirt off shoes and trapping dust from the air much faster than an untreated floor.
How do you remove heavy furniture indentations after cleaning?
Place a standard ice cube directly inside the crushed indentation and allow it to melt completely at room temperature. The slow release of moisture swells the crushed fibers. Once the spot dries, use a coin or a spoon to gently fluff the swollen yarn back to its upright position.


