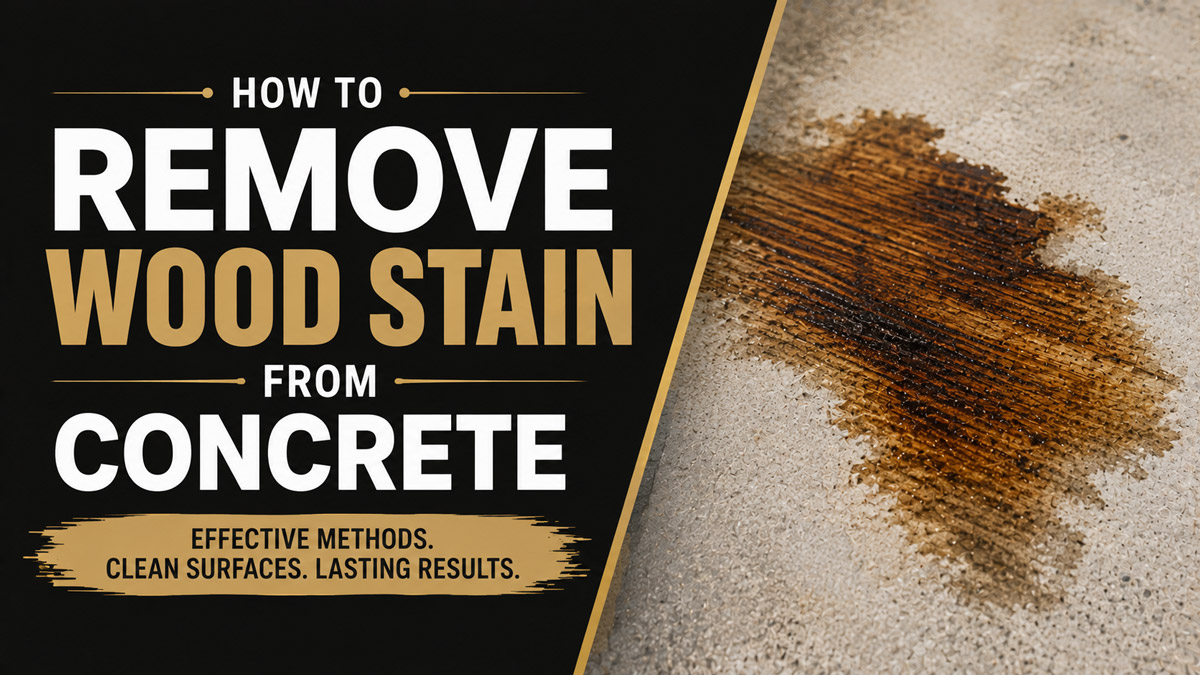
Removing wood stain from concrete requires breaking down the pigment binder and lifting it from the porous substrate. You must apply a chemical solvent or stripper to dissolve the stain, agitate the surface with a stiff nylon brush, and extract the residue using a wet-dry vacuum or pressure washer.
Key Facts / At a Glance
- Wood stain penetrates the microscopic pores of concrete through capillary action.
- Chemical poultices draw deep, small stains out of the surface over 12 to 24 hours.
- Thick chemical strippers dissolve widespread dried acrylic resins in 30 to 60 minutes.
- Mechanical grinding removes permanent stains instantly but generates heavy silica dust.
- Muriatic acid does not dissolve wood stain and will permanently lock the pigment into the concrete.
- Steel wire brushes leave metal fragments in the concrete pores that rapidly cause rust stains.
Why Do Wood Stains Penetrate Concrete So Deeply?
Wood stain penetrates concrete deeply because concrete acts like a rigid, microscopic sponge. The material consists of Portland cement, sand, aggregate, and water. As the water evaporates during the curing process, it leaves behind an intricate network of tiny capillary tubes and open pores.
When you spill wood stain on this surface, capillary action immediately pulls the liquid downward. Unlike exterior paint, which is designed to form a thick protective film on top of a surface, wood stains are formulated with highly fluid solvents and microscopic pigments. These thin formulations easily slip past the top layer of the concrete. Alkyd oil-based stains contain resins that harden and bond directly to the alkaline concrete matrix. Water-based acrylic stains contain polymers that fill the pores and dry into a stubborn plastic-like plug. Because the pigment physically resides below the surface level, simple wiping or mopping only removes the excess liquid on top. Complete extraction requires methods that either reach into the pores chemically or remove the top layer of the concrete entirely.
What Are the Primary Stain Removal Mechanisms?
Removing wood stain from concrete relies on three distinct physical and chemical mechanisms to separate the pigment from the porous substrate. You must match the mechanism to the specific type of stain you spilled.
Chemical Dissolution
Solvents attack the chemical bonds of the binders holding the pigment together. Acetone, mineral spirits, and commercial paint strippers melt the hardened oil or acrylic resins back into a liquid state. Dissolution works best on fresh spills and oil-based stains. The solvent breaks the grip the stain has on the concrete, allowing you to extract the suspended pigment before the solvent evaporates.
Emulsification
Surfactants and heavy-duty degreasers surround oil particles and lift them away from the concrete surface. Emulsification changes the chemical properties of the stain so it can mix with water. This mechanism is highly effective for cleaning the residual greasy shadows left behind after the main pigment is removed.
Mechanical Abrasion
Physical force grinds away the top microscopic layer of the concrete paste. Mechanical abrasion removes the stained pores entirely, exposing the clean, unaffected concrete beneath. Contractors use diamond-impregnated grinding wheels to achieve this. Abrasion ignores the chemical makeup of the stain, making it 100% effective on old, sun-baked, or chemically resistant pigments.
Which Wood Stain Removal Method Works Best?
The best method depends entirely on the size of the spill, the age of the stain, and whether the concrete is indoors or outdoors. Selecting the wrong approach wastes time and often drives the pigment deeper into the slab.
Master Method Comparison
| Method | Best Used For | Typical Cost | Timeframe | Primary Advantage | Notable Drawback |
| Chemical Poultice | Small, deep, concentrated stains | $15 – $30 | 12 – 24 hours | Pulls pigment from deep pores | Covers a very small surface area |
| Liquid Solvents | Fresh oil-based splatter | $20 – $40 | 1 – 3 hours | Works rapidly on wet stains | Emits toxic, flammable fumes |
| Gel Strippers | Large, dried water-based stains | $40 – $80 | 4 – 12 hours | Clings to vertical surfaces | Leaves a messy, sticky residue |
| Mechanical Grinding | Old, permanent, widespread stains | $150 – $300 | 2 – 6 hours | Guarantees complete removal | Generates hazardous silica dust |
Which Should You Choose?
The Budget-Conscious User
Choose the chemical poultice method. You can build an effective poultice using cheap household ingredients like baking soda and off-the-shelf acetone. This approach targets small drips and concentrated spills effectively without requiring heavy machinery rentals.
The Weekend DIYer
Choose a store-bought gel stripper. Soy-based or citrus-based paint and stain strippers have long dwell times and low odor. These characteristics make them safe and forgiving for beginners. They cover large areas easily and require manual scrubbing rather than specialized power tools.
The Impatient Restorer
Choose mechanical grinding. Rent a walk-behind concrete grinder or purchase a diamond-cup wheel for a handheld angle grinder. This method strips the wood stain physically in minutes with zero drying time. You bypass the chemical guesswork entirely, though you must manage the resulting dust.
Before You Start: Required Tools and Materials
You must assemble the right equipment before opening any chemicals. Attempting to gather extraction tools while a solvent dries on the concrete will ruin the project.
- Total Time: 2 to 24 hours (depending on method).
- Difficulty: Moderate to Advanced.
- Critical Factor: Extraction speed. You must remove dissolved stain before it re-hardens in the pores.
Equipment and Cost Breakdown
| Tool or Material | Specific Requirement | Cost Range | Primary Purpose |
| Stiff-Bristle Brush | Nylon or natural Tampico fiber | $8 – $15 | Agitating the concrete pores safely |
| Wet-Dry Vacuum | Minimum 5 Peak HP, fine dust filter | $80 – $150 | Extracting dirty liquid instantly |
| Pressure Washer | 2000 to 3000 PSI rating | $250 – $400 | Blasting residue from outdoor slabs |
| Chemical Respirator | NIOSH-approved, Organic Vapor cartridges | $35 – $55 | Filtering toxic solvent fumes |
| Heavy-Duty Gloves | Chemical-resistant Nitrile, 9 mil thickness | $12 – $20 | Protecting skin from severe chemical burns |
Method 1: How to Apply a Chemical Poultice
The poultice method is the most effective way to remove localized, deeply penetrated wood stain. A poultice combines a liquid solvent with an absorbent powder. The solvent breaks down the stain, and the powder draws the liquid up out of the concrete as it dries.
Step 1: Prepare the Target Area
Clear the workspace completely of furniture, vehicles, and debris. Sweep the concrete thoroughly to remove loose dirt. Put on your safety goggles, nitrile gloves, and an organic vapor respirator. Ensure the area is well-ventilated if you are working inside a garage.
- Specifics: Open all doors and windows to achieve cross-ventilation.
- Checkpoint: You’ll know the area is ready when the concrete is bone dry and dust-free.
- Common Mistake: Applying a poultice over wet concrete blocks the solvent from entering the pores.
Step 2: Mix the Poultice Paste
Create a thick paste by combining your liquid solvent and absorbent material in a disposable plastic bucket. For oil-based wood stain, mix acetone or mineral spirits with baking soda, talcum powder, or crushed unscented kitty litter.
- Specifics: Add the liquid slowly until the mixture reaches the consistency of thick peanut butter.
- Checkpoint: You’ll know the consistency is right when the paste sticks to a trowel without dripping.
- Common Mistake: Making the mixture too thin causes the solvent to run away from the stain.
Step 3: Apply and Seal the Mixture
Trowel the paste directly over the wood stain. Spread the mixture to a thickness of 0.25 inches, extending it roughly one inch past the edges of the stain. Cover the poultice immediately with clear plastic wrap. Tape down all four edges of the plastic with painter’s tape to create an airtight seal.
- Specifics: Press the tape down firmly to prevent solvent vapor from escaping prematurely.
- Checkpoint: You’ll know it is sealed when condensation begins forming under the plastic wrap.
- Common Mistake: Leaving the edges unsealed allows the solvent to flash off into the air instead of sinking into the concrete.
Step 4: Manage the Dwell Time
Leave the sealed poultice undisturbed for exactly 24 hours. The solvent needs this time to break down the hardened resins deep inside the concrete matrix. After 24 hours, remove the plastic wrap and the tape. Allow the exposed paste to air dry completely.
- Specifics: The drying phase creates the vacuum effect that pulls the dissolved pigment into the powder.
- Checkpoint: You’ll know it worked when the paste turns into a hard, dry crust.
- Common Mistake: Scraping the poultice away while it is still wet leaves the suspended pigment trapped in the concrete pores.
Step 5: Scrape and Extract
Scrape the dry crust off the concrete using a plastic putty knife. Sweep up the bulk of the contaminated powder and dispose of it in a sealed metal container. Scrub the remaining residue vigorously with a stiff nylon brush and a mixture of warm water and dish soap. Rinse the area completely.
- Specifics: Use 2 tablespoons of grease-cutting dish soap per gallon of warm water.
- Checkpoint: You’ll know the process is complete when the concrete rinses clean with no colored water.
- Common Mistake: Using a metal putty knife can easily scratch or gouge the concrete finish.
Method 2: How to Use Chemical Stain Strippers
Chemical gel strippers are the best solution for large, widespread wood stain spills. The thick gel consistency allows the active chemicals to cling to the surface without evaporating rapidly, making them ideal for heavy acrylic and urethane-based stains.
Step 1: Protect Adjacent Surfaces
Mask off surrounding walls, baseboards, and landscaping with heavy plastic sheeting. Chemical strippers will ruin painted drywall and kill grass instantly. Put on your protective gear. Because strippers cover a large area, proper ventilation is mandatory.
- Specifics: Tape the plastic drop cloths at least 3 feet up the adjacent walls.
- Checkpoint: You’ll know you are protected when no exposed surfaces remain within splash distance.
- Common Mistake: Skipping the masking tape allows the stripper to bleed underneath the plastic.
Step 2: Apply a Thick Layer of Stripper
Pour the chemical stripper directly onto the stained concrete. Spread it evenly using a solvent-resistant brush or a heavy-nap paint roller. Do not brush the product out thinly like paint.
- Specifics: Apply a uniform layer approximately 1/8 to 1/4 inch thick across the entire stain.
- Checkpoint: You’ll know the application is correct when you can no longer see the concrete through the gel.
- Common Mistake: Over-brushing the gel breaks the chemical seal and accelerates unwanted evaporation.
Step 3: Monitor the Dwell Time Strictly
Let the chemical stripper dwell for 30 to 60 minutes. Check the manufacturer’s instructions for the exact timeframe, as soy-based strippers may require up to 4 hours. You must keep the surface wet. If the stripper begins to dry out, apply more product over the top.
- Specifics: Test a small corner with a scraper after 30 minutes to see if the stain lifts easily.
- Checkpoint: You’ll know it worked when the stain begins to bubble, wrinkle, or lift away from the surface.
- Common Mistake: Letting the chemical stripper dry completely re-hardens the stain onto the concrete permanently.
Step 4: Scrub and Agitate the Pores
Once the stain softens, scrub the area vigorously using a stiff-bristle nylon brush attached to a broom handle. The agitation physically breaks the stain out of the microscopic pores. Work in small sections, moving in tight, overlapping circles.
- Specifics: Apply heavy downward pressure to force the bristles into the concrete texture.
- Checkpoint: You’ll know the agitation is effective when the gel turns into a dark, muddy slurry.
- Common Mistake: Using steel wire brushes causes metal bristles to snap off, which later rust and create orange stains on your driveway.
Step 5: Extract the Slurry and Rinse
Remove the dissolved stain before it settles back into the concrete. For indoor floors, use a wet-dry vacuum to pull up the dirty liquid instantly. For outdoor slabs, pressure wash the area to blast the pores clean.
- Specifics: Pressure wash using a 25-degree or 40-degree nozzle tip at 2000 to 3000 PSI. Keep the wand 8 to 12 inches away from the surface.
- Checkpoint: You’ll know the extraction is complete when the water runs completely clear.
- Common Mistake: Blasting the concrete closer than 6 inches with a pressure washer will permanently gouge out the cement paste.
Method 3: How to Mechanically Grind Concrete
When chemical methods fail on old, heavily cured wood stains, mechanical grinding provides the ultimate solution. This method uses industrial diamonds to shave off the top millimeter of the concrete, removing the stained pores entirely.
Step 1: Select the Right Equipment
Rent a walk-behind concrete floor grinder for large areas like garages or patios. For small spots, purchase a 5-inch or 7-inch angle grinder equipped with a segmented diamond cup wheel. You must attach a dust shroud and a heavy-duty HEPA vacuum to the grinder to capture the hazardous silica dust.
- Specifics: Choose a 30-grit or 50-grit medium-bond diamond tooling attachment for efficient material removal.
- Checkpoint: You’ll know your setup is correct when the vacuum hose connects tightly to the grinder shroud.
- Common Mistake: Grinding without a shroud and vacuum floods the area with toxic, cancer-causing silica dust.
Step 2: Prepare the Surface for Grinding
Sweep the floor entirely clean of loose debris, screws, or pebbles. Exposed metal fasteners will shatter the diamond segments on your grinding wheel. Mark the stained areas clearly with chalk.
- Specifics: Ensure the concrete is completely dry, as wet concrete creates an abrasive mud that ruins dry-grinding tooling.
- Checkpoint: You’ll know the floor is ready when no loose objects remain in the grinding path.
- Common Mistake: Failing to hammer down protruding nails will instantly destroy a $100 diamond blade.
Step 3: Grind the Stained Concrete
Turn on the HEPA vacuum first, then start the grinder. Keep the grinding wheel moving constantly over the stained area. Never let the machine sit spinning in one spot. Move in a smooth, sweeping motion, overlapping your passes by 50 percent.
- Specifics: Apply light, even pressure. Let the weight of the machine and the diamonds do the cutting work.
- Checkpoint: You’ll know it worked when the concrete turns white and the stain disappears completely.
- Common Mistake: Pressing down too hard or stopping in one place cuts deep circular gouges into the slab.
Step 4: Clean and Evaluate the Surface
Turn off the equipment and vacuum the remaining residual dust from the floor. Inspect the ground area carefully. The freshly ground concrete will appear lighter and much more porous than the surrounding slab.
- Specifics: Wipe the surface with a damp microfiber cloth to reveal the true final color.
- Checkpoint: You’ll know the process is finished when no pigment remains visible in the concrete matrix.
- Common Mistake: Leaving fine silica dust on the floor prevents new sealers or coatings from adhering properly.
What Are the Most Common Stain Removal Mistakes?
Even experienced DIYers frequently ruin concrete floors by applying the wrong chemicals or techniques. Avoiding these major failure modes separates successful restorations from permanent damage.
Using Muriatic Acid to Clean Stains
Muriatic acid does not dissolve wood stain. Acid attacks the alkaline concrete paste itself, eating away the surface. When you apply acid over a wood stain, it etches the surrounding clean concrete while leaving the chemical binders intact. This reaction physically locks the pigment into the slab, making future removal nearly impossible.
Letting Chemical Strippers Dry Out
Chemical strippers rely on staying wet to keep the stain binders suspended in a liquid state. If you apply a stripper in direct sunlight or leave it past its dwell time, the solvent evaporates. The dissolved stain then re-hardens directly onto the surface, often sinking deeper into the pores than the original spill. You must always keep the working area damp.
Power Washing Too Close to the Surface
High-pressure water acts like a liquid scalpel. Blasting a tough stain with a 0-degree nozzle or holding a wand closer than 6 inches will shatter the top layer of the concrete. This mistake permanently gouges out the smooth paste, exposing the rough aggregate rock beneath. You cannot fix this damage without resurfacing the entire slab.
How Do You Troubleshoot Stubborn Haze and Residue?
Sometimes the primary removal method leaves behind secondary problems. You can resolve these lingering issues with specific follow-up techniques.
The Stain Turned Into a Gooey Smear
If the stain turns into a sticky, spreadable mess, the solvent successfully dissolved the binder, but you failed to extract it fast enough. You essentially created a new batch of liquid paint on your floor. To fix this, immediately reapply your solvent or stripper. Scrub the area vigorously, and instantly vacuum up the resulting liquid with a wet-dry shop vac before it has a chance to settle.
A White Haze Remains After Rinsing
A powdery white haze left on the concrete is dried chemical residue from your stripper or poultice. It is not permanent damage. Scrub the hazy area with clean, hot water mixed with a splash of grease-cutting dish soap. Rinse the floor thoroughly with a hose, pushing the soapy water completely off the slab.
How Do Surface Variations Alter the Removal Process?
Not all concrete is finished the same way. The texture and location of your slab dictate how aggressive you can be with your removal methods.
Stamped and Decorative Concrete
Stamped concrete features complex textures and artificial coloring. You cannot use mechanical grinding on stamped concrete, as the grinder will instantly destroy the stamped pattern and shave off the integral color. You must rely exclusively on gentle chemical poultices and soft-bristle nylon brushes to avoid ruining the expensive decorative finish.
Smooth Indoor Garage Floors
Indoor floors are generally steel-troweled to a tight, smooth finish. Because you cannot use a pressure washer indoors without flooding the room, extraction relies heavily on shop vacuums and absorbent mops. The smooth finish makes mechanical grinding highly effective, but you must maintain strict dust control to keep silica particulate out of your home’s HVAC system.
Broom-Finished Driveways
Exterior driveways feature a rough broom finish designed for tire traction. This rough texture traps heavy amounts of wood stain in the deep grooves. Chemical strippers work best here, combined with aggressive pressure washing. The rough texture easily hides minor surface etching, making outdoor driveways more forgiving to aggressive scrubbing than smooth indoor floors.
Frequently Asked Questions
Will mineral spirits remove wood stain from concrete?
Yes, mineral spirits effectively remove fresh, oil-based wood stains. The solvent breaks down alkyd resins quickly if applied before the stain cures completely. However, mineral spirits have very little effect on dried, water-based acrylic stains, which require specialized chemical strippers.
Can you power wash wood stain off concrete?
You cannot power wash wood stain out of concrete using water alone. The high-pressure water will merely bounce off the cured resins. You must apply a chemical stripper or solvent first to break the chemical bond, using the pressure washer solely as an extraction tool to rinse the loosened pigment away.
How long does a baking soda poultice take to dry?
A baking soda and acetone poultice typically takes 12 to 24 hours to dry completely when covered with plastic wrap. The exact timeframe depends on the ambient temperature and humidity. The poultice must dry into a hard crust to successfully pull the liquid stain out of the concrete pores.
Does bleach remove wood stain from a patio?
No, household bleach does not remove wood stain. Bleach is an oxidizing agent that kills organic matter like mold and mildew. It lacks the solvent properties required to dissolve alkyd oil binders or acrylic resins. Applying bleach will simply wet the stain without breaking it down.
How do you dispose of chemical strippers safely?
You must never wash solvent-laden chemical strippers down a storm drain or into your lawn. Sweep up the dried slurry or absorb the wet residue with kitty litter. Place the contaminated material into a sealed metal or heavy plastic container, and take it to your local household hazardous waste disposal facility.


