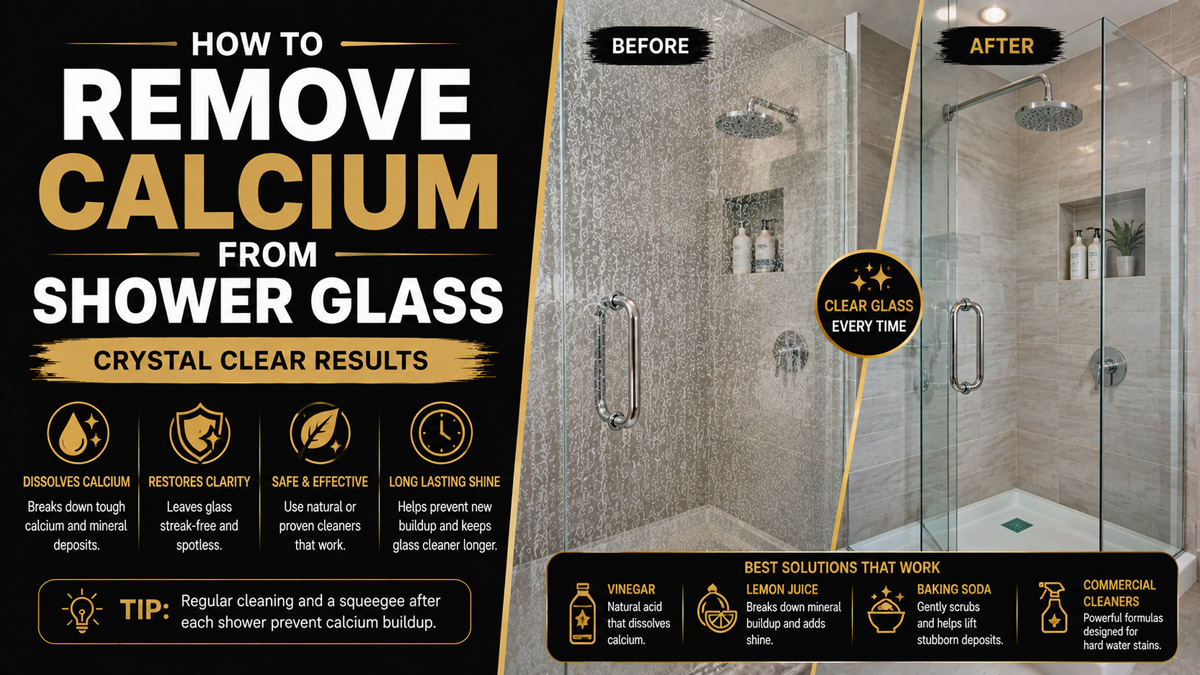
Knowing how to remove calcium from shower glass restores your bathroom to a spotless shine. This six-step process requires 35 minutes of active time and basic household supplies. You will prep the area, heat an acidic mixture, apply it evenly, agitate the deposits, rinse thoroughly, and polish the surface. The single biggest factor for success is keeping the glass wet during the chemical dwell time.
Before You Start
Do not begin this process until you have gathered all materials and prepared your workspace. Heated acetic acid produces strong fumes. Open a window or turn on your bathroom exhaust fan at least five minutes before mixing your solution.
- Total Time Required: 35-45 minutes
- Difficulty Level: Beginner
- Typical Cost: $3.00 to $5.00
- Prerequisite Conditions: The shower must be completely dry before starting. Wet glass dilutes the acid and prevents the solution from clinging to the calcium deposits.
Tools and Materials Required
| Item | Quantity / Specification | Typical Cost | Purpose |
| White Vinegar | 2 cups (5% acidity) | $1.50 | Primary acid to dissolve calcium carbonate. |
| Distilled Water | 2 cups | $1.00 | Dilutes the acid safely without adding new minerals. |
| Dawn Dish Soap | 2 tablespoons | $0.50 | Acts as a surfactant to help the acid cling to vertical glass. |
| Spray Bottle | 1 standard (16-32 oz) | $0.00 (Owned) | Even application of the liquid solution. |
| Scrub Sponge | 1 (Non-scratch specific) | $1.00 | Provides safe mechanical agitation. |
| Squeegee | 1 rubber blade | $0.00 (Owned) | Rapid water removal during the final rinse. |
| Microfiber Cloths | 2 (Clean and dry) | $0.00 (Owned) | Polishing the glass to a streak-free finish. |
| Baking Soda | 1/2 cup (Optional) | $1.00 | Creates an abrasive paste for severe calcification. |
Process Overview
| Step | Action | Time | Most Common Mistake |
| Step 1 | Prep and Protect | 3 mins | Failing to cover natural stone floors. |
| Step 2 | Mix the Solution | 2 mins | Boiling the vinegar instead of warming it. |
| Step 3 | Apply and Dwell | 20 mins | Letting the acidic solution dry on the glass. |
| Step 4 | Agitate Deposits | 10 mins | Pressing too hard and scratching the glass. |
| Step 5 | Rinse Completely | 2 mins | Rinsing with hard tap water and leaving drops. |
| Step 6 | Dry and Polish | 3 mins | Using a dirty cloth that smears old soap scum. |
Phase 1: Preparation
Preparation dictates how effective your cleaning will be. You must ensure the chemicals only touch the intended targets.
Step 1: Identify the Stains and Protect Surroundings
Assess the glass and cover any vulnerable surfaces nearby.
Calcium carbonate appears as chalky white spots with a slightly raised texture. Run your fingernail gently over a dry spot. You should feel a tiny bump. If the glass feels perfectly smooth but looks cloudy, you might be dealing with silica etching. Etching represents physical damage to the glass surface that no cleaner can remove.
Once you confirm the presence of calcium, look at your shower floor. Acid damages natural stone instantly. If you have marble, travertine, or limestone tiles, lay a thick cotton towel along the bottom track of the shower door. This barrier catches any acidic runoff. Wrap metal fixtures tightly with plastic wrap to prevent accidental overspray.
- You’ll know it worked when: Your fingernail catches on the white spots, and your vulnerable stone or metal surfaces are completely shielded.
- Common Mistake: Skipping the floor protection. Vinegar etches marble on contact, leaving permanent dull marks that require professional repolishing.
Step 2: Mix the Acidic Cleaning Solution
Combine your liquid ingredients in a heat-safe container to activate the acid.
Measure exactly 2 cups of 5% acidity white vinegar and 2 cups of distilled water into a microwave-safe glass bowl. Microwave this mixture on high for 30 to 45 seconds. The liquid should feel warm to the touch (around 105°F to 115°F), but it must not boil. Boiling vinegar degrades the acetic acid and releases overpowering fumes.
Carefully pour the warm liquid into your empty spray bottle. Add exactly 2 tablespoons of blue Dawn dish soap. Close the bottle and swirl it gently in a circular motion for 15 seconds. Do not shake the bottle vigorously. Shaking creates excessive foam that makes spraying difficult.
- You’ll know it worked when: The solution is warm, slightly blue, and mixed evenly without a massive head of foam at the top of the bottle.
- Common Mistake: Mixing the soap in before heating. Heating dish soap can alter its chemical structure and cause it to separate from the water.
Phase 2: Application and Removal
This phase requires patience. Chemical bonds take time to break down, and rushing the process always results in leftover stains.
Step 3: Apply the Solution and Maintain Moisture
Coat the shower glass completely and monitor the surface to prevent evaporation.
Start at the top corner of the glass panel. Spray the warm solution in sweeping, horizontal lines, working your way down to the bottom. The soap will cause the liquid to cling to the glass and slide down very slowly. Apply a heavy secondary coat directly onto the thickest, crustiest white areas.
Set a timer for 15 minutes. Stand by and watch the glass. Standard chemistry dictates that acetic acid requires uninterrupted contact time to dissolve calcium carbonate bonds. If any section of the glass begins to look dry or flaky, spray it again immediately. The glass must remain visibly wet for the entire duration.
- You’ll know it worked when: You see tiny bubbles forming on the white spots. This micro-bubbling indicates the acid is successfully dissolving the mineral salts.
- Common Mistake: Letting the solution dry. Dried vinegar redeposits the dissolved calcium directly back onto the glass, often baking it on harder than before.
Step 4: Agitate the Calcium Deposits
Scrub the glass mechanically to dislodge the loosened mineral scale.
Wet your non-scratch sponge thoroughly with warm tap water. Starting at the top of the door, apply medium pressure and scrub the glass in tight overlapping circles. Work in sections of roughly 12 by 12 inches. Do not use extreme force. The acid has already done the heavy lifting, so your goal is simply to wipe away the broken chemical bonds.
Pay special attention to the bottom three inches of the glass. Gravity pulls hard water down, making this lower edge the most heavily calcified zone. Take your time here. If you encounter a spot that feels rough and resists the sponge, spray it with more solution and wait two minutes before scrubbing again.
- You’ll know it worked when: The sponge glides smoothly over the glass without snagging or dragging on rough patches.
- Common Mistake: Using abrasive tools. The National Glass Association advises against using steel wool or razor blades on tempered shower glass, as these tools easily create microscopic scratches that harbor future bacteria and minerals.
Phase 3: Finishing
Proper finishing prevents new water spots from forming immediately after you finish cleaning.
Step 5: Rinse the Glass Completely
Wash away all traces of acid, soap, and dissolved minerals.
Turn on your shower head and set it to warm water. If you have a handheld wand, start at the top of the glass and spray downward, pushing the soapy residue toward the drain. If your shower head is fixed, fill a clean plastic bucket with warm water and splash it against the glass from top to bottom.
Continue rinsing until the water runs completely clear. Any leftover soap will dry into a hazy film, while leftover vinegar will attract dust. Check the metal tracks and rubber seals at the bottom of the door. Direct a heavy stream of water into these crevices to flush out any trapped acid.
- You’ll know it worked when: The glass looks perfectly transparent while wet, and there are no suds pooling at the bottom track.
- Common Mistake: Rinsing with cold water. Cold water causes the dish soap to coagulate rapidly, leaving a stubborn greasy residue on the glass.
Step 6: Squeegee and Buff to a Polish
Remove the rinse water immediately to prevent new mineral deposits from forming.
Place the rubber blade of your squeegee at the top left corner of the wet glass. Pull straight down with firm, even pressure. Wipe the squeegee blade with a clean towel. Overlap your next downward stroke by one inch, repeating this pattern until you have cleared the entire panel.
Grab your first dry microfiber cloth. Wipe the edges, corners, and metal hardware where the squeegee could not reach. Switch to your second, completely dry microfiber cloth. Buff the entire glass surface using fast circular motions until it shines.
- You’ll know it worked when: The glass is crystal clear, entirely dry to the touch, and free of streaks or white halos.
- Common Mistake: Letting the rinse water air dry. Tap water contains the very minerals you just removed. Air drying guarantees a fresh layer of hard water spots.
Common Mistakes and How to Fix Them
Even careful beginners encounter issues when dealing with heavy mineralization. Understanding failure modes helps you recover quickly.
Using Dangerous Abrasives
Desperation often leads people to grab green heavy-duty scrub pads, pumice stones, or razor blades. Tempered glass has a Mohs hardness rating of roughly 5.5. Many abrasives exceed this hardness and will permanently scratch the surface.
The Fix: If you have accidentally scratched the glass, cleaning will not fix it. You must hire a professional glass restorer to polish the surface with cerium oxide, or replace the panel entirely. Stick exclusively to blue non-scratch sponges.
Allowing the Acid to Dry
A common error is spraying the glass and walking away to do other chores. The vinegar evaporates, and the calcium carbonate re-hardens onto the surface in an uneven, chalky layer.
The Fix: Do not try to scrub the dried paste. Re-saturate the entire area heavily with your warm vinegar solution. Wait five minutes for the bonds to soften again, then scrub normally and rinse immediately.
Mixing Vinegar with Bleach
Homeowners sometimes try to tackle mold and calcium simultaneously by combining vinegar with bleach-based tile cleaners. This combination triggers a severe chemical reaction that produces toxic chlorine gas.
The Fix: Never mix these chemicals. If you accidentally do, evacuate the bathroom immediately. Leave the exhaust fan running and open all windows. Wait at least two hours before re-entering, then flush the area heavily with cold water. Treat calcium and mold in completely separate cleaning sessions.
Ignoring the Hardware and Seals
Cleaning the large glass panels while ignoring the rubber sweeps and metal tracks allows calcium to build up in the mechanical joints. Over time, this rots the rubber and corrodes the metal hinges.
The Fix: Dip an old toothbrush into your vinegar solution. Scrub the bottom tracks and the edges of the plastic sweeps. Rinse these areas heavily.
Troubleshooting Persistent Failures
Sometimes a single liquid pass is not enough for neglected showers.
Thick Crust Remains After Drying
If heavy, raised white stalactites of calcium remain on the glass after your final buffing, the liquid solution was too thin to penetrate the thickest layers.
The Fix: Create an abrasive chemical paste. Mix 1/2 cup of baking soda with just enough white vinegar to form a thick, fizzing paste. Apply this paste directly onto the stubborn crust using your finger. Let it sit for 15 minutes. The paste format keeps the acid concentrated on the spot. Scrub firmly with your wet sponge and rinse.
The Glass Looks Cloudy or Hazy
You finished the process, but the glass lacks a brilliant shine and looks slightly milky. This happens when soap scum residue or a thin layer of dissolved minerals gets smeared during the drying phase.
The Fix: Spray pure distilled water lightly over the hazy areas. Instantly buff the area with a brand-new, completely dry microfiber cloth. Distilled water acts as a hungry solvent for loose surface residues without depositing new minerals.
Variations for Specific Situations
Not all showers are built the same. You must adjust your approach based on your specific materials.
Cleaning Natural Stone Showers
Vinegar destroys natural stone. If your shower features travertine, marble, or limestone walls and floors, you cannot use the standard spray method safely.
Variation: Substitute the vinegar with a commercial, stone-safe hard water remover. Look for products specifically formulated with chelating agents rather than harsh acids. Apply the cleaner directly to your sponge rather than spraying it, and wipe carefully to avoid dripping onto the stone.
Factory-Coated Glass
Many modern shower doors come with factory-applied protective coatings (like ShowerGuard). Highly acidic solutions or abrasive scrubbing can strip these expensive hydrophobic layers.
Variation: Skip the vinegar entirely. Mix a mild solution of warm distilled water and Dawn dish soap. Wash the glass gently using a microfiber cloth instead of a scrub sponge. If calcium persists, consult the glass manufacturer’s exact maintenance guidelines to avoid voiding your warranty.
Extreme Buildup (Commercial Solutions)
When ten years of calcium crust cover the glass, household vinegar may prove too weak.
Variation: Purchase a dedicated commercial descaler like CLR (Calcium, Lime, and Rust Remover). Wear thick rubber gloves and safety goggles. Dilute the CLR exactly according to the manufacturer’s instructions, apply it with a sponge, limit dwell time to two minutes, and rinse aggressively.
Time and Cost Breakdown
Understanding the economics of this task helps you decide whether to do it yourself or hire a professional.
| Method | Material Cost | Time Required | Effort Level |
| DIY Vinegar Method | $3 – $5 | 35 minutes | Medium |
| DIY Commercial Descaler | $10 – $15 | 20 minutes | Medium |
| Professional Cleaning | $150 – $300 | Zero | None |
Doing this task yourself saves substantial money. The DIY vinegar method is incredibly cost-effective because most homes already stock the necessary supplies.
Frequently Asked Questions
How often should I clean calcium off my shower glass?
You should perform a deep clean every four to six weeks. If you live in an area with extremely hard water, you might need to clean the glass every two weeks to prevent severe buildup.
Does lemon juice work as well as white vinegar?
Lemon juice contains citric acid, which dissolves calcium effectively. However, it often leaves a sticky sugary residue behind. White vinegar is preferred because it leaves no organic residue and cleans more cleanly.
Can I use a Magic Eraser on shower glass?
You should avoid Magic Erasers on smooth glass. They are made of melamine foam, which acts as a micro-abrasive. While they remove stains quickly, they can leave microscopic scratches that dull the glass over time.
Why do hard water stains keep coming back so fast?
Hard water stains return quickly because your home’s water supply contains high levels of dissolved calcium and magnesium. The only permanent solution is installing a whole-house water softening system.
Will WD-40 remove hard water stains from glass?
WD-40 displaces water and can temporarily mask the appearance of calcium by filling in the chalky texture with oil. It does not dissolve the minerals, and it leaves a dangerous, slippery film on your shower floor.
Mastering how to remove calcium from shower glass gives you control over your bathroom’s appearance and hygiene. By correctly formulating your acidic solution, managing dwell times, and avoiding destructive abrasives, you can maintain crystal-clear glass for years to come.


