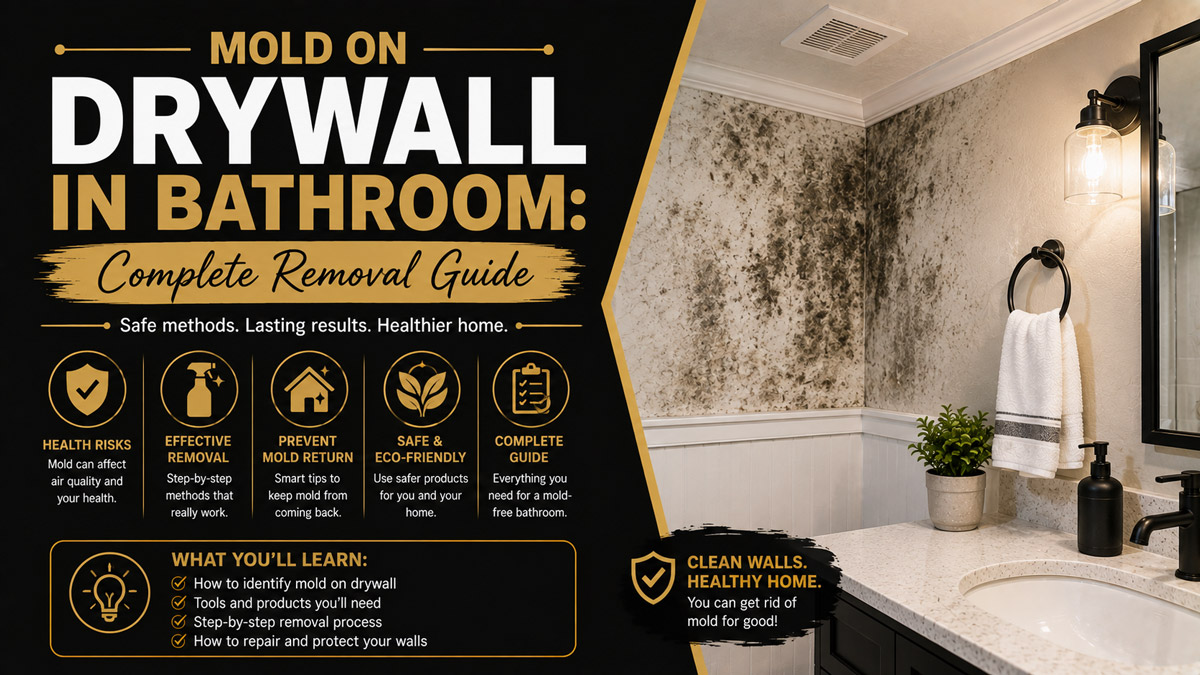
Mold on drywall in bathroom environments is a rapidly spreading fungal infestation triggered by excessive moisture interacting with cellulose-rich paper backing. Addressing this issue requires identifying the moisture source, neutralizing the root system, and replacing structurally compromised materials to prevent continuous airborne spore circulation.
Key Facts / At a Glance
- Fungal spores colonize damp paper-backed walls within 24 to 48 hours of initial moisture exposure.
- The EPA recommends professional remediation for any contaminated area exceeding 10 square feet.
- Household bleach fails to penetrate porous gypsum cores and actively feeds fungal root systems.
- Indoor humidity levels must remain between 30% and 50% to halt biological reproduction.
- Effective exhaust fans must operate for at least 20 minutes post-shower to clear residual humidity.
What Causes Mold on Drywall in Bathroom?
Fungal growth requires four specific conditions to thrive: airborne spores, a food source, appropriate temperatures, and sustained moisture. Bathrooms naturally provide the perfect breeding ground for these microscopic organisms.
The Biology of Bathroom Fungi
Mold is a living organism that reproduces by releasing microscopic spores into the air. These spores circulate constantly in both indoor and outdoor environments. When a spore lands on a compatible surface, it remains dormant until environmental conditions trigger germination. The paper facing of standard wallboard consists entirely of cellulose. Fungi consume cellulose as their primary food source. Once moisture activates the spore, the organism grows root-like structures called hyphae. These hyphae dig deep into the porous paper backing and penetrate the underlying gypsum core.
Environmental Triggers and Physics
Relative humidity levels consistently above 60% initiate spore germination. Bathrooms experience rapid temperature and humidity spikes during hot showers. This creates steam that expands and touches cooler surfaces like exterior-facing walls. When the warm steam hits the cooler surface, it reaches its dew point and condenses into liquid water. If the bathroom lacks proper ventilation, this liquid water saturates the wallboard. The moisture sits on the surface, soaking through the latex paint layer into the paper facing. This sustained dampness combined with the organic cellulose triggers immediate biological activity.
Common Fungal Types and Identifiers
Not all bathroom fungi present the same risks or require the exact same treatment protocols. Accurately identifying the species helps determine the urgency of the remediation effort.
Cladosporium
This species frequently appears as black, green, or brown clusters. Cladosporium commonly grows on damp surfaces, painted walls, and tile grout. It thrives in environments with fluctuating moisture levels. Exposure to Cladosporium typically causes mild allergic reactions, including sneezing, watery eyes, and throat irritation. It lacks the severe toxicity associated with other dark strains, but it spreads aggressively across poorly ventilated surfaces.
Penicillium
Penicillium colonies generally manifest with blue, green, or white coloring. This species spreads exceptionally fast in highly humid rooms. It requires slightly less moisture to survive than other common bathroom strains. Penicillium spores easily become airborne when disturbed. These spores can trigger severe asthma attacks and chronic sinus infections in sensitive individuals. You will often find Penicillium spreading rapidly across ceilings directly above shower enclosures.
Stachybotrys Chartarum
Commonly known as toxic black mold, Stachybotrys chartarum appears dark greenish-black with a notably slimy texture. This species demands constant, heavy moisture saturation to survive. It rarely grows from general shower humidity alone. Finding this strain usually indicates a hidden plumbing leak behind the wall or a continuously failing roof membrane. Stachybotrys chartarum produces mycotoxins. These chemical byproducts can cause severe respiratory distress, neurological symptoms, and chronic fatigue. Finding this species requires immediate structural intervention.
Health Risks of Fungal Exposure
Prolonged exposure to fungal spores carries documented health consequences. The severity depends heavily on the individual’s immune system, the specific fungal species, and the duration of exposure.
Acute Allergic Reactions
Most individuals experience immediate respiratory symptoms upon entering a heavily contaminated space. The body recognizes airborne spores as foreign invaders. The immune system releases histamine, causing inflammation in the nasal passages and throat. Symptoms include coughing, wheezing, red eyes, and skin rashes. These acute reactions typically subside once the individual leaves the contaminated environment. However, repeated exposure worsens the severity of the immune response over time.
Chronic Exposure Consequences
Living continuously with hidden wall fungi leads to long-term health complications. The EPA notes that prolonged inhalation of spores permanently damages lung tissue in developing children. For adults with preexisting asthma, consistent spore exposure increases the frequency and severity of attacks. Furthermore, toxicogenic strains like Stachybotrys release mycotoxins that absorb directly into the bloodstream through the lungs. Chronic mycotoxin exposure correlates with persistent memory issues, joint pain, and chronic sinus inflammation.
How Do You Assess the Damage?
Determining the scope of the infestation dictates whether you can handle the cleanup safely or if you need professional intervention. Superficial stains require basic chemical treatment, while deep rot demands structural demolition.
Visual and Olfactory Signs
Surface discoloration provides the first warning sign. Look for bubbling paint, peeling wallpaper, or dark spotting near baseboards and ceilings. Fungi often grow from the inside out. By the time you see black spots on the paint, the underlying gypsum core might already be saturated. Smell also serves as a critical diagnostic tool. Actively growing fungi emit microbial volatile organic compounds. These compounds produce a distinct, heavy, musty odor that persists even after cleaning the bathroom with standard detergents.
Using Moisture Meters
Professionals rely on specialized equipment to map hidden damage. A pinless moisture meter uses electromagnetic sensors to detect water content behind the paint layer. Standard dry wallboard should register a moisture content below 12%. If the meter reads above 15%, the material is actively damp. Readings above 20% indicate severe saturation that will inevitably support biological growth. You should scan outward from the visible stain in 6-inch increments until you find dry material. This mapping process tells you exactly how much wallboard you need to remove.
The 10-Square-Foot EPA Rule
The U.S. Environmental Protection Agency provides a clear threshold for DIY remediation. If the contaminated area covers less than 10 square feet (roughly a 3-foot by 3-foot patch), a homeowner can typically manage the cleanup safely. If the visible damage exceeds this size, the spore load is too high for consumer-grade protective equipment. Furthermore, large infestations usually indicate severe structural defects that require licensed contractors to fix. Never attempt to demolish a wall cavity exceeding 10 square feet without professional containment systems.
Step-by-Step Remediation Process
Following a strict procedural order prevents cross-contamination. Disturbing dry spores without proper containment will spread the infestation throughout your entire house.
Step 1: Preparation and Containment
Proper safety gear protects your respiratory system. You must wear an N95 respirator mask, unvented safety goggles, and heavy-duty nitrile gloves. Before touching the wall, seal the bathroom door with 6-mil polyethylene sheeting and heavy painter’s tape. Turn off your central HVAC system to prevent the return ducts from pulling spores into other rooms. Open the bathroom window and place a high-velocity box fan pointing outward. This creates negative air pressure, pulling clean air under the door seal and exhausting contaminated air outside.
Step 2: Surface Treatment
Assess the structural integrity of the material. Press firmly on the stained area with a screwdriver handle. If the wall feels hard and sounds solid, you can treat it topically. Spray undiluted white vinegar or a professional commercial fungicide directly onto the stain. Vinegar contains mild acetic acid that penetrates porous materials to neutralize hyphae roots. Let the solution sit undisturbed for exactly one hour. Scrub the area gently with a stiff nylon brush, then wipe away the residue using a clean, damp microfiber cloth. Allow the surface to dry completely for 48 hours.
Step 3: Structural Removal
If the wallboard feels soft, spongy, or crumbles under pressure, the gypsum core is ruined. You cannot clean rotten material. You must cut it out. Use a manual utility knife or a drywall saw to cut a square section around the damage. You must extend your cut 12 inches past the last visible sign of discoloration. This 12-inch margin ensures you capture the invisible, microscopic root systems spreading out from the main colony. Place the ruined material immediately into heavy contractor bags, seal them tightly with tape, and remove them through the window if possible.
Step 4: Encapsulation and Rebuilding
Once you remove the rotten sections, you must address the exposed wall cavity. Spray the wooden studs with an antimicrobial solution and let them dry completely. Coat the cleaned studs and the cut edges of the remaining wallboard with a specialized mold-killing primer. This chemical encapsulation traps any microscopic remnants and creates an uninhabitable surface. Finally, patch the hole using moisture-resistant fiberglass-faced panels. Tape the seams, apply setting-type joint compound, and finish the repair with two coats of semi-gloss interior paint.
How Much Does Mold Removal Cost?
Understanding the financial requirements helps you decide between a DIY approach and hiring a professional firm. Costs vary wildly based on the size of the infestation and the underlying cause.
DIY Expense Breakdown
For patches smaller than 10 square feet, doing the work yourself remains highly cost-effective. Personal protective equipment including an N95 mask, goggles, and gloves costs between $20 and $40. Chemical treatments like Concrobium range from $15 to $30 per gallon. A gallon of antimicrobial primer costs approximately $45. Small patching materials, including joint compound, tape, and a half-sheet of greenboard, will add another $30 to $50. A complete DIY remediation project typically costs between $110 and $165.
Professional Remediation Pricing
Hiring certified remediation experts dramatically increases the financial burden. Professionals utilize commercial HEPA scrubbers, negative air machines, and thermal imaging cameras. For a medium-sized bathroom infestation contained to a single wall, expect to pay between $500 and $1,500. If the fungi have spread into the ceiling joists, the HVAC ductwork, or the subfloor, costs routinely escalate. Complex remediations involving full structural tear-outs generally run between $2,500 and $4,000.
Insurance Coverage Factors
Homeowners insurance rarely covers fungal remediation as a standalone claim. Policies explicitly exclude damage resulting from long-term maintenance failures, such as ignoring a slow shower leak or failing to run an exhaust fan. However, if the biological growth results directly from a covered sudden peril, the policy will likely cover the cleanup. For example, if a water heater suddenly bursts and floods the bathroom, the subsequent fungal cleanup falls under the water damage claim. Always document the sudden peril with photographs before beginning any demolition.
Treatment Options and Comparisons
Choosing the correct chemical agent determines the long-term success of your cleanup. The market offers several distinct approaches to neutralizing spores on porous surfaces.
| Treatment Option | Mechanism of Action | Material Cost per 100 Sq Ft | Best Application Scenario |
| Distilled White Vinegar | Acetic acid penetrates pores to alter internal cellular pH. | $3 to $5 | Minor surface staining on intact, hard walls. |
| Hydrogen Peroxide (3%) | Oxidizes fungal cell walls, causing immediate structural collapse. | $5 to $8 | Small grout lines and non-porous ceramic fixtures. |
| Commercial Encapsulants | Crushes spores chemically and leaves an antimicrobial barrier. | $40 to $60 | Medium DIY repairs covering previously cleaned framing. |
| Structural Replacement | Physical extraction removes the food source and root system entirely. | $75 to $120 | Deeply rotted, sagging, or water-compromised wallboard. |
Expert Insight: Never use standard household bleach on porous building materials. Bleach consists of 90% water and 10% sodium hypochlorite. The chlorine molecule is too large to penetrate the gypsum core, so it stays on the surface and bleaches the stain white. Meanwhile, the water component sinks deep into the wall, providing heavy moisture that actively feeds the surviving root system.
Expert Recommendations by User Profile
Different occupancy situations demand completely different approaches to remediation and liability. Your legal rights and structural responsibilities change based on whether you own or rent the property.
Advice for Renters
Renters should never attempt structural demolition. If you discover a soft, spongy wall, photograph the damage immediately with a time-stamped camera. Send a formal, written notification to your landlord or property management company requesting inspection. You can legally clean minor surface spots on the shower grout using white vinegar. However, attempting to cut open a wall makes you financially liable for the physical damage. If the landlord refuses to address structural fungal growth within local legal timeframes, contact your municipal health department to force an inspection.
Guidelines for Homeowners
Homeowners must prioritize long-term structural integrity over quick cosmetic fixes. Never simply paint over a dark stain before an open house. The fungi will consume the oils in the fresh paint and bleed through within weeks. Invest immediately in a high-capacity bathroom exhaust fan. When replacing ruined walls around a shower enclosure, upgrade the materials. Switch from standard white wallboard to fiberglass-faced panels, which contain zero organic cellulose for spores to consume. Use a semi-gloss or high-gloss paint finish, as glossy surfaces repel condensation significantly better than flat or matte finishes.
Protocols for Property Managers
Property managers face severe legal liabilities regarding indoor air quality. If a tenant reports a systemic bathroom infestation, skip the superficial wipe-downs used by basic maintenance crews. Hire a certified inspector to evaluate the building’s central ventilation shafts and wall cavities. Chronic moisture problems in multi-unit buildings often stem from shared plumbing chases or poorly calibrated rooftop exhaust units. Remediate structurally via professional contractors, and keep all clearance testing certificates on file to defend against future health-related lawsuits.
How Can You Prevent Regrowth?
Remediation only solves the immediate symptom. If you fail to correct the underlying environmental physics, spores will re-colonize the same spot within a matter of months.
Upgrading Ventilation Systems
Mechanical ventilation represents your primary defense against moisture accumulation. Most builder-grade exhaust fans lack the necessary power to clear heavy steam. You must install a fan rated for the specific cubic footage of your space. Calculate your requirement by allowing 1 CFM (cubic foot per minute) of airflow for every square foot of floor space. A 100-square-foot bathroom requires at least a 100 CFM fan. Wire the fan to a digital timer switch rather than the light switch. Set the timer to run for a minimum of 20 to 30 minutes after the shower water stops flowing.
Moisture-Resistant Materials
Standard building materials fail rapidly in high-humidity zones. When rebuilding, select products engineered specifically for wet environments.
| Wall Material Type | Core Composition | Moisture Resistance Rating | Average Cost per Sheet |
| Standard White Board | Raw gypsum with heavy paper facing. | Very Low | $12 to $16 |
| Greenboard | Gypsum with a wax-coated paper facing. | Moderate | $16 to $22 |
| Purple Board | Treated gypsum with specialized heavy paper. | High | $20 to $26 |
| Glass-Mat Panels | Treated gypsum wrapped in fiberglass mesh. | Extreme (No cellulose) | $35 to $45 |
Expert Insight: For areas directly bordering a shower surround or bathtub flange, building codes in many jurisdictions now prohibit the use of any paper-faced material. You must use cement board or glass-mat panels in these direct splash zones to comply with modern residential building standards.
Common Remediation Mistakes to Avoid
Many well-intentioned homeowners accidentally make their infestations worse by applying improper techniques.
Do not rely on ultraviolet light wands to clean porous surfaces. UV light only sanitizes the exact surface layer it touches. The microscopic roots hiding a fraction of an inch inside the gypsum remain completely unaffected and will regenerate rapidly.
Avoid using high-pressure sprayers or aggressive dry-sanding techniques on contaminated spots. Scrubbing dry spores forcefully sends millions of microscopic particles airborne simultaneously. This guarantees the fungi will travel through the HVAC system and colonize other damp areas in the house, such as the basement or laundry room.
Never ignore the root cause. Scrubbing the wall weekly while ignoring a constantly dripping showerhead or a failing window seal ensures the biological cycle continues indefinitely. You must stop the water intrusion before applying any chemical treatments.
Troubleshooting Recurring Fungal Growth
If you follow all remediation steps and the dark stains return to the exact same spot within 3 months, your initial moisture diagnosis was incorrect. Use this systematic checklist to identify hidden variables.
- The Exhaust Fan Tissue Test: Turn on your exhaust fan and hold a single square of toilet tissue against the ceiling grille. If the fan cannot hold the tissue tightly against the plastic via suction, the motor is failing or the ductwork is severely clogged with lint.
- The Attic Insulation Check: Go into the attic directly above the bathroom. Check if the exhaust fan duct vents completely through the roof. Many older homes vent bathroom steam directly into the attic. This causes massive condensation on the backside of the bathroom ceiling drywall.
- The Grout Line Inspection: Examine the lowest layer of tile where it meets the bathtub. If the grout lines show tiny hairline cracks, water is slowly wicking behind the tile assembly. This capillary action constantly feeds the wallboard from the inside, making surface cleaning completely ineffective.
- The Cold Wall Phenomenon: Check the exterior insulation in cold climates. If the bathroom wall lacks proper fiberglass batting, the interior wall surface becomes freezing cold in winter. Hot shower steam will aggressively condense on this cold patch, creating a localized moisture trap that requires foam insulation injection to fix.
Frequently Asked Questions
How long does it take for spores to colonize wet walls?
Microscopic spores begin germinating within 24 to 48 hours of constant moisture exposure on cellulose materials. Visible discoloration and structural degradation typically appear within 12 to 21 days if the surface remains consistently damp.
Can I sleep in a house with bathroom mold?
You can generally remain in the home if the infestation is small, isolated to one room, and properly sealed behind a closed door. However, if the fungi cover large structural areas or if occupants experience severe respiratory distress, you must vacate until professionals complete the remediation.
Does a dehumidifier kill existing fungal growth?
No, a dehumidifier cannot kill existing root systems. Lowering the humidity forces the organism into a dormant state, stopping further expansion. The hyphae remain alive inside the material and will reactivate the moment moisture levels rise again.
Will homeowners insurance cover bathroom mold removal?
Policies typically deny coverage for slow, long-term maintenance issues like leaky pipes or poor ventilation. Insurance usually only covers fungal remediation if it directly results from a sudden, catastrophic covered event, such as a burst supply line flooding the house.
Is it safe to scrape dried mold off the wall?
Scraping dry fungal colonies is highly dangerous. Physical agitation forces millions of dormant spores directly into your breathing zone. You must always dampen the area with a cleaning solution before scrubbing to weigh the spores down and prevent airborne contamination.
Successfully eliminating mold on drywall in bathroom spaces requires combining aggressive physical removal with strict environmental moisture control. By starving the environment of humidity and upgrading your building materials, you can permanently protect your home from future biological degradation.


