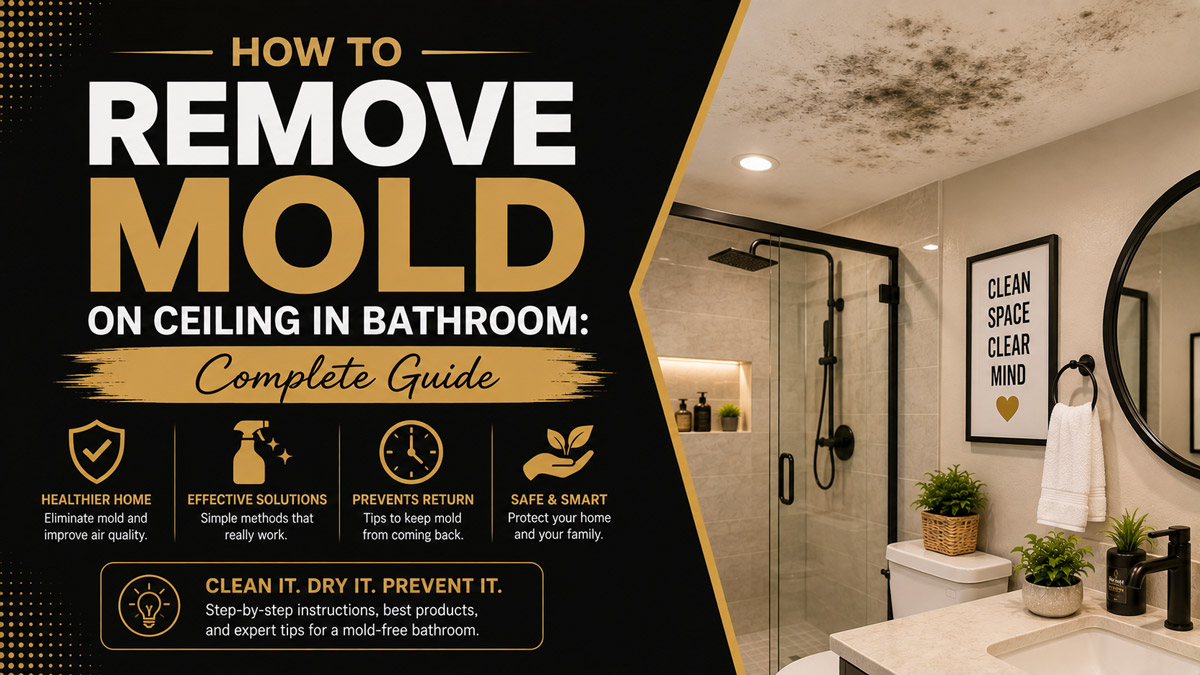
Mold on ceiling in bathroom environments is a fungal infestation driven by chronic moisture accumulation and poor ventilation. Spores feed on the paper backing of drywall when warm shower steam hits cold ceiling surfaces and condenses. Effective removal requires killing the underlying roots and lowering relative humidity below 50 percent.
Key Facts / At a Glance
- Relative Humidity Target: Maintain bathroom moisture levels between 30 and 50 percent to halt all fungal growth.
- The 10 Square Foot Rule: The EPA mandates that any continuous mold cluster larger than 10 square feet requires professional remediation.
- Safe DIY Costs: Basic safety gear and fungicidal solutions cost between $20 and $50.
- Professional Costs: Standard surface treatments range from $500 to $1,000, while structural remediation costs up to $8,000.
- Primary Prevention: Running an exhaust fan for 20 minutes after every shower eliminates the condensation necessary for spore activation.
What Causes Bathroom Ceiling Mold?
Bathroom ceiling mold develops when airborne spores locate a hospitable environment containing moisture, organic food, and optimal temperatures. Showers generate massive volumes of steam that carry water vapor upward to the highest point in the room. This vapor interacts with the ceiling materials and creates a microclimate perfectly suited for fungal colonization.
The Role of Relative Humidity and Condensation
Condensation dictates where mold forms inside residential structures. Warm air holds significantly more moisture than cold air. When hot steam from a shower rises, it eventually contacts the painted drywall of the ceiling. If the ceiling surface is cooler than the surrounding air, the air reaches its dew point and deposits liquid water onto the paint.
Inactive mold spores require this surface water to germinate. Spores activate when relative humidity on a surface remains above 60 percent for 24 to 48 hours. Once activated, the spores push microscopic root systems called hyphae directly into the porous drywall paper. The fungus then consumes the cellulose within the paper and physically degrades the structural integrity of the ceiling.
Attic Insulation Deficiencies
Cold ceiling surfaces usually indicate a failure in the attic insulation directly above the bathroom. Heat transfers naturally to colder areas. In winter months, inadequate insulation allows the cold attic air to chill the bathroom ceiling drywall. This drastic temperature differential accelerates the condensation process during a hot shower.
Adding R-38 to R-49 fiberglass or blown-in cellulose insulation above the bathroom stabilizes the drywall temperature. A warmer ceiling surface prevents the shower steam from reaching its dew point as quickly. This thermal boundary upgrade serves as one of the most effective long-term strategies for starving surface mold of its water supply.
What Are the Common Types of Bathroom Mold?
Fungal species present different visual markers, growth speeds, and health risks inside a home. Identifying the specific mold variant helps homeowners determine the urgency of the removal process. Some species tolerate dry spells well, while others require continuous plumbing leaks to survive.
Identifying Species by Color and Texture
Penicillium and Cladosporium account for the vast majority of bathroom fungal growths. Penicillium spreads rapidly under normal shower condensation and typically presents as a powdery green, blue, or yellow patch. Cladosporium manifests as dark green or brown spots that resemble dirt. This specific species survives temperature fluctuations easily and thrives near HVAC vents or drafty windows.
Stachybotrys chartarum requires significantly more moisture than normal shower steam provides. Often referred to as black mold, this slimy, dark greenish-black growth indicates a severe structural problem. You will usually find Stachybotrys growing under active roof leaks or behind walls suffering from burst pipes. This species can release mycotoxins and requires immediate professional intervention when discovered.
Table 1: Bathroom Mold Identification and Risk Factors
| Species Name | Visual Appearance | Primary Moisture Trigger | Estimated DIY Removal Difficulty |
| Penicillium | Powdery green, blue, or yellow patches | Standard shower condensation | Low (easily killed with vinegar) |
| Cladosporium | Dark green or brown spotting | Intermittent condensation and temperature swings | Low (surface scrubbing effective) |
| Aspergillus | Light colored, grey, or brown fuzz | Elevated humidity and poor ventilation | Medium (spreads spores easily) |
| Stachybotrys chartarum | Slimy, dark greenish-black clusters | Continuous active leaks or flooding | High (requires professional extraction) |
How Can You Distinguish Mold from Ghosting and Dirt?
Homeowners frequently misidentify normal household dust accumulations as fungal growth. Treating dirt with heavy fungicidal chemicals damages paint and wastes money. You must isolate the root cause of the ceiling discoloration before starting a heavy remediation project.
The Static Electricity Ghosting Phenomenon
Ghosting occurs when dark streaks appear in perfectly straight lines across your bathroom ceiling. These lines typically mirror the location of the wooden ceiling joists hidden behind the drywall. This phenomenon has absolutely nothing to do with mold spores or fungal hyphae.
Thermal tracking, or ghosting, happens when cold air transfers through uninsulated ceiling joists. The cold stripe on the ceiling generates a small static charge. This static electricity acts like a magnet for airborne soot, candle smoke, and dust particles. If the dark marks form distinct, evenly spaced parallel lines, you are looking at ghosting rather than a biological growth.
Testing Exhaust Fan Efficiency
A failing exhaust fan allows moisture to linger and supports continuous mold growth. You can test your bathroom ventilation system using a standard tissue paper square. Turn the exhaust fan on and hold a single sheet of toilet paper directly against the plastic grill.
If the fan motor generates sufficient suction, the tissue will stick firmly to the ceiling grate when you let go. If the tissue falls, the fan cannot move enough air to dry the room. This failure usually stems from a clogged duct, a burnt-out motor, or a system improperly vented directly into the attic insulation rather than outside the roof.
What Equipment Do You Need for Safe Mold Removal?
Proper preparation prevents spores from entering your lungs and spreading to unaffected rooms during the cleaning process. Agitating dry mold launches millions of microscopic particles into the air. You must build a physical barrier and wear appropriate filtration gear before touching the contaminated ceiling.
Personal Protective Equipment Requirements
A standard cloth mask or surgical mask offers zero protection against fungal spores. You must equip a properly fitted N95 respirator or a P100 half-face respirator. These filters block particles as small as 0.3 microns, successfully capturing all common household mold species.
Pair the respirator with non-vented safety goggles. Spores easily enter the mucous membranes of the eyes and cause severe irritation. Wear thick nitrile or neoprene gloves that extend halfway up your forearm. Fungal spores and the cleaning chemicals used to kill them will cause contact dermatitis on bare skin.
Chemical Agents and Cleaning Supplies
Avoid purchasing generic, multi-surface bathroom cleaners for this task. You need a solution capable of penetrating porous drywall to kill the root system. Distilled white vinegar (5 percent acetic acid) kills 82 percent of all known mold species. You can also utilize a 3 percent hydrogen peroxide solution for its powerful bleaching and oxidizing properties.
Gather a clean spray bottle, a soft-bristled nylon scrub brush, and several microfiber cloths. Purchase 6-mil polyethylene plastic sheeting and a roll of heavy-duty painter’s tape to build your containment zone. Keep a heavy-duty trash bag inside the bathroom to dispose of contaminated cloths immediately after use.
How Do You Remove Mold on Ceiling in Bathroom?
This DIY methodology safely eradicates fungal growth covering less than 10 square feet. Attempting to clean larger infestations yourself risks massive spore inhalation and structural damage. Follow these steps sequentially to contain the spores and kill the root systems permanently.
Step 1: Contain the Bathroom Workspace
Isolate the bathroom to prevent cross-contamination throughout the house. Shut the bathroom door and seal the frame using painter’s tape and plastic sheeting. Turn off your central heating and cooling system to stop the HVAC unit from pulling airborne spores into the ductwork.
Tape a piece of plastic over the bathroom HVAC return vent. Lay drop cloths or plastic sheeting over your bathroom vanity, sink, and floor directly beneath the moldy area. This catches any liquid drips or falling debris during the scrubbing process.
Step 2: Apply a Non-Toxic Fungicidal Solution
Never scrub a dry mold colony. The friction will instantly launch billions of spores directly into your breathing zone. You must saturate the fungus to weigh the particles down.
Pour undiluted distilled white vinegar into a spray bottle. Lightly mist the entire affected area on the ceiling, ensuring you cover an extra two inches around the visible perimeter. Let the acetic acid sit undisturbed on the drywall for exactly 15 minutes. This dwell time allows the acid to soak through the paint and attack the hyphae inside the gypsum core.
Step 3: Gently Agitate the Surface Growth
Use a soft-bristled nylon brush or a damp sponge to clear away the dead surface growth. Apply very light pressure during this step. Wet drywall loses its structural integrity rapidly, and aggressive scrubbing will puncture the paper facing or create gouges in the ceiling.
Wipe the loosened debris away using a damp microfiber cloth. Rinse the cloth in a bucket of warm water frequently, or switch to a new cloth once it becomes heavily soiled. Do not reuse these cloths anywhere else in the house.
Step 4: Dry the Drywall Completely
The cleaning process introduces additional water into the already compromised ceiling. You must extract this moisture rapidly to prevent surviving spores from regenerating. Wipe the ceiling down with a dry towel to remove any standing liquid.
Bring a portable dehumidifier into the bathroom and set it to run continuously. Point an oscillating fan directly upward at the ceiling patch to accelerate evaporation. Keep the room sealed and leave the drying equipment running for 24 to 48 hours until the drywall feels completely rigid and dry to the touch.
Step 5: Seal and Repaint the Ceiling
Cleaning removes the biological growth but often leaves dark cosmetic stains embedded in the paint. You cannot simply apply standard latex wall paint over these stains. Standard paint contains organic compounds that future mold will use as a food source.
Apply a high-quality, shellac-based stain-blocking primer (such as Zinsser B-I-N or Kilz Restoration) over the cleaned area. Shellac creates an impermeable moisture barrier that seals off any microscopic stains. Once the primer dries, apply a semi-gloss or gloss bathroom-specific paint containing antimicrobial additives. Gloss finishes repel water droplets better than flat finishes.
Why Should You Never Use Bleach on Drywall?
Homeowners default to chlorine bleach because it instantly removes the ugly black stains associated with mold. This chemical reaction creates a dangerous illusion of cleanliness. Bleach fundamentally fails to solve fungal infestations on porous building materials.
The Mechanics of Porous Material Penetration
Chlorine bleach consists of roughly 5 to 10 percent sodium hypochlorite and 90 to 95 percent water. The chemical structure of sodium hypochlorite prevents it from penetrating porous surfaces like wood or drywall paper. When you spray bleach on a ceiling, the chlorine stays on the surface, while the massive volume of water soaks deep into the drywall core.
The surface chlorine bleaches the visible mold white, making it invisible to the naked eye. Meanwhile, the water feeds the hidden root system inside the drywall. According to Michael Pinto, CEO of Wonder Makers Environmental (2022), “Applying bleach to porous materials introduces the exact moisture the mold needs to regrow, often returning stronger within two weeks.” You should only use bleach on non-porous surfaces like glass, ceramic tile, or porcelain tubs.
Table 2: Comparison of Mold Treatment Solutions
| Cleaning Agent | Active Ingredient | Porous Penetration | Pros | Cons |
| White Vinegar | Acetic Acid (5%) | Excellent | Non-toxic, kills roots, cheap | Leaves a strong sour odor for hours |
| Hydrogen Peroxide | Hydrogen Peroxide (3%) | Good | Powerful oxidizer, bleaches stains, odorless | Can degrade cheap paint finishes |
| Commercial Biocide | Concrobium (Sodium Carbonate) | Excellent | Crushes spores as it dries, creates barrier | More expensive, requires heavy ventilation |
| Chlorine Bleach | Sodium Hypochlorite | Zero (Surface only) | Removes surface stains instantly on tile | Feeds roots in drywall, creates toxic fumes |
When Do You Need Professional Mold Remediation?
Certain mold infestations exceed the safety limits of DIY cleaning protocols. Attempting to tackle a massive fungal bloom without industrial containment equipment puts your health and property at risk. You must recognize the thresholds that require certified professional intervention.
The 10 Square Foot Rule
The United States Environmental Protection Agency (EPA) provides a strict metric for residential mold removal. According to 2023 EPA guidelines, any mold cluster covering more than 10 square feet requires professional remediation. This area equates to a single 3-foot by 3-foot patch.
Colonies larger than this threshold contain billions of spores. Disturbing an infestation of this size without negative air machines and industrial HEPA scrubbers will contaminate your entire home. Furthermore, a colony this large indicates a massive, ongoing moisture intrusion that surface cleaning will never resolve.
Remediation Cost Breakdown
Professional mold remediation involves controlled demolition and specialized chemistry. You are not paying for someone to simply spray the ceiling. You are paying for structural safety and verified air quality.
A standard professional bathroom ceiling treatment typically costs between $500 and $1,000. This price includes building physical containment barriers, setting up negative air pressure systems, applying antimicrobial biocides, and HEPA vacuuming all surfaces. If the mold stems from a roof leak and requires the removal of the ceiling drywall, framing repairs, and replacing soaked insulation, the total project cost frequently rises to $2,500 to $8,000.
What Are the Legal Options for Renters with Bathroom Mold?
Renters face unique challenges when dealing with fungal growth. The responsibility for remediation depends entirely on the root cause of the moisture. Tenants must protect themselves legally before attempting any physical repairs.
Documenting the Damage
Do not immediately scrub the mold away if you rent your home. You must preserve the evidence of the infestation. Photograph the ceiling from multiple angles, ensuring the images are clear and time-stamped. Take wide shots showing the entire bathroom and close-up shots of the structural damage.
If the mold returns repeatedly despite your normal cleaning efforts, the problem likely stems from a structural defect. Exhaust fans vented improperly into walls or slow leaks from upstairs plumbing fall under the landlord’s maintenance obligations.
Reporting Protocols
Notify your landlord or property management company immediately in writing. An email or certified letter creates a necessary paper trail. State clearly that the bathroom suffers from excessive moisture and fungal growth.
Under the implied warranty of habitability, property owners must maintain safe living conditions free from environmental hazards. If a landlord ignores written requests to fix structural leaks causing mold, tenants in many jurisdictions have the legal right to break their lease without penalty. Some states also allow “repair and deduct” actions, where the tenant hires an IICRC-certified professional and deducts the remediation cost directly from the next month’s rent. Always consult local housing codes before withholding rent.
How Do You Prevent Bathroom Ceiling Mold Permanently?
Killing existing mold solves the immediate biological threat, but it does not fix the environmental conditions that allowed the spores to thrive. You must change the thermodynamics and airflow patterns in your bathroom to prevent future colonies.
Optimizing Bathroom Ventilation
Your exhaust fan serves as your primary defense against fungal growth. The Home Ventilating Institute recommends a ventilation rate of 1 cubic foot per minute (CFM) for every square foot of bathroom space. A standard 10-foot by 10-foot bathroom requires a fan rated for at least 100 CFM.
You must run this fan during the shower and leave it running for exactly 20 minutes after you turn the water off. Many homeowners turn the fan off immediately upon leaving the room, trapping residual humidity inside. Install a digital countdown timer switch on the wall. This allows you to press a button, leave the room, and let the fan evacuate the moisture automatically.
Managing Attic Temperatures
Since cold ceilings drive condensation, you must address the attic space above the bathroom. Verify that the bathroom exhaust fan ducts entirely through the roof to the home’s exterior. Many older homes vent bathroom fans directly into the attic, dumping gallons of water vapor into the insulation and causing massive roof deck rot.
Ensure the attic floor insulation covers the area directly above the bathroom ceiling evenly. Pull back any batts that look compressed or water-damaged and replace them with fresh R-38 fiberglass. A thermally stable ceiling will never reach the dew point during a normal shower, eliminating the water source necessary for fungal survival.
Frequently Asked Questions
Can you paint directly over active bathroom mold?
Painting directly over active spores fails immediately and wastes material. The fungus will consume the organic binders within the fresh latex paint, break through the new coating within a few weeks, and continue spreading outward across the ceiling.
How long does bathroom ceiling mold take to grow?
Mold spores activate and begin growing microscopic roots within 24 to 48 hours of encountering a wet surface. While the biological growth starts immediately, visible discoloration on the ceiling paint typically takes 18 to 21 days to appear.
Is mold on a bathroom ceiling dangerous to your health?
Yes. As the fungus matures, it releases millions of spores into the air which trigger allergic reactions, asthma attacks, and chronic sinus inflammation. Prolonged exposure to toxic species like Stachybotrys can cause severe respiratory damage and neurological symptoms.
Does a bathroom exhaust fan kill existing mold?
An exhaust fan cannot kill spores or remove existing root systems from drywall. The fan simply extracts humid air to prevent new condensation from forming, which stops existing colonies from expanding and prevents new spores from activating.
Will opening a bathroom window stop mold growth?
Opening a window helps vent steam, but it fails to stop mold in humid or freezing climates. If the outside air is highly humid, you bring moisture in. If the outside air is freezing, it lowers the ceiling temperature and actually increases condensation inside the room.
Successfully eliminating mold on ceiling in bathroom environments requires combining chemical eradication with strict moisture control. By killing the roots with acetic acid and upgrading your ventilation habits, you can restore your ceiling and protect your home from future fungal attacks.


