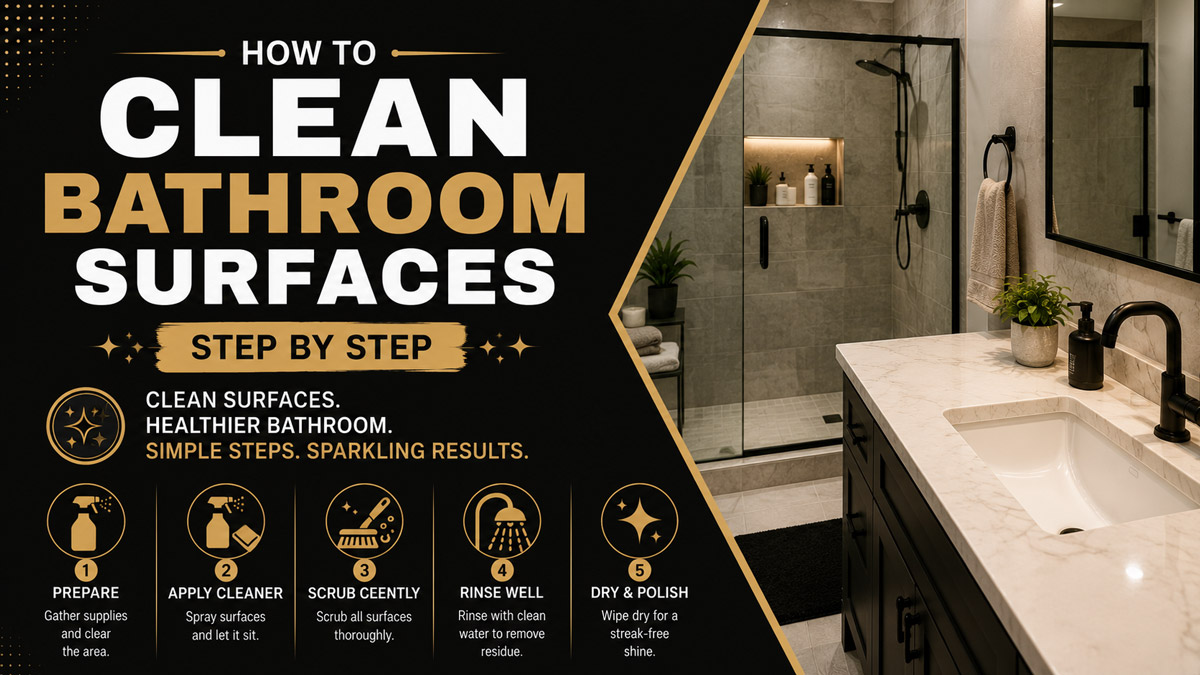
Learning how to clean bathroom surfaces correctly means working from top to bottom, removing dry debris before using liquid cleaners, allowing products enough contact time, and preventing toilet-area cross-contamination. This 10-step process takes about 45-75 minutes, requires beginner-level skills, and succeeds mainly when cleaners remain wet for their full label-directed dwell time.
Before You Start
A normal weekly bathroom cleaning usually takes 45-60 minutes. A neglected bathroom with soap scum, mineral scale, mold, or heavy toilet buildup may take 75-120 minutes.
Difficulty: Beginner
Typical cost per cleaning: $2-$7 in consumed supplies
Setup requirement: Running water, working ventilation, and enough time for surfaces to dry
Tools and Materials
| Item | Quantity or specification | Typical cost | Purpose |
| Nitrile or rubber gloves | 1 pair | $1-$5 | Protects hands |
| Safety glasses | 1 pair | $5-$15 | Protects eyes from splashes |
| Microfiber cloths | 5 cloths | $5-$12 | Cleaning separate zones |
| Bathroom cleaner | 12-24 oz bottle | $3-$7 | Removes soap, oils, and soil |
| EPA-registered disinfectant | 1 bottle | $4-$8 | Disinfects compatible surfaces |
| Toilet bowl cleaner | 2-4 oz per use | $3-$6 | Cleans bowl and under-rim deposits |
| Non-scratch sponge | 1 | $1-$4 | Scrubs tubs and sinks |
| Grout brush | 1 | $3-$8 | Cleans grout and corners |
| Toilet brush | 1 dedicated brush | $5-$15 | Scrubs toilet bowl |
| Vacuum or broom | 1 | Existing tool | Removes hair and debris |
| Mop and bucket | 1 set | Existing tool | Cleans floor |
| Squeegee | 8-12 inches wide | $5-$12 | Dries glass and tile |
| Baking soda | 1 cup available | Under $1 per use | Mild abrasive for compatible surfaces |
| Trash bag | 1 | Under $1 | Removes waste |
| Measuring spoon | 1 tablespoon | Existing tool | Dilutes floor cleaner accurately |
Use five cloth zones to prevent cross-contamination:
- Cloth 1: mirror and glass
- Cloth 2: sink and vanity
- Cloth 3: shower and tub
- Cloth 4: general touchpoints
- Cloth 5: toilet exterior only
Do not reuse the toilet cloth elsewhere, even after rinsing it during the same cleaning session.
Safety Checks
Read every product label before opening the bottle. Confirm that the cleaner is suitable for the surface and note its required contact time, ventilation instructions, dilution ratio, and protective-equipment requirements.
Warning: Never mix bleach with ammonia, vinegar, toilet bowl cleaner, rubbing alcohol, or another cleaning product. Mixing chemicals can release dangerous gases or create unpredictable reactions.
Test unfamiliar products on a hidden 1-inch area. Wait the label-recommended time, rinse if required, and inspect for dullness, discoloration, softening, or texture changes.
Bathroom Cleaning Steps at a Glance
| Step | Action | Typical time | Most common mistake |
| 1 | Ventilate and inspect | 3 minutes | Starting without reading labels |
| 2 | Clear surfaces and start laundry | 5 minutes | Cleaning around clutter |
| 3 | Dust from high to low | 5 minutes | Dusting after surfaces are wet |
| 4 | Remove hair and debris | 5 minutes | Mopping over loose hair |
| 5 | Apply pre-treatment | 5 minutes | Wiping cleaner off too soon |
| 6 | Clean shower or tub | 10-20 minutes | Using abrasive tools |
| 7 | Clean vanity and mirror | 8-12 minutes | Using too much glass cleaner |
| 8 | Clean and disinfect toilet | 8-12 minutes | Spreading toilet germs |
| 9 | Clean touchpoints | 5 minutes | Missing handles and switches |
| 10 | Mop, dry, and reset | 8-12 minutes | Replacing rugs on a wet floor |
Phase 1: Prepare the Bathroom
Step 1: Ventilate and Inspect the Room
Turn on the exhaust fan, open a window if available, and inspect every surface before applying cleaner.
Look for cracked grout, loose caulk, peeling finishes, natural stone, acrylic panels, rust, mold, and standing water. These conditions affect which cleaner and tool you should use. Check product labels before spraying anything.
Run the exhaust fan throughout cleaning. Keep it operating for at least 20 minutes afterward, especially when using fragranced, acidic, alkaline, or disinfecting products.
Identify delicate surfaces. Marble, travertine, limestone, and other calcium-based stones can be etched by vinegar and acidic bathroom cleaners. Acrylic tubs can scratch under abrasive powders or stiff pads. Brushed metal finishes may discolor when harsh cleaners remain too long.
You’ll know it worked when fresh air is moving, the room is brightly lit, and you have identified surfaces requiring special treatment.
A common mistake is treating every white surface as ceramic. White acrylic, cultured marble, porcelain, and painted wood may look similar but require different cleaners.
Step 2: Clear Surfaces and Start the Laundry
Remove every movable object from the floor, vanity, shower ledges, tub edge, toilet tank, and windowsill.
Place toiletries in a basket instead of moving each bottle repeatedly. Discard empty packages and obvious trash. Empty the wastebasket and install a fresh liner.
Shake bath mats outside or over the tub, then wash them according to their care labels. Place washable shower curtains and liners in the laundry only when their labels permit machine washing. Do not wash rubber-backed mats in hot water unless the manufacturer allows it because heat can damage the backing.
Move toothbrushes, razors, cosmetics, medicine, toilet paper, towels, and electrical devices outside the splash zone. Unplug hair dryers, trimmers, and heated styling tools.
You’ll know it worked when countertops, ledges, and most of the floor are fully exposed.
Do not spray cleaner around toiletries. Overspray can contaminate toothbrushes, medication containers, and personal-care products.
Step 3: Dust From the Ceiling Downward
Remove dry dust from vents, lights, shelves, frames, trim, and baseboards before wetting lower surfaces.
Use a dry microfiber cloth or vacuum brush attachment. Start with the exhaust grille and light fixture, then clean upper shelves, window trim, mirror frames, cabinet tops, towel bars, door trim, and baseboards.
Do not open or disassemble an electrical exhaust fan unless power has been shut off and the manufacturer permits user cleaning. Vacuum the accessible grille instead.
Fold the cloth into quarters. Each fold creates a fresh cleaning face, reducing the need to smear dust across multiple surfaces.
Work downward because loosened dust will fall onto areas that have not yet been washed. Most guides skip this order, then wet dust forms gray streaks around sink edges and baseboards.
You’ll know it worked when visible lint, cobwebs, and dust are gone from upper surfaces and no loose particles fall when you wipe a finger across the trim.
Step 4: Remove Hair and Loose Debris
Vacuum or sweep the dry floor, corners, tub edge, and drain area before applying water-based cleaners.
Hair is easier to remove while dry. Use a vacuum crevice tool around the toilet base, behind the door, under the vanity, and along baseboards. Pick up long hair from the tub or shower drain with tissue or a disposable glove.
Do not vacuum standing water. If the floor is damp, collect hair manually and allow the area to dry before vacuuming.
Check the drain cover. Remove visible hair near the opening, but do not push debris deeper into the pipe. A plastic drain-cleaning strip can remove shallow hair clogs, provided the drain design allows it.
You’ll know it worked when the floor feels grit-free under a dry paper towel and no visible hair remains around corners, drains, or the toilet base.
Mopping before this step creates wet hair clumps that stick to grout, mop heads, and baseboards.
Phase 2: Apply Cleaners and Use Dwell Time
Step 5: Pre-Treat the Toilet, Shower, Tub, and Sink
Apply compatible cleaners evenly and allow them to remain wet for the label-directed dwell time.
Apply 2-4 ounces of toilet bowl cleaner beneath the rim, directing it around the entire bowl. Close the lid to reduce accidental splashes while the product works.
Spray the shower walls, tub, sink basin, and other washable surfaces from about 6-8 inches away. Apply enough product to create a uniform wet film without causing heavy runoff. For many cleaning products, 5-10 minutes is sufficient for soil loosening, but the product label controls.
A disinfectant’s contact time may differ from a cleaner’s dwell time. Some disinfectants require a surface to remain visibly wet for several minutes. Reapply a light amount if the product begins drying before the required time ends.
Do not apply one cleaner over residue from another. Rinse between incompatible products.
You’ll know it worked when soap scum begins looking softer or streaked, dried toothpaste loosens, and toilet deposits are easier to disturb with the brush.
The main mistake is spraying and wiping immediately. That wastes the chemical action that makes scrubbing easier.
Phase 3: Clean the Wet Areas
Step 6: Scrub and Rinse the Shower or Bathtub
Scrub the pre-treated shower or tub with a non-scratch sponge, then rinse every cleaned surface thoroughly.
Begin at the highest wall and work downward. Use overlapping circular strokes on broad surfaces and short back-and-forth strokes along corners, grout lines, door tracks, and fixture bases.
For compatible ceramic tile grout, mix 3 tablespoons of baking soda with 1 tablespoon of water to create a 3:1 paste. Apply it to stained grout, wait 5-10 minutes, then scrub gently with a grout brush. Do not use this abrasive paste on polished stone, acrylic, coated glass, or delicate metal.
Rinse until water runs clear and surfaces no longer feel slippery. Product residue attracts soil and can make a tub unsafe.
Squeegee glass from top to bottom with overlapping passes. Wipe the blade after each pass. Dry metal fixtures with a clean cloth to limit water spots.
You’ll know it worked when the tub or shower feels smooth rather than greasy, rinse water has no foam, and glass appears clear after drying.
Do not use steel wool or aggressive scouring pads. They can permanently scratch porcelain glaze, glass, acrylic, and chrome.
Step 7: Clean the Vanity, Sink, Mirror, and Fixtures
Clean the mirror first, then wash the countertop, faucet, sink basin, and cabinet exterior.
Lightly dampen a dedicated glass cloth with water or glass cleaner. Two to four sprays are usually enough for an average mirror. Wipe from the top corner downward in an S-shaped pattern, then buff with a dry section.
Apply a surface-compatible cleaner to the vanity. On sealed laminate, solid-surface material, and many ceramic sinks, wipe with a damp microfiber cloth. For natural stone, use a pH-neutral stone cleaner rather than vinegar.
Use a soft toothbrush or detailing brush around the faucet base, drain rim, overflow opening, and countertop seam. Do not force water into cabinet joints or unsealed wood edges.
Rinse the sink, then dry the faucet and counter. Drying is not cosmetic only. It exposes missed residue and reduces mineral spotting.
You’ll know it worked when the mirror has no haze from normal viewing angles, the faucet feels smooth, the drain area has no visible ring, and the countertop is dry.
Using too much glass cleaner is the usual cause of streaks. Start with less product, then add more only when needed.
Phase 4: Clean and Disinfect High-Risk Areas
Step 8: Clean and Disinfect the Toilet
Scrub the bowl first, then clean the toilet exterior from the least contaminated area to the most contaminated area.
Raise the seat and scrub beneath the rim with the toilet brush. Continue around the waterline, bowl sides, trap opening, and lower bowl. Scrub for 1-2 minutes, then flush while holding the brush in the flowing water if the product label permits.
Allow the brush to drain over the bowl before returning it to the holder. Clean the holder separately when residue is visible.
Using the toilet-only cloth, clean the tank top, flush handle, lid, upper seat, lower seat, hinges, rim, exterior bowl, and base. Use a fresh cloth face as you move downward.
After visible soil is removed, apply an EPA-registered disinfectant to compatible high-touch surfaces. Keep them visibly wet for the product’s stated contact time, then wipe or air-dry according to the label.
You’ll know it worked when the bowl has no visible ring, hinges are free of residue, and the toilet exterior feels clean rather than sticky.
Never clean the toilet and then touch the faucet, cleaner bottles, or door handle with contaminated gloves. Change gloves or wash them before continuing.
Step 9: Clean Touchpoints and Bathroom Accessories
Clean and disinfect frequently touched bathroom surfaces after the main fixtures are complete.
Focus on door handles, light switches, cabinet pulls, drawer handles, towel bars, toilet-paper holders, shower controls, faucet handles, soap dispensers, trash-can lids, and grab bars.
Spray cleaner onto the cloth rather than directly into electrical switches, wall outlets, electronic scales, or smart devices. Wipe the surface, remove visible soil, and apply disinfectant separately when disinfection is appropriate and the material is compatible.
Wash reusable soap dishes and toothbrush holders with warm soapy water. Rinse and dry them before returning them to the vanity. Wipe product bottles that have sticky rings or soap residue underneath.
You’ll know it worked when handles feel clean, switches have no fingerprints, accessories are dry, and no sticky residue remains beneath bottles.
Do not overlook the underside of handles. Fingers frequently contact these areas even when the top looks clean.
Phase 5: Finish the Floor and Reset the Room
Step 10: Mop, Dry, and Replace Bathroom Items
Mop from the farthest corner toward the doorway, allow the floor to dry, and return only clean items.
Sweep or vacuum once more if cleaning loosened hair or debris. Dilute floor cleaner according to its label. When the product allows it, a common working mixture is 2 tablespoons of cleaner per gallon of warm water.
Use a damp mop rather than a dripping one, especially on laminate, wood, vinyl seams, or floors with damaged grout. Mop behind the toilet, along baseboards, around the vanity, and toward the exit.
Change the water if it becomes gray or contains visible debris. Dirty mop water redistributes soil instead of removing it.
Allow the floor to air-dry completely. Return clean bath mats, towels, toiletries, wastebasket, and accessories. Leave space between bottles so future wiping takes less time.
You’ll know it worked when the floor dries without sticky patches, footprints, hair, or dull cleaner residue.
Replacing rugs too soon traps moisture beneath them and may encourage odor, mildew, or floor discoloration.
Common Mistakes and How to Fix Them
Cleaner Dried Before Contact Time Ended
Cause: Too little product, strong airflow, warm surfaces, or an overly large working area.
Fix: Work in smaller sections. Reapply enough disinfectant to restore a visibly wet film, then restart the complete label-directed contact time.
The Mirror Looks Streaky
Cause: Excess cleaner, a dirty cloth, hard-water residue, or wiping before oily deposits were removed.
Fix: Wipe once with a clean, lightly damp cloth. Immediately buff with a dry microfiber cloth. For compatible glass, use a manufacturer-approved glass cleaner sparingly.
Shower Glass Still Looks Cloudy
Cause: Hard-water minerals remain after soap residue has been removed.
Fix: On acid-safe glass only, apply warm white vinegar, leave it for 10-15 minutes, scrub with a non-scratch sponge, rinse thoroughly, and squeegee dry. Keep vinegar away from natural stone and vulnerable metal finishes.
Grout Still Has Black Spots
Cause: Mold has entered porous grout or failed caulk.
Fix: Apply a compatible mildew remover according to its label. For surfaces that permit peroxide, use hydrogen peroxide without combining it with another cleaner. Replace crumbling or deeply contaminated caulk rather than repeatedly bleaching it.
The Toilet Has Orange or Brown Stains
Cause: Iron or mineral deposits rather than ordinary organic soil.
Fix: Use a toilet-safe mineral or rust remover. Avoid automatically applying chlorine bleach because bleach may not remove iron staining and can complicate later treatment. Follow the bowl manufacturer’s care instructions.
The Floor Feels Sticky After Mopping
Cause: Too much cleaner, dirty water, or insufficient rinsing.
Fix: Mop again with clean water if the flooring manufacturer permits it. Use a freshly rinsed mop head and a thinner cleaning solution next time.
Variations for Different Bathroom Conditions
How to Clean a Very Dirty Bathroom
Plan 90-120 minutes and divide the work into zones. Remove heavy dry debris first. Apply cleaner to one area at a time so products do not dry.
Use two cleaning cycles on heavy soap scum. The first softens the upper layer. Rinse completely before applying the second treatment.
Replace heavily soiled cloths rather than continuously rinsing them in one bucket. Use separate water for the shower, vanity, toilet, and floor when contamination is substantial.
How to Clean Marble or Natural Stone
Use a pH-neutral cleaner labeled for the specific stone. Avoid vinegar, lemon juice, acidic descalers, chlorine products not approved for stone, and abrasive powders.
Blot spills instead of rubbing aggressively. Use a soft cloth or non-scratch sponge. Rinse lightly and dry immediately.
Stone sealers reduce absorption but do not make stone acid-proof. Test every new product in a hidden area.
How to Clean an Acrylic Tub or Shower
Use warm water, mild dishwashing liquid, or a cleaner specifically labeled for acrylic. Apply it with a soft microfiber cloth or non-scratch sponge.
Avoid scouring powders, melamine foam unless approved, razor blades, steel wool, and stiff brushes. These can create microscopic scratches that later trap grime.
Rinse thoroughly and dry with a soft cloth.
How to Clean a Bathroom Without Commercial Cleaner
Mild dishwashing liquid diluted in warm water can remove ordinary body oils and soap residue from many washable surfaces. Baking soda can provide gentle abrasion on compatible ceramic surfaces.
White vinegar may dissolve mineral scale on acid-resistant glass and ceramic, but it is unsuitable for marble, limestone, travertine, and some metal finishes.
A homemade cleaner is not automatically a disinfectant. Use an appropriately registered disinfectant when disinfection is necessary.
How Long Does Bathroom Cleaning Take?
| Bathroom condition | Typical time | Main time driver |
| Light weekly cleaning | 25-40 minutes | Minimal buildup |
| Standard full cleaning | 45-60 minutes | Shower and toilet cleaning |
| Deep cleaning | 75-120 minutes | Scale, mold, grout, clutter |
| Large primary bathroom | 60-100 minutes | More fixtures and floor area |
| Post-illness cleaning | 60-90 minutes | Disinfectant contact times |
The shower usually determines the total duration. Glass doors, textured tile, grout, hard water, and built-in shelves add cleaning time.
What Does Bathroom Cleaning Cost?
A household using products already on hand may consume about $2-$7 in cleaner, cloth wear, gloves, trash bags, and laundry utilities per session.
A first-time supply setup commonly costs $35-$90, depending on whether you need a mop, squeegee, brushes, microfiber cloths, safety glasses, and multiple cleaners.
Professional cleaning costs vary widely by location, bathroom size, service frequency, and buildup. Request a written scope that explains whether grout restoration, mold treatment, shower-glass descaling, laundry, or interior cabinet cleaning is included.
Bathroom Cleaning Schedule
| Frequency | Tasks |
| Daily | Squeegee glass, hang towels, rinse sink, remove standing water |
| Twice weekly | Wipe sink, faucet, toilet seat, and touchpoints |
| Weekly | Complete standard bathroom cleaning |
| Monthly | Clean vents, baseboards, drains, grout, and accessories |
| Every 3-6 months | Wash curtain, descale fixtures, inspect caulk and seals |
A five-minute daily reset can reduce weekly scrubbing. Drying wet surfaces is especially effective because soap scum and mineral deposits develop as water evaporates.
Frequently Asked Questions
What Should Be Cleaned First in a Bathroom?
Start with ventilation, decluttering, dusting, and dry hair removal. Apply wet cleaners only after loose debris is gone. This sequence prevents dust and hair from turning into sticky sludge and allows pre-treatment products to work while you clean another area.
Should I Clean or Disinfect First?
Clean first. Cleaning removes visible dirt, oils, soap, and organic material. Disinfection follows on compatible surfaces after the soil is gone. Apply enough disinfectant to keep the surface wet for the complete contact time listed on the product label.
Can I Use the Same Cloth for the Whole Bathroom?
No. Use separate cloths for glass, vanity surfaces, shower areas, touchpoints, and the toilet. The toilet cloth should never contact the sink, faucet, countertop, cleaner bottles, or door handle during the same cleaning session.
How Often Should a Bathroom Be Deep Cleaned?
Most frequently used bathrooms benefit from weekly standard cleaning and a deeper monthly cleaning. Bathrooms with several users, poor ventilation, hard water, children, or illness may need more frequent attention. Clean visible spills, urine, mold, and standing water immediately.
Can I Mix Vinegar and Baking Soda?
Combining them produces bubbling, but they largely neutralize each other. Use baking soda separately as a mild abrasive on compatible surfaces, or use vinegar separately for mineral buildup on acid-resistant surfaces. Never combine either product with bleach or another cleaner.
Why Does My Bathroom Smell After Cleaning?
Common causes include a dirty drain, damp bath mat, wet toilet-brush holder, concealed urine around the toilet base, mildew, a dry drain trap, or cleaner residue. Inspect each source separately rather than masking the odor with fragrance.
Conclusion
The safest way to learn how to clean bathroom surfaces is to follow a consistent order: ventilate, clear clutter, remove dry debris, pre-treat grime, clean each fixture, disinfect high-touch areas, and finish with the floor. Use separate cloths, respect product contact times, protect delicate materials, and dry the room before replacing rugs and toiletries.


