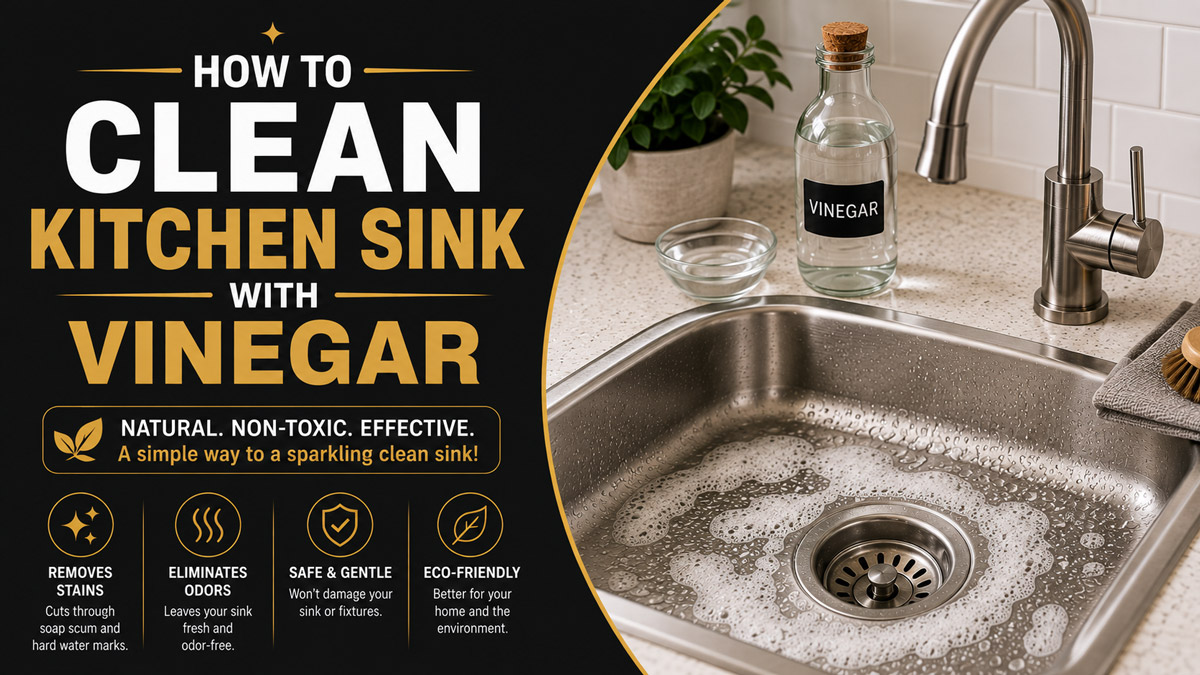
To clean a kitchen sink with vinegar, first wash away food and grease with dish soap, then apply a 1:1 solution of distilled white vinegar and water for 5-10 minutes. Gently scrub, rinse thoroughly, and dry the basin. Confirm that the sink manufacturer permits acidic cleaners before applying vinegar to composite, stone, or specialty finishes.
Key Facts at a Glance
- Distilled white vinegar works best on hard-water film, soap residue, light grease, and odor-causing buildup.
- A 1:1 vinegar-and-water solution is sufficient for most routine sink cleaning.
- Vinegar cleans and deodorizes, but it is not a substitute for an EPA-registered disinfectant when disinfection is necessary.
- Never mix vinegar with chlorine bleach because the combination can release toxic chlorine gas.
- Drying the sink after rinsing prevents more water spots than adding extra vinegar.
- Natural stone and acid-sensitive finishes should be cleaned with a manufacturer-approved, pH-neutral product.
Before You Start
| Requirement | Typical amount or value | Practical note |
| Total working time | 15-25 minutes | Add 20-30 minutes for heavy mineral deposits |
| Difficulty | Beginner | No specialized equipment is required |
| Distilled white vinegar | 1/2-1 cup | Standard household vinegar is usually about 5% acidity |
| Warm water | 1/2-1 cup | Mix with vinegar for routine cleaning |
| Dish soap | 1 teaspoon | Removes grease before vinegar attacks mineral film |
| Baking soda | 2-4 tablespoons | Optional for stubborn grime or odor |
| Microfiber cloths | 2 | Use one wet and one dry cloth |
| Non-scratch sponge | 1 | Avoid steel wool and harsh scouring pads |
| Old toothbrush | 1 | Useful around drains, seams, and faucet bases |
| Expected material cost | About $0.25-$1 | Depends on local vinegar and cloth prices |
Check the sink manufacturer’s care instructions before starting. Stainless steel, glazed porcelain, fireclay, and some engineered composites may tolerate diluted vinegar, but approved contact times and cleaning products vary.
Elkay, for example, recommends a 50/50 white-vinegar-and-water solution for certain Quartz Classic composite sinks. That manufacturer guidance shows why blanket claims such as “never use vinegar on any quartz-composite sink” are too broad.
How to Clean Kitchen Sink With Vinegar Step by Step
Step 1: Identify the Sink Material
Confirm whether the basin is stainless steel, porcelain, fireclay, enameled cast iron, acrylic, copper, natural stone, or engineered composite. Sink material determines whether vinegar is appropriate, how long it can remain on the surface, and which scrubbing tool is safe.
Look beneath the sink, check purchase records, or search the model number printed on a label. Do not assume a black sink is granite composite or that a white sink is porcelain. Similar-looking materials may have different care requirements.
You will know this step is complete when you can match the sink to a manufacturer care guide or one of the material categories below.
| Sink material | Vinegar guidance | Maximum starting contact time | Preferred alternative |
| Stainless steel | Usually suitable when diluted | 5-10 minutes | Dish soap for daily grease |
| Glazed porcelain | Usually suitable if glaze is intact | 5 minutes | Baking soda paste for marks |
| Fireclay | Often suitable when diluted | 5 minutes | Mild dish soap |
| Enameled cast iron | Use cautiously on intact enamel | 3-5 minutes | Non-abrasive cream cleaner |
| Quartz or granite composite | Follow manufacturer instructions | 2-5 minutes initially | Manufacturer-approved cleaner |
| Natural granite or marble | Avoid routine vinegar use | 0 minutes | pH-neutral stone cleaner |
| Copper | Avoid unless manufacturer approves | 0 minutes | Copper-safe soap or cleaner |
| Acrylic or solid surface | Test first | 2 minutes | Mild soap and warm water |
Common mistake: Treating “quartz countertop,” “quartz-composite sink,” and “natural stone sink” as identical materials. They have different resin content, finishes, and care instructions.
Step 2: Empty and Rinse the Basin
Remove dishes, strainers, racks, sponges, food pieces, and removable disposal guards. Rinse the entire basin with warm water, directing crumbs into a waste basket or strainer rather than forcing large scraps down the drain.
Warm water softens greasy residue, but extremely hot water is unnecessary. Water that is comfortable for hand washing is adequate for normal household grease.
Pay attention to the rear ledge, corners, drain flange, overflow opening, faucet base, and silicone seams. These low-movement areas collect residue even when the center of the sink looks clean.
You will know the rinse is complete when no loose food, coffee grounds, flour, or visible debris remains.
Common mistake: Pouring vinegar directly onto a sink that still contains cooking oil. Acid is better at dissolving alkaline mineral deposits than removing a thick layer of fat.
Step 3: Wash Away Grease With Dish Soap
Apply about 1 teaspoon of dish soap to a damp, non-scratch sponge. Wash the basin, drain rim, faucet base, divider, and sink ledges for 1-2 minutes, then rinse away the suds.
This prewash matters because cleaning and disinfecting are separate processes. The CDC states that cleaning with soap or detergent removes dirt, impurities, and many germs, while disinfection is a separate treatment used when circumstances require it.
Use light pressure. For stainless steel, move the sponge along the visible grain rather than across it. For glazed sinks, avoid gritty pads that can dull the finish.
You will know the degreasing step worked when water spreads evenly instead of separating into oily beads.
Common mistake: Skipping soap because vinegar is considered an “all-purpose” cleaner. Vinegar alone may leave greasy cooking residue behind.
Step 4: Apply Diluted Vinegar
Mix equal quantities of distilled white vinegar and warm water in a spray bottle or bowl. A typical single-bowl sink needs about 1/2 cup of each. Spray or wipe the solution across the basin until the surface is evenly damp but not flooded.
Allow the solution to remain for 5 minutes during routine cleaning. Extend the time to 10 minutes for visible hard-water haze on compatible stainless steel. Keep the surface damp by reapplying a small amount if it begins drying.
Ruvati recommends white vinegar for removing mineral deposits from stainless steel and advises routine rinsing and drying as part of sink care. Its guidance for colored stainless finishes also warns against leaving vinegar on for longer than 30 minutes.
You will know the acid is working when chalky deposits become softer or easier to smear with a damp cloth.
Common mistake: Assuming a longer soak always produces a better result. Extended acid exposure can affect plated parts, sealants, patinas, rubber components, and specialty coatings.
Step 5: Loosen Residue With Gentle Scrubbing
Scrub the damp surface using a microfiber cloth, soft sponge, or nylon brush. Work for 1-3 minutes, concentrating on the drain rim, corners, water line, faucet base, and textured areas.
For stainless steel, follow the polish lines. For porcelain or fireclay, use circular movements with minimal pressure. Around caulk and gaskets, use a soft toothbrush instead of a stiff detailing brush.
Vinegar removes mineral film through acid contact, while the cloth supplies the mechanical action needed to lift loosened residue. Neither part should be omitted when the sink has visible buildup.
You will know the surface is clean when it feels smooth under a gloved fingertip and no gray, greasy, or chalky residue transfers to a white cloth.
Common mistake: Using steel wool. Steel fragments may scratch stainless steel, become embedded, and later create rust-colored spots.
Step 6: Rinse the Sink Thoroughly
Rinse every treated surface with clean warm water for 30-60 seconds. Flush corners, seams, drain hardware, faucet bases, and accessories where acidic solution may collect.
Thorough rinsing removes loosened scale and stops prolonged acid contact. It also prevents the hazy residue that can appear when vinegar, minerals, soap, or baking soda dries on the surface.
Do not apply bleach immediately after vinegar. The CDC warns that household chlorine bleach can release toxic chlorine gas when mixed with acidic cleaning agents. Poison Control gives the same direct warning for vinegar and chlorine bleach.
You will know rinsing is complete when the water runs clear and the vinegar odor is faint.
Common mistake: Rinsing the basin but forgetting vinegar-soaked towels around the faucet or sprayer hose.
Step 7: Dry and Inspect the Finish
Dry the basin immediately with a clean microfiber cloth. Begin at the faucet deck and work toward the drain so water is not pulled back across finished areas.
Drying is essential because fresh tap water can deposit new calcium and magnesium residue as it evaporates. A properly dried sink may look cleaner than one treated with a stronger acid solution but left wet.
Inspect the sink under overhead light. Reclean only the remaining spots rather than repeating the entire process. Persistent marks may be scratches, rust transfer, enamel damage, etching, discoloration, or worn coating rather than removable dirt.
You will know the job is finished when the surface is dry, odor-free, and evenly reflective or evenly matte according to its original finish.
Common mistake: Applying olive oil as a routine final coating. Excess oil attracts dust, creates streaks, and may become rancid around a food-preparation area.
How Does Vinegar Clean a Kitchen Sink?
Vinegar cleans a kitchen sink primarily because its acetic acid dissolves alkaline mineral deposits and loosens soap film. It is particularly useful against the calcium-rich white haze created by hard water, but it is less effective against thick grease, deeply oxidized metal, damaged enamel, or established plumbing blockages.
Standard distilled white vinegar normally contains about 5% acetic acid. Cleaning vinegar may contain approximately 6% acidity, making it stronger but not automatically necessary for household sink care.
The acid reacts with calcium-carbonate scale, converting part of the solid deposit into compounds that rinse away more easily. The visible bubbling sometimes observed on heavy scale is associated with carbon dioxide formation during the acid-carbonate reaction.
Vinegar’s limitations matter. It should be treated as a mineral-removing cleaner and deodorizer, not as a universal chemical for every soil and every material.
Should You Mix Baking Soda and Vinegar?
Baking soda and vinegar can help loosen light debris through foaming, but mixing them in advance neutralizes much of their useful acidity and alkalinity. For stubborn sink grime, use baking soda first as a mild abrasive, rinse it away, and then apply vinegar separately for remaining mineral film.
To use baking soda safely:
- Wet the compatible sink.
- Sprinkle 2-4 tablespoons across the basin.
- Scrub gently with a damp sponge.
- Rinse away the powder completely.
- Apply diluted vinegar only if mineral haze remains.
- Rinse and dry again.
The immediate fizz looks powerful because carbon dioxide gas forms, but visual activity does not prove that the final mixture is stronger than either ingredient used at the correct stage.
Do not use baking soda aggressively on mirror-polished metal, delicate coatings, acrylic, copper patina, or damaged enamel. Even a mild abrasive can change a vulnerable finish.
How Do You Remove Hard-Water Stains From the Faucet?
Wrap the affected faucet area with a cloth or paper towel saturated in a 1:1 vinegar-and-water solution for 10-20 minutes. Remove the wrap, loosen softened scale with a soft toothbrush, rinse thoroughly, and dry immediately.
Use this method only when the fixture manufacturer permits acidic cleaners. Chrome, stainless steel, and brushed nickel may tolerate brief contact, but unlacquered brass, oil-rubbed bronze, gold-tone plating, and damaged finishes can discolor.
For an aerator, unscrew it if the manufacturer’s instructions allow removal. Soak only the removable mineral-covered components, not decorative finishes or rubber pieces, for about 15-30 minutes. Rinse, reassemble, and run water for 30 seconds.
Stop immediately if the cloth picks up the fixture’s color or the finish becomes cloudy.
Can Vinegar Clean a Kitchen Sink Drain?
Vinegar can reduce odor and soften light residue near a drain opening, but it cannot reliably remove a solid grease plug, foreign object, damaged pipe, or severe blockage. Use it as a maintenance treatment rather than a guaranteed drain opener.
For a mildly odorous, freely draining sink:
- Remove visible debris from the strainer.
- Add 1/2 cup of baking soda to the drain.
- Slowly add 1 cup of vinegar.
- Cover the opening for 10 minutes.
- Flush with hot tap water for 1-2 minutes.
Use hot tap water rather than automatically pouring boiling water into plumbing. Boiling water may be unsuitable for some plastic pipework, seals, disposal components, or sink materials.
Never combine this treatment with bleach, caustic drain opener, acidic drain cleaner, or another plumbing chemical. If a chemical product was already used, follow its label rather than adding vinegar.
A drain that repeatedly smells, gurgles, backs up, or drains slowly may require trap cleaning, disposal inspection, vent diagnosis, or professional plumbing service.
How Do You Clean a Garbage Disposal With Vinegar?
Clean a garbage disposal by turning off its power, removing accessible debris with tongs, washing the removable splash guard, and flushing the operating disposal with cold water. Vinegar may help with odor, but it should not replace safe mechanical cleaning.
Never place a hand inside the disposal chamber. Disconnect power at the wall switch and, where appropriate, at the breaker before removing debris.
After restoring power, run cold water and operate the unit according to the manufacturer’s instructions. A small amount of diluted vinegar may be used only when the disposal manual permits it. Avoid repeated heavy baking-soda treatments because accumulated powder and grease can form a paste in poorly flushed plumbing.
Persistent odor usually comes from the underside of the splash guard, trapped food, or a drain connection rather than the visible stainless-steel opening.
Vinegar Types Compared
| Product | Typical acidity | Kitchen-sink use | Main limitation |
| Distilled white vinegar | About 5% | Best general option when permitted | Strong odor |
| Cleaning vinegar | About 6% | Heavy mineral film on compatible surfaces | Greater finish risk |
| Apple cider vinegar | About 5% | Technically usable | Color and organic residue |
| Rice vinegar | About 4-5% | Not cost-effective | May contain sugar or seasoning |
| Horticultural vinegar | 20-45% | Do not use for routine kitchen cleaning | Corrosive, injury risk |
| Premixed vinegar spray | Product-specific | Convenient light cleaning | May contain fragrance or surfactants |
Choose plain distilled white vinegar unless the sink manufacturer recommends another product. Industrial or horticultural acetic-acid concentrates are not stronger versions of ordinary household cleaner in a practical sense. They require specialized handling and can cause chemical injuries.
Common Mistakes and How to Fix Them
| Problem | Likely cause | Recovery |
| White haze after cleaning | Dried minerals or baking soda | Rinse again, then dry with microfiber |
| Greasy basin remains | Vinegar used without detergent | Wash with dish soap before repeating |
| Vinegar odor persists | Incomplete rinsing or soaked accessories | Rinse for 60 seconds and ventilate |
| Dark finish looks patchy | Acid affected coating or residue dried | Stop cleaning and check manufacturer guidance |
| Rust-colored dots appear | Steel-wool contamination or rust transfer | Use a manufacturer-approved rust treatment |
| Drain still smells | Debris under splash guard or in trap | Clean removable parts or inspect the trap |
| Sink drains slowly | Physical blockage or grease accumulation | Use mechanical clearing or call a plumber |
| Surface feels rough | Etching, damage, or remaining scale | Stop abrasive cleaning and identify the material |
Mistake 1: Using Vinegar as a Disinfectant
Vinegar should not be assumed to provide reliable disinfection against every kitchen pathogen. The CDC distinguishes ordinary cleaning with soap or detergent from disinfection with an appropriate disinfecting product. In most routine household situations, cleaning may be sufficient, but higher-risk contamination can require a labeled disinfectant.
Mistake 2: Mixing Vinegar With Bleach
Never mix vinegar with chlorine bleach, and never apply one directly after the other without thoroughly rinsing. Acid can react with hypochlorite bleach and release chlorine gas, which can irritate the eyes and airways and cause serious respiratory injury.
Mistake 3: Ignoring Manufacturer Instructions
Sink composition alone does not determine compatibility. Coatings, pigments, drain hardware, adhesives, caulk, protective sealers, and warranty terms also matter.
A manufacturer may approve diluted vinegar for one composite series and recommend a different cleaner for another. Product-specific guidance takes priority over a universal home-cleaning recipe.
How Often Should You Clean the Sink?
Clean visible food and grease from the kitchen sink daily, then use diluted vinegar weekly or when hard-water haze appears. Homes with very hard water may need targeted descaling every 3-7 days, while soft-water homes may need vinegar only once or twice per month.
Drying after each major use reduces the required frequency. Also remove wet sponges, dishcloths, strainers, and rubber mats that trap moisture against the basin.
Perform a deeper cleaning after handling raw meat, cleaning heavily soiled produce, washing pet items, or dealing with illness in the household. Choose the cleaning or disinfecting procedure appropriate to the contamination rather than automatically increasing vinegar strength.
When Should You Avoid Vinegar?
Avoid vinegar when the sink or nearby counter contains natural marble, limestone, travertine, onyx, or another acid-sensitive stone. Acid can etch calcium-rich stone, creating dull spots that cleaning cannot reverse.
Also avoid or limit vinegar on:
- Unsealed grout or deteriorated caulk
- Unlacquered decorative metals
- Oil-rubbed or living finishes
- Chipped enamel with exposed metal
- Unknown black, gold, or colored coatings
- Rubber components not rated for acid exposure
- Recently applied stone sealer
- Any surface whose manufacturer prohibits acidic cleaners
When uncertain, use warm water, a few drops of dish soap, and a soft microfiber cloth. Test any new cleaner on a hidden area and inspect it after drying.
Frequently Asked Questions
Can I use undiluted vinegar on a stainless-steel sink?
Undiluted white vinegar can be used for brief, targeted treatment of mineral deposits when the sink manufacturer permits it. A 1:1 dilution is safer for routine cleaning. Keep contact time short, rinse thoroughly, follow the grain, and dry the stainless steel to prevent fresh water spots.
Does vinegar remove rust from a kitchen sink?
Vinegar may loosen light surface rust or rust transferred from a can, steel tool, or wire pad. It will not repair pitted stainless steel or exposed metal beneath chipped enamel. Use a short spot treatment, rinse, and identify the rust source before applying repeated acid treatments.
Can vinegar damage a quartz-composite sink?
Vinegar can affect some composite finishes, but compatibility depends on the manufacturer and model. Some Elkay Quartz Classic instructions permit a 50/50 vinegar-and-water solution. Begin with the approved care guide, use a brief contact time, rinse completely, and never assume countertop-care advice applies directly to a composite sink.
Why does my sink still smell after vinegar?
A persistent smell usually indicates trapped food beneath the strainer, inside the disposal splash guard, in the P-trap, or within an overflow channel. Cleaning the basin cannot reach those locations. Remove and wash accessible components safely, flush the drain, and investigate slow drainage or plumbing defects.
Is cleaning vinegar better than white vinegar?
Cleaning vinegar is slightly more acidic and may dissolve heavy scale faster, but ordinary 5% distilled white vinegar handles most sink maintenance with less finish risk. Stronger is not always better. Use cleaning vinegar only on compatible surfaces, wear gloves, ventilate the room, and shorten the initial contact time.
Can I disinfect the sink after cleaning with vinegar?
Yes, but first rinse the vinegar away completely and dry or prepare the surface according to the disinfectant label. Never combine vinegar with bleach. When disinfection is needed, use an EPA-registered product labeled for the sink material and follow its stated dilution, wet-contact time, ventilation, and rinsing requirements.
The Bottom Line
The safest way to clean a kitchen sink with vinegar is to remove grease with dish soap, apply a 1:1 vinegar-and-water solution for 5-10 minutes, scrub gently, rinse thoroughly, and dry immediately. Vinegar is most useful for hard-water film and odors, not every stain or every sink material.
Check the sink manufacturer’s instructions before treatment, especially for composite, natural-stone, copper, colored, or coated sinks. Never mix vinegar with chlorine bleach. When the sink needs true disinfection rather than routine cleaning, use an appropriate labeled disinfectant after all vinegar has been rinsed away.


