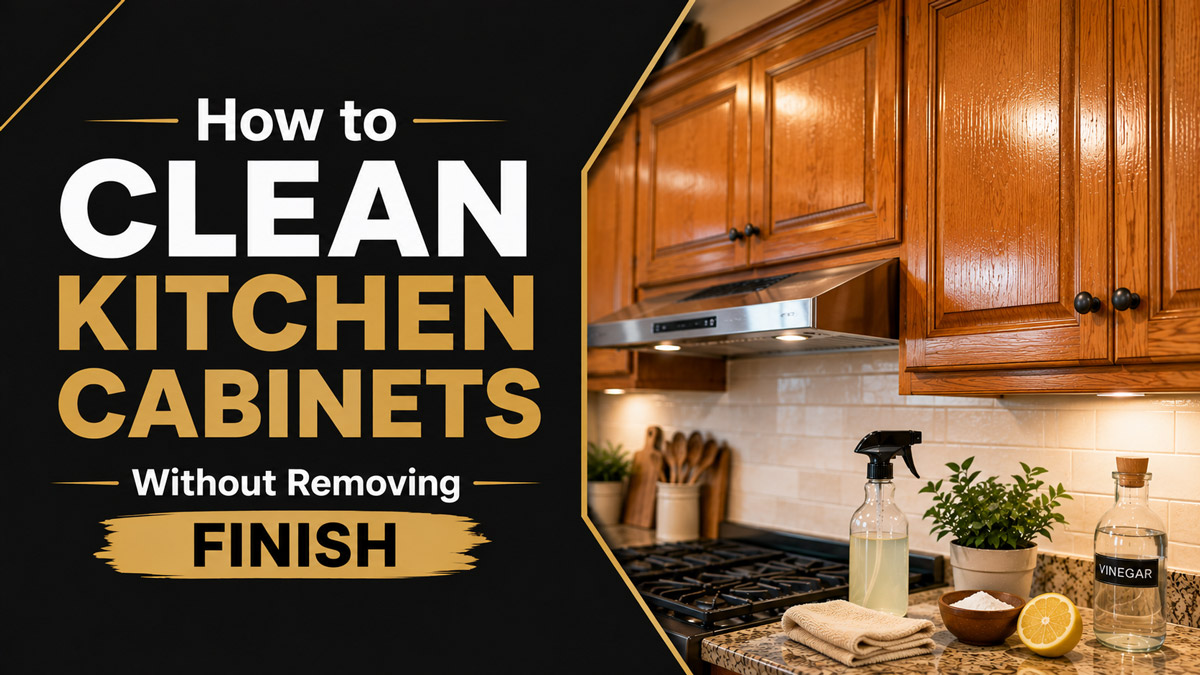
The most effective method to clean kitchen cabinets without removing the finish involves wiping surfaces with a highly diluted solution of one tablespoon mild liquid dish soap per one gallon of warm water. Apply this mixture using a lightly damp microfiber cloth. Immediately rinse away soap residue with a separate water-dampened cloth, then buff the wood completely dry.
At a Glance
- Water saturation causes wood warping and finish peeling within minutes.
- Standard liquid dish soap provides the safest pH balance for cleaning clear topcoats.
- White distilled vinegar dissolves oxidized grease but slowly degrades polyurethane finishes over time.
- Melamine foam sponges act as fine sandpaper and permanently scratch cabinet sealants.
- Sticky cabinet surfaces often indicate permanent chemical degradation of the lacquer.
What is the safest soap for cleaning wood cabinet finishes?
Standard liquid dish soap mixed with warm water is the safest cleaning agent for wood cabinet finishes. Liquid dish detergents contain mild surfactants that lift cooking oils without introducing harsh alkaline chemicals into the wood grain. You should combine one to two tablespoons of a basic dish soap with one gallon of warm water.
Professional cabinet installers typically recommend avoiding dish soaps that contain added bleach, heavy artificial fragrances, or aggressive grease-cutting solvents. These additives can soften clear coats over repeated applications. You only need a tiny amount of soap to break the surface tension of the water and emulsify light kitchen grease. Using too much soap creates a thick film on the cabinet doors. This film attracts airborne dust and cooking aerosols, creating a dull appearance that requires harder scrubbing to remove later. Stick to the precise one-ounce-per-gallon measurement to ensure the solution remains gentle enough for daily or weekly use on sensitive clear coats.
How much water is safe to use on wood kitchen cabinets?
Wood kitchen cabinets can only withstand a slightly damp cloth that produces no visible water droplets when squeezed. You must wring your cleaning cloth completely dry before allowing it to touch the cabinet surface. Water represents the single greatest threat to wooden cabinetry.
Cabinet doors feature unsealed seams where the horizontal rails meet the vertical stiles. When excess water drips down the face of a cabinet, it pools inside these microscopic joints. The raw wood inside the joint absorbs the liquid like a sponge. This absorption causes the wood fibers to expand violently. The expansion forces the rigid protective topcoat to crack, flake, and peel away from the surface. You should never spray soapy water directly onto the cabinet doors. Spraying guarantees that liquid will run down the surface and settle into crevices. Always apply the moisture directly to your cloth, wring it out aggressively, and only then bring the cloth to the wood.
How long does it take for water damage to ruin cabinet finishes?
Water damage can ruin specific cabinet finishes in as little as five minutes. The timeline for irreversible damage depends entirely on the chemical composition of the protective topcoat and the integrity of the surface sealant. You cannot leave standing moisture on any cabinet material without risking permanent degradation.
| Cabinet Finish Type | Safe Moisture Exposure Time | Primary Failure Mechanism |
|---|---|---|
| Catalyzed Lacquer | 5 to 10 minutes | Finish blushes (turns milky white). |
| Polyurethane | 15 to 20 minutes | Water penetrates microscopic scratches. |
| Thermofoil (PVC) | 1 to 2 hours | Moisture weakens underlying MDF glue. |
| Unsealed Wood | 0 minutes | Wood fibers instantly swell and warp. |
Professional refinishers typically observe that water left on catalyzed lacquer causes a chemical reaction called blushing. Blushing occurs when moisture becomes trapped under the top layer of the clear coat, creating a cloudy white stain that you cannot wipe away. Thermofoil cabinets resist surface water longer, but moisture that reaches an edge will quickly dissolve the industrial adhesive holding the plastic veneer to the particleboard core. You must follow the strict rule of drying every cabinet door immediately after washing it.
How do you prepare and test a cabinet finish before applying cleaner?
You must test your cleaning solution on a hidden interior surface of the cabinet before applying it to the highly visible exterior doors. Testing prevents catastrophic finish failure on older or degraded cabinetry. You should follow a specific sequence to evaluate the health of your cabinet sealant.
- Locate a hidden area on the inside face of a lower cabinet door.
- Apply a small dot of your diluted soap solution using a white cotton swab.
- Wait exactly two minutes to observe any chemical reactions.
- Wipe the spot firmly with a clean white microfiber cloth.
- Inspect the cloth for any transfer of wood stain or colored pigment.
If the white cloth turns brown or picks up the color of your cabinets, stop cleaning immediately. Color transfer indicates that the protective clear coat has completely failed and the cleaner is now stripping the raw dye out of the wood. You will also want to touch the test spot with your bare finger. If the spot feels tacky or sticky after wiping, the cleaner is actively dissolving the lacquer. You must restrict your cleaning to plain water or consult a professional refinisher.
What type of microfiber cloth is best for delicate cabinetry?
A 300 to 400 GSM (Grams per Square Meter) edgeless microfiber cloth is the best tool for delicate cabinetry. This specific weight provides enough pile to trap dirt particles without applying aggressive friction to the clear coat. You must avoid paper towels, cotton rags, and abrasive scrub sponges entirely.
Paper towels consist of rigid wood pulp fibers. Wiping a high-gloss cabinet with a paper towel creates thousands of microscopic scratches in the finish. Over several months, these micro-scratches scatter light and make the cabinet appear cloudy and dull. Edgeless microfiber cloths utilize split synthetic fibers that lift and lock grease away from the surface. You should purchase cloths with no stitched borders. The polyester thread used to sew the edges of cheap towels is often much harder than the towel itself, leading to deep circular scratches near the cabinet handles. Wash your cabinet cloths separately from standard laundry to prevent them from picking up abrasive lint or fabric softeners.
How do you safely wipe cabinets to prevent streaks and scratches?
You prevent streaks and scratches by wiping the cabinet surface in straight lines that parallel the natural grain of the wood. You should never wipe wood cabinets in a circular motion. Circular wiping patterns force dirt particles across the grain, creating highly visible swirl marks that catch the light in standard kitchens.
Begin at the top corner of the cabinet door. Pull the damp cloth straight down to the bottom edge using light, even pressure. Lift the cloth completely off the wood, return to the top, overlap your previous path slightly, and pull down again. This linear technique ensures you do not grind abrasive salt, sugar, or dust crystals into the clear coat. For painted cabinets with no visible grain, wipe vertically to align any potential micro-marring with the natural vertical geometry of the doors. You must flip your cloth to a clean side frequently. Dragging a saturated, dirty cloth across a new cabinet door simply redistributes the grease.
How do you clean cabinet hardware without scratching the surrounding wood?
You clean cabinet hardware by isolating the metal pulls from the wood surface using a plastic shield or a carefully folded cloth. Metal knobs and handles accumulate the highest concentration of acidic skin oils and food residue. You must clean these touchpoints thoroughly without allowing heavy degreasers to touch the adjacent wood finish.
Slide a thin plastic card or a dry microfiber cloth directly underneath the handle to protect the wood. Spray your cleaning solution directly onto a detail brush or a dedicated hardware cloth. Never spray the handle itself, as the liquid will run behind the hardware escutcheon and soak into the raw screw holes. Wipe the metal firmly to remove the buildup. If the hardware is severely oxidized or sticky, you might need to remove the screws entirely. Taking the handles off the doors allows you to soak the metal hardware in a sink basin full of warm soapy water. This approach guarantees zero risk to your cabinet topcoat.
How do you clean sticky grease off cabinets safely?
You clean sticky, oxidized grease off cabinets safely by using a one-to-one mixture of warm water and white distilled vinegar. You must apply this acidic mixture only as a temporary spot treatment for heavy buildup. Routine application of acids will permanently damage your woodwork.
Cooking grease becomes sticky when it aerosolizes, lands on the cabinet, and chemically oxidizes over several weeks. Standard soap cannot cut through this polymerized layer. Vinegar possesses a pH level of approximately 2.4, making it acidic enough to break the chemical bonds of hardened cooking oils.
| Contaminant Type | Recommended Cleaning Solution | Application Dwell Time | Risk to Cabinet Finish |
|---|---|---|---|
| Light dust | Dry microfiber cloth | 0 minutes | Very low |
| Fresh cooking oil | Soap and warm water | 15 to 30 seconds | Low |
| Oxidized sticky grease | 1:1 Vinegar and water | 1 to 2 minutes | Medium (rinse required) |
| Hardened food splatter | Baking soda paste | 3 to 5 minutes | High (do not scrub) |
For thick food splatters that ignore vinegar, mix two parts baking soda with one part water to form a paste. Apply the paste directly to the spot with your fingertip. Let it sit for three minutes to soften the debris. Wipe it away gently without scrubbing. Baking soda is a mild abrasive that will scratch the topcoat if you apply heavy pressure.
Can you use Magic Erasers on kitchen cabinets?
You can never use Magic Erasers on kitchen cabinets under any circumstances. Melamine foam permanently destroys cabinet finishes. While these white sponges appear soft to the touch, they operate as a highly abrasive sanding block.
Industrial testing indicates melamine foam abrasiveness equates to 3000 to 5000 grit sandpaper. When you rub a Magic Eraser against a sticky cabinet door, it quickly removes the grease. However, it simultaneously sands away the polyurethane or lacquer topcoat. This friction leaves a permanent, foggy, dull patch on the wood that you cannot fix with cleaning. The only remedy for melamine foam damage involves sanding the entire door down to bare wood and applying a new layer of chemical sealant. You must ban these products from your kitchen woodwork entirely.
Should you use steam cleaners on kitchen cabinets?
You should never use steam cleaners on kitchen cabinets. The combination of intense heat and forced moisture represents the most destructive force you can apply to residential cabinetry. Steam machines will instantly compromise the structural integrity of both the finish and the wood.
Steam cleaners typically operate at temperatures exceeding 200 degrees Fahrenheit. Clear coats like lacquer and varnish begin to soften and melt at these temperatures. Furthermore, the high-pressure nozzle forces moisture deep into the porous end-grain of the wood. For modern kitchens built with MDF (Medium Density Fiberboard) or particleboard cores, steam penetration causes immediate and irreversible bubbling. The heat also melts the edge-banding glue used to secure laminate veneers. While steam sanitizes tile floors perfectly, it will destroy an expensive kitchen cabinet installation in a single afternoon.
What household chemicals instantly destroy cabinet topcoats?
Ammonia, liquid bleach, and high-alkaline commercial degreasers instantly destroy cabinet topcoats. You must avoid these aggressive chemicals to preserve the protective sheen on your woodwork. These liquids cause immediate chemical reactions that ruin clear finishes.
Ammonia acts as a powerful solvent that liquefies traditional wood varnishes upon contact. Spraying window cleaner (which usually contains ammonia) on glass cabinet inserts often leads to finish damage when the overspray hits the wooden frames. Liquid bleach oxidizes the wood fibers, causing permanent discoloration and stripping the color pigments out of custom stains. High-alkaline degreasers initiate a process called saponification. This chemical reaction attempts to turn the oil-based components of your cabinet sealant into soap, resulting in a sticky, gummy surface that never dries. You must read the warning labels on all multi-surface cleaners.
Can you use olive oil and vinegar to clean and polish cabinets?
You cannot use olive oil and vinegar to clean and polish cabinets. This popular internet myth actively damages your kitchen over time. While the mixture might temporarily make dull cabinets look shiny, the long-term consequences require intensive restoration.
Olive oil is a non-drying culinary fat. Unlike pure tung oil or boiled linseed oil, olive oil never cures or hardens into a protective barrier. When you wipe it onto a cabinet, it sits on the surface and remains wet. Within a few weeks, this wet oil goes rancid and emits a foul odor. The sticky oil slick also traps airborne kitchen dust, pet hair, and new cooking grease. This combination forms a dense, black sludge inside the corners of your cabinet panels. You should use dedicated commercial paste waxes or synthetic polymer polishes if your woodwork requires a physical shine.
How do you clean matte versus high-gloss cabinet finishes?
You clean matte cabinet finishes using broad, gentle strokes, while high-gloss finishes require meticulous dust removal before wiping. Manufacturers engineer these two visual styles using entirely different chemical topcoats. You must tailor your physical pressure to match the surface type.
Matte finishes diffuse light to hide fingerprints, but they remain highly susceptible to burnishing. Burnishing occurs when you scrub a matte surface too hard in one specific spot. The friction polishes the microscopic dulling agents in the paint, creating a permanent shiny bald spot that catches the light. You must use light, even pressure across the entire door. High-gloss finishes reflect light perfectly, making microscopic scratches highly visible. You must use a dry microfiber duster to remove loose grit from a gloss cabinet before you introduce a damp cloth. Wiping a gloss door without dusting first drags hard particles across the acrylic, causing thousands of permanent swirl marks.
How do you clean unsealed or raw wood cabinets?
You clean unsealed or raw wood cabinets using specialized commercial paste waxes or solvent-based wood cleaners. You must never apply water or water-based soaps to raw wood. Water immediately raises the natural grain of unsealed timber.
When moisture touches bare wood, the severed cellular fibers swell and stand up straight. This reaction leaves the cabinet surface feeling incredibly rough and splintery to the touch. Water also carries dissolved dirt deep into the porous wood structure, creating dark stains that you cannot wash away. To clean raw wood safely, apply a solvent-based technical cleaner using a soft cloth. These specialized products use mineral spirits to dissolve greasy fingerprints without swelling the wood fibers. Once the surface is clean, you should apply a thin layer of carnauba paste wax to provide a temporary barrier against future kitchen moisture.
How do you clean glass cabinet inserts without damaging wood?
You clean glass cabinet inserts by spraying your glass cleaner directly onto a cloth rather than spraying the glass itself. This method prevents hazardous chemical overspray from dripping down onto the wooden muntins and trim framing the glass.
Standard glass cleaners contain harsh solvents like ammonia and isopropyl alcohol. When you spray a glass panel heavily, the liquid rapidly runs down the pane and pools at the bottom wooden edge. The ammonia sits in this crevice and systematically dissolves the lacquer finish protecting the wood. Over time, the bottom rail of the cabinet door will peel, turn black, and rot. You should walk away from the cabinets, spray a dedicated waffle-weave glass towel until it is damp, and then wipe the glass panels carefully.
What is the best commercial cleaner for wood kitchen cabinets?
The best commercial cleaners for wood kitchen cabinets are pH-neutral oil soaps and technical wood restorers designed specifically for delicate millwork. When homemade soap mixtures fail to remove heavy grime, you must transition to professional formulations.
Murphy Oil Soap remains a reliable industry standard for sealed wood. It utilizes potassium soap derived from natural vegetable oils to break down grease without stripping topcoats. You must heavily dilute Murphy Oil Soap according to the manufacturer specifications, as using it at full strength will leave a hazy residue. Howard Products Clean-A-Finish provides an excellent alternative for heavily soiled woodwork. It relies on traditional soap flakes and natural essential oils rather than harsh alkaline detergents. When evaluating any new commercial product, verify that the label explicitly states the formula is safe for painted, stained, and sealed wood cabinetry.
How often should you deep clean kitchen cabinets?
You should deep clean all kitchen cabinet surfaces every three to six months, while spot-cleaning high-touch areas once a week. Maintaining this specific schedule prevents cooking grease from undergoing permanent chemical oxidation.
Professional cleaning services typically recommend weekly maintenance for the cabinets immediately surrounding your stove and the doors holding your trash pull-outs. These specific zones accumulate heavy oil vapor and acidic food residues daily. If you wipe these areas quickly with a damp cloth every Sunday, the grease never has time to harden. A comprehensive deep clean every six months requires emptying the cabinets, wiping down the interior shelves, cleaning the top ledges where heavy dust settles, and treating the exterior panels. Adhering to this routine ensures you never need to resort to abrasive scrubbing or acidic vinegar treatments.
Why do kitchen cabinets feel sticky after cleaning?
Kitchen cabinets feel sticky after cleaning because the protective chemical finish has begun to permanently degrade and break down. This phenomenon represents a structural failure of the topcoat, not a temporary layer of surface dirt.
Traditional cabinet finishes, particularly nitrocellulose lacquers, deteriorate after years of exposure to ambient kitchen heat, boiling steam, and acidic skin oils from human hands. Repeated cleaning with harsh alkaline chemicals accelerates this exact process. The polymer chains within the solid clear coat begin to snap, causing the rigid plastic barrier to revert into a sticky liquid state. You can diagnose this issue by pressing a fingernail gently into the sticky area. If your nail leaves a permanent physical dent in the finish, the lacquer has failed. You cannot wash this stickiness away. You must hire a professional to chemically strip the doors and apply a new modern polyurethane sealant.
The Bottom Line
The safest strategy to clean kitchen cabinets without removing the finish relies on a heavily diluted mixture of dish soap and warm water applied with a well-wrung microfiber cloth. You must absolutely avoid soaking the wood, scrubbing with abrasive melamine foams, or applying household chemicals like ammonia and bleach. By wiping away grease frequently before it oxidizes and drying the surfaces immediately after washing, you will preserve the structural integrity and visual sheen of your cabinet topcoats for decades.


