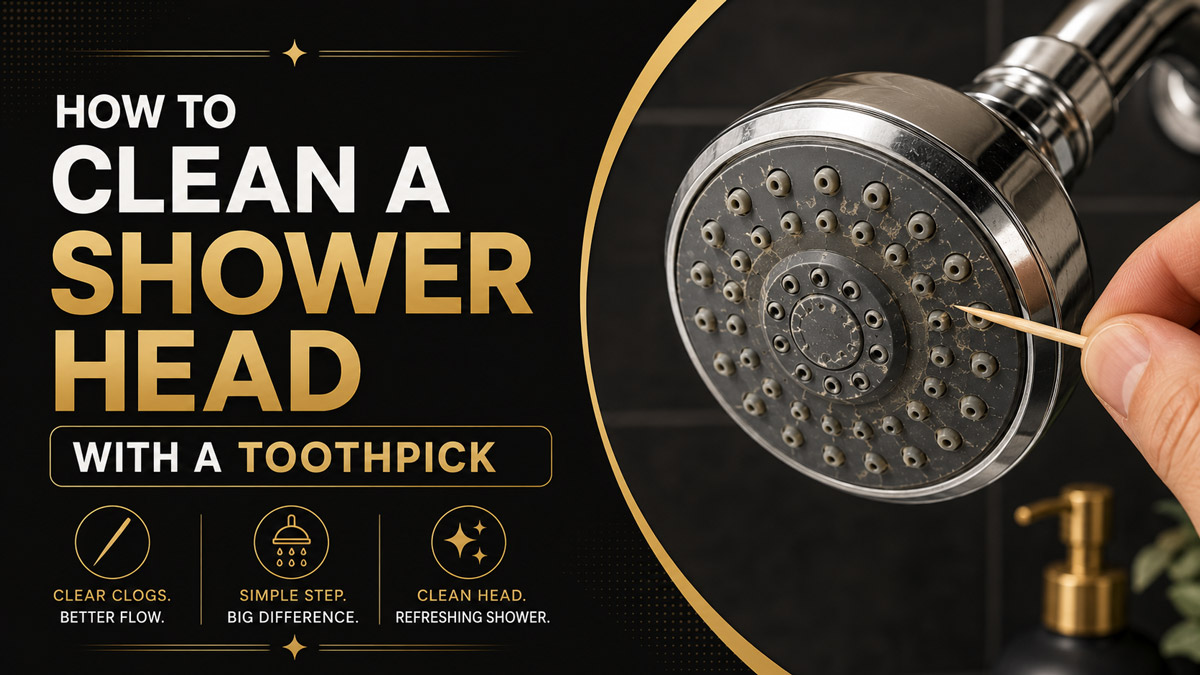
To clean a shower head with a toothpick, shut off the water, dry the spray face, and gently insert a wooden toothpick no more than 2-3 millimeters into each clogged nozzle. Twist lightly to loosen mineral buildup, wipe away surface scale, and flush the shower head with cold water for 30 seconds.
At a Glance
- A wooden toothpick can remove limescale blocking individual shower head nozzles.
- The toothpick should enter each opening no deeper than 2-3 millimeters.
- Flexible silicone nozzles require a blunt wooden toothpick and very light pressure.
- A typical shower head takes 10-25 minutes to clean manually.
- Vinegar soaking helps when mineral deposits are too hard for dry cleaning.
- Persistent low pressure may indicate a blocked filter screen or flow restrictor.
Why Does a Toothpick Unclog Shower Head Nozzles?
A toothpick unclogs a shower head by breaking and lifting mineral deposits that physically obstruct individual spray openings. The method works best when a few streams are weak, missing, or spraying at unusual angles.
Hard water contains dissolved calcium and magnesium. As water dries around the shower head face, these minerals form a white or chalky deposit commonly called limescale. The deposit gradually narrows the nozzle channel until water flow becomes distorted.
A wooden toothpick provides more control than a metal needle. Wood is softer than most metal finishes, and its slightly rough surface can grip loose mineral particles rather than pushing every fragment deeper into the shower head.
Toothpick cleaning does not chemically dissolve minerals. It only removes deposits that the toothpick can reach. Thick scale inside the spray plate, filter screen, or water channels may require a vinegar soak or disassembly.
Use the method when fewer than one-third of the nozzles appear clogged. A heavily mineralized shower head usually responds better to soaking first and manual clearing afterward.
What Supplies Do You Need?
You need wooden toothpicks, a microfiber cloth, an old toothbrush, a small bowl, and clean water. White vinegar, a plastic bag, and a rubber band are optional when the mineral deposits are hardened.
Keep several toothpicks nearby. A wooden tip can become blunt or wet after cleaning 5-10 openings, especially when the nozzles are made from metal rather than flexible silicone.
| Supply | Purpose | Typical Quantity |
|---|---|---|
| Wooden toothpicks | Clears individual openings | 3-5 |
| Microfiber cloth | Dries and protects the finish | 1 |
| Old toothbrush | Loosens surface scale | 1 |
| White vinegar | Softens hardened limescale | 1-2 cups |
| Plastic bag | Holds vinegar around fixed heads | 1 |
| Rubber band | Secures the soaking bag | 1-2 |
| Tweezers | Removes broken wood or filter screens | 1 pair |
Avoid steel pins, safety pins, knives, drill bits, or paperclips. Metal tools can scratch decorative coatings, enlarge nozzle openings, puncture silicone, or damage internal components.
A flat or slightly blunt toothpick is safer for rubber nozzles. A standard pointed toothpick can be used on hard metal openings when pressure remains light.
How Do You Clean a Shower Head With a Toothpick?
Clean each shower head nozzle individually, working slowly and limiting the insertion depth to 2-3 millimeters.
- Shut off the shower.
Turn the mixing valve fully off. You normally do not need to shut off the main household water supply. - Dry the spray face.
Wipe the shower head with a microfiber cloth. A dry surface makes white mineral crust easier to identify. - Inspect the spray openings.
Look for blocked holes, uneven deposits, bent silicone tips, or dark debris. - Rub flexible nozzles first.
Pinch or massage silicone nozzles between your fingers. Many modern shower heads release surface scale this way. - Insert the toothpick gently.
Hold the toothpick at approximately the same angle as the nozzle channel. Insert only 2-3 millimeters. - Twist with minimal pressure.
Rotate the toothpick once or twice in each direction. Do not force it through resistance. - Scrape the outer rim.
Use the side of the wooden tip to lift visible crust around the opening. - Brush the spray face.
Use a damp toothbrush to remove loosened particles from the surrounding surface. - Flush the shower head.
Point the head downward and run cold water at full flow for approximately 30 seconds. - Test the spray pattern.
Repeat the process only on nozzles that remain blocked or misdirected.
How Far Should the Toothpick Enter Each Nozzle?
Insert the toothpick no more than 2-3 millimeters into a shower head nozzle. The goal is to clear the opening, not probe the internal water chamber.
Greater depth does not necessarily improve cleaning. Pushing a toothpick too far can compress mineral debris inside the channel, damage a flexible nozzle, or move the obstruction toward an internal screen.
Use resistance as the stopping point. If the toothpick does not enter with gentle finger pressure, remove it rather than forcing it. Hardened deposits should be softened with vinegar before another attempt.
| Nozzle Type | Recommended Depth | Pressure Level | Main Risk |
| Flexible silicone | 1-2 mm | Very light | Tearing or stretching |
| Hard plastic | 2-3 mm | Light | Enlarging the opening |
| Chrome-plated metal | 2-3 mm | Light | Pushing scale inward |
| Brass opening | 2-3 mm | Light | Blunting the toothpick |
| Fine mist nozzle | 1 mm or less | Minimal | Damaging the insert |
Fine mist and massage jets can contain small internal components. Consult the manufacturer’s cleaning instructions before inserting any object into unusually narrow or mechanically adjustable nozzles.
Should You Remove the Shower Head First?
You do not need to remove a standard angled or handheld shower head when the clogged openings are easy to reach. Removal is more useful for fixed rain heads, severe blockages, and internal filter cleaning.
An attached shower head allows quick surface cleaning. It also lets you flush loose debris immediately. Point the shower head toward the floor or wall before turning the water back on.
A large overhead rain shower can be harder to clean in place. Debris pushed upward may remain inside the spray plate and settle back into the same openings. Removing the head allows you to turn it face down over a sink and flush the loosened deposits outward.
Before unscrewing a shower head, place a cloth around the connection and use an adjustable wrench carefully. The cloth protects chrome, black, gold, and brushed finishes from tool marks.
Apply fresh plumber’s tape to the shower arm threads before reinstalling the fixture when the previous tape is damaged or displaced.
Can a Toothpick Damage Rubber Shower Nozzles?
Yes, a sharp toothpick can puncture, stretch, or deform a flexible rubber or silicone nozzle when inserted too deeply or pushed sideways. Use a blunt wooden tip and very light pressure.
Modern silicone nozzles are designed to flex. Start by rubbing each nozzle with a finger or microfiber cloth. This often breaks the mineral crust without inserting anything.
Use the toothpick only when material remains inside the opening. Follow the direction of the channel rather than levering the toothpick against the sidewall.
Stop if the nozzle bends sharply, feels unusually soft, or begins to split. A damaged silicone opening may produce a permanently crooked stream even after all mineral deposits are removed.
Never use a sewing needle as the first cleaning tool on silicone. A needle can pierce the material rather than clearing the channel. Replacement of a damaged spray plate may be impossible because many shower heads are sealed assemblies.
Can a Toothpick Scratch Black, Gold, or Chrome Finishes?
A clean wooden toothpick is unlikely to scratch an intact metal or powder-coated finish when used gently. Scratches are more likely to come from trapped grit, metal tools, abrasive pads, or forceful scraping.
Wipe the shower head before cleaning. Sand, rust particles, and hard mineral fragments caught beneath a cloth or tool can mark the finish even when the tool itself is relatively soft.
Finish type also affects chemical cleaning. Vinegar can dull or discolor certain gold-tone coatings, natural brass, nickel, anodized aluminum, and specialty finishes when exposure is excessive.
| Finish | Toothpick Risk | Vinegar Exposure | Safer Approach |
| Polished chrome | Low | Up to 30 minutes | Wipe and rinse thoroughly |
| Matte black | Low with clean wood | 10-15 minutes | Test an inconspicuous area |
| Gold-tone coating | Low with light pressure | 5-15 minutes | Use diluted vinegar |
| Natural brass | Low | 5-15 minutes | Mild soap first |
| Brushed nickel | Low | 10-15 minutes | Avoid abrasive brushing |
| Anodized aluminum | Low | 5-10 minutes | Follow manufacturer guidance |
Do not assume every decorative finish is chemically resistant. Check the fixture manufacturer’s care instructions before prolonged soaking.
How Long Does Toothpick Cleaning Take?
Cleaning a standard shower head with a toothpick usually takes 10-25 minutes. A small handheld shower head may take less than 10 minutes, while a large rain head can require 30-45 minutes.
The actual time depends on the number of nozzles, deposit hardness, accessibility, and whether soaking is necessary.
| Shower Head Condition | Active Cleaning Time | Soaking Time | Total Time |
| 1-5 blocked nozzles | 5-10 minutes | 0 minutes | 5-10 minutes |
| Light surface scale | 10-15 minutes | 0-15 minutes | 10-30 minutes |
| Moderate hard-water scale | 15-25 minutes | 30 minutes | 45-55 minutes |
| Large rain shower head | 25-45 minutes | 30-60 minutes | 55-105 minutes |
| Blocked internal filter | 20-30 minutes | 0-30 minutes | 20-60 minutes |
Do not rush by pushing harder. A slow pass with fresh toothpicks is safer than trying to clear every opening with one softened or damaged toothpick.
Should You Soak the Shower Head in Vinegar First?
Soak the shower head first when mineral buildup is hard, widespread, or resistant to gentle toothpick pressure. Light deposits around only a few openings can usually be cleared without soaking.
For a fixed shower head, fill a plastic bag with equal parts warm water and white vinegar. Raise the bag over the spray face and secure it with a rubber band.
Soak standard chrome or durable plastic fixtures for approximately 30 minutes. Limit exposure to 5-15 minutes for sensitive gold-tone, brass, matte, nickel, or anodized finishes unless the manufacturer permits longer contact.
Remove the bag and rinse the shower head. The softened deposit should feel chalky or paste-like. Use a toothpick to clear each opening, then brush the surface and flush the fixture for 30 seconds.
Do not mix vinegar with chlorine bleach. The combination can release hazardous chlorine gas. Use only one cleaning product at a time and ventilate the bathroom.
What If the Toothpick Breaks Inside a Nozzle?
Stop cleaning and pull the broken toothpick straight out with fine tweezers or needle-nose pliers. Do not push the fragment deeper into the shower head.
A toothpick commonly breaks because it has absorbed water, become blunt, or encountered a hardened deposit. Replace wet toothpicks frequently rather than continuing until the wood softens.
When part of the toothpick remains exposed, grip it close to the nozzle and pull along the same angle at which it entered. Twisting aggressively can break the fragment again.
If the wood is flush with the opening, allow it to dry. Dry wood may shrink slightly and become easier to remove. A fine needle may be used to hook the wood fibers toward the opening, but the needle should not scrape the nozzle walls.
Remove and disassemble the shower head when the fragment cannot be reached safely. Continuing to probe can move the wood into the internal spray chamber or filter.
Why Does the Shower Spray Sideways After Cleaning?
A shower stream may continue spraying sideways because mineral scale remains around the inner nozzle wall, the silicone tip is deformed, or debris has only been partially loosened.
Inspect the opening under bright light. An irregular white ring usually indicates remaining limescale. Soak the shower head with diluted vinegar, then repeat the toothpick cleaning after the deposit softens.
Massage flexible silicone nozzles between two fingers. The nozzle may have remained bent after cleaning, particularly when the toothpick was inserted at an angle.
A permanently distorted stream may indicate physical damage. Compare the problem nozzle with surrounding openings. A split, enlarged, or oval-shaped opening usually cannot be corrected through further cleaning.
Flush for at least 30 seconds after every cleaning attempt. Loose fragments inside the head can briefly redirect water before they wash out.
Why Is the Shower Pressure Still Low After Cleaning?
Low pressure after nozzle cleaning usually means the obstruction is inside the shower head, supply pipe, filter screen, or flow restrictor rather than at the visible openings.
Unscrew the shower head and inspect the threaded inlet. Many models contain a small mesh screen that traps sediment before it reaches the nozzles. Remove the screen with tweezers, rinse it under running water, and reinstall it in the same orientation.
Check the flow restrictor only after consulting local regulations and the manufacturer’s instructions. The restrictor controls water consumption and is not automatically a defect.
Test water flow from the bare shower arm by briefly turning on the shower while directing the pipe into a bucket. Strong flow from the arm indicates a shower head problem. Weak flow suggests a valve, plumbing, pressure, or supply issue.
Call a plumber when multiple fixtures have low pressure, the pressure changed suddenly, or rust and sediment continue appearing after cleaning.
Can You Use a Needle, Paperclip, or Plastic Pick?
A wooden toothpick is generally safer than a needle or paperclip because wood is softer and less likely to scratch the nozzle surface. Plastic picks are usable in some hard nozzles but may snap without warning.
| Tool | Cleaning Ability | Damage Risk | Recommendation |
| Wooden toothpick | Good for light scale | Low | Best first choice |
| Plastic dental pick | Moderate | Medium | Use only with light pressure |
| Sewing needle | High precision | High | Reserve for extracting wood |
| Paperclip | Moderate | High | Avoid |
| Safety pin | High precision | High | Avoid |
| Soft toothbrush | Good for surface scale | Low | Use before probing |
| Interdental brush | Good for larger holes | Medium | Confirm nozzle size first |
Never use a power drill, wire brush, or pressure washer on shower head openings. These tools can permanently enlarge the jets, strip coatings, or damage internal seals.
How Often Should You Clean the Shower Head Nozzles?
Clean shower head nozzles every 3-6 months in a hard-water area and every 6-12 months where mineral buildup is light. Visible spray distortion should trigger cleaning sooner.
A monthly wipe with a damp microfiber cloth prevents surface deposits from hardening. Flexible silicone nozzles can also be rubbed gently during routine bathroom cleaning.
Homes with well water, high sediment levels, or frequent plumbing work may require more regular filter-screen cleaning. Inspect the inlet screen whenever pressure drops suddenly after a water outage or pipe repair.
The practical rule is simple: clean the shower head when several streams become weak, crooked, or completely blocked. Early cleaning takes minutes. Waiting until most openings are mineralized often requires removal, soaking, and internal disassembly.
When Should You Replace the Shower Head?
Replace the shower head when cleaning, soaking, filter rinsing, and flushing fail to restore an even spray. Cracked housings, split silicone nozzles, severe corrosion, and persistent leaks also justify replacement.
A shower head that is 5-7 years old may have internal mineralization that cannot be reached without damaging the sealed housing. Replacement can be more practical than repeated soaking when inexpensive fixtures remain badly restricted.
Consider replacement when:
- Water leaks from the body rather than the threaded connection.
- Several nozzles are torn, enlarged, or permanently misdirected.
- The housing is cracked or swollen.
- Rust returns shortly after cleaning.
- Internal rattling continues after flushing.
- Pressure remains poor despite strong flow from the shower arm.
Do not replace the shower head automatically when the connection leaks. Fresh plumber’s tape or a new rubber washer may solve a leak at the threaded joint.
The Bottom Line
The safest way to clean a shower head with a toothpick is to dry the spray face, insert a wooden tip only 2-3 millimeters, loosen the mineral deposit gently, and flush the fixture for 30 seconds. Soak hardened limescale with diluted white vinegar before probing rather than using additional force. Clean flexible silicone nozzles carefully, and avoid metal tools that can puncture openings or scratch finishes. Persistent low pressure usually points to an internal screen, restrictor, plumbing obstruction, or shower head that needs replacement.


